Email routing is a process that every email takes, passing through different mail servers and checks before it reaches its destination.
In simple terms, email routing is like setting up an organized path to ensure that your messages reach the intended recipient’s inbox.
If you’re running a website that relies on email for user sign-ups, notifications, or customer support, then having a solid email routing setup is crucial.
In this guide, I’ll explain what email routing is, why it matters, and how WordPress users can optimize it to keep emails flowing smoothly.
What Is Email Routing and How Does It Work?
When an email is sent, it first leaves the sender’s email server and starts its journey through several checkpoints before reaching the recipient’s inbox.

Here’s a simple view of that journey:
- Sender’s Email Server: When you hit “send,” your email is directed from your email client (like Gmail or Outlook) to the outgoing mail server associated with your email provider. This server is responsible for starting the process.
- Domain Name System (DNS): DNS acts as the internet’s directory, turning domain names (like example.com) into IP addresses that servers understand. For emails, DNS settings include MX (Mail Exchange) records, which tell the internet which server to contact for email delivery on behalf of a specific domain.
- Routing Through Intermediate Servers: Sometimes, emails pass through several intermediate servers to reach their destination. These servers help in finding the best path to the recipient’s email server.
- Recipient’s Email Server and Inbox: Finally, the email arrives at the recipient’s server, where it’s checked against spam filters and other security measures before reaching their inbox. The recipient’s server may use POP3 or IMAP to retrieve and display the email in their inbox.
Understanding how each step works, from the sender’s server to DNS records, can give you a clearer view of how your messages reach their destination.
Key Components in Email Routing
Email routing relies on several key components, each playing a specific role to ensure emails are directed to the right place and verified for authenticity:
- MX Records: These are DNS settings that specify which mail server should receive emails on behalf of a domain. MX records are essential because they let email senders know where to route the email, ensuring it lands on the right server.
- SMTP (Simple Mail Transfer Protocol): SMTP is the protocol used to send outgoing emails from the sender’s email server to the recipient’s server. Think of SMTP as the mail carrier that takes your email from point A to point B, ensuring it’s sent out to the correct address.
- SPF (Sender Policy Framework): SPF is an email validation tool that helps verify the sender’s IP address, ensuring that emails are genuinely coming from the domain they claim to be from. SPF records can prevent your emails from being marked as spam by verifying their origin.
These elements combined ensure that emails are directed properly and are less likely to be mistaken for spam.
Role of Email Servers in Routing
Email servers are like the managers of email traffic. They handle both the emails you send (outgoing) and the ones you receive (incoming).
Outgoing emails are sent through SMTP servers, which help direct your emails to the intended recipient’s inbox.
On the other side, IMAP and POP3 servers manage incoming emails, allowing users to download messages to their email client.
For WordPress users, plugins like Easy WP SMTP simplify connecting their WordPress site to an SMTP provider.
This setup makes sure that emails, especially transactional ones like password resets or order confirmations, are reliably sent through a trusted SMTP server.
Configuring SMTP helps improve email deliverability and ensures that emails don’t end up in spam, giving WordPress site owners peace of mind about their email communication.
Types of Email Routing
When it comes to managing how emails move from sender to recipient, there are various methods known as email routing types.
Each type serves a unique purpose and is suited to different needs based on how an organization handles email traffic:
Direct Routing
Direct routing is one of the simplest types of email routing. In this method, emails travel directly from the sender’s server straight to the recipient’s server without any extra stops or filtering.
This setup works well when there’s a need for quick delivery and minimal processing, like when a small business is sending internal updates or when there’s no need for additional filtering or routing rules.
Direct routing can be efficient, but it might lack the control or customization that some businesses require to manage different types of emails.
Conditional or Custom Routing
Conditional routing, sometimes called custom routing, is a more tailored approach.
In this setup, emails are routed based on specific rules or conditions, such as the sender’s identity, the domain the email is going to, or even the email’s size.
For example, a business might set a rule where customer service emails are routed to a support team, while emails from specific clients go directly to account managers.
This type of routing is incredibly useful for organizations that handle different kinds of emails and need to ensure each one gets to the right team or person without delay.
Split Delivery
Split delivery offer even more flexibility by routing copies of an email to multiple locations.
With split delivery, emails can be directed to different email services based on conditions, like routing some emails to a backup server while the primary server handles the rest.
Easy WP SMTP offers a Smart Routing feature, which makes it incredibly easy to set up additional connections and route emails, based on specific requirements like whether you’re sending marketing or transactional emails.
Configuring Email Routing for WordPress
For anyone who’s relied on default WordPress email functions, you’ve probably encountered issues like emails not reaching their destination or ending up in spam folders.
That’s where using an SMTP provider can make a real difference and tools like Easy WP SMTP make it a breeze, ensuring your emails are authenticated and have a better chance of hitting the inbox.
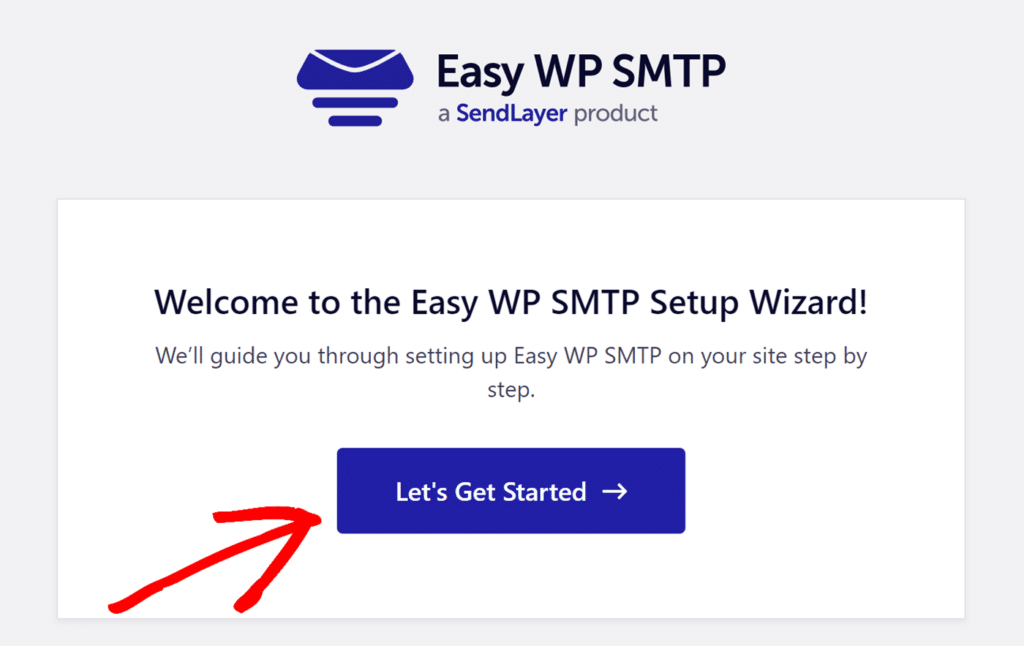
By following the Setup Wizard, you’ll be guided step-by-step through connecting your email to an SMTP service provider. Information you’ll need to enter includes:
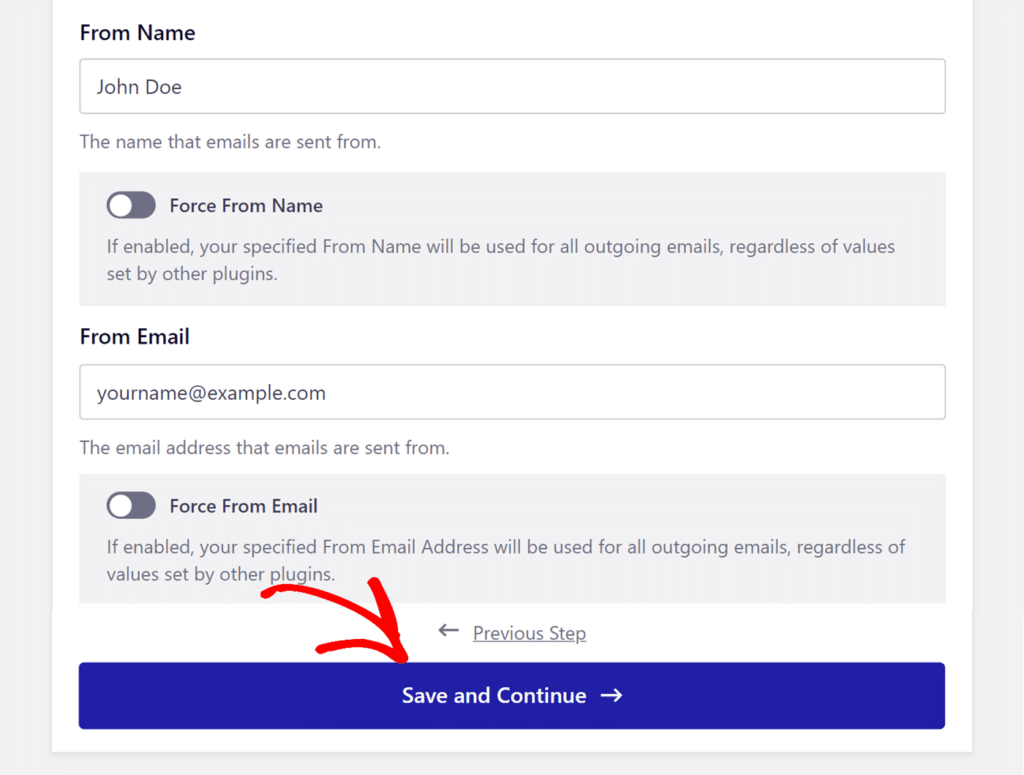
- From Name: The name that will appear as the sender of emails from your site in your recipients’ inboxes.
- From Email: The email address your site emails are sent from. This email address should be linked to your domain for better deliverability.
- API Key: If you’re using SendLayer, SMTP.com, Brevo, or Mailgun to send your email, the API key allows Easy WP SMTP to communicate with your email service.
Users opting to use the Other SMTP option instead of an API-based connection will need to enter some specific SMTP settings. These include:
- SMTP Host: This is the server used for sending emails, which you can find in your email provider’s SMTP settings.
- Encryption: Depending on your provider’s requirements, choose the correct encryption type—either TLS, SSL, or none.
- SMTP Port: This port number is essential for establishing a secure connection. Each provider has its preferred port settings for SMTP.
- Authentication: Most providers require this to be enabled. Authentication ensures your emails are sent securely.
- SMTP Username and Password: These credentials will allow Easy WP SMTP to send emails on behalf of your account.
Note: The Other SMTP option stores login credentials within WordPress, potentially accessible to other administrators. We recommend using Easy WP SMTP’s more secure mailer options.
Once you’ve finished configuring your mailer, you can click the Save and Continue button to continue with setup in the wizard.
Setting Up Smart Routing for Split Delivery
Before you can use the Smart Routing feature, you must have at least one additional connection set up in Easy WP SMTP.
Once another connection has been added, navigate to Easy WP SMTP » Settings. Next, select the tab for Smart Routing.

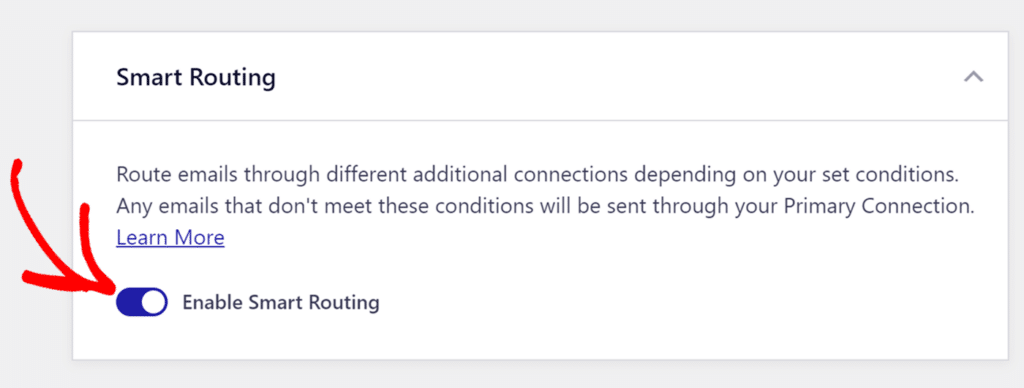
You must turn on the Enable Smart Routing option in order to utilize this functionality. Once this option is enabled, go ahead and set up your preferences.
For instance, choose a different connection from the Select a Connection option that will be utilized if the criteria you specify are satisfied.
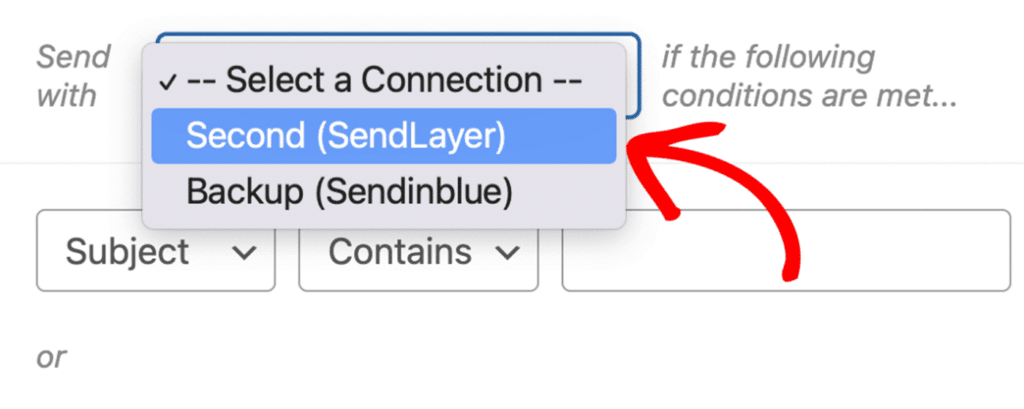
Here is a quick summary of the choices that are available:
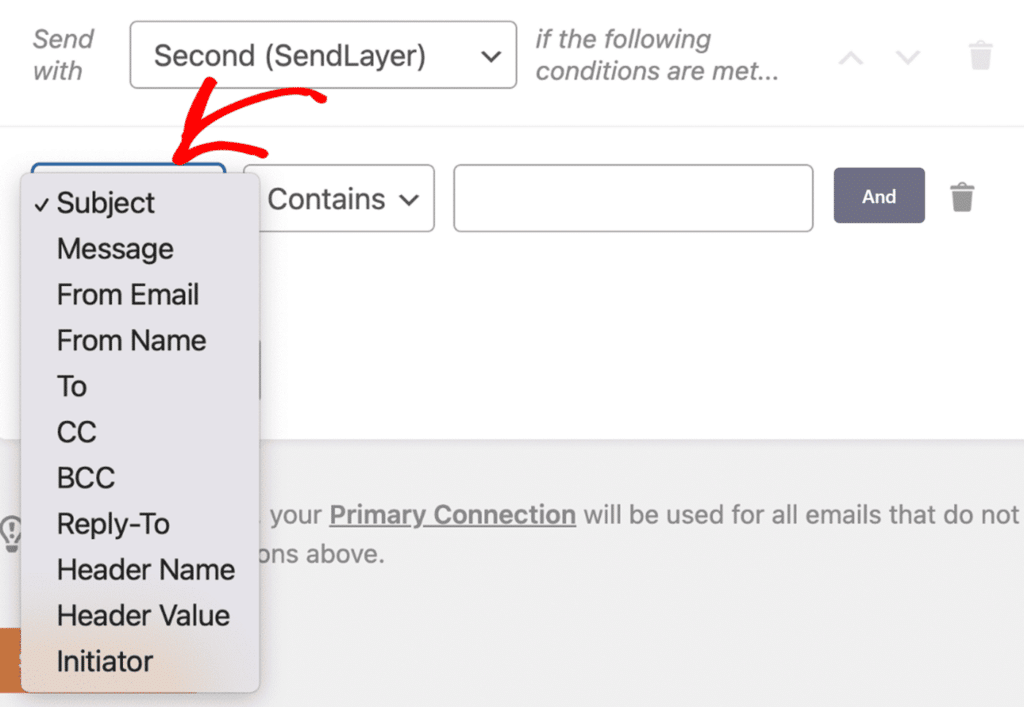
- Condition type: The choices you want to use as the foundation for the condition are contained in this area.
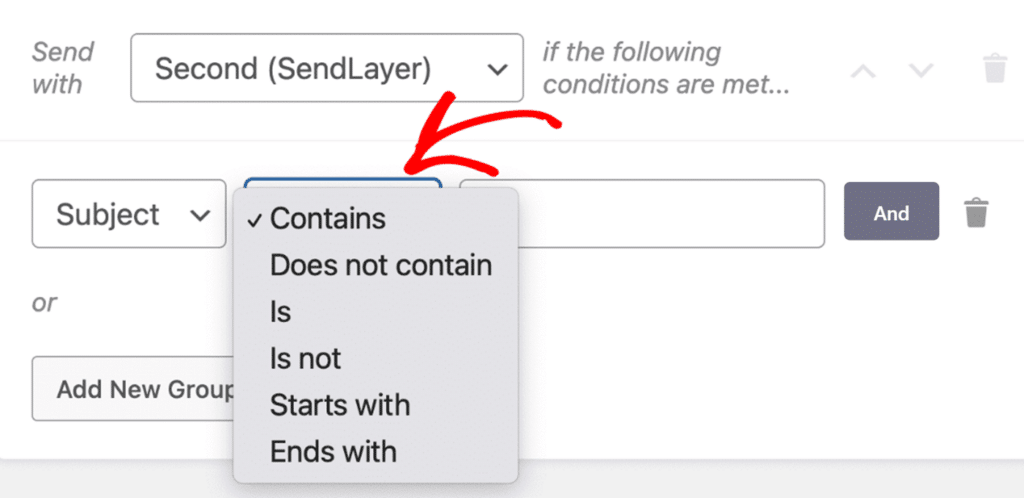
- Operator: To configure the condition, this field offers a variety of comparison operators.
- Value: The text or keyword to compare with the condition type must be entered in this box.
You may set up the condition using the choices in the condition type menu.
Next, decide how you want to condition the item you chose in the comparison operator dropdown.
After that, enter the text you want to use as the condition for sending emails with this connection in the value field.
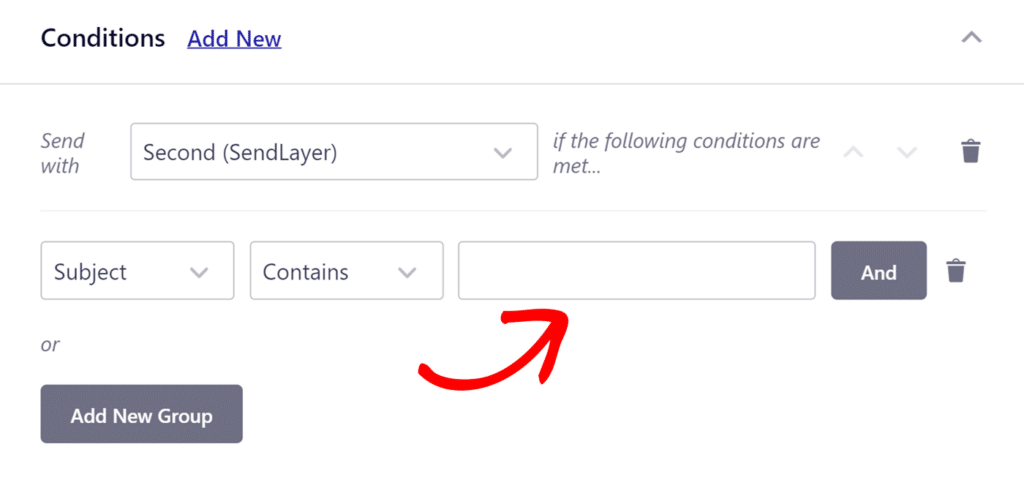
For instance, if “Inquiry” appears in the Subject line, we’ll utilize the SendLayer mailer to route all the emails.
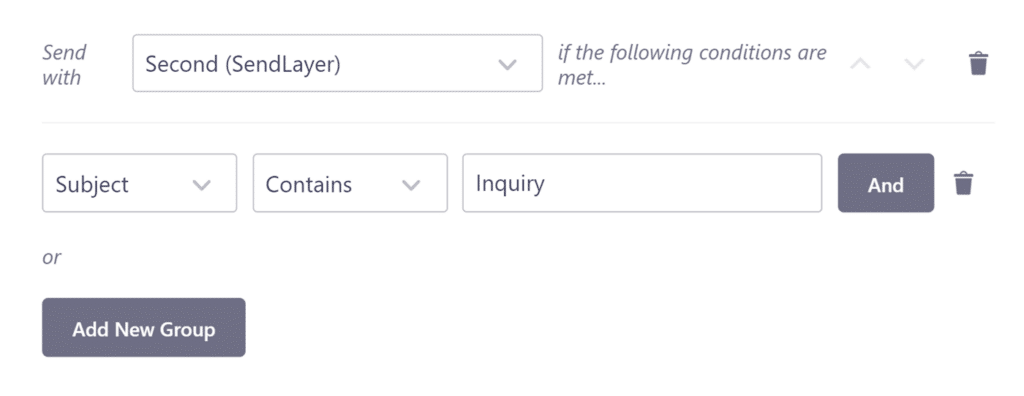
After adding the condition, click on Save Settings to update your changes.
How to Monitor and Manage Email Routing
Keeping an eye on your email metrics is key to making sure your routing setup is working well.
Important metrics like delivery rates and spam complaints offer insights into the effectiveness of your routing configurations.
Using Easy WP SMTP makes this process straightforward, as it includes features to track and analyze these metrics over time.
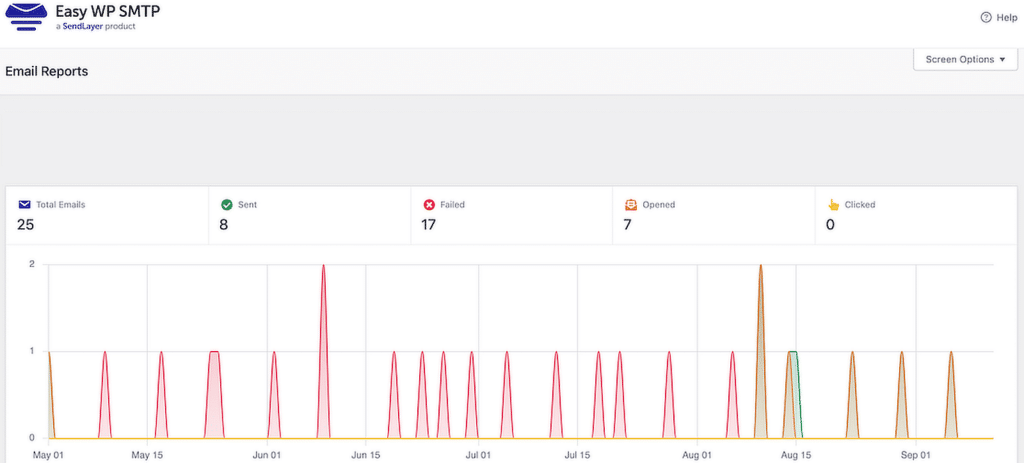
From your WordPress dashboard, simply navigate to Easy WP SMTP » Email Reports to monitor your email performance.
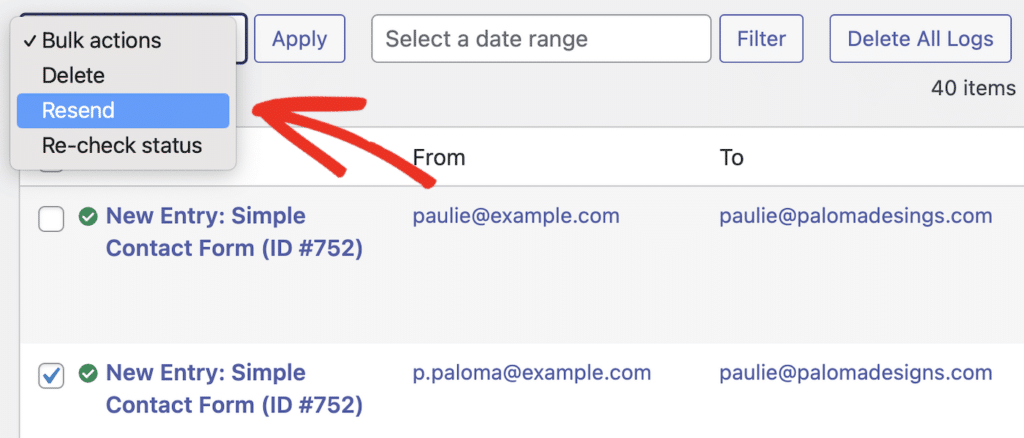
You can also view individual email logs from the Email Logs menu to see any failed emails and then resend them as required.
While Easy WP SMTP covers the essentials, some advanced tools can provide deeper insights into your email deliverability and routing.
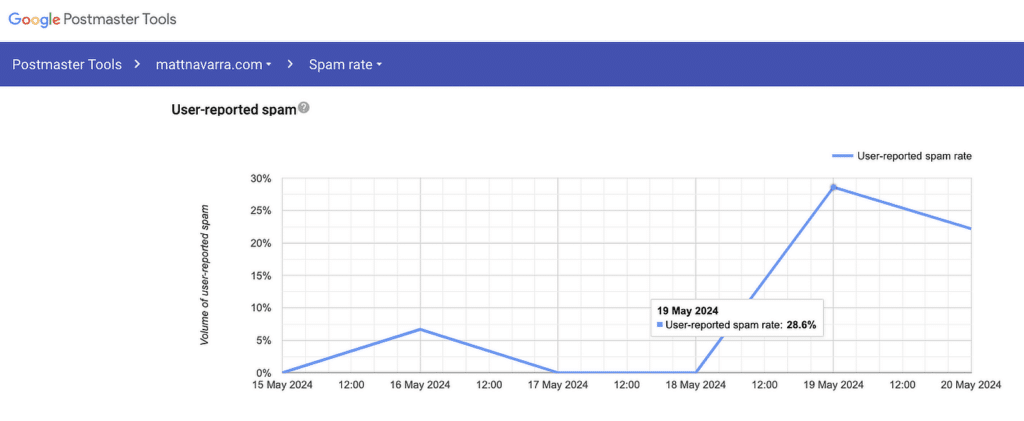
Google Postmaster Tools, for example, gives you access to data specifically for emails sent to Gmail users, offering details on metrics like reputation status and spam rate.
Another useful tool, Sender Score, allows you to assess the reputation of your sending IP, scoring it on a scale of 0 to 100. This can reveal whether email providers consider your IP trustworthy.
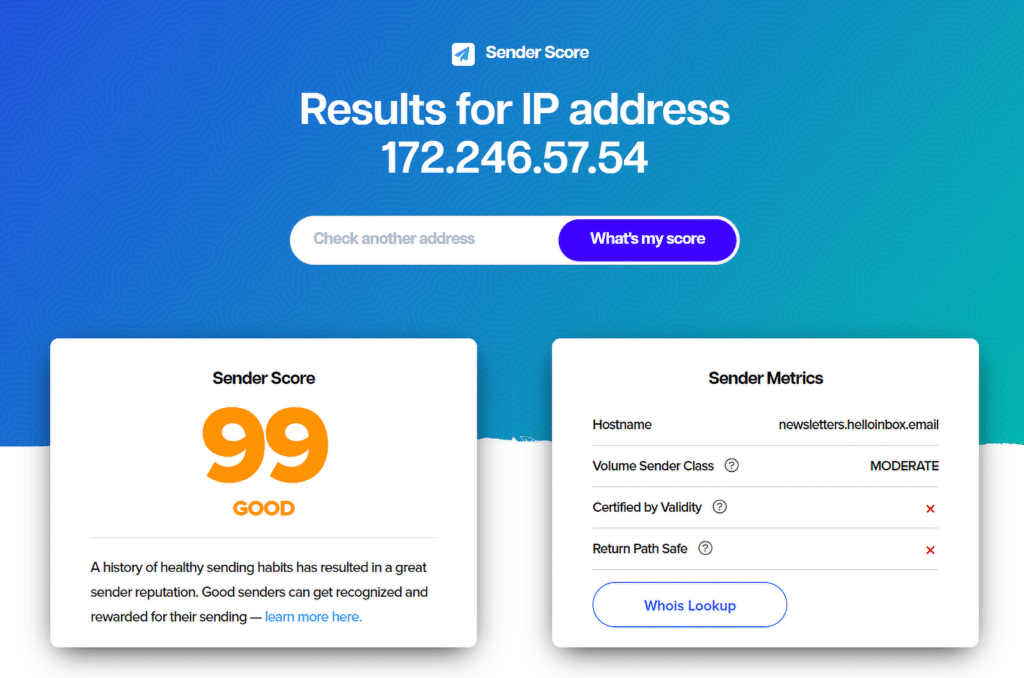
Using these tools alongside Easy WP SMTP can create a complete email management solution, making it easier to fine-tune your routing and maintain a strong reputation.
FAQs about Email Routing
Email routing is a popular topic among our readers. Here are answers to some common queries about it:
How do emails get routed?
Emails get routed through a process that involves several steps. When an automated email is sent, it first goes to the sender’s email server.
From there, it travels through various mail transfer agents, following specific routes determined by DNS and MX (Mail Exchange) records, until it reaches the recipient’s email server.
Finally, the email is delivered to the recipient’s inbox, assuming there are no issues with spam or filtering.
What is an email router?
An email router is a tool or system that directs emails to their correct destinations.
It determines the path an email should take based on rules set by DNS records and SMTP protocols.
Email routers ensure that messages are sent through the right channels, reaching the intended inbox without unnecessary delays.
What is the purpose of email routing?
The purpose of email routing is to guide emails from the sender to the recipient efficiently. It helps manage email traffic, prevent delays, and avoid spam filters.
Proper email routing ensures that messages are delivered reliably, enhancing communication for businesses and individuals.
That’s it! Now you everything there is to know about email routing
Next, do you want to ensure that important notifications, customer communications, and transactional emails are reaching their intended recipients?
Check out this guide to view WordPress email logs and improve your site’s email performance.
Or, learn how to connect your WordPress forms to an SMS service so you can receive instant text notifications whenever a form is submitted.
