In this doc, we’ll guide you through the process of setting up Easy WP SMTP using our Setup Guide.
Before starting, ensure you’ve installed and activated the Easy WP SMTP plugin.
1. Launching the Setup Wizard
To initiate the Setup Wizard from the WordPress dashboard, go to Easy WP SMTP » Settings.

Next, below the Mailer Settings section, click on the Setup Wizard link.

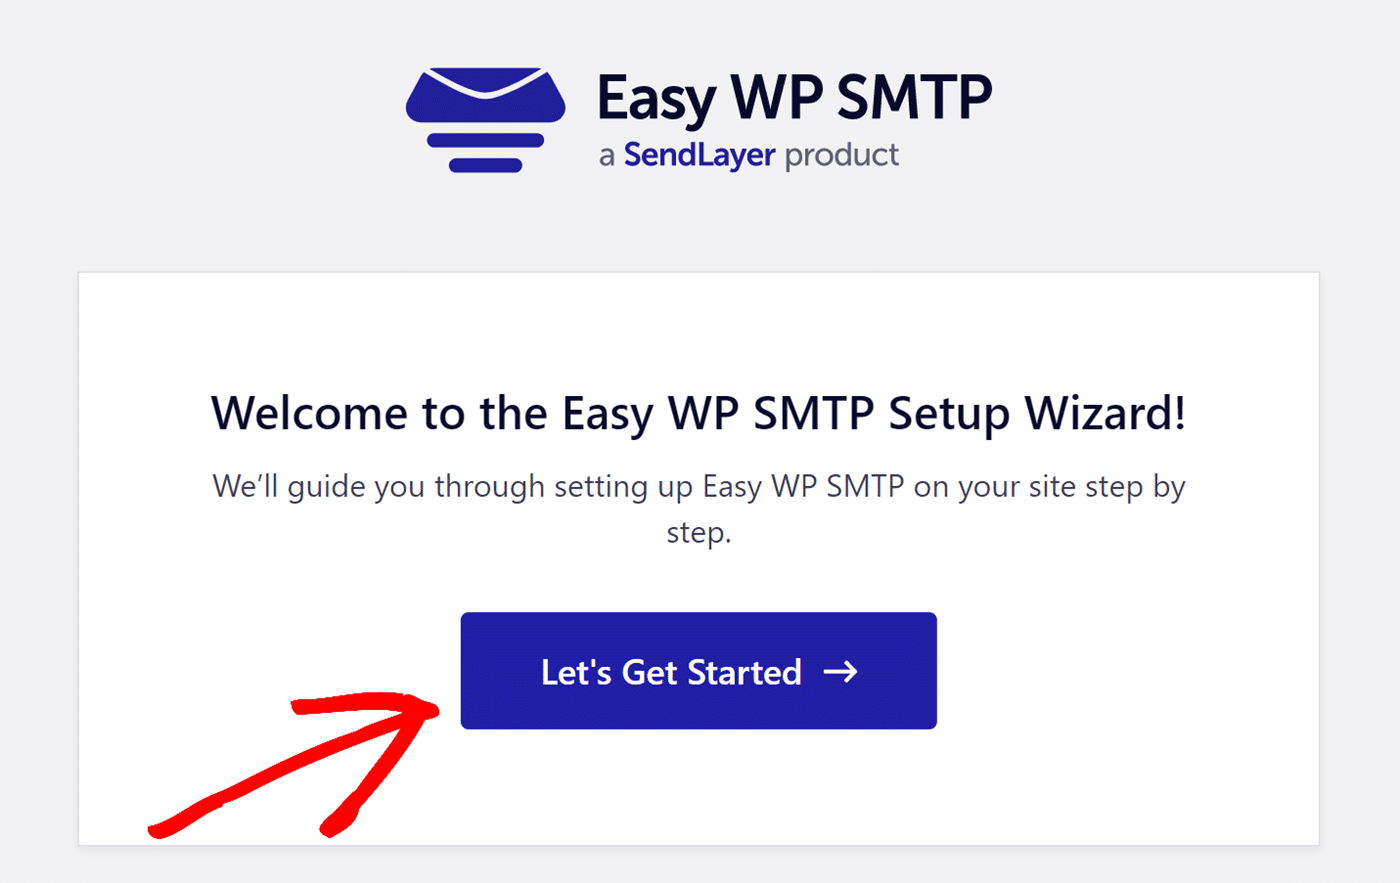
After launching the wizard, click the Let’s Get Started button to begin the setup process.
2. Choosing Your SMTP Mailer
The first step in the setup process is to select the mailer you’d like to configure. Click on the mailer you’d like to use to select it.
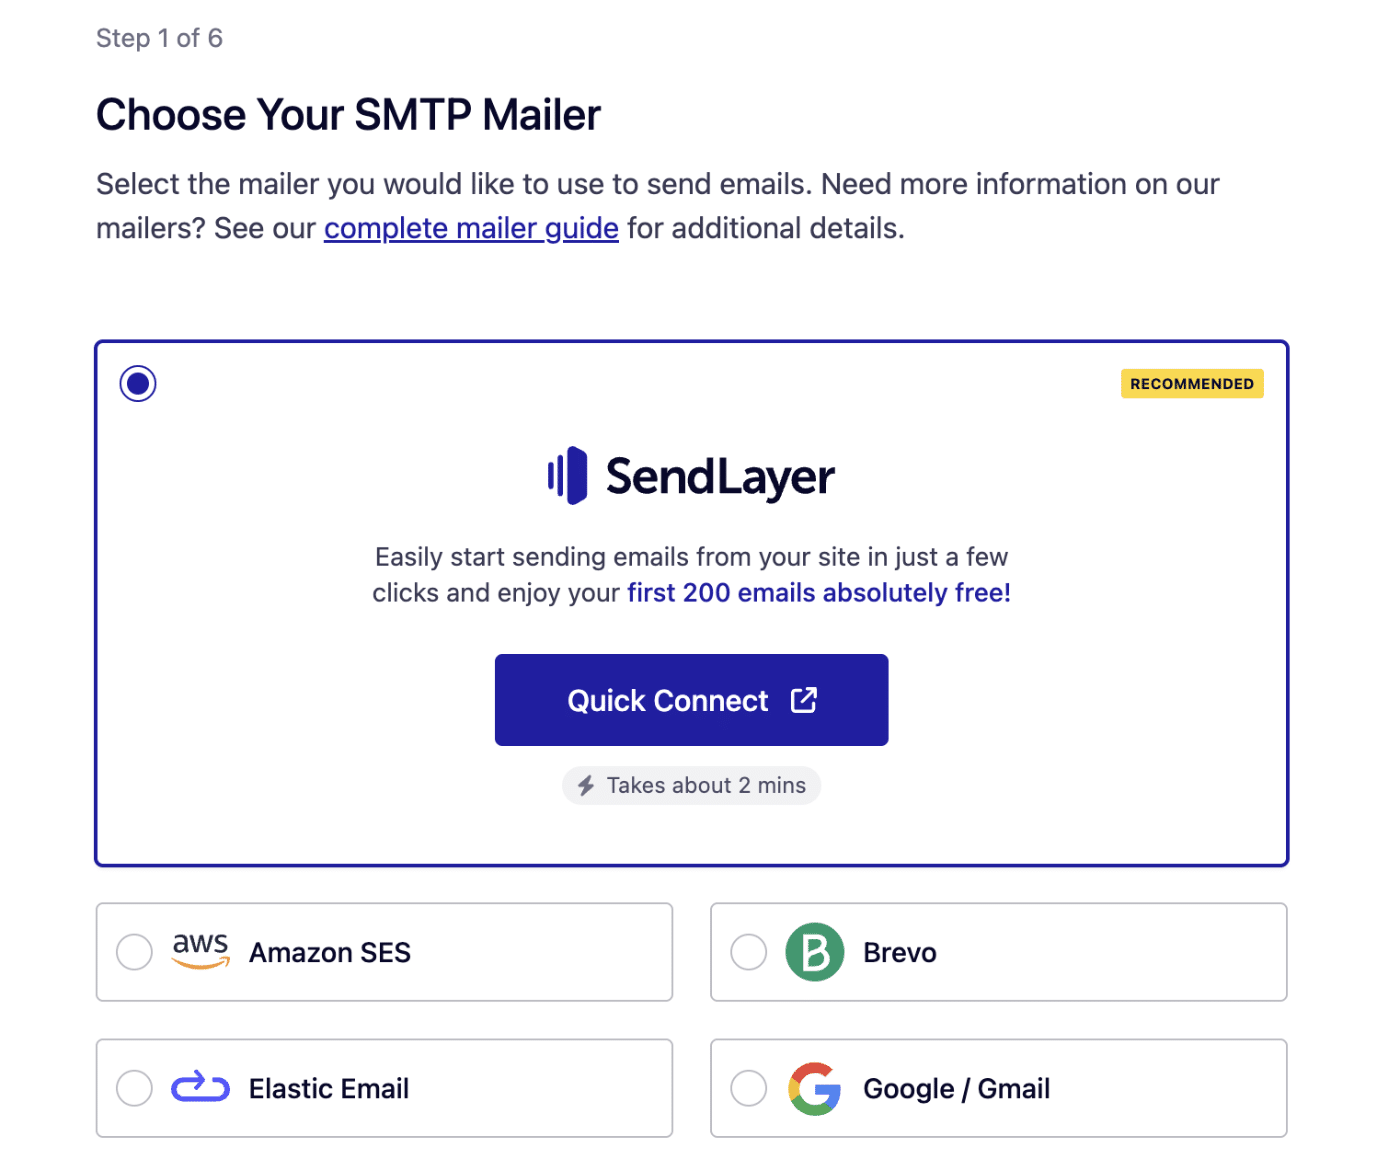
Note: You can connect the SendLayer email provider using the Quick Connect feature. This option doesn’t require you to add a custom domain or DNS records to your site. To learn more, see our tutorial on setting the SendLayer mailer using Quick Connect.
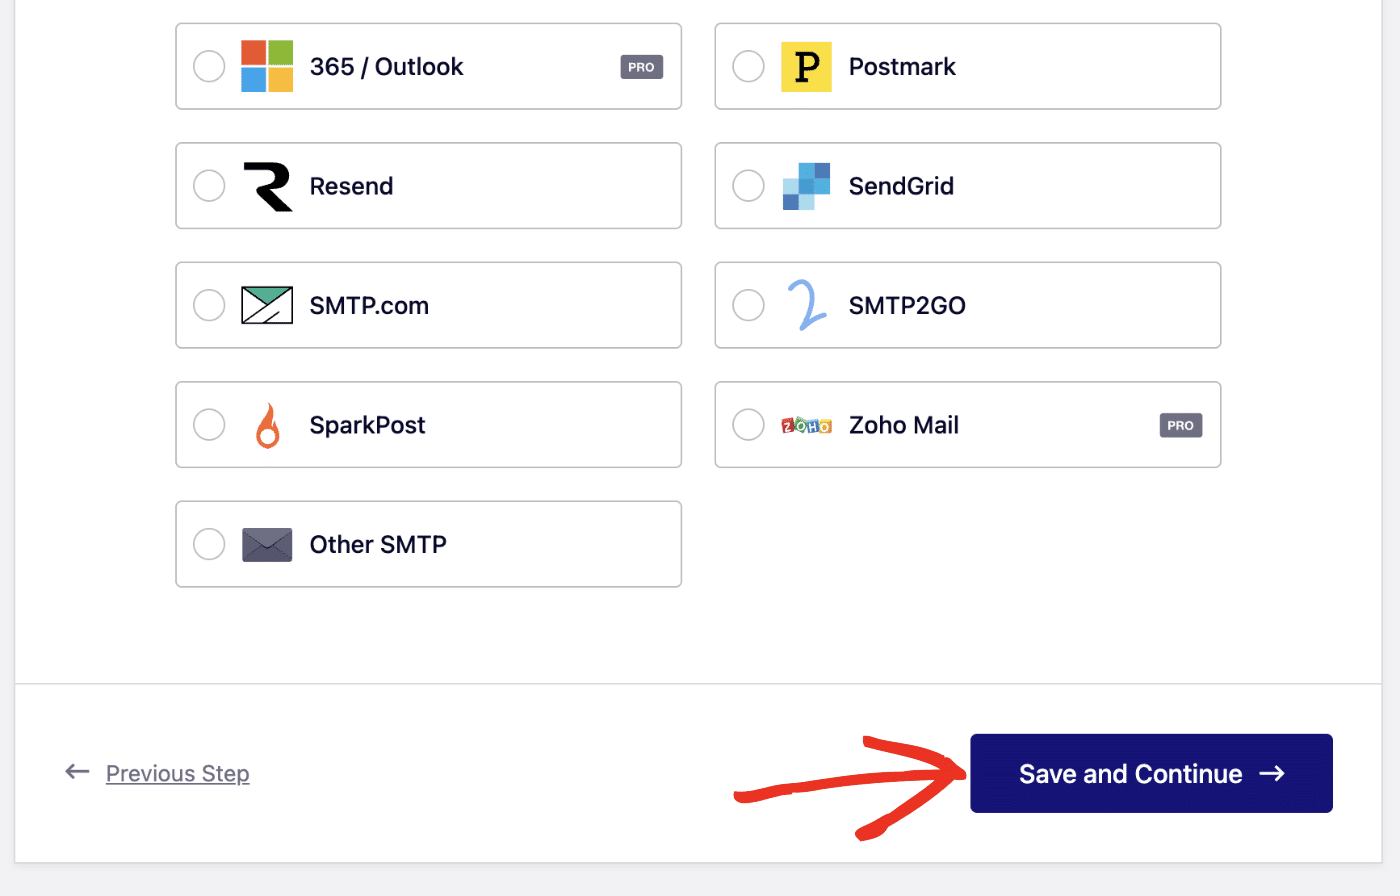
After choosing, click the Save and Continue button to proceed to the next step.
3. Configuring Mailer Settings
Once you’ve chosen a mailer, you’ll need to configure its settings. This process will differ slightly for each mailer. If you require additional guidance, a link to a full walkthrough for your chosen mailer is available in this step.
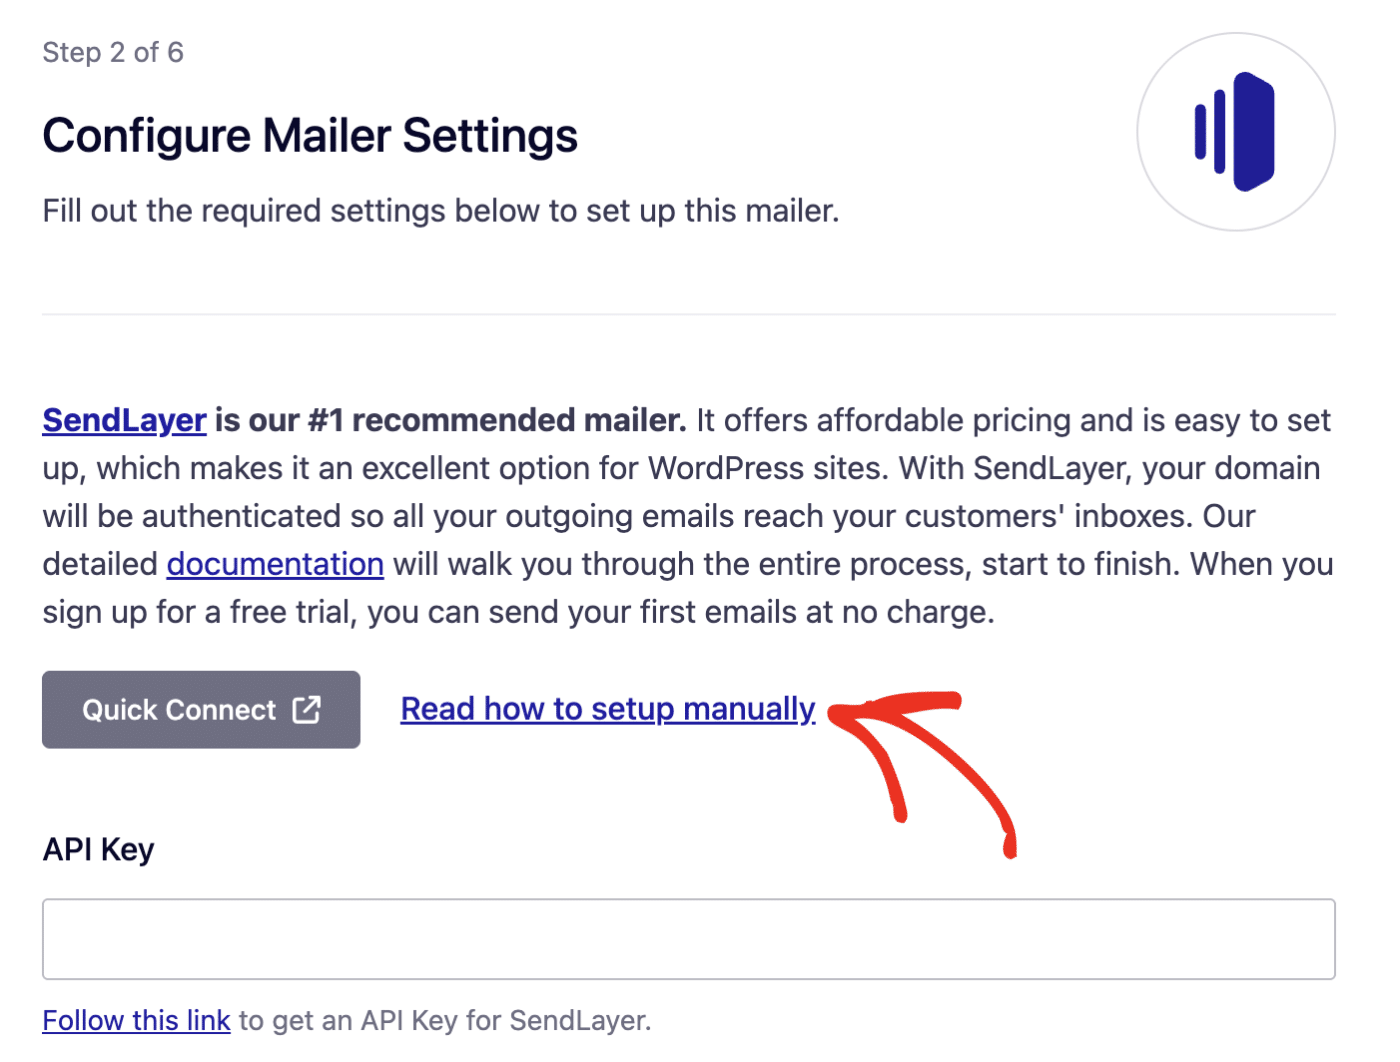
We’ve outlined the settings you may need to complete to configure your mailer below.
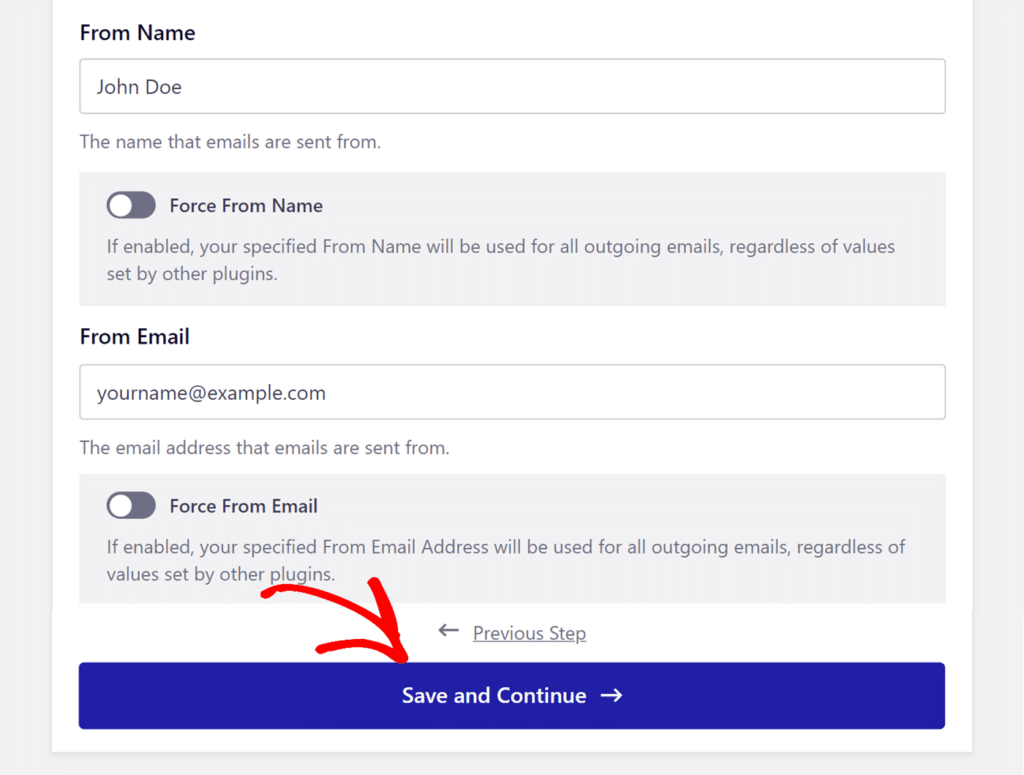
From Name
The From Name is the name that will appear as the sender of all emails sent from your site. By default, it’ll be your website’s name, but you can change it to any text you prefer.
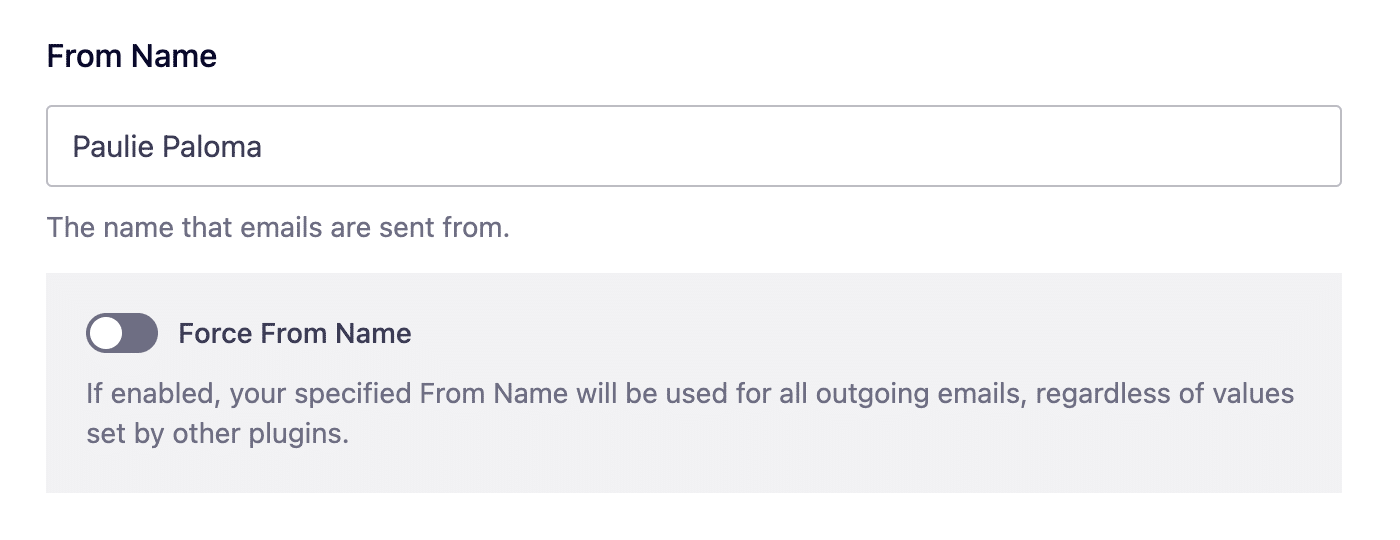
You can also enable the Force From Name option to apply this name to all emails site-wide.
From Email
The From Email is the email address that all of your WordPress site’s emails are sent from. For emails to deliver correctly, this email address must match the domain you’ve authorized to send emails. For example, if you authorized example.com as your domain, the From Email must contain @example.com.
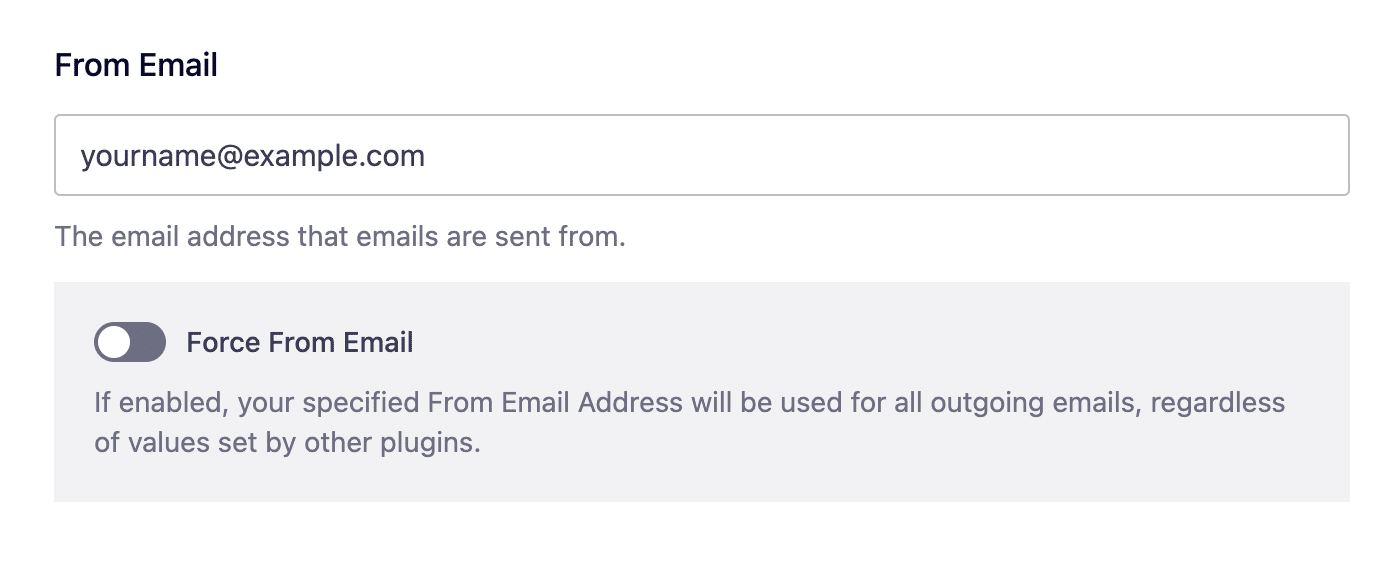
We strongly recommend enabling the Force From Email option, which will save you from having to edit the From Email settings throughout your site (in all settings where email could be sent from) and ensure that all of your site’s emails are authenticated.
API Key
The API Key field is where you’ll need to enter the API key generated in your mailer account. This enables your website to communicate with your mailer. Copy your API key from your account and paste it into the field provided in the Setup Wizard.
Note: For more details on where to find your API key, check the full setup guide for your mailer.
The following mailers require an API Key:
- SendLayer
- SMTP.com
- Brevo (Sendinblue)
- Mailgun
- MailerSend
- Elastic Email
- Mailjet
- Mandrill
- Resend
- SendGrid
- SMTP2GO
- SparkPost
Region
Some mailers have servers located in multiple regions around the world. You may need to indicate which region your server is in to complete the setup of your mailer.
Authorization
Certain mailers will require you to click a button authorizing your site to connect to your mailer account. After clicking this button, you may have to log in to your mailer account as well.
Access Key ID and Secret Access Key (Amazon SES Only)
Similar to an API key, your Amazon SES Access Key ID and Secret Access Key are unique credentials that you must create in your Amazon SES account. Once generated, enter these credentials in the Setup Wizard to allow your website to communicate with your Amazon SES account.
Note: For more details on how to find your Access Key ID and Secret Access Key, see our Amazon SES mailer tutorial.
Application ID and Application Password (Microsoft 365 / Outlook Only)
To use the Microsoft 365 / Outlook mailer, you must first set up a Microsoft Azure application. After setting it up, copy your Application ID and Application Password and paste them into the fields provided in the Setup Wizard.
Note: For additional guidance on how to create a Microsoft Azure application and find your credentials, please see our Microsoft 365 / Outlook mailer tutorial.
Other SMTP Mailer Settings:
Please be aware that Other SMTP is less secure than other options in Easy WP SMTP because it stores your login details in WordPress. Other administrators can access them, so we recommend using Easy WP SMTP’s more secure mailers whenever possible.
Additionally, some hosting providers block SMTP ports by default, which can prevent an SMTP connection. If you encounter this issue, contact your web host to find a solution.
If you’re using the Other SMTP option, you’ll need to enter several unique settings in the Setup Wizard. These settings include:
- SMTP Host: The outgoing server listed in your email provider’s SMTP settings.
- Encryption: The type of encryption used for your SMTP connection, such as TLS, SSL, or none.
- SMTP Port: The port your provider uses for SMTP connections.
- Authentication: This option turns authentication on or off. Most providers require it to be on.
- SMTP Username: Your SMTP username.
- SMTP Password: Your SMTP password. In some cases, you’ll need to generate an app password. Check out our Other SMTP setup tutorial for more information.
Once you’ve entered your mailer settings, click the Save and Continue button to proceed to the next step.
4. Enabling Email Features
Once you’ve set up your mailer settings, you can choose which email features you want to turn on. These features include:
- Improved Email Deliverability: This feature authenticates your emails through your chosen mailer. This feature is enabled by default.
- Email Error Tracking: Easily identifies errors causing delivery issues. This feature is enabled by default.
- Detailed Email Logs: Records every email sent from your website. See our tutorial on setting up email logging for more details.
- Complete Email Reports: Monitors email deliverability and performance.
- Weekly Email Summary: Provides weekly statistics about the emails you’ve sent.
- Instant Email Alerts: Notifies you via email, SMS, Slack, or webhook if emails fail to send.
Note: Email logging is only available in the paid version of Easy WP SMTP.
By default, Improved Email Deliverability and Email Error Tracking are the only enabled features. To turn on other features, click the checkbox next to the desired feature.
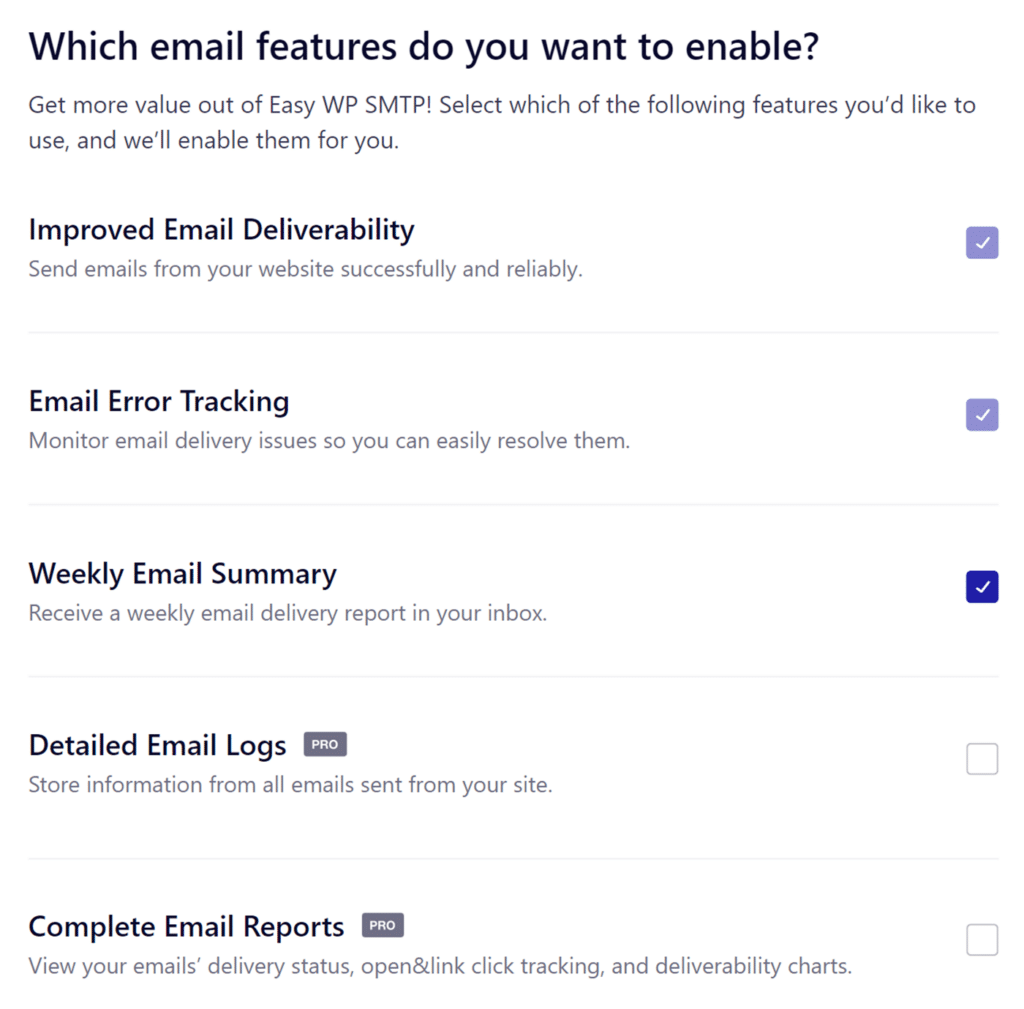
To turn off a feature, simply click the checkmark to the right of it. Please note that Improved Email Deliverability and Email Error Tracking cannot be disabled.
Once you’re done, click the Save and Continue button.
5. Configuring Email Logs
If you enabled Detailed Email Logs in the previous step, you can choose the features you want to include in the logs. However, if you didn’t enable Detailed Email Logs, you will be skipped to the next step of the setup process.
Here are the available logging features:
- Store the content for all sent emails: This option allows you to resend emails and store email content in your WordPress database. Keep in mind that this may include sensitive information like passwords and personal details.
- Save file attachments sent from WordPress: This feature saves all file attachments sent from your site to the WordPress Uploads folder.
- Track when an email is opened: This feature tracks which emails were opened by the recipients.
- Track when a link in an email is clicked: This feature tracks which links were clicked in emails sent from your WordPress site.
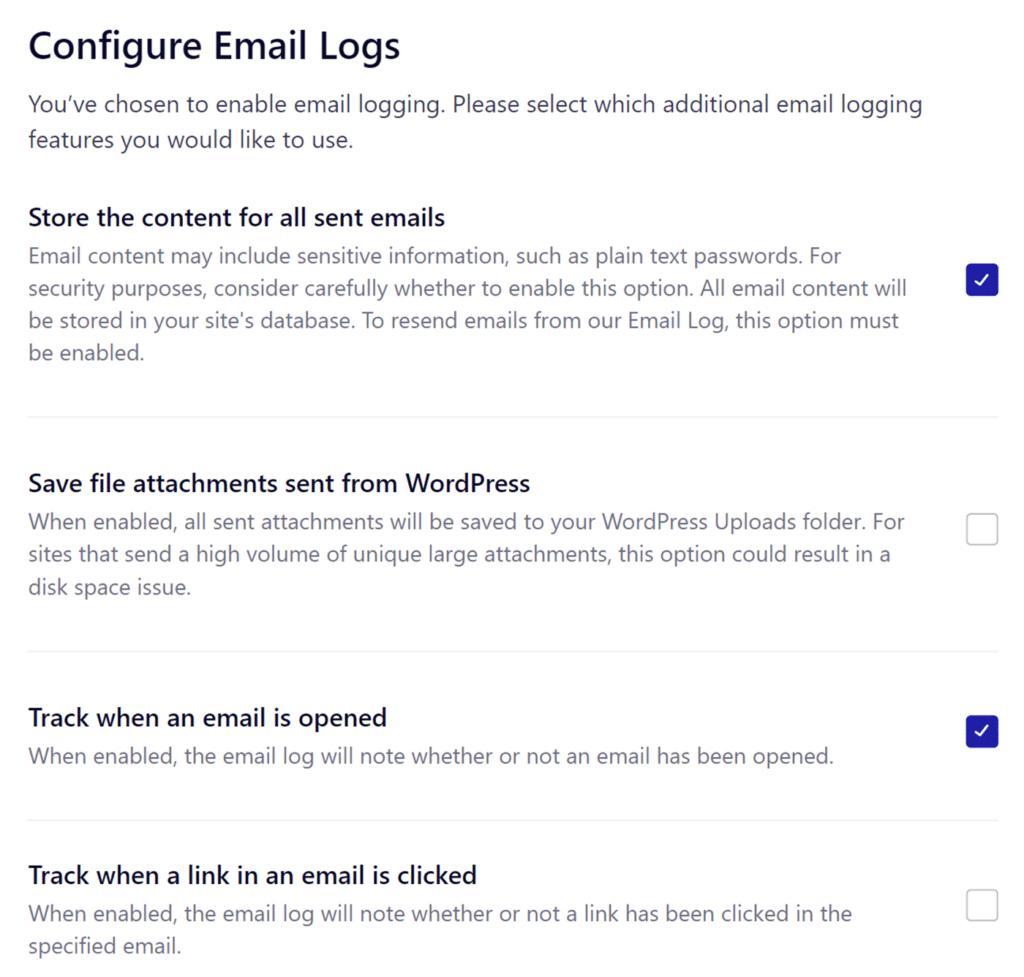
Click the checkbox next to the logging features you want to turn on, and then click the Save and Continue button when you’re ready to move on to the next step.
6. Entering Your Easy WP SMTP License Key
After configuring your email features, you’ll be asked to enter your license key to enable automatic plugin updates. If you have the license key, simply paste it into the provided field and click the Verify License Key button to activate your license automatically. Don’t have a license key yet? You can purchase it here.
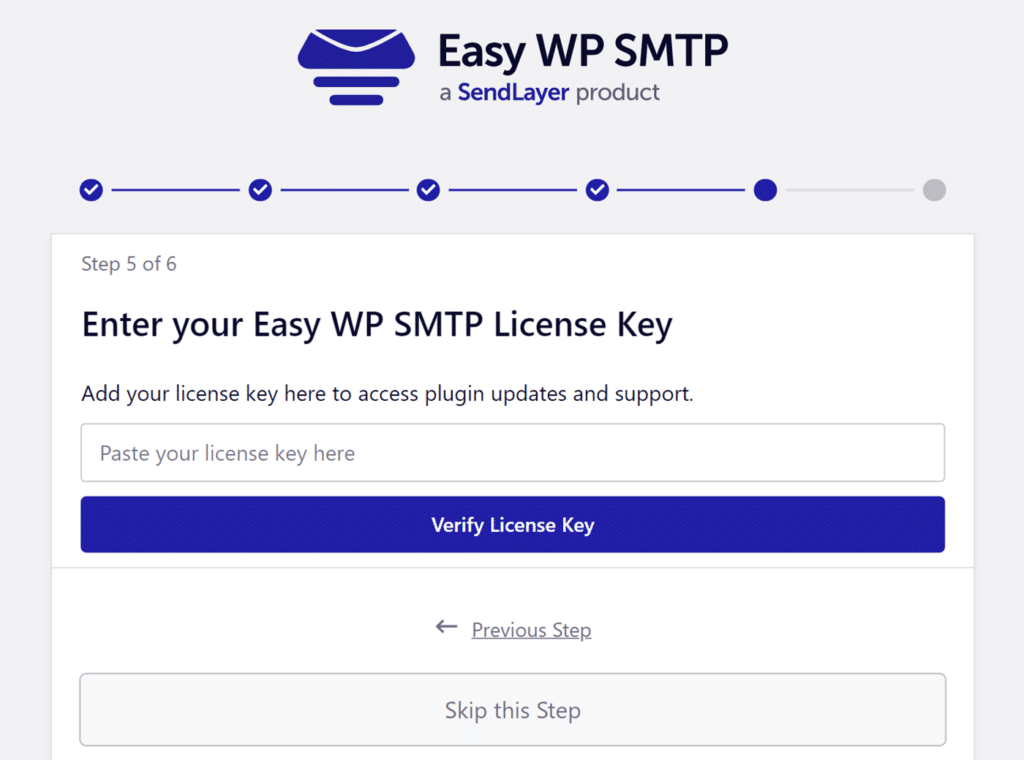
Otherwise, you can click the Skip this Step button if you’d like to verify your key later.
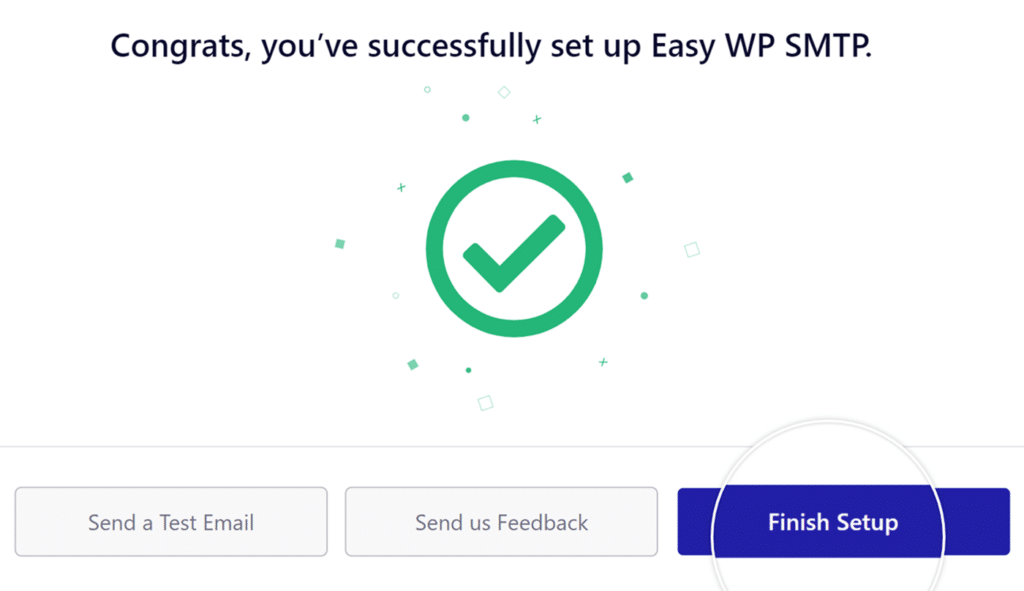
7. Sending a Test Email
Once you’ve entered your license key, Easy WP SMTP will send a test email to ensure that your setup is working correctly. If everything is working as it should, you’ll see a message that says “Congrats, you’ve successfully set up Easy WP SMTP!” To finish the setup, click the Finish Setup button.
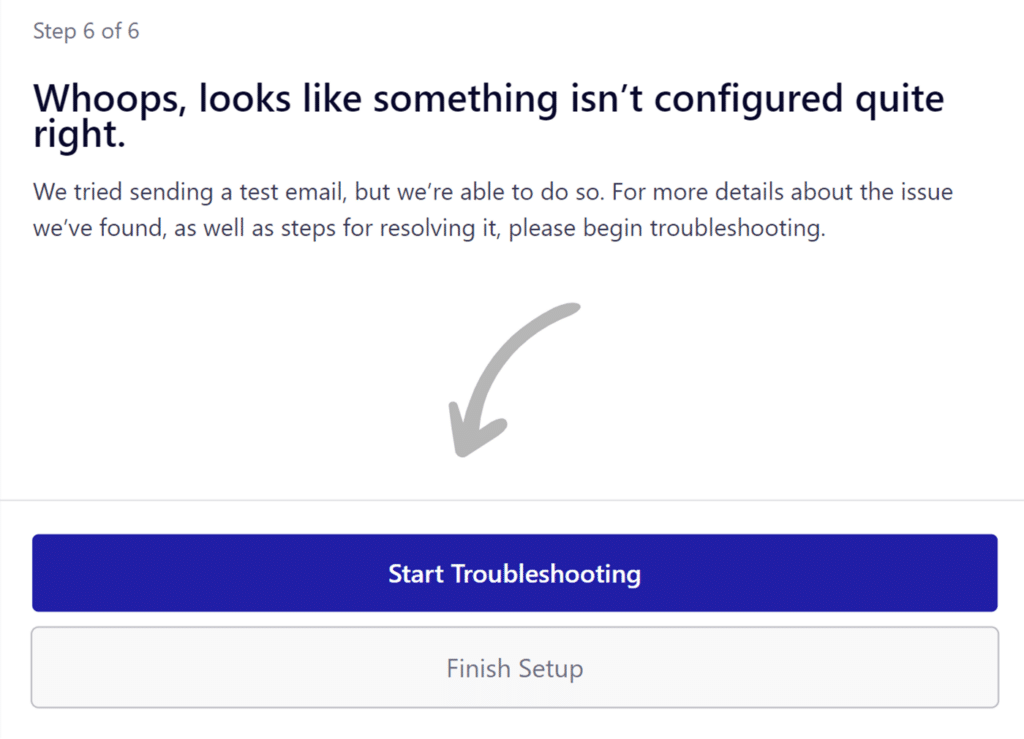
If there are any errors during the test email, you’ll see a message that says “Whoops, looks like something isn’t configured quite right.” Click the Start Troubleshooting button to begin the troubleshooting process and view any error messages. Follow the recommended troubleshooting steps to resolve any issues.
That’s it! We’ve just shown you how to use Easy WP SMTP’s Setup Wizard to configure a mailer.