Sending automated emails in WordPress can prove incredibly useful, especially if you’re looking to save time and keep your audience engaged.
For example, if someone signs up for your email newsletter, an automated welcome email can greet them right away, making a great first impression.
In this guide, I’ll walk you through how to set up automatic emails effectively so you can keep your visitors engaged and informed without having to lift a finger every time.
How to Send Automated Emails in WordPress
Automated emails are simply messages sent out on their own based on certain triggers or schedules you set up.
However, before you go into setting up email automation, it’s important to ensure your website is configured for proper email deliverability.
This is where Easy WP SMTP comes in handy, which replaces the default PHP mail function with a reliable SMTP service of your choice.
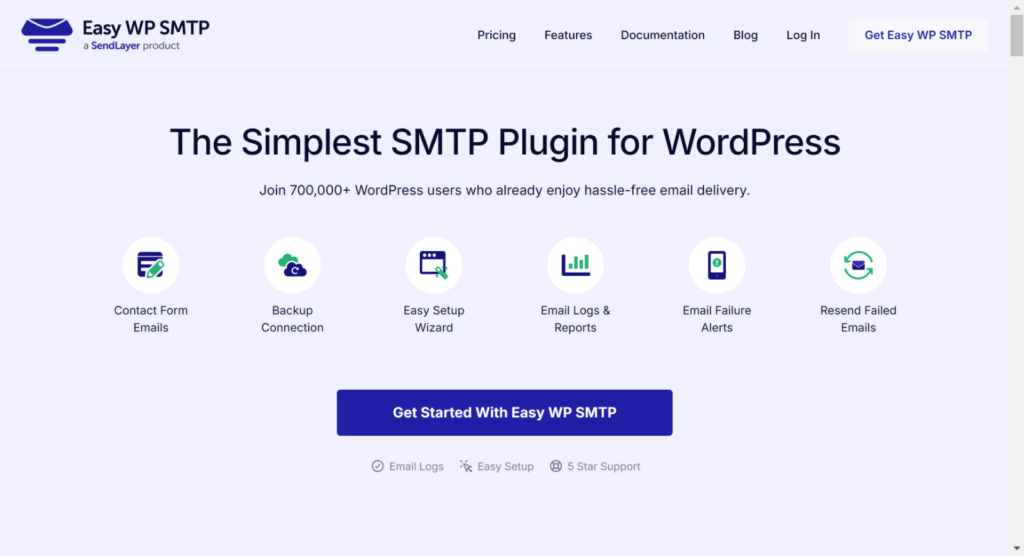
By authenticating emails, these mailers ensure that they never get flagged as spam and provide regular updates on email delivery statuses.
For complete instructions on installing and configuring Easy WP SMTP, see this complete guide on how to set up Easy WP SMTP.
After you’ve configured Easy WP SMTP on your WordPress site, check out these examples of sending automated emails in WordPress for different purposes.
Example 1: Send Welcome Emails to New Subscribers
WPForms is one of the best form builders available for WordPress. It’s super easy to use and packed with powerful features.
There are also hundreds of form templates available, so if you want to create an email subscription form, you can have one ready to go in just a few clicks.
Not to mention, you have a ton of integrations available. For instance, if you want to use a service like AWeber or Mailchimp, you can upgrade to the Pro version.
Step 1: Install the WPForms Plugin
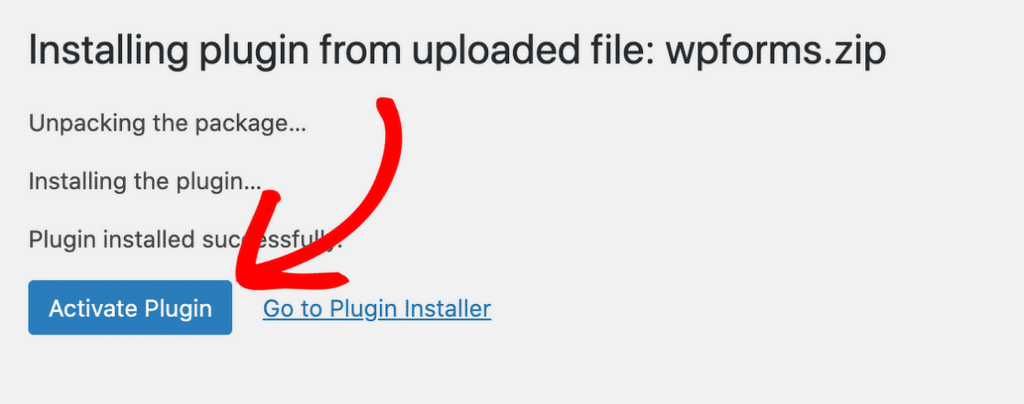
Begin by installing and activating the WPForms plugin. If you need a hand with this, just check out this guide on installing the Pro version of WPForms.
Step 2: Create an Email Signup Form
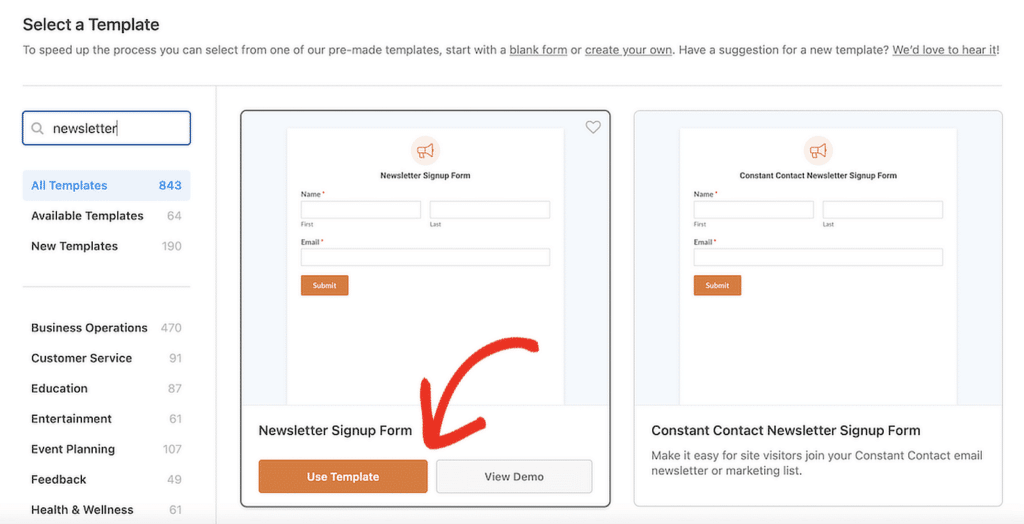
After installation, go to WPForms » Add New. This takes you straight to the form builder. Name your form then and search for “newsletter” in the templates.
When you find the Newsletter Signup Form template, hit the Use Template button to load it in the form builder.
If you’re dealing with spam on your form, make sure to check out this guide to prevent spam submissions.
Step 3: Set Up a Welcome Email Notification
WPForms automatically sends an email notification to the site admin for each form submission and can even be configured to send SMS notifications.
But if you want to send a welcome email to new subscribers, you can adjust this notification to go to the user’s email instead.
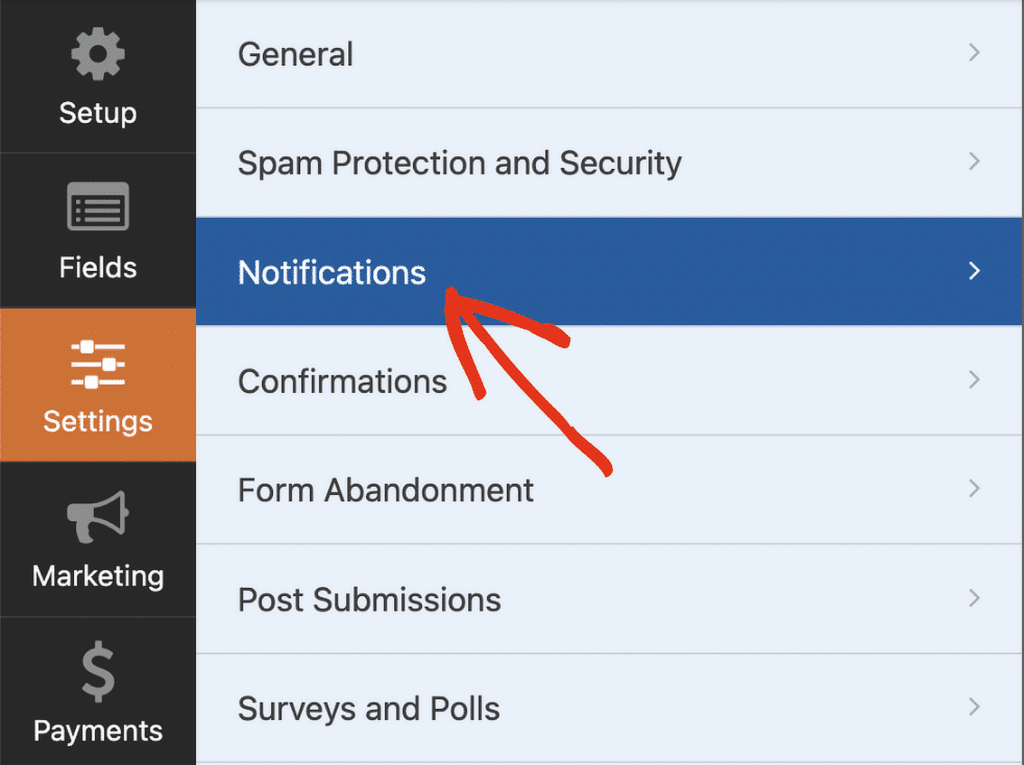
To do this, navigate to the Settings tab and then click on Notifications.
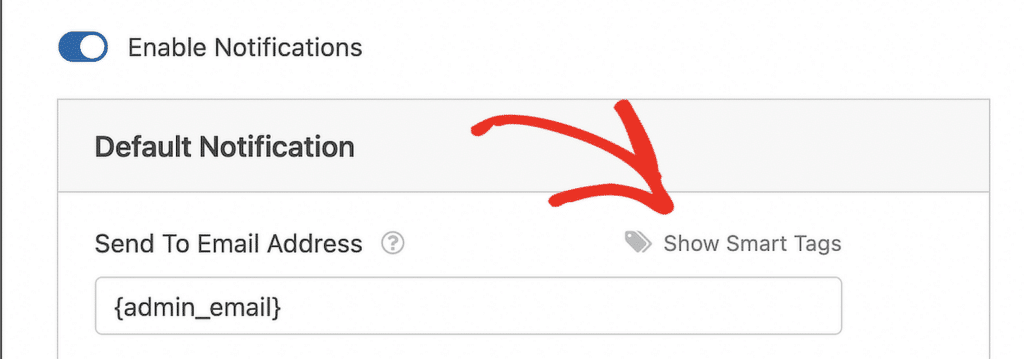
First, ensure that Enable Notifications is turned on. Then, click on Show Smart Tags next to the Send To Email Address field.
Choose Email from the available fields, so the email entered by the user in the form is where the notification gets sent.

If you prefer that the admin doesn’t receive this welcome email, simply delete {admin_email} from the Send To Email Address field.
Alternatively, if you want both the admin and the user to get the email, keep both addresses separated by a comma.

Feel free to change the Email Subject Line, From Name, and Email Message to create a warm welcome message.
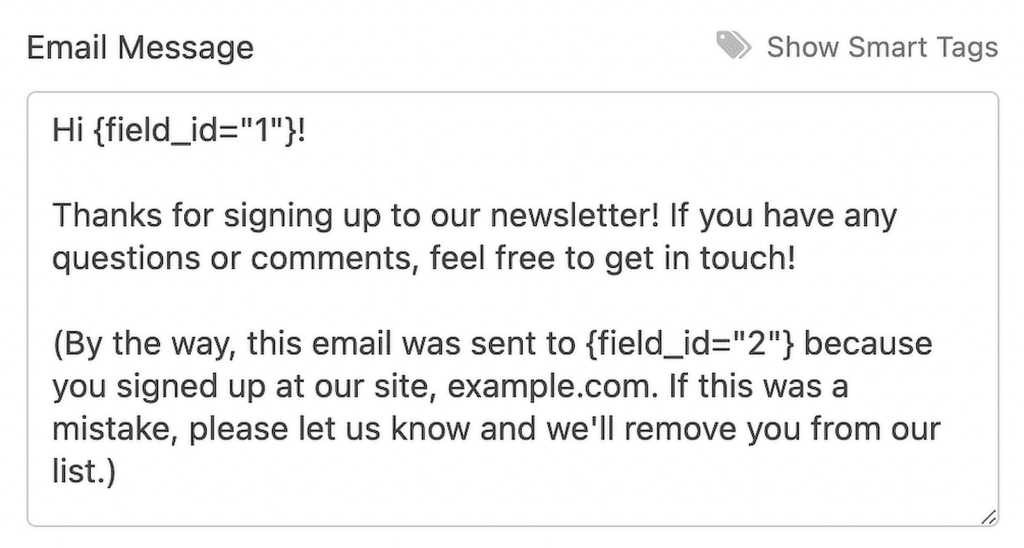
You can personalize the message by using Smart Tags to insert the name of the subscriber. Check out this guide for help with WPForms’ smart tags.
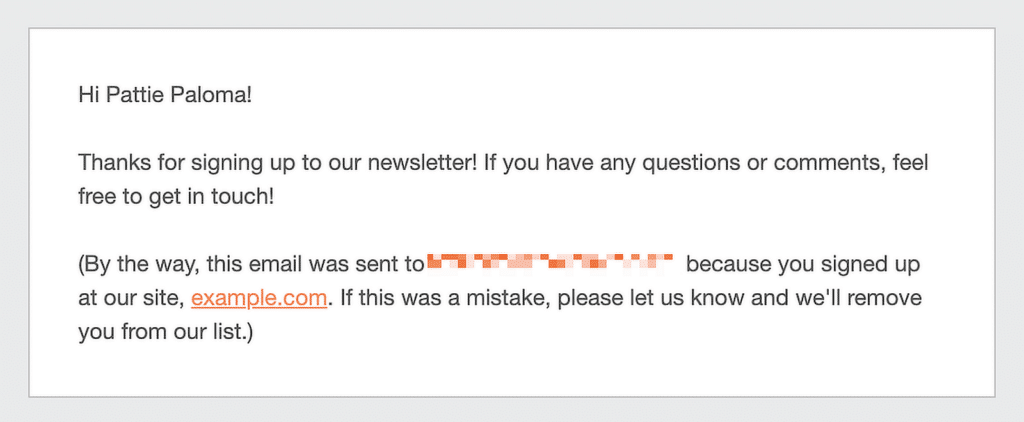
An example email message might look something like this with the relevant smart tags applied to make it more appealing.
Finally, set the Reply-To field to {admin_email} or another address where you can monitor responses from subscribers.
You’ve now got a signup form that sends a thank you email but won’t automatically add the user to your email list.
When everything looks good, click Save at the top of the form builder. Your welcome email should now be ready to go.
I recommend doing a quick test submission to ensure both emails are received as expected and look just right.
You can also use WPForms to design your email notifications using custom templates, styling, and more options.
This process sets up a welcome email but doesn’t automatically add the subscriber to your email list.
To make that happen, I’ll walk you through linking WPForms to Constant Contact so that you can send automated follow-up emails.
Example #2: Create a Drip Campaign with Constant Contact
Drip marketing is all about sending out a series of automated emails to subscribers on a set schedule, like little reminders or updates over time.
Once the emails are set up, they go out automatically, saving tons of time. You just create the content, configure the triggers, and the platform does the rest.
For this email automation, I’d recommend starting with Constant Contact, which works seamlessly with WPForms and even has a free starting option.
Before you dive in, make sure you’ve already set up a signup form with WPForms. Here’s a simple way to get your drip campaign rolling:
Step 1: Connect WPForms with Constant Contact
First, open up WPForms, go to All Forms, and click your newsletter form to access the builder.

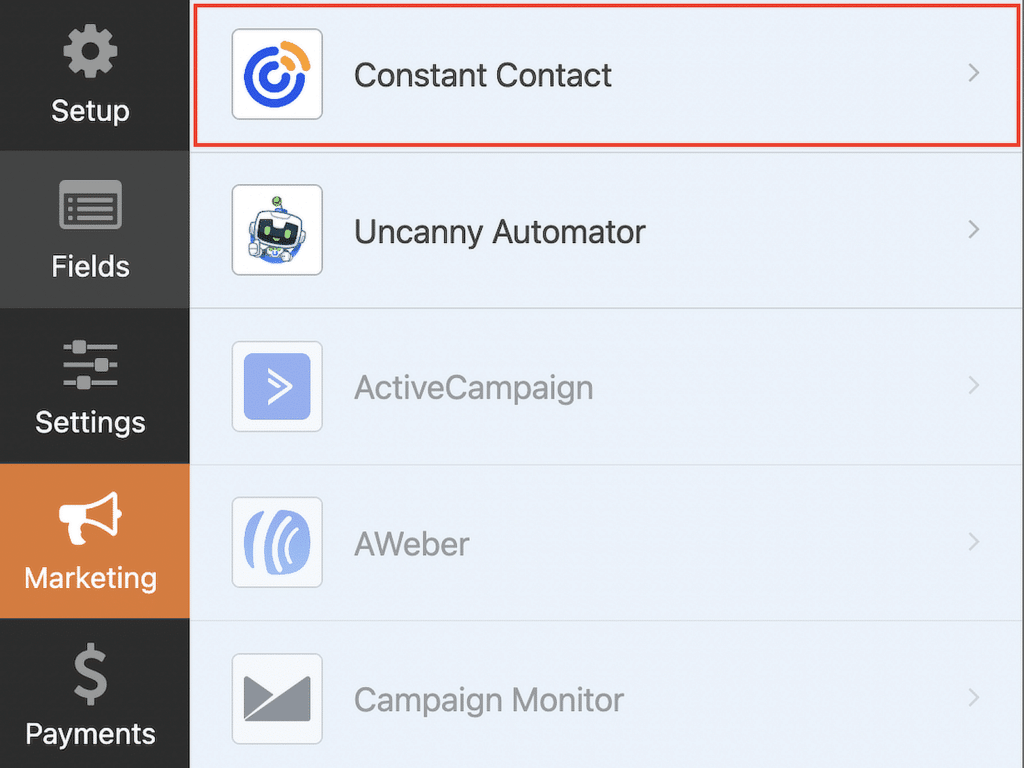
In the builder, switch to the Marketing tab and select Constant Contact to connect the form.
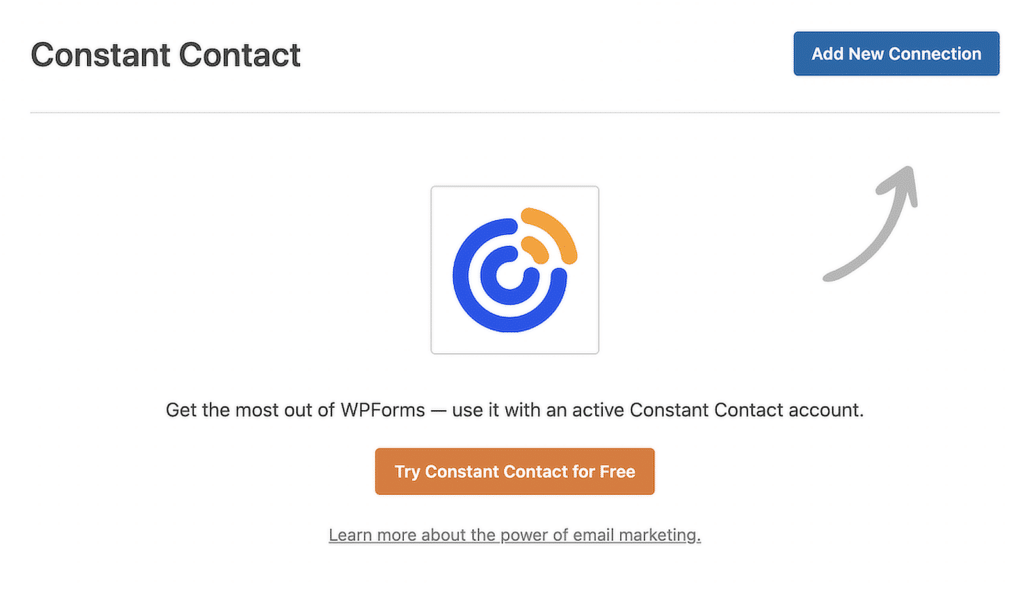
If you don’t already have an account with Constant Contact, you’ll see an option to start a free trial right there.
Once you’re set, click Add New Connection, name it, and follow the steps to authorize WPForms with Constant Contact.
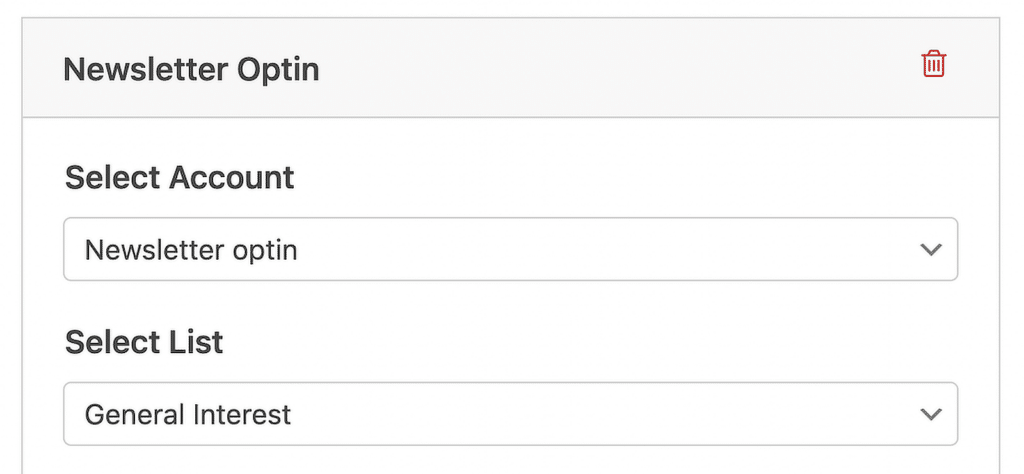
Then, just pick the list in Constant Contact where you want to save your sign ups and create the trigger.
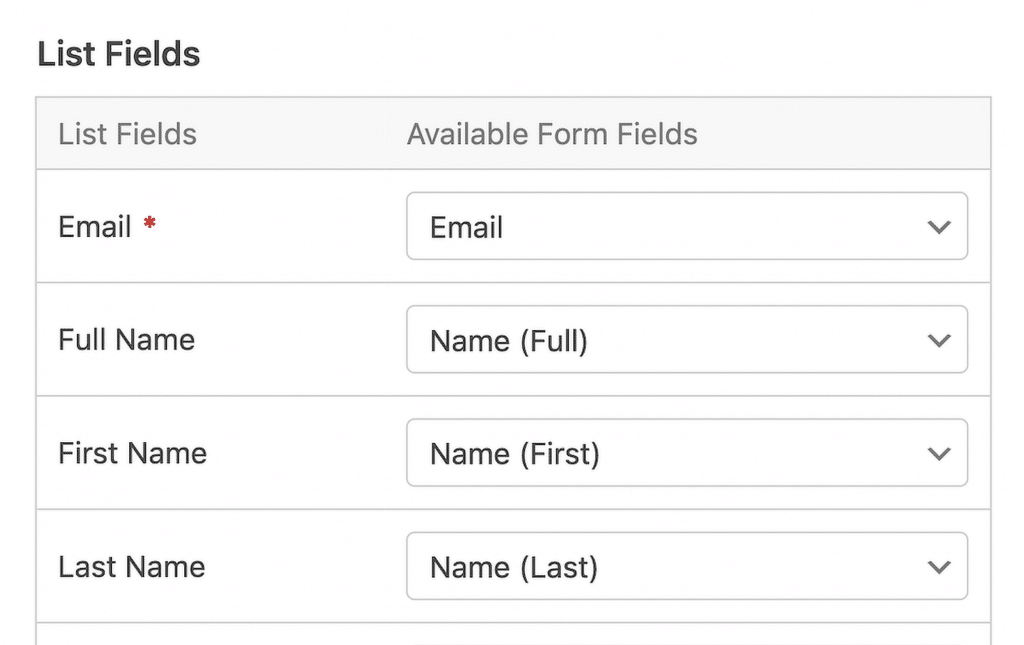
After that, map the fields from WPForms (like name and email) to match the fields in Constant Contact. Don’t forget to click Save at the end.
Step 2: Create Your Automated Campaign
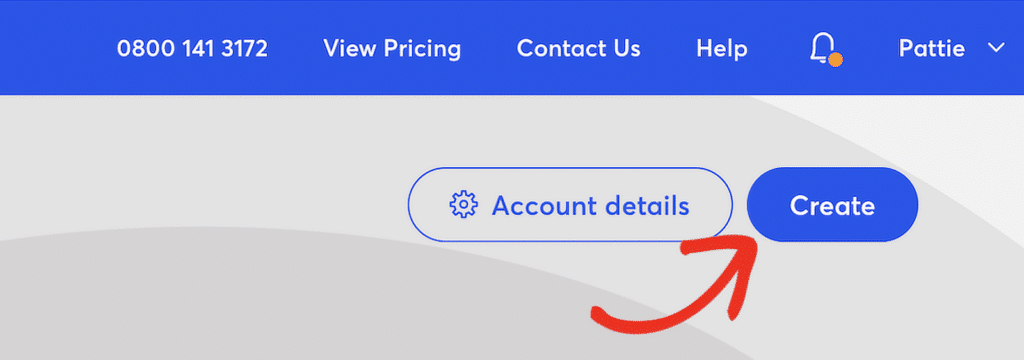
Now, it’s time to create your drip campaign. Log into your Constant Contact account and click on Create in the top corner.
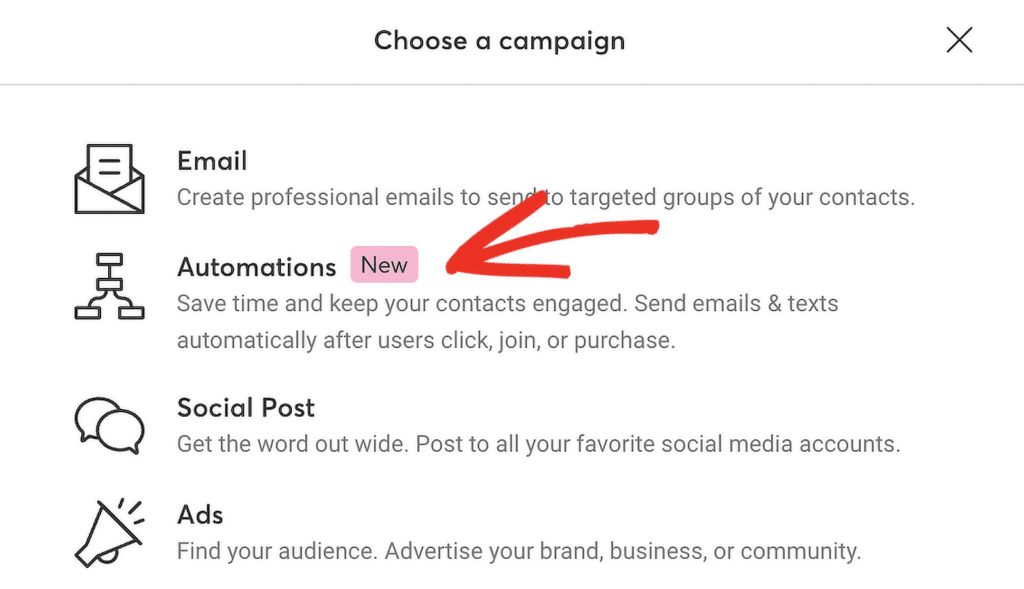
Next, choose Automations. Constant Contact has a few templates for automated sequences, or you can make your own.
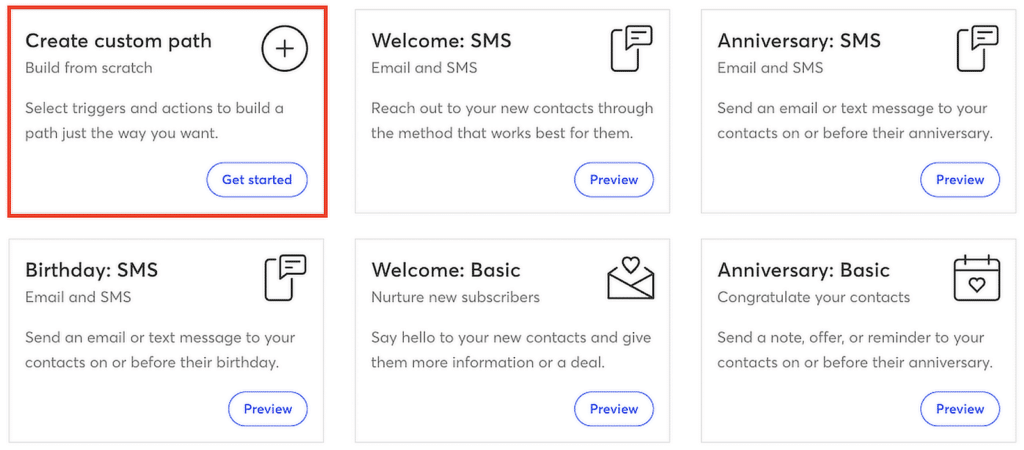
I usually choose the custom option by clicking on Create custom path, as it lets me tailor the triggers and actions exactly to my needs.
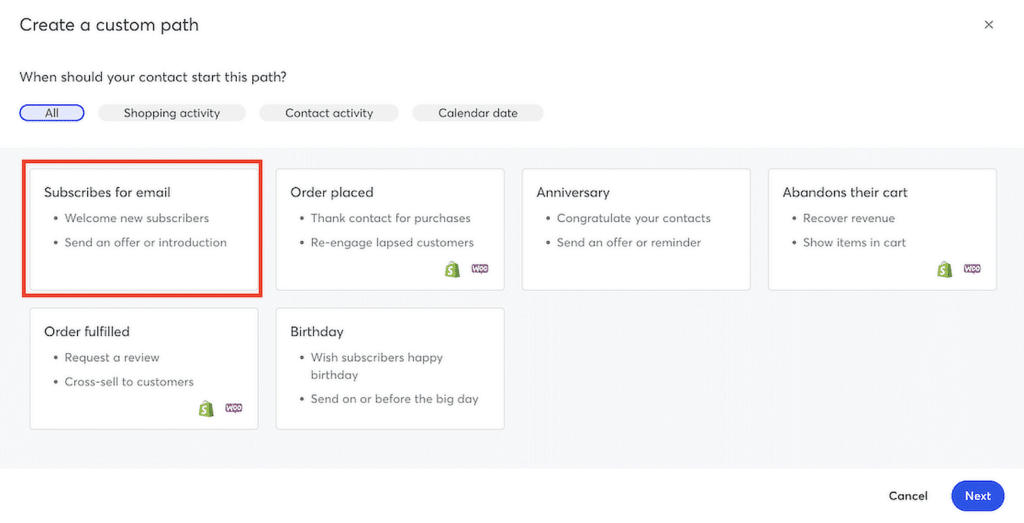
To initiate the email series, choose the trigger. This date or an action taken by the user will cause the automation to start. For this example, we need Subscribes for email.
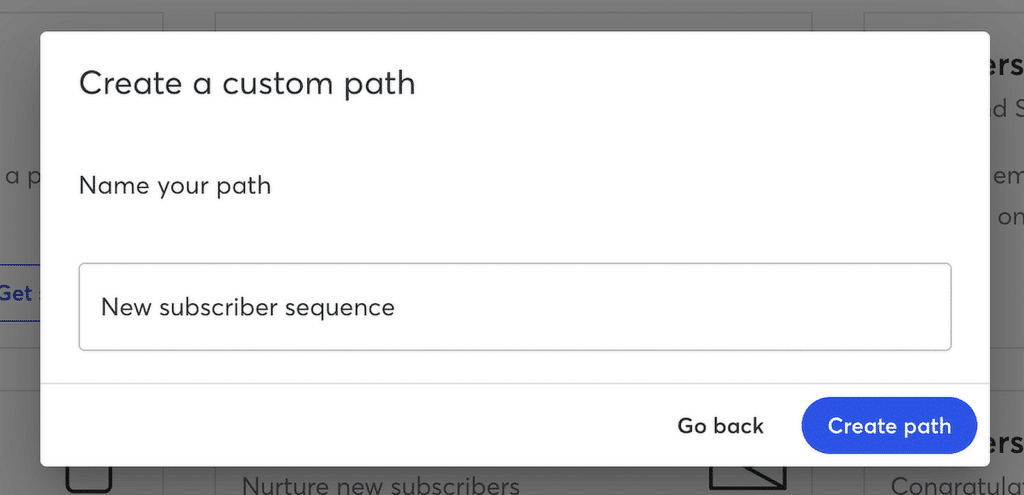
Give your sequence a name, and click the Create path button to start building it using the drag-and-drop editor.
You can add as many emails as you need, by dragging Send an email actions, spaced out with Time Delays.
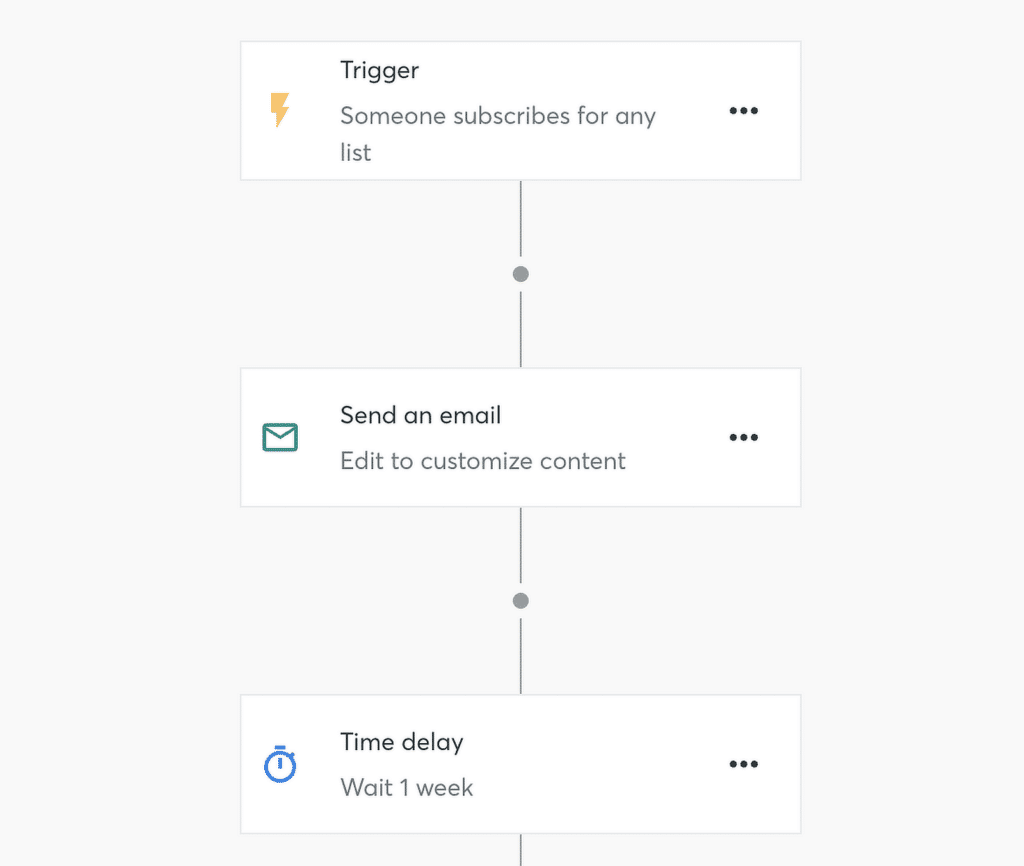
To edit each action and delay between emails, just click on the three dots next to each item.
For the Send an email action, clicking the three dots lets you create a new email or reuse an existing one.

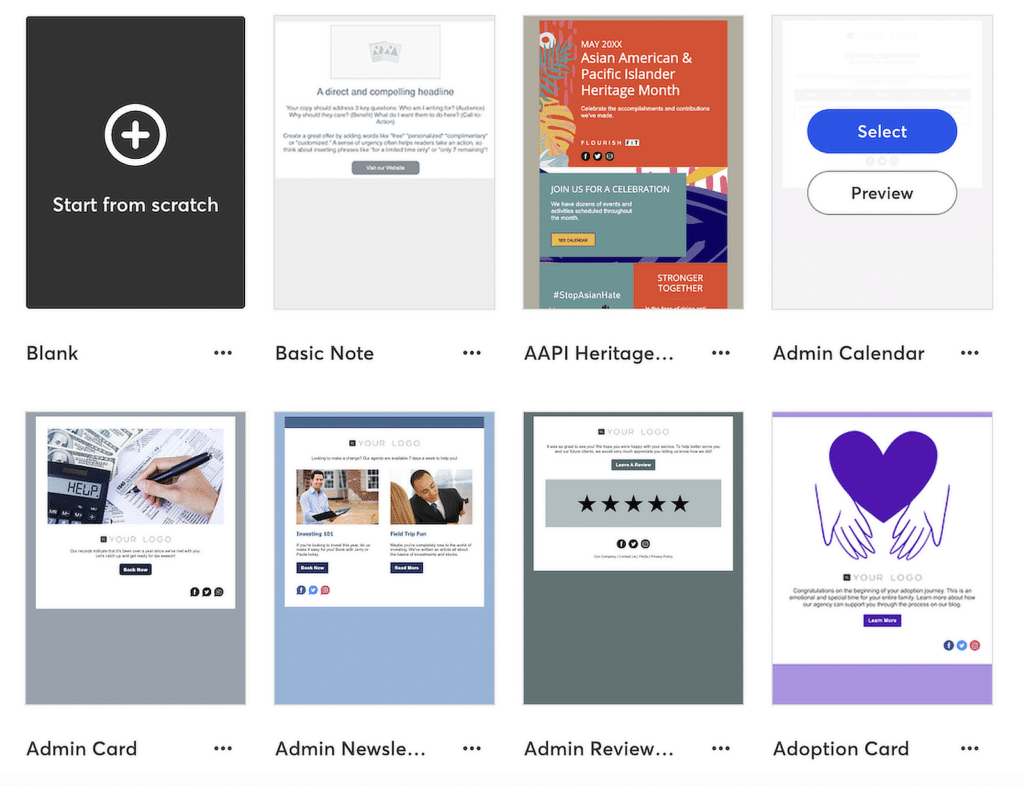
Start by naming your email so it’s easy to identify. Next, pick a template for your message.
Constant Contact offers a variety of designs to choose from, which makes it simple to put together a great-looking email.
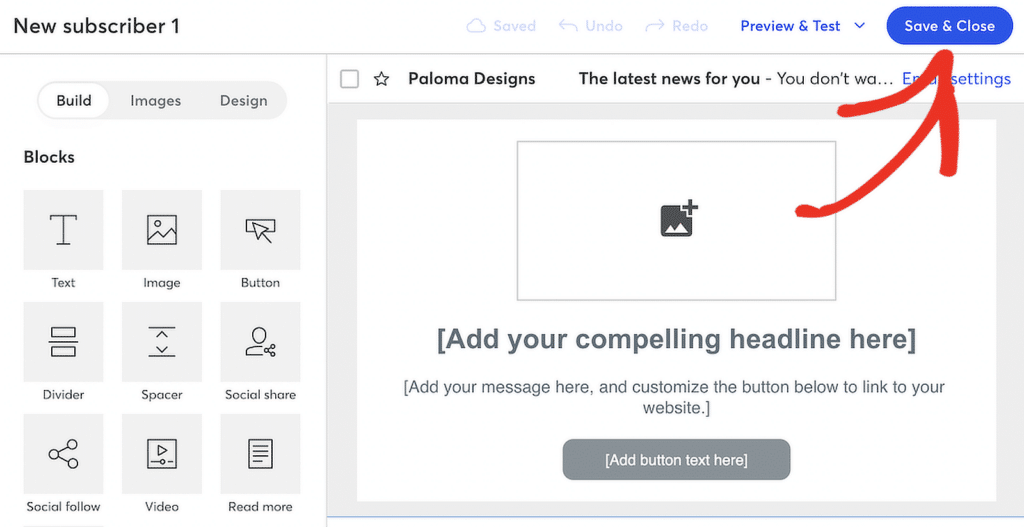
This takes you into their visual editor, where you can drag and drop images, layouts, and text to customize your message.
Once you’re satisfied with how it looks, hit Save & Close at the top to go back to the sequence builder.
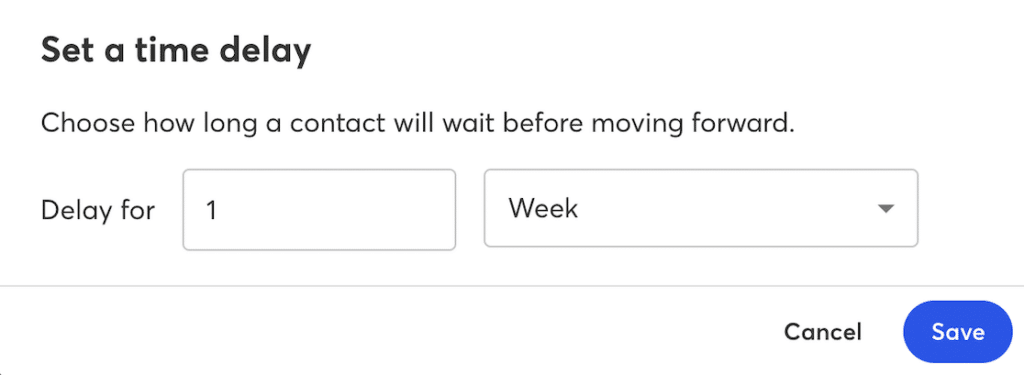
To adjust the timing between emails, click the three dots next to the time delay and set the interval you want.
You can space them out by minutes, hours, days, weeks, or months, whatever makes sense for your flow.
When everything looks good, click Activate. If you’re on a free Constant Contact plan, you’ll need to upgrade to activate the campaign, or you can save it and return to it later.
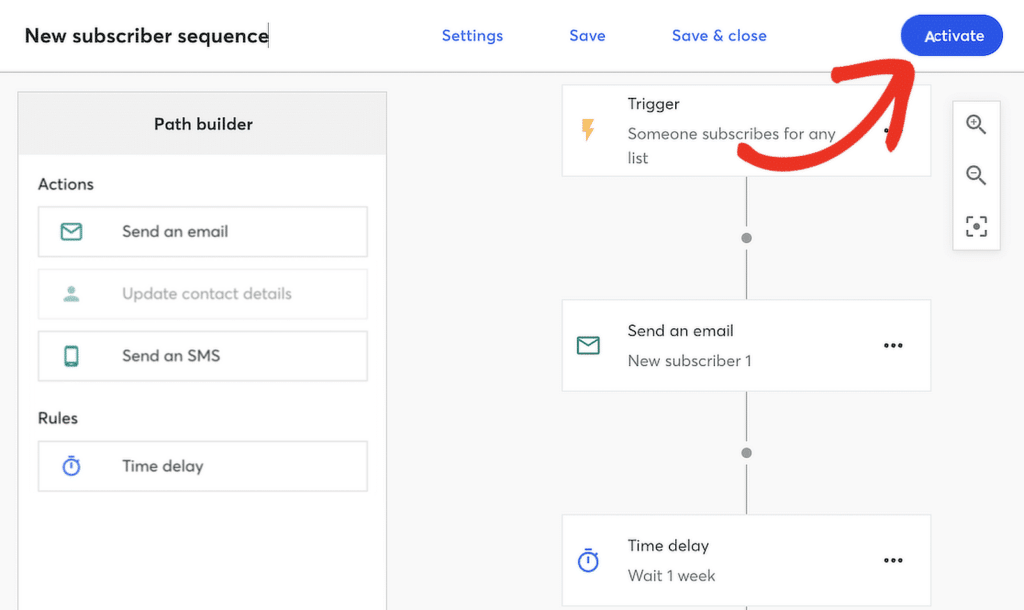
And that’s it, you’re all set! Your automated email campaign is now ready to run. New subscribers will get your series of messages on the schedule you set.
They’ll also have the option to unsubscribe if they decide they no longer want to receive your emails.
Example #3: Set Up Targeted Marketing with OptinMonster
OptinMonster is my top pick for generating leads on WordPress. It makes it super easy to create eye-catching signup forms through popups, slide-ins, welcome mats, landing pages, and more to help grow your email list.
One of OptinMonster’s best features is its advanced A/B testing and segmentation tools. You can divide your audience based on location, actions they’ve taken, device type, and referral source, among other criteria.
By segmenting your audience this way, you can send them more targeted and relevant emails, which increases the chances of turning them into customers.
Step 1: Install and Activate the OptinMonster Plugin
Head to OptinMonster’s website to sign up and create an account.
Then, from your WordPress dashboard, go to Plugins » Add New, search for “OptinMonster,” and install and activate it.
Don’t forget to link it to your OptinMonster account. If you need any assistance, OptinMonster provides a full guide on how to get set up and connected.
Step 2: Set Up a New Campaign
Once OptinMonster is all set up on your WordPress site, head to OptinMonster » Campaigns, and click on the Add New option.

In the popup, select Templates, as that will let you kick off the campaign creation process without starting from scratch.
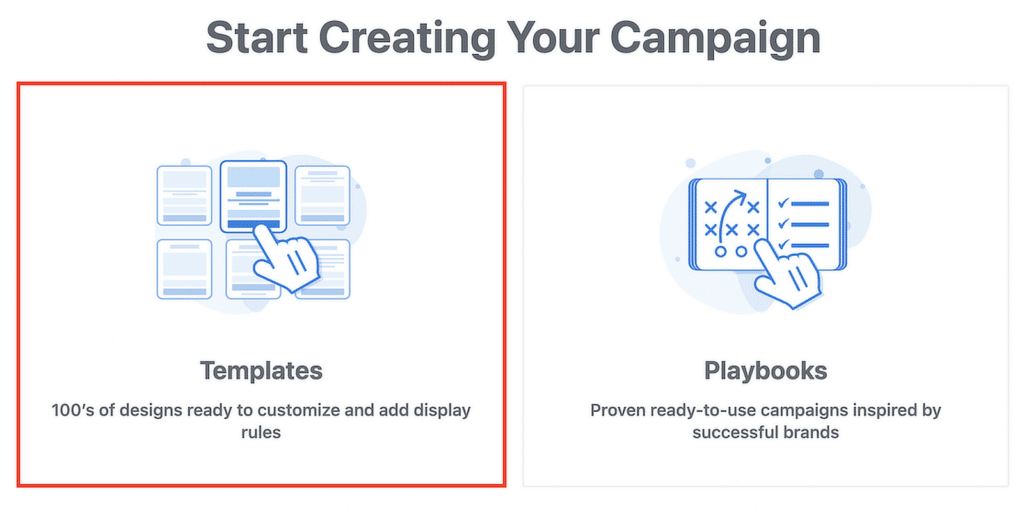
Choose the type of campaign and template you’d like to use. For example, let’s go with a popup campaign using the Subscribe To Email template.
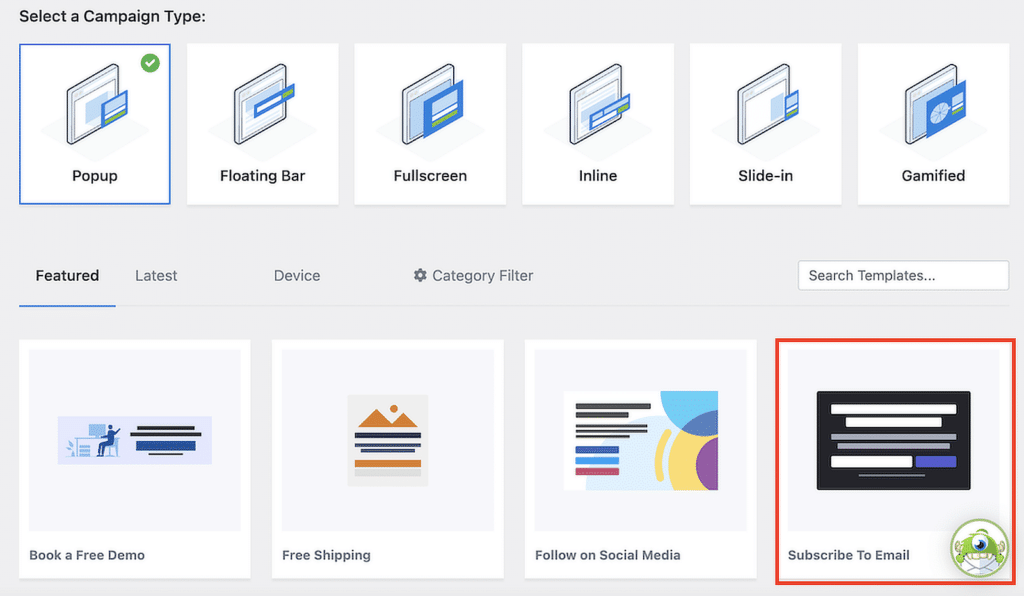
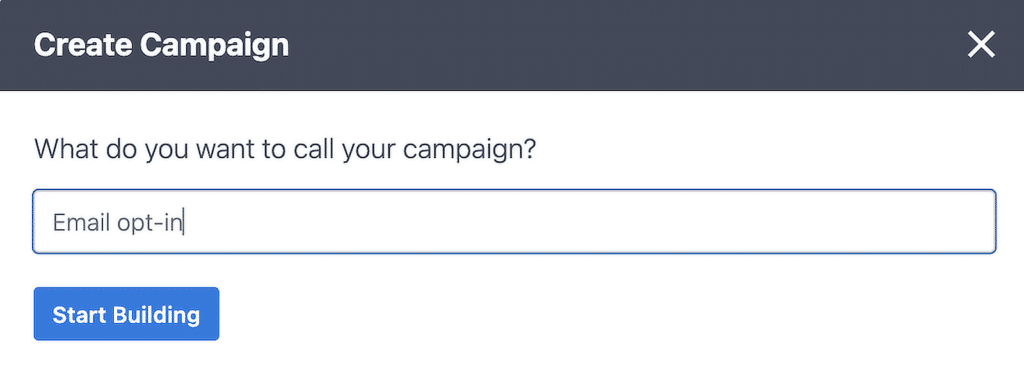
After selecting the Subscribe to Email template, click on the Use Template option and give your campaign a name, click on Start Building.
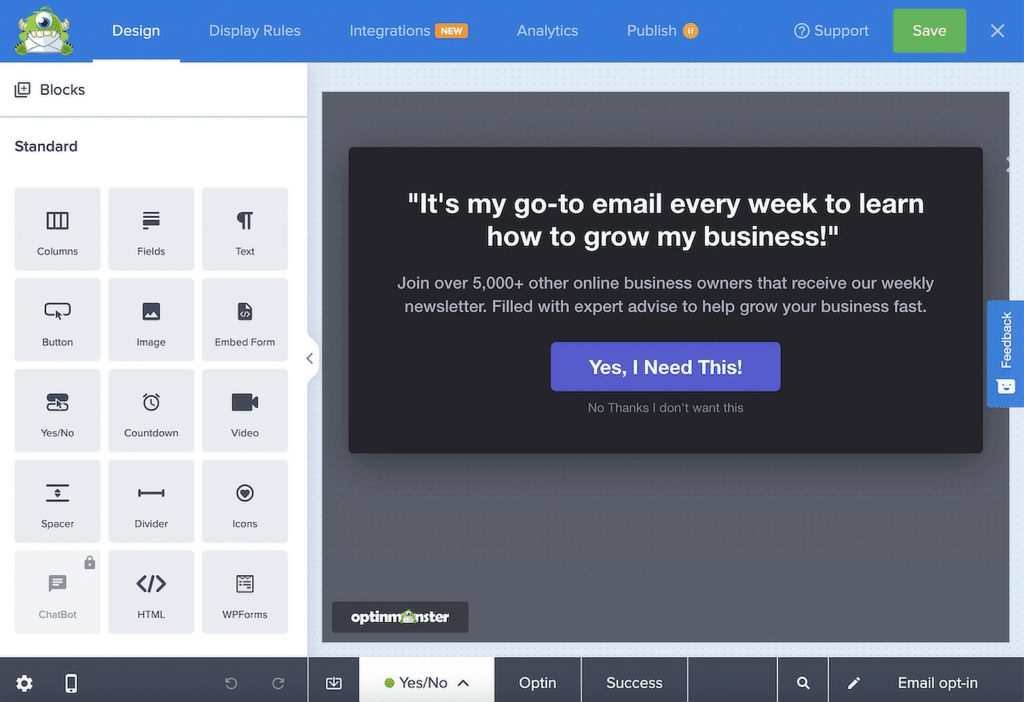
This will redirect you to OptinMonster’s drag-and-drop builder, where you can customize your popup’s design and settings.
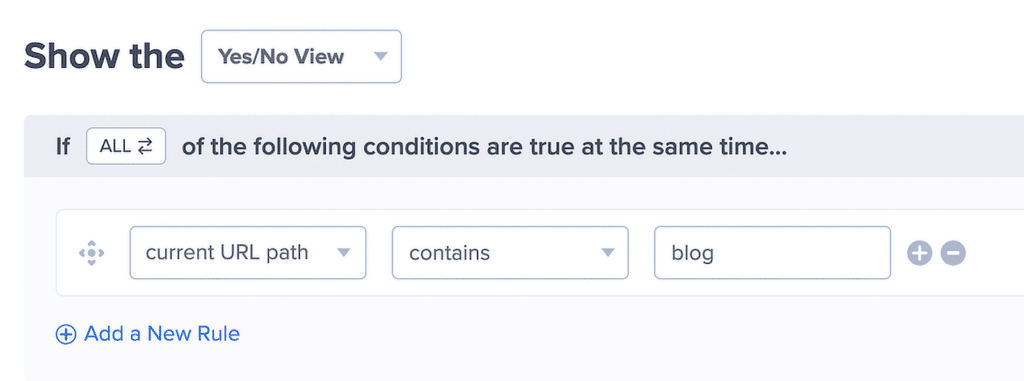
OptinMonster has various Display Rules that control when and where your popup will appear.
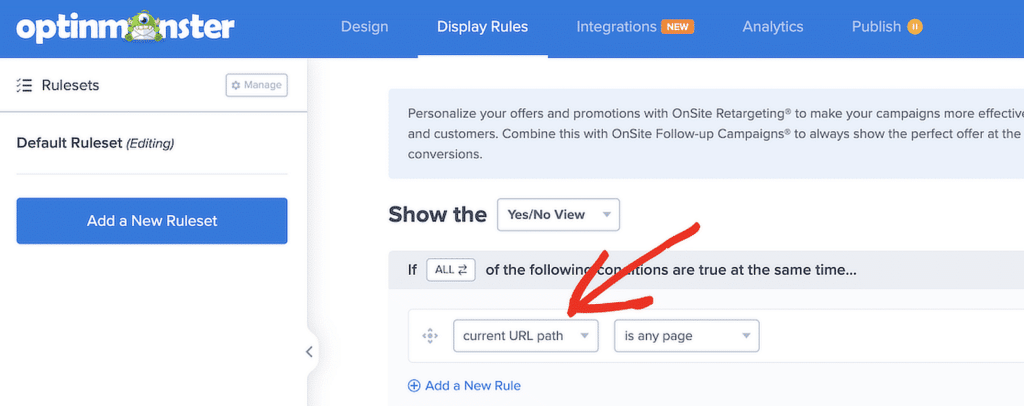
For example, you can choose to display your popup only when a user visits a specific page, such as those with “blog” in the URL.
Step 3: Connect OptinMonster with Your Email Marketing
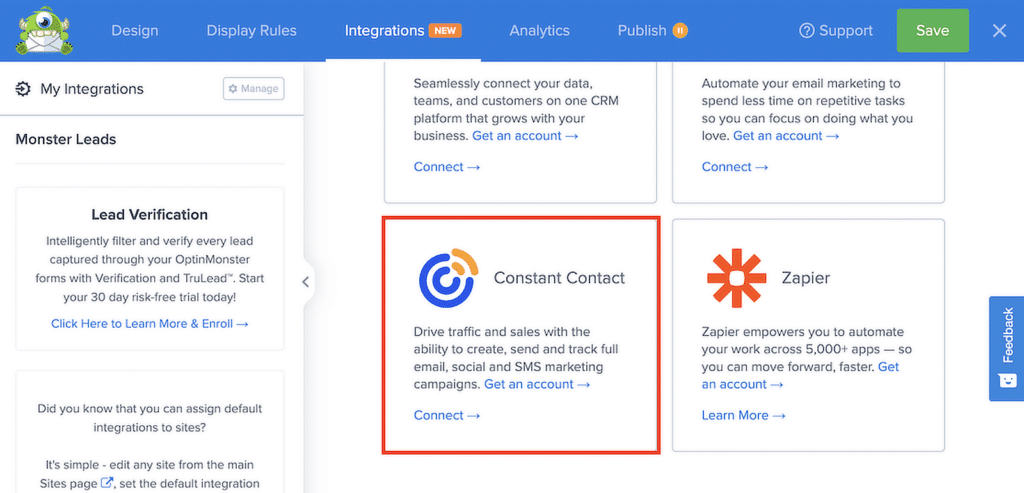
Once you’ve set your display conditions, go to the Integrations tab to connect your email marketing platform.
For this example, let’s go with Constant Contact. Follow the steps to connect your OptinMonster account with Constant Contact.
You can then use these details in Constant Contact to build automated campaigns tailored to each segment of your audience, sending highly personalized messages or even an entire series of emails based on user interactions.
FAQs on How to Send Automated Email in WordPress
Automated email is a popular topic among our readers. Here are answers to some common queries about it:
How to send email in WordPress programmatically?
To send emails programmatically in WordPress, you can use a plugin like Easy WP SMTP. It’s handy for sending automated notifications from your WordPress site from different plugins by using the Force Name and Force Email options.
How do I set my email to automatically send?
To set up automatic email sending in WordPress, you’ll need a plugin like Easy WP SMTP. This plugin helps you connect your site to reliable SMTP services.
You can then create email automation through platforms like WPForms, OptinMonster, and other tools to send welcome messages, reminders, or order confirmations without manual intervention.
Can I send recurring emails automatically?
Yes, you can send recurring emails automatically by setting up an automation workflow with tools like WPForms and pairing it with an email marketing platform.
This approach lets you create regular, timed email campaigns, like welcome emails or weekly updates, that go out to subscribers based on a set schedule.
That’s it! Now you know how to send automated emails in WordPress
Next, learn how to identify the cause of an SMTP outage, implement immediate solutions, and, most importantly, take proactive steps to prevent them from happening in the first place.
