This tutorial covers the steps to set up Push Notifications with Easy WP SMTP.
Before getting started, make sure Easy WP SMTP is installed and activated on your WordPress site and that you’ve verified your license.
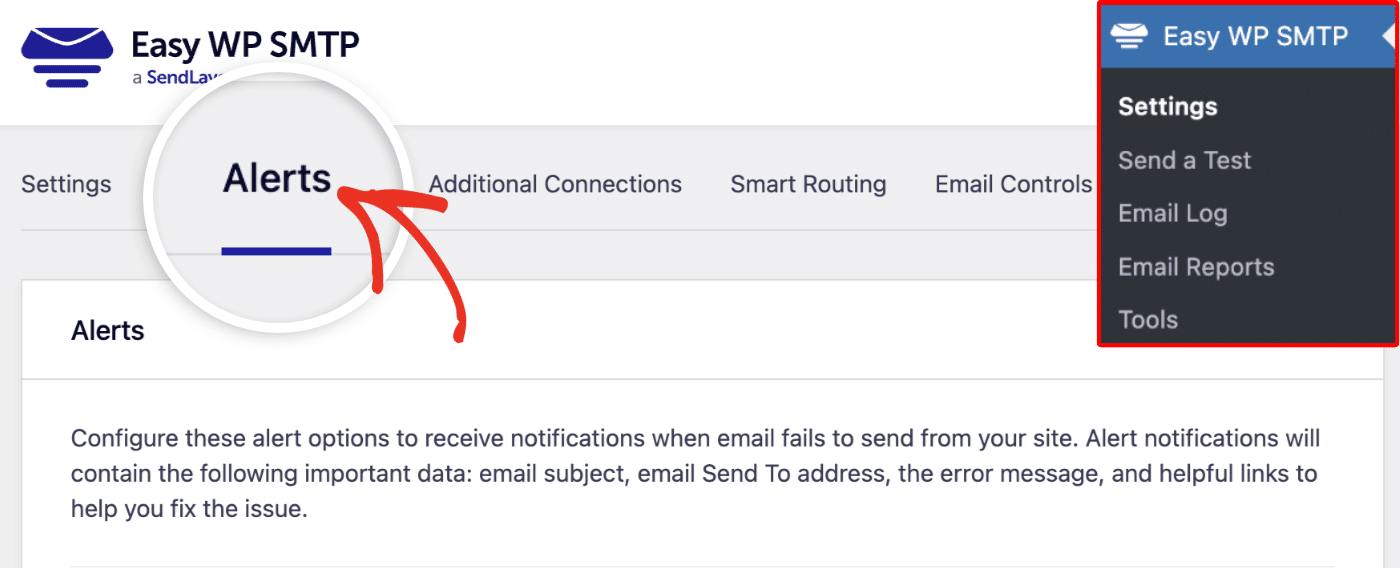
Accessing Email Alerts Settings
Start by navigating to Easy WP SMTP » Settings from your WordPress dashboard. Once here, click on the Alerts tab.
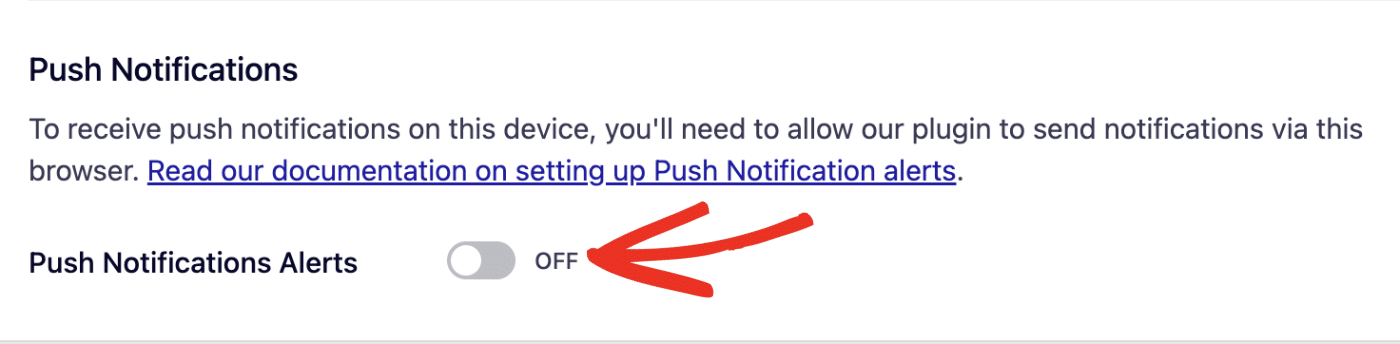
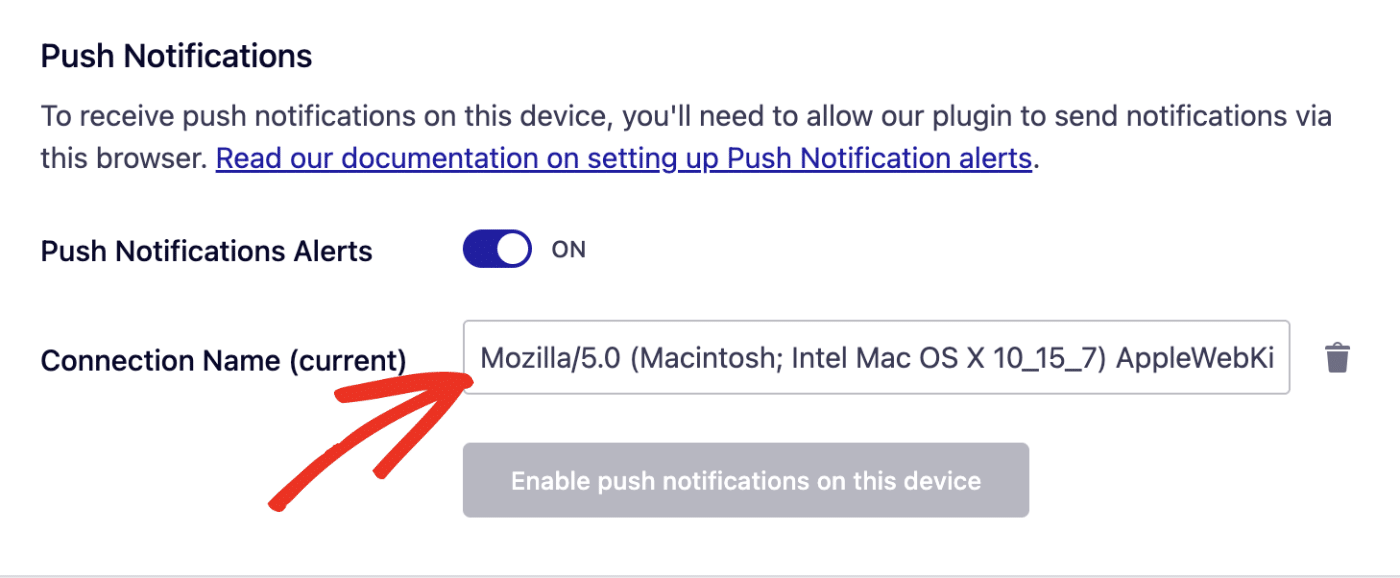
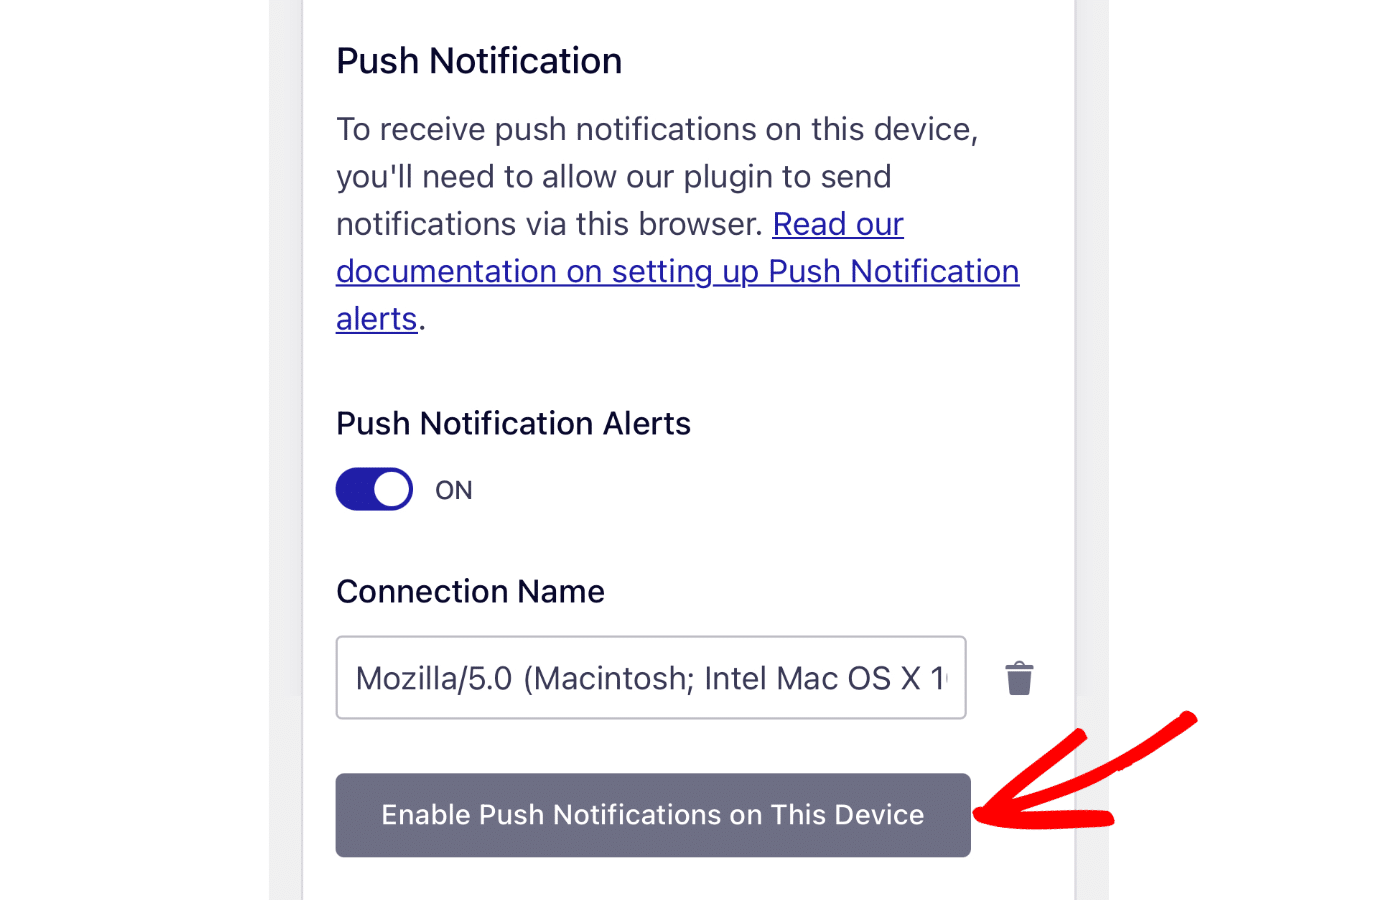
Then scroll to the Push Notifications section. To use push notifications, you’ll need to enable them on each device where you’d like to receive alerts. Before doing this, ensure the Push Notifications Alerts option is set to the ON position.
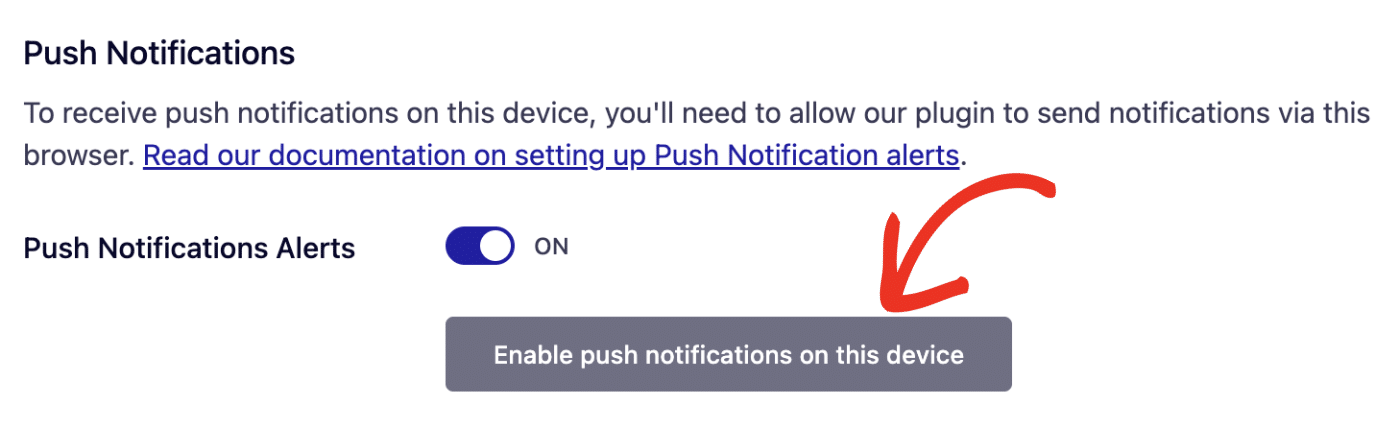
Enabling Push Notifications
Next, click the Enable push notifications on this device button to proceed.
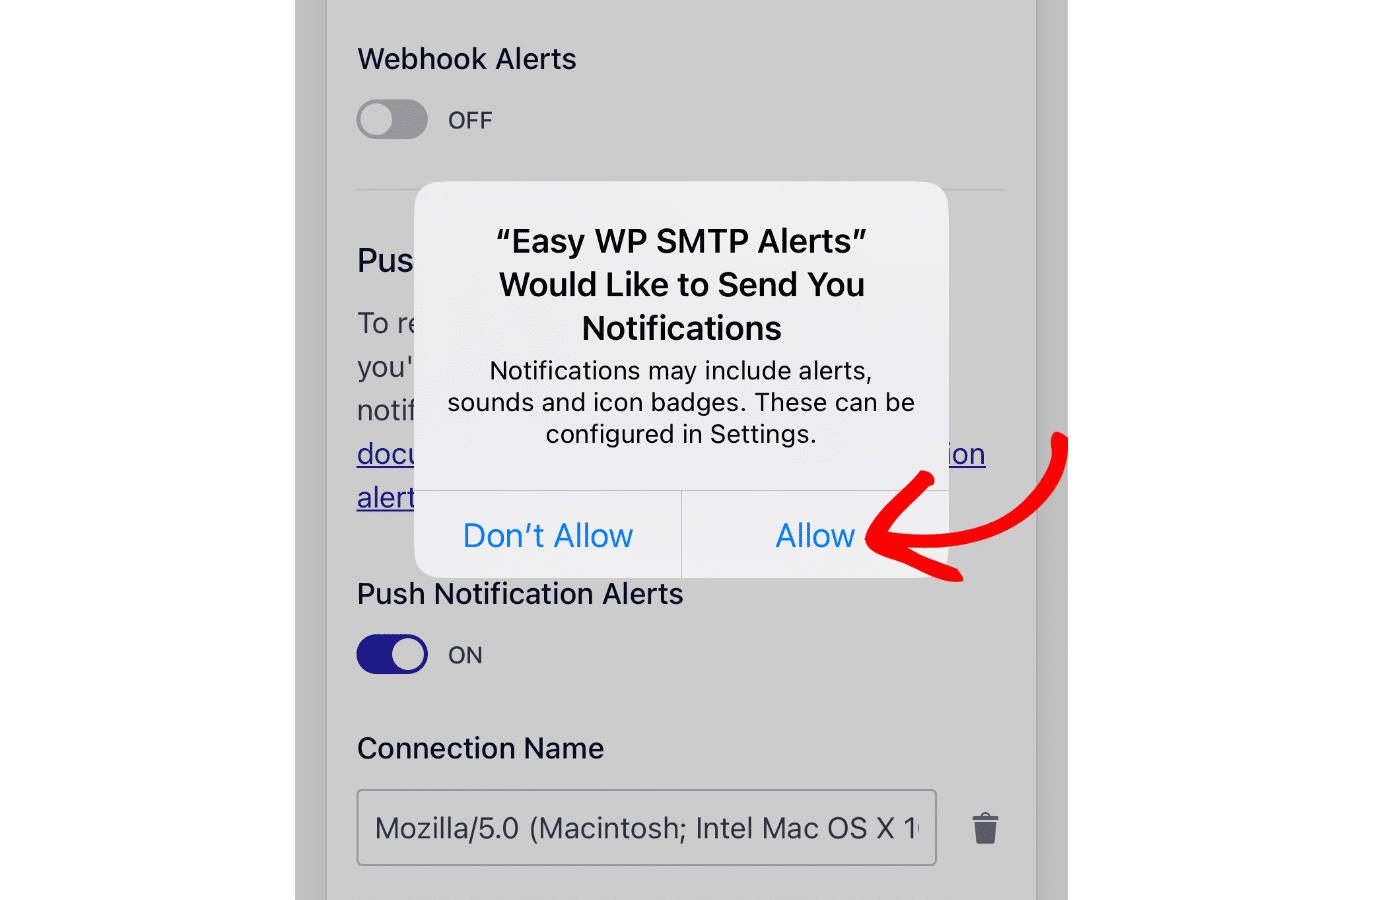
In the popup that appears, click Allow to enable push notifications for the browser.
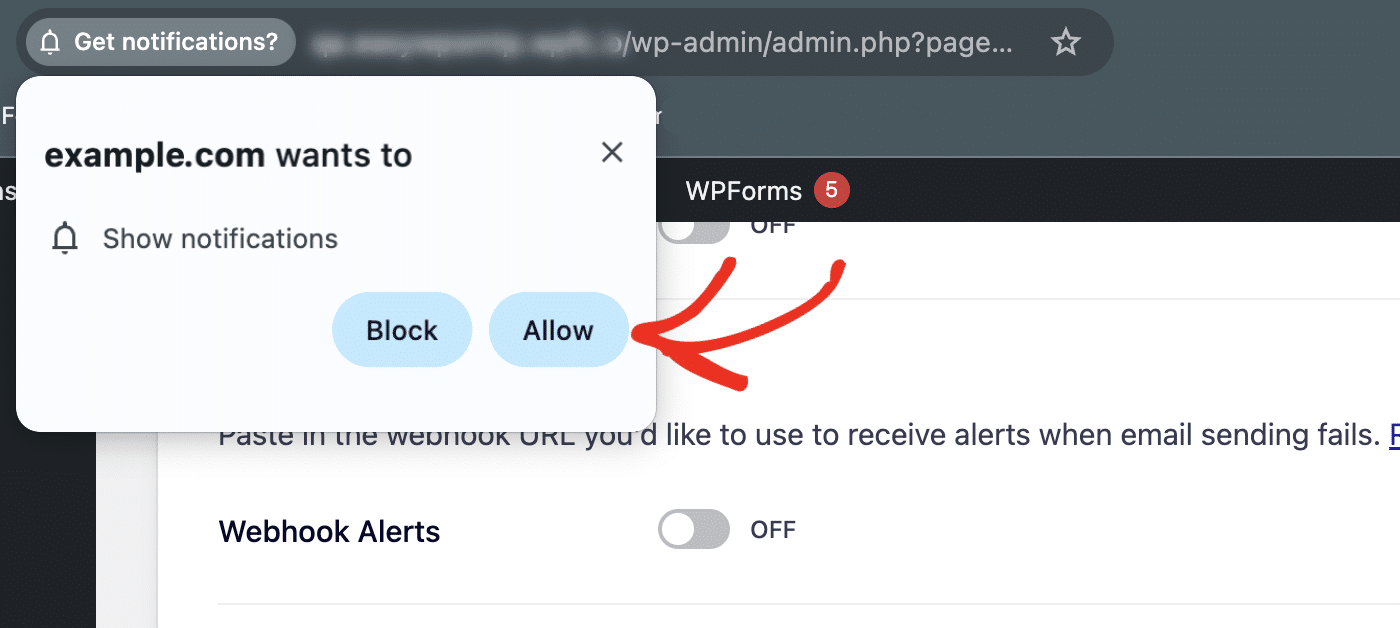
Note: If you mistakenly choose Block, you won’t receive push alerts on that device. However, you can reset your selection. See our FAQ for more details.
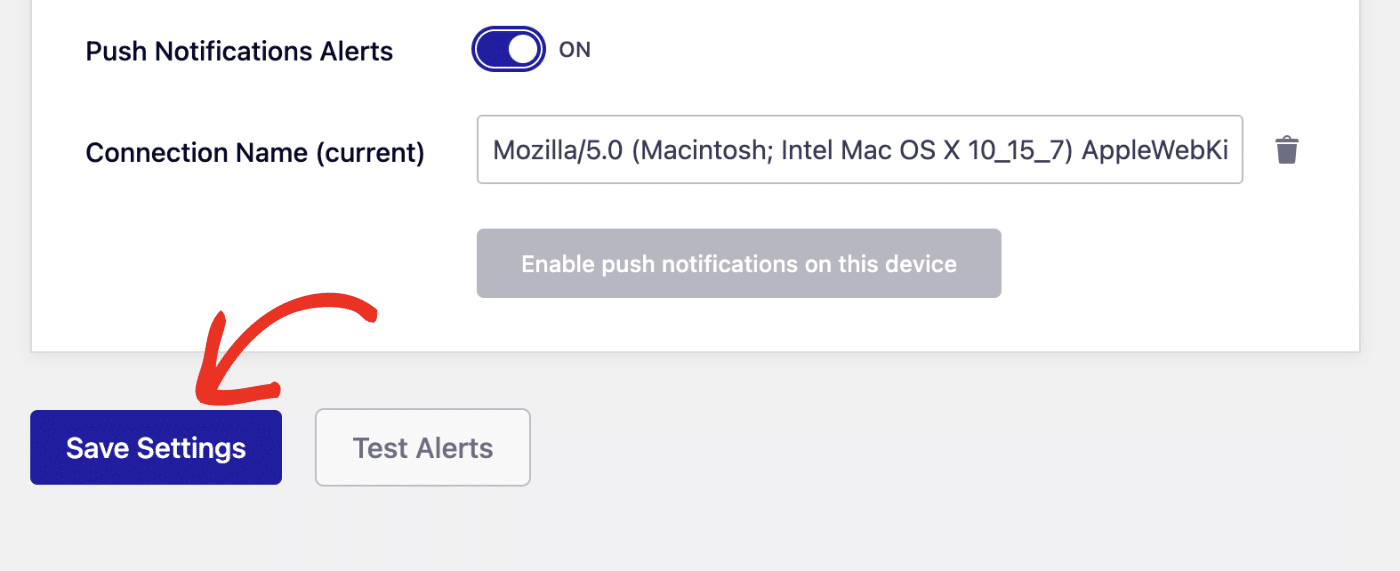
Your device will be added to the Connection Name field. You can update the value of this field to any name you’d like.
Note: After enabling push notifications for a specific device, the Enable push notifications on this device button will be disabled on that device.
You can add another push notification channel by accessing your site on a different browser or device. On the new device, simply click Enable push notifications on this device and allow the browser access to your site.
Setting Up Push Notifications on iPhone
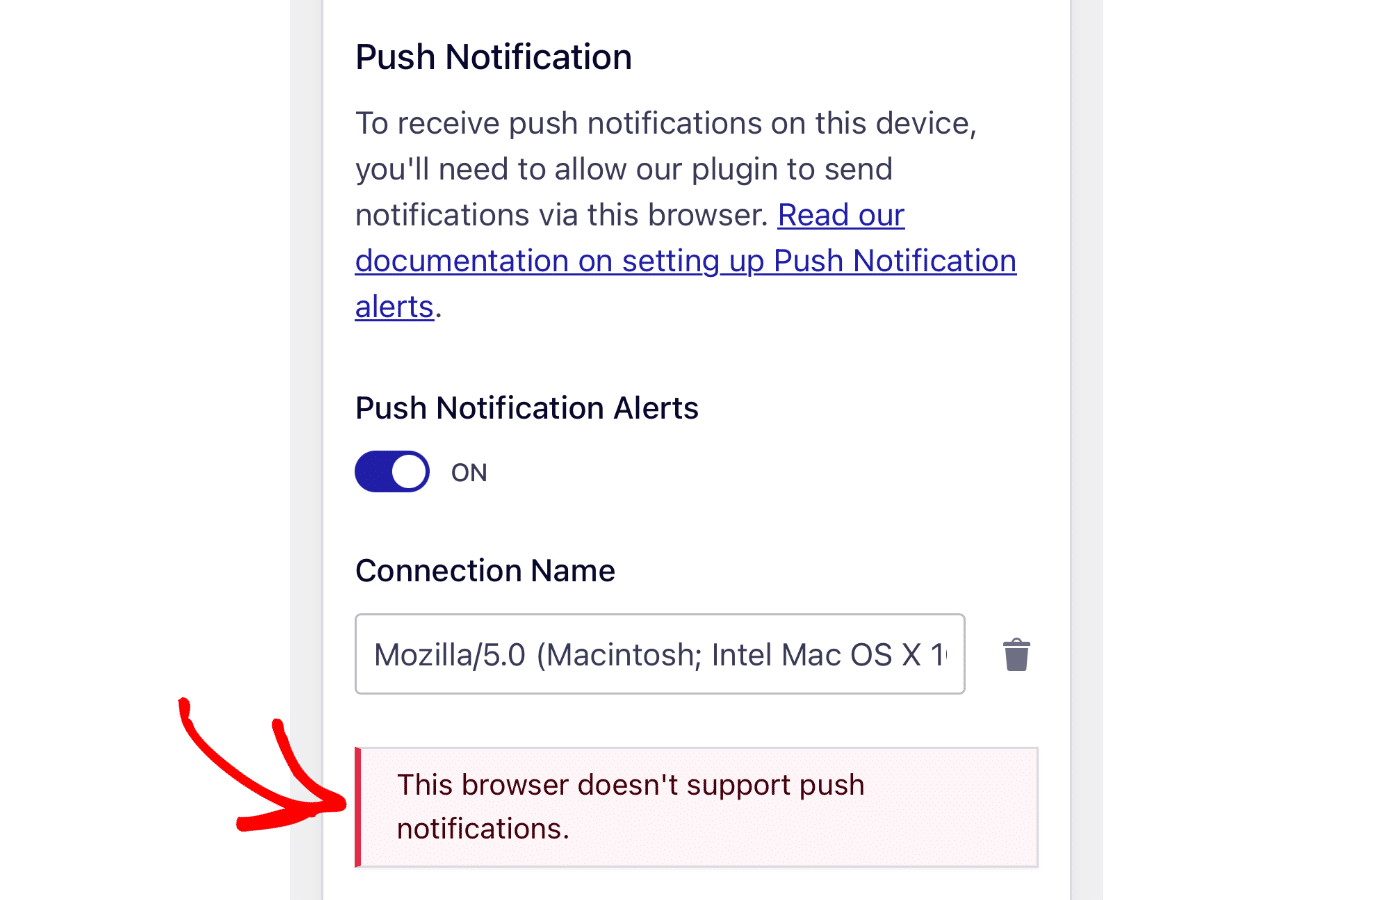
The setup process is different for iPhone users. If you access the Alerts page on your browser, you’ll see the error below.
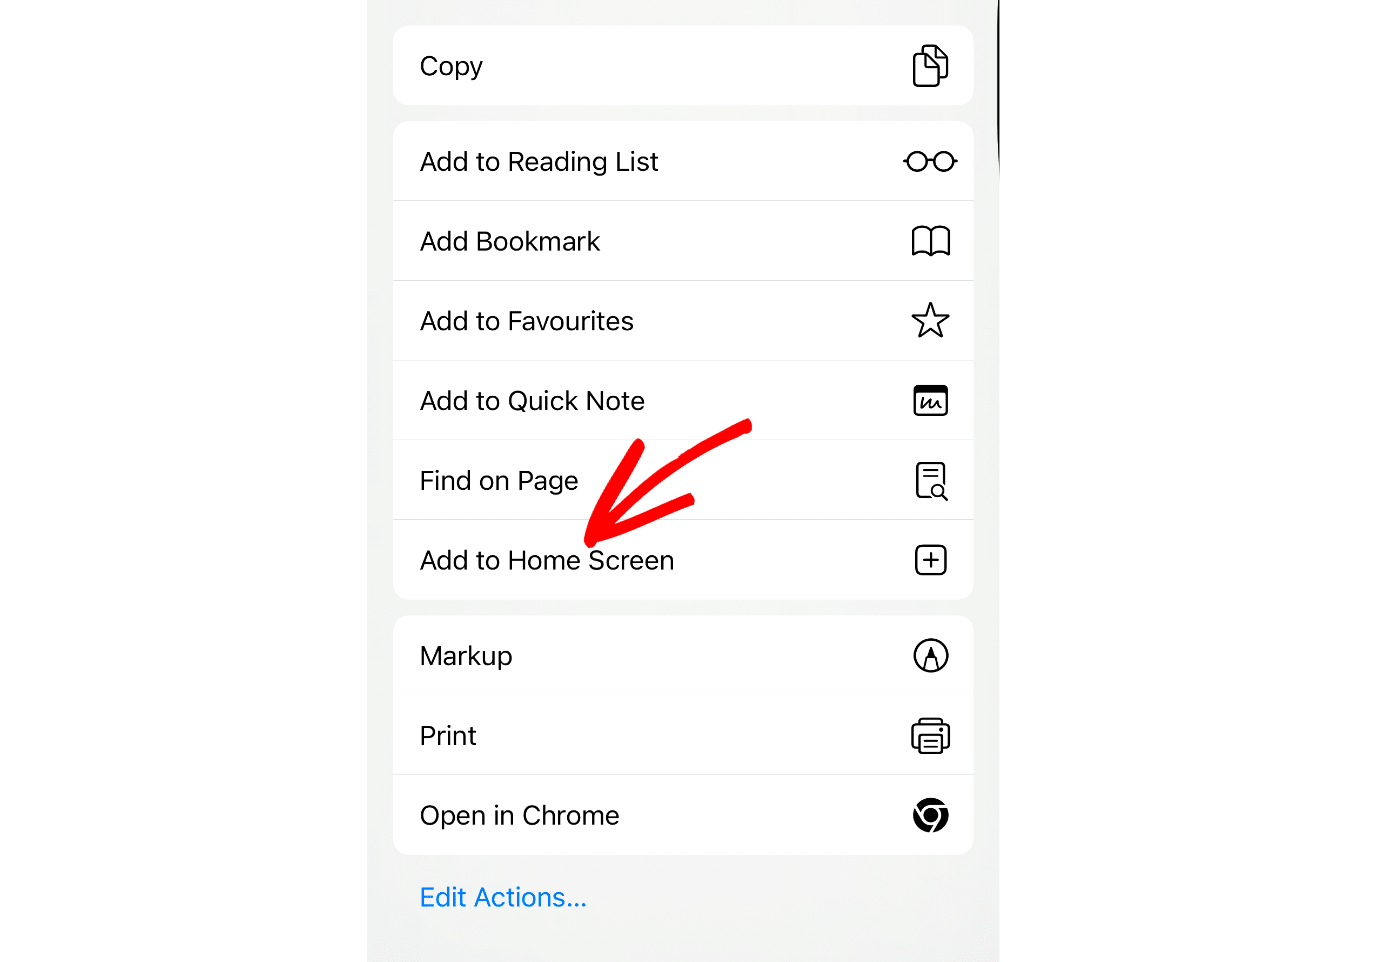
Here’s what you need to do to resolve this issue. First, make sure you’re on the Alerts settings screen. Then, click on the Share icon on your iPhone’s browser.
Next, scroll down and select the Add to Home Screen option.
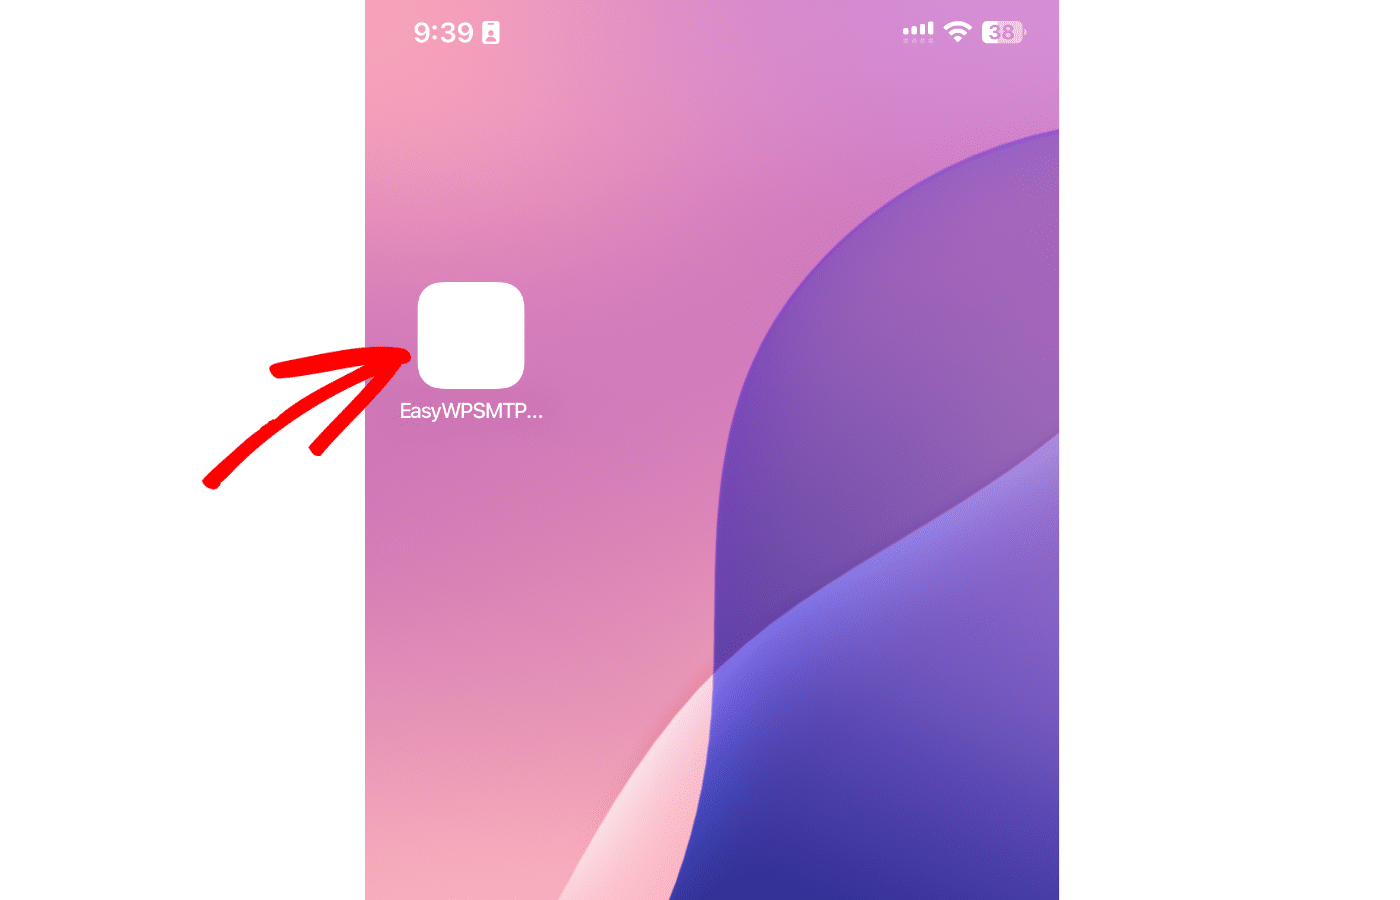
This will create an app icon on your phone’s home screen. Go ahead and click on the icon to open your site’s Alerts settings screen.
Once there, scroll to the Push Notifications section and click the Enable Push Notifications on This Device button.
Then select Allow to enable it.
Once you’re done with this step, either save your settings or continue to add other integrations.
To save your settings, scroll down and click the Save Settings button.
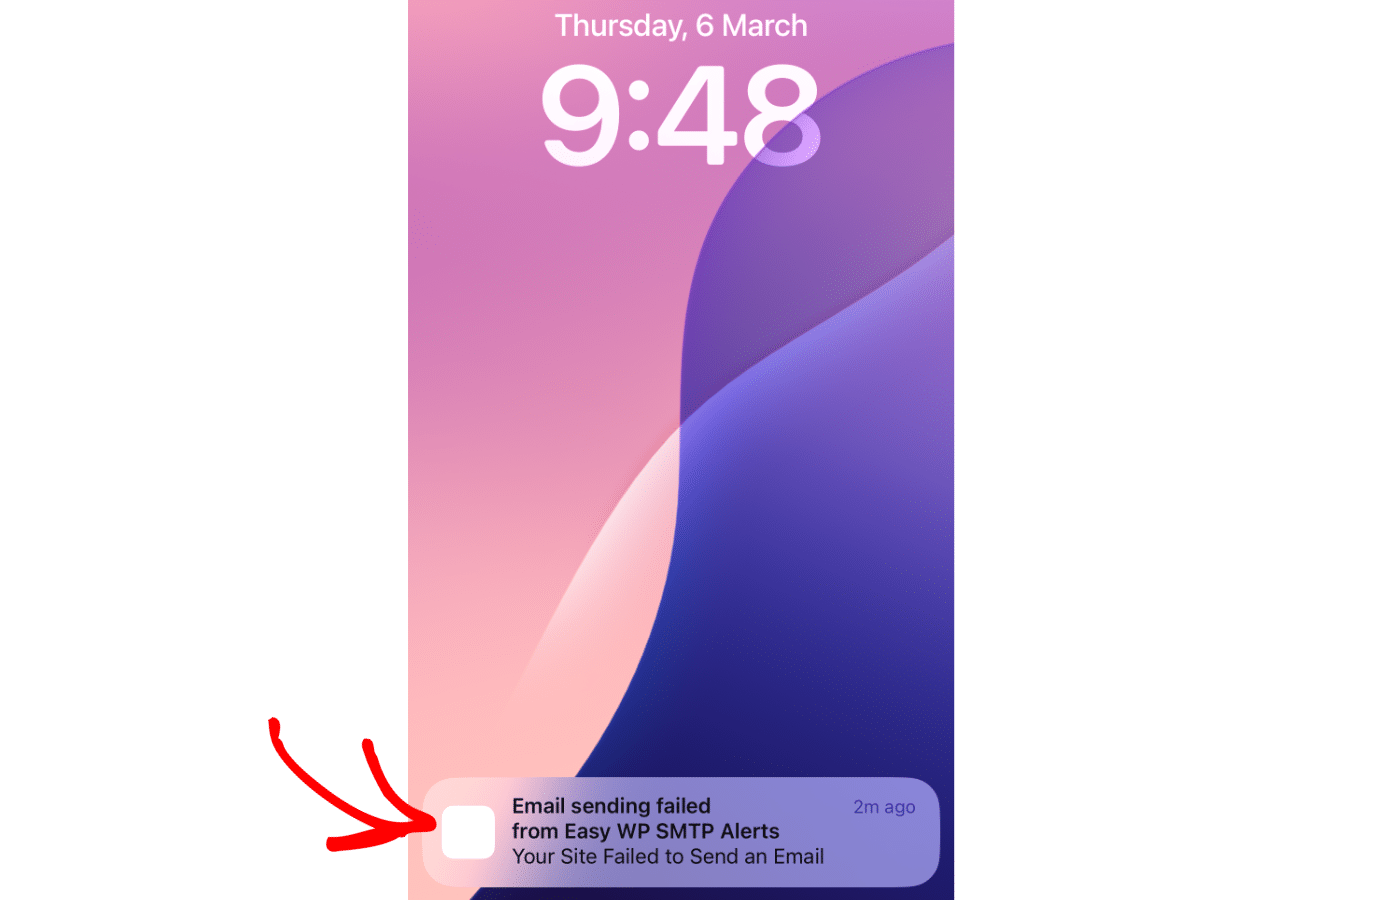
You’ll receive a push notification on your device from your browser whenever your site fails to send an email. Here’s an example:

Here’s how it looks on mobile devices.
Frequently Asked Questions
Below, we’ve listed some of the most common questions we receive about email alerts.
I selected ‘Block’ instead of ‘Allow’ when enabling push notifications. How do I reset my selection?
You’ll need to remove your site from the disallowed list first before re-enabling push notifications. We’ll share the steps to remove a site from the block list for some of the most popular browsers.
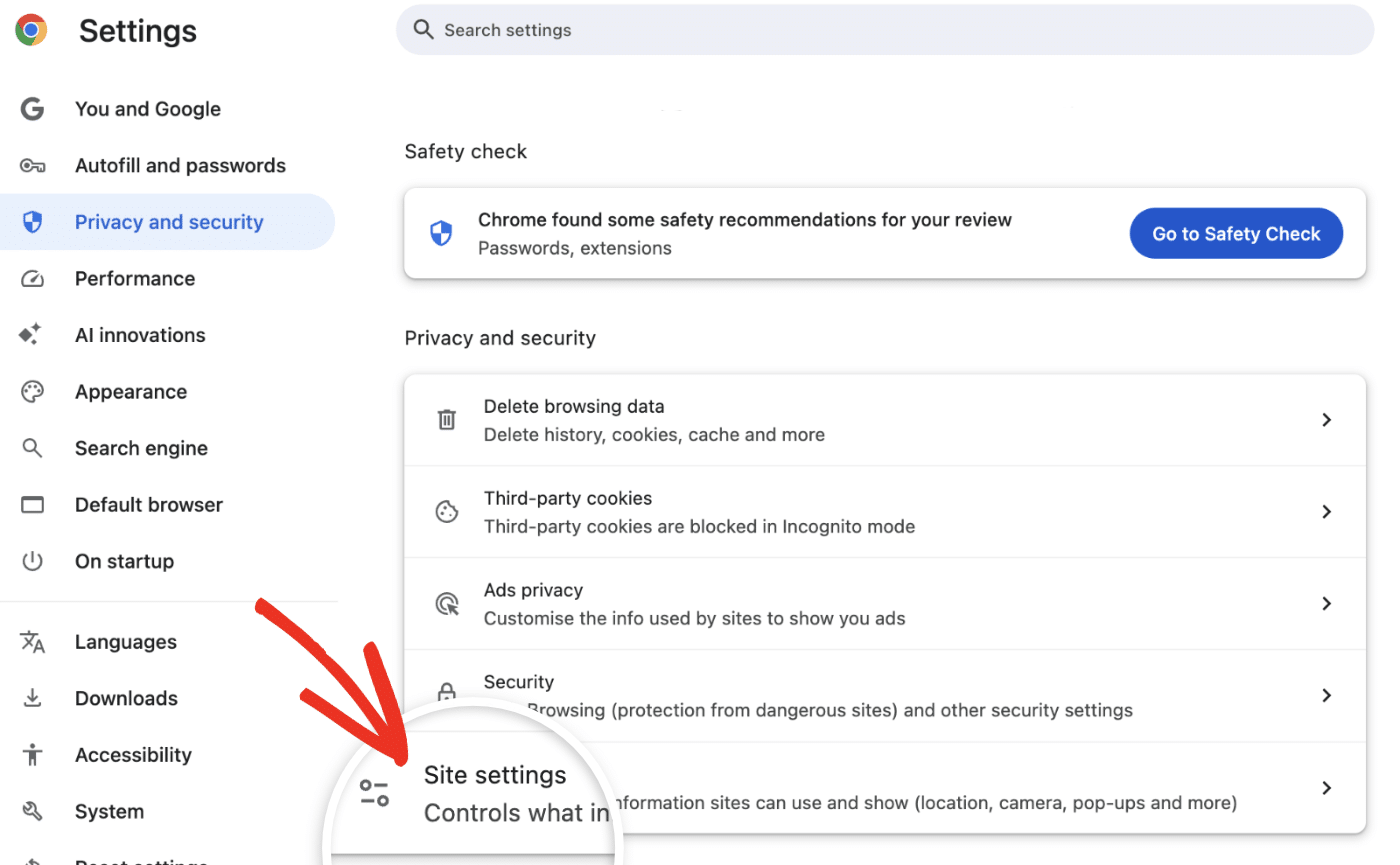
If you use Chrome, open your browser settings and navigate to Privacy and security » Site settings.
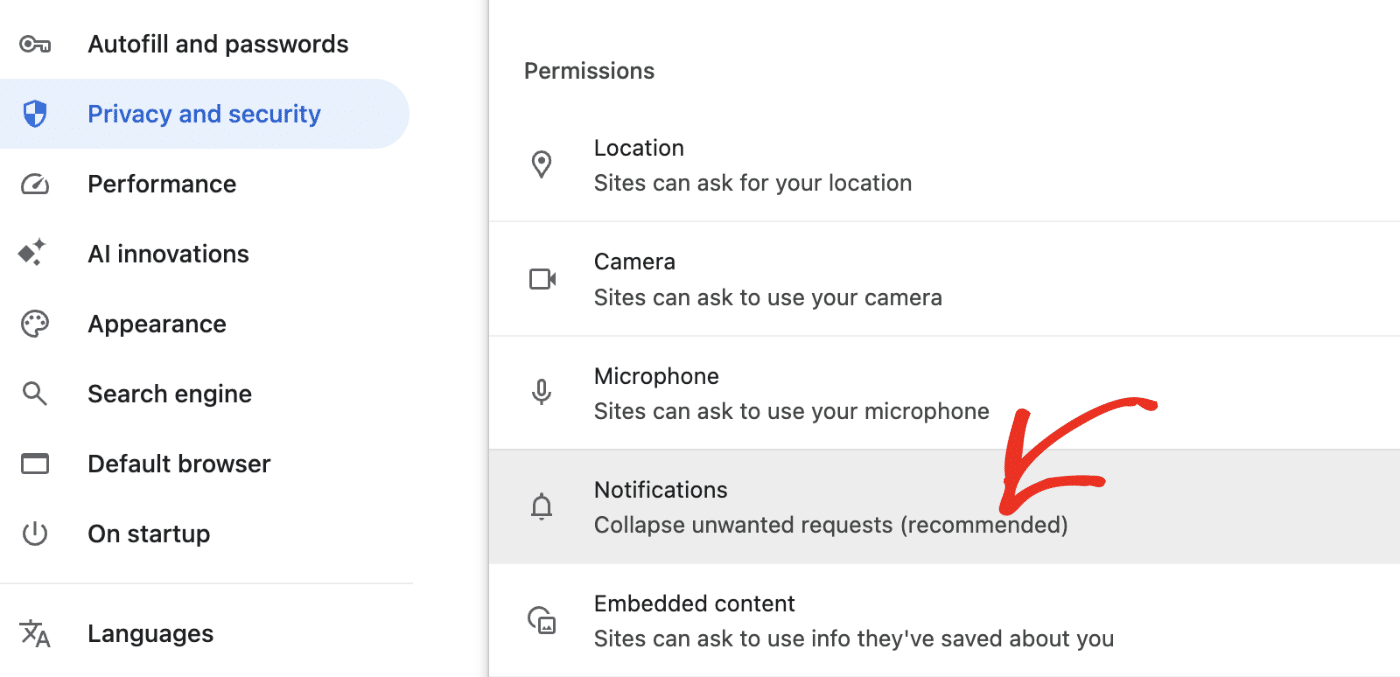
Next, select the Notifications option under Permissions.
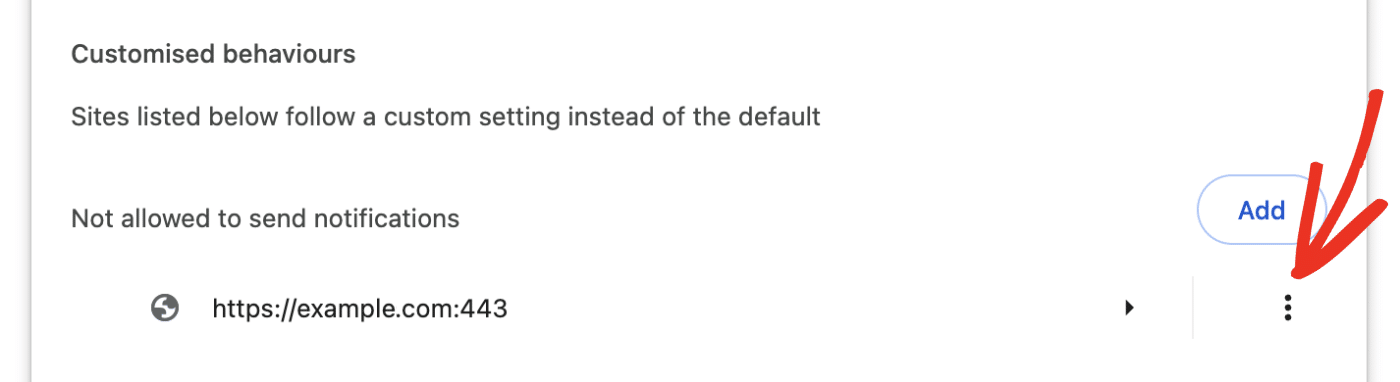
Then scroll down to the Not allowed to send notifications section and remove your site from the block list.
Note: The steps to remove a site from the disallowed list are the same for Chrome and Firefox users.
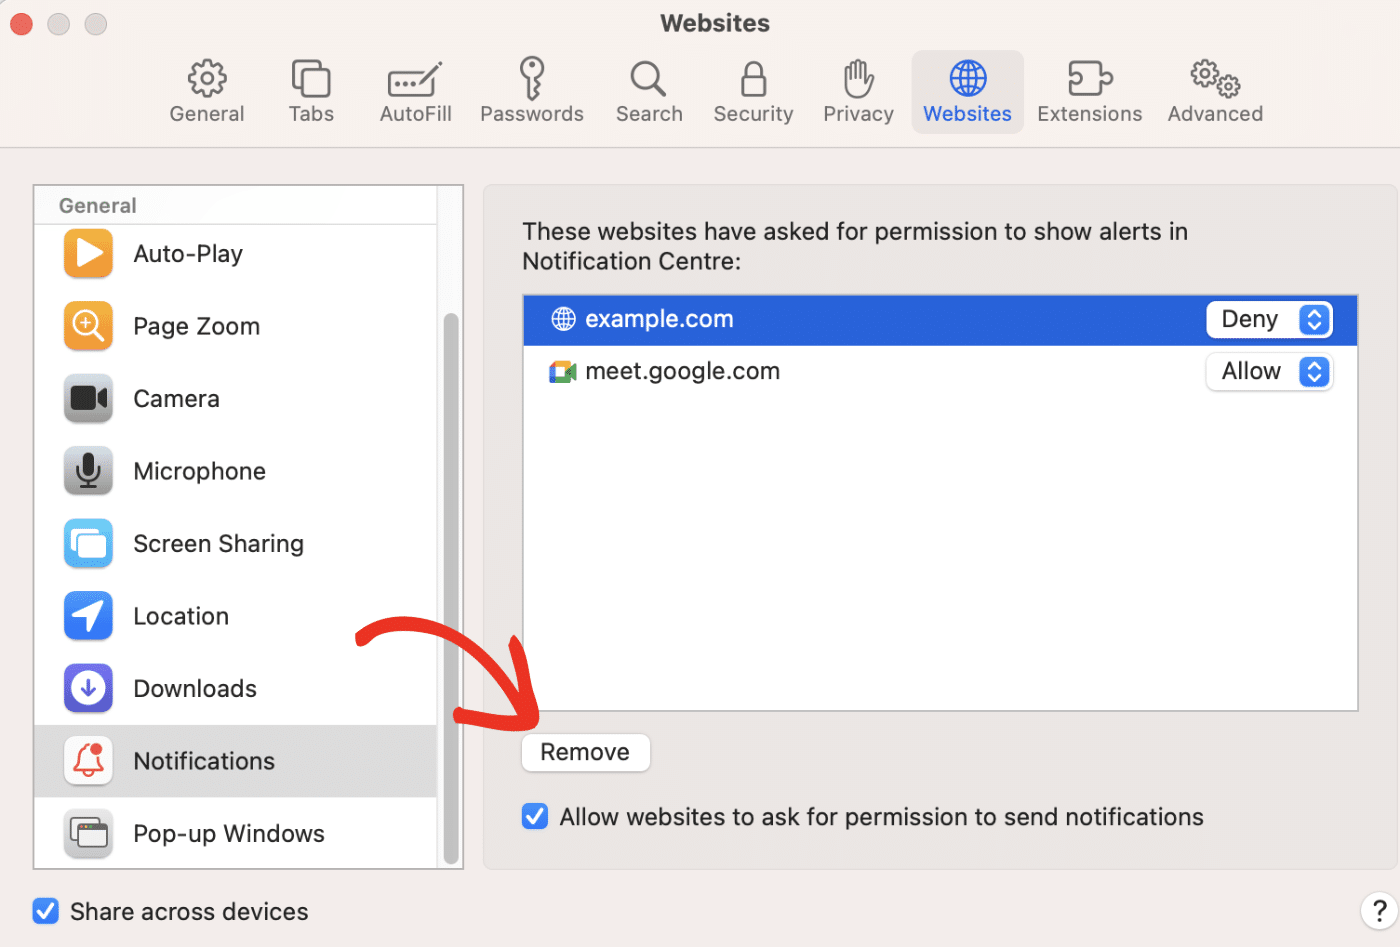
In Safari, open your browser settings screen, then navigate to Websites » Notifications.
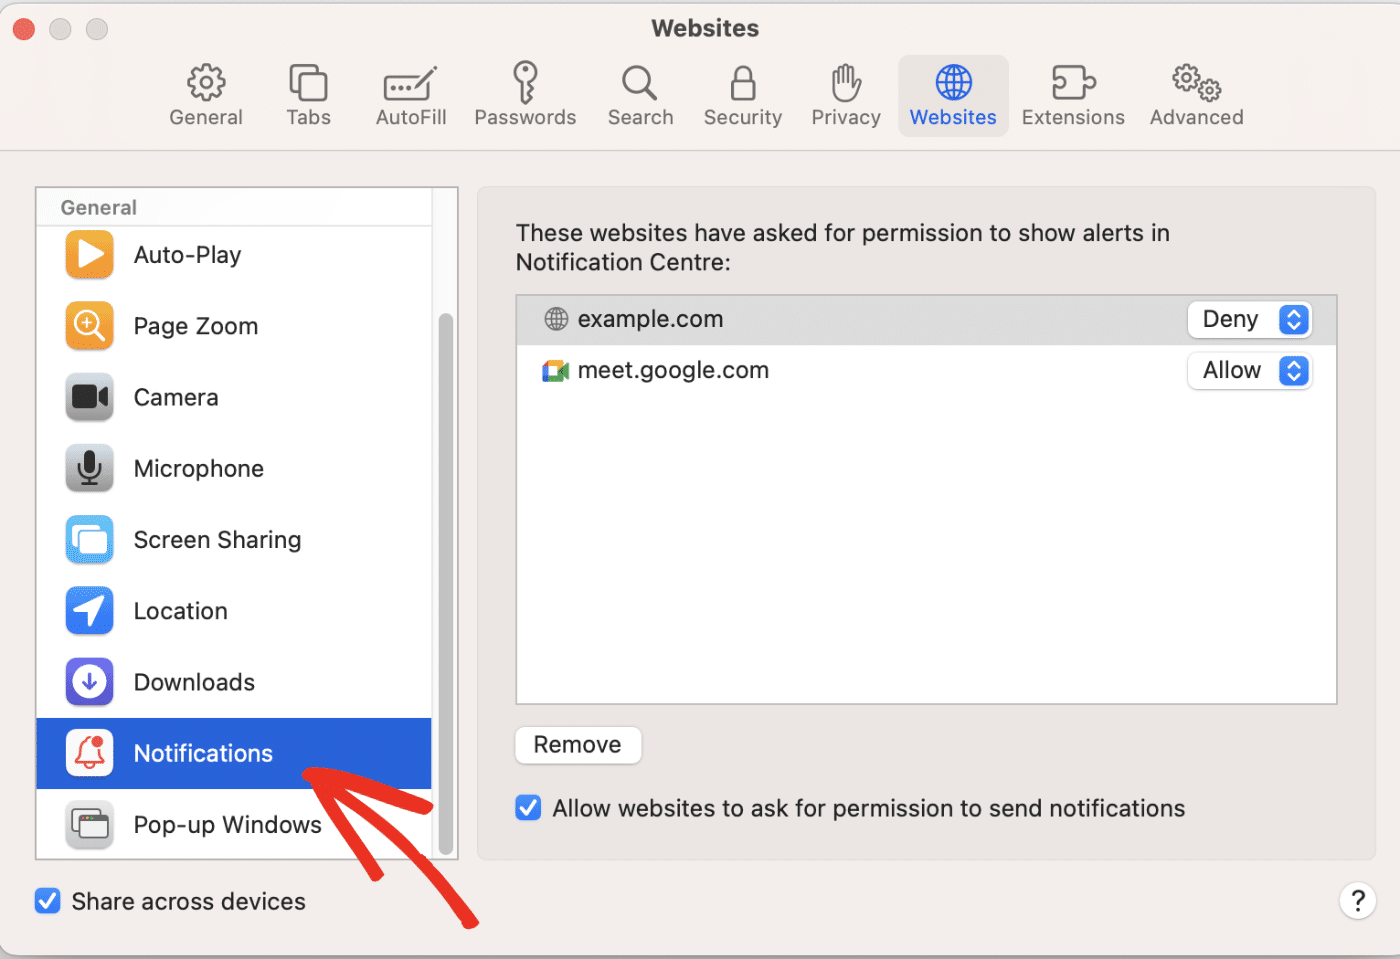
Next, select your website and click Remove.
After removing your site, return to your Easy WP SMTP settings page and follow the procedure listed above to enable push notifications on your site. Be sure to select Allow when the browser popup appears.
I enabled push notifications on my site. Why are push alerts not coming through?
This can occur due to a variety of reasons, including operating system settings and browser-related causes. We’ve written a complete troubleshooting guide that addresses some of the common causes of the issue of push notifications not sending.
That’s it! You’ve successfully set up push notifications with Easy WP SMTP.