Understanding email delivery statuses can make a big difference when it comes to managing your emails effectively. These statuses tell you if your email reached its destination, bounced back, or got stuck along the way.
I’ve worked with email systems for a while now, and figuring out delivery statuses has helped me troubleshoot issues, spot problems, and fix them before they hurt my engagement and deliverability.
In this guide, I’ll break down what email delivery statuses are, why they matter, and how you can use them to make sure your emails land where they’re supposed to.
What Are Email Delivery Statuses?
Email delivery statuses show what happens after you send an email. They let you know if the email reached the recipient or not.
These statuses are generated by mail servers and help you understand the success or failure of each email.
Whether an email is successfully delivered, flagged as spam, or rejected, the delivery status gives you insight into the journey of your email and what might need to be fixed.
Why Do Email Delivery Statuses Matter?
If too many of your emails bounce or get marked as spam, it can damage your sender’s reputation. This means future emails might not even make it to the inbox.
On the flip side, good delivery statuses help you keep engagement rates high. For example, emails that consistently reach recipients are more likely to be opened and acted upon.
Monitoring delivery statuses also helps you track deliverability metrics, such as the number of emails that were successfully delivered versus the number that failed.
The good news is that if you use a plugin like Easy WP SMTP, you can easily track email delivery statuses through their Email Logs dashboard.
Types of Email Delivery Statuses
When you send an email, it goes through several steps, and the delivery status tells you what happened along the way. Here’s a breakdown of the most common ones you’re likely to encounter:
Delivered
A “delivered” status means the email successfully reached the recipient’s server.

This is the ultimate goal for every email you send, as it’s the first step to ensuring your message is seen.
Sent
“Sent” means your email service provider has processed the email and is on its way to the recipient’s server.

However, it doesn’t guarantee delivery. Think of it like mailing a letter. Dropping it off at the post office doesn’t mean it has reached the recipient yet.
Failed
When an email shows as “failed,” it means the email couldn’t be delivered to the recipient’s server.

This could happen for various reasons, like the recipient’s email address being invalid or the server rejecting the message.
I’ve seen this status come up most often with outdated email lists.
Opened
“Opened” shows that the recipient has opened your email. This is often tracked directly with Easy WP SMTP in the email logs report.

While this status is helpful for engagement tracking, it’s not always 100% accurate since some email clients block these trackers.
Clicked
A “clicked” status means the recipient clicked on a link inside your email.

This is one of the most valuable engagement metrics because it shows direct interaction with your content.
Bounced
A “bounced” status means the email couldn’t be delivered, but it’s a bit more specific than “failed.” There are two types:
- Hard Bounce: This happens when the recipient’s email address doesn’t exist. It’s a permanent failure, and the email won’t go through.
- Soft Bounce: This is a temporary issue, like the recipient’s inbox being full or the server being down. These emails might go through later, but it’s not guaranteed.
Deferred
“Deferred” means the email wasn’t delivered immediately and is waiting to be retried.
This usually happens because the recipient’s server is temporarily unavailable or overloaded.
I’ve seen this status resolve itself in many cases, but it’s a good idea to monitor it if the delay continues.
Spam
When an email is marked as spam, it means it didn’t land in the recipient’s inbox but instead went straight to their spam or junk folder.
This can happen due to poor sender reputation, spammy content, or aggressive filters on the recipient’s server. This status can seriously hurt your engagement, so it’s one to watch out for.
How to Check Email Delivery Statuses
Easy WP SMTP makes it simple to view your email delivery statuses in the WordPress dashboard. Not only does it improve email delivery, but it also gives you access to helpful logging tools.
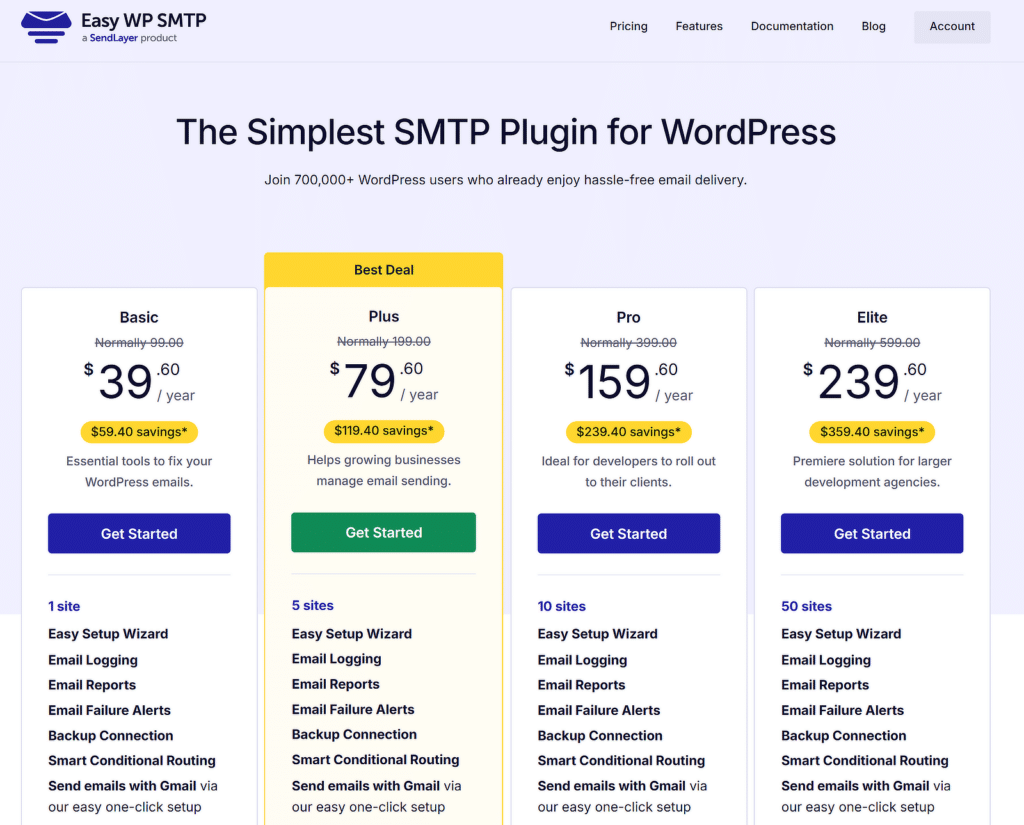
To enable email logging in WordPress, you’ll need a paid license for Easy WP SMTP. Visit the pricing page and select the license that fits the number of sites you want to use it on.
Once logging is enabled, you’ll have access to valuable details about your site’s email activity. Here’s how to check and understand your email delivery statuses:
Accessing the Email Log
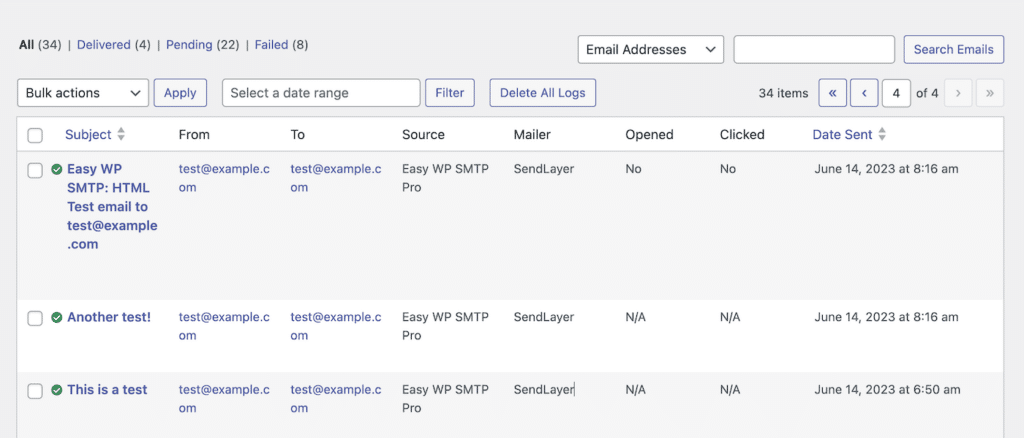
In your WordPress dashboard, go to Easy WP SMTP » Email Log. You’ll find a list of all logged emails, with the most recent ones displayed first.
Viewing Detailed Email Logs
For more details about a specific email, click the View Log option next to it. This will show you additional information such as:

- The full email content and subject
- The date and time it was created
- Sender and recipient email addresses
- Delivery status
- Mailer used
- Any attachments
- The plugin or process that sent the email
- Whether the email was opened or clicked
There’s also a Technical Details section where you can view the full email headers and the source process that created the email.
Searching and Filtering Logs
To locate specific emails or look for patterns with your email delivery status, you can navigate your logs in a few ways:
For instance, you can use the search bar to find emails by recipient, subject, or content.

If needed, you can also use the links at the top to filter by Delivered, Pending, or Failed emails or select a specific date range to view emails sent during that period.

Resending WordPress Emails
If you view an email log and find out that it’s email delivery status is failed, you can resend it in no time with Easy WP SMTP.
To resend an email with Easy WP SMTP, first locate it in the email log and click on its subject to open the detailed log view.
Next, click the Resend link in the bottom right corner under the Actions menu.

A confirmation popup will appear showing the original recipient’s email address.
You can edit this address if needed (for example, if the original address was entered incorrectly) or add extra recipients, separated by commas.

Once everything looks correct, click Yes to confirm and resend the email. A final popup will let you know that the email was successfully sent.
Best Practices for Successful Email Delivery
So, how can you prevent those undesirable delivery statuses and ensure you see more green checkmarks? Start by following these excellent practices:
- Set Up Authentication: Configure SPF, DKIM, and DMARC to verify your domain identity and boost your credibility.
- Use a Verified Email Service Provider: Professional services like SendLayer or Mailgun handle delivery more reliably than standard servers.
- Keep Your Email List Clean: Regularly remove invalid or inactive email addresses to prevent bounces and use double opt-in processes.
- Monitor Your Sender Reputation: Use tools like Google Postmaster Tools or SenderScore to track your domain reputation.
- Avoid Spam Triggers: Write subject lines and content that don’t use words flagged by spam filters (e.g., “Free,” “Win,” or “Cash”).
Bonus Tip: Set Up Email Alerts with Easy WP SMTP
Another way to stay on top of your email delivery is by setting up alerts with Easy WP SMTP.
This feature helps you keep track of important delivery statuses in real time, so you can respond quickly to any issues.
For example, you can set up email notifications to get instant updates when an email fails to send or encounters a problem.
If you prefer other platforms, you have the option to send alerts directly to Slack or Microsoft Teams, which makes monitoring convenient if you’re working with a team.
You can also enable SMS notifications using Twilio, which I’ve found handy when I need updates on the go.
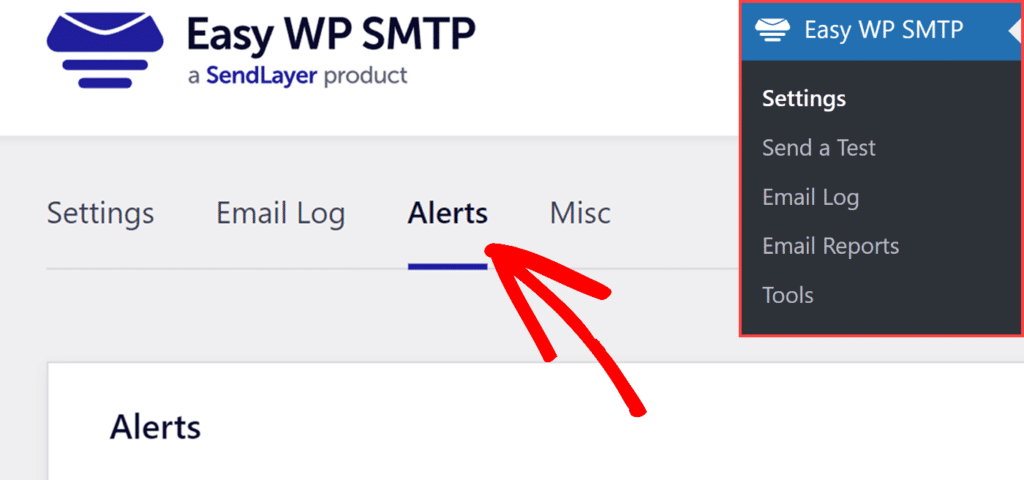
To set up alerts, go to Easy WP SMTP Settings, click on the Alerts tab, and choose the most suitable option.
FAQs — Email Delivery Statuses
Email delivery statuses are a popular topic of interest among our readers. Here are answers to some common queries about it:
How to check delivery status of email?
You can check the delivery status of an email by using email logs provided by tools like Easy WP SMTP. These logs show whether the email was delivered, failed, or deferred, along with details like the recipient’s address and the time it was sent.
How do I know if an email has been sent successfully?
If the status in your email log says “Delivered,” it means the email was successfully sent and accepted by the recipient’s server. This doesn’t guarantee it landed in the inbox but confirms the server received it.
How do I confirm an email has been received?
You can confirm receipt if your email tool provides tracking for opens or clicks. For example, Easy WP SMTP offers a log that shows if the email was opened, though this depends on the recipient’s settings and email client.
Can you tell if an email has been read without a read receipt?
Yes, many email tracking tools, like Easy WP SMTP, can detect if an email has been opened or clicked by embedding a tracking pixel. However, this method might not always work if the recipient blocks images or uses a client that disables tracking.
That’s it! Now you know everything about email delivery statuses
Next, learn how to set up automatic emails effectively so you can keep your visitors engaged and informed without having to lift a finger every time, based on certain triggers or schedules you set up.
