In this tutorial, we’ll cover how to set up the Easy WP SMTP plugin with the SparkPost mailer.
1. Configuring Your SparkPost Account
To get started with SparkPost, create a new account or log in to your existing SparkPost account.
If you’re creating a new account, choose your email server region (US or EU). If you’re in Europe, select SparkPost EU. Otherwise, choose SparkPost for a US-based server.
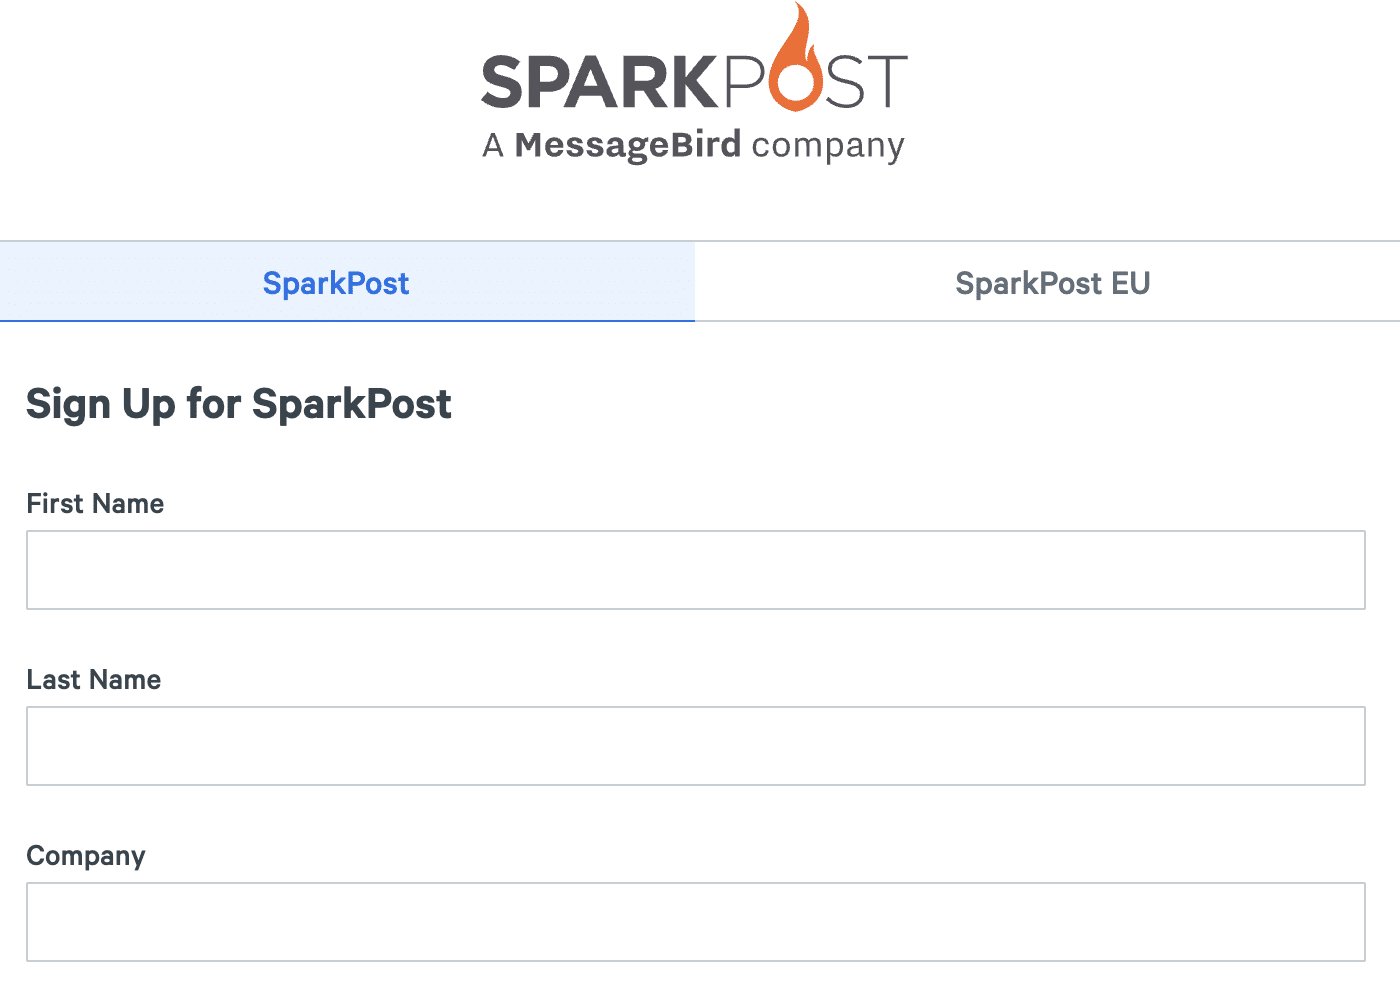
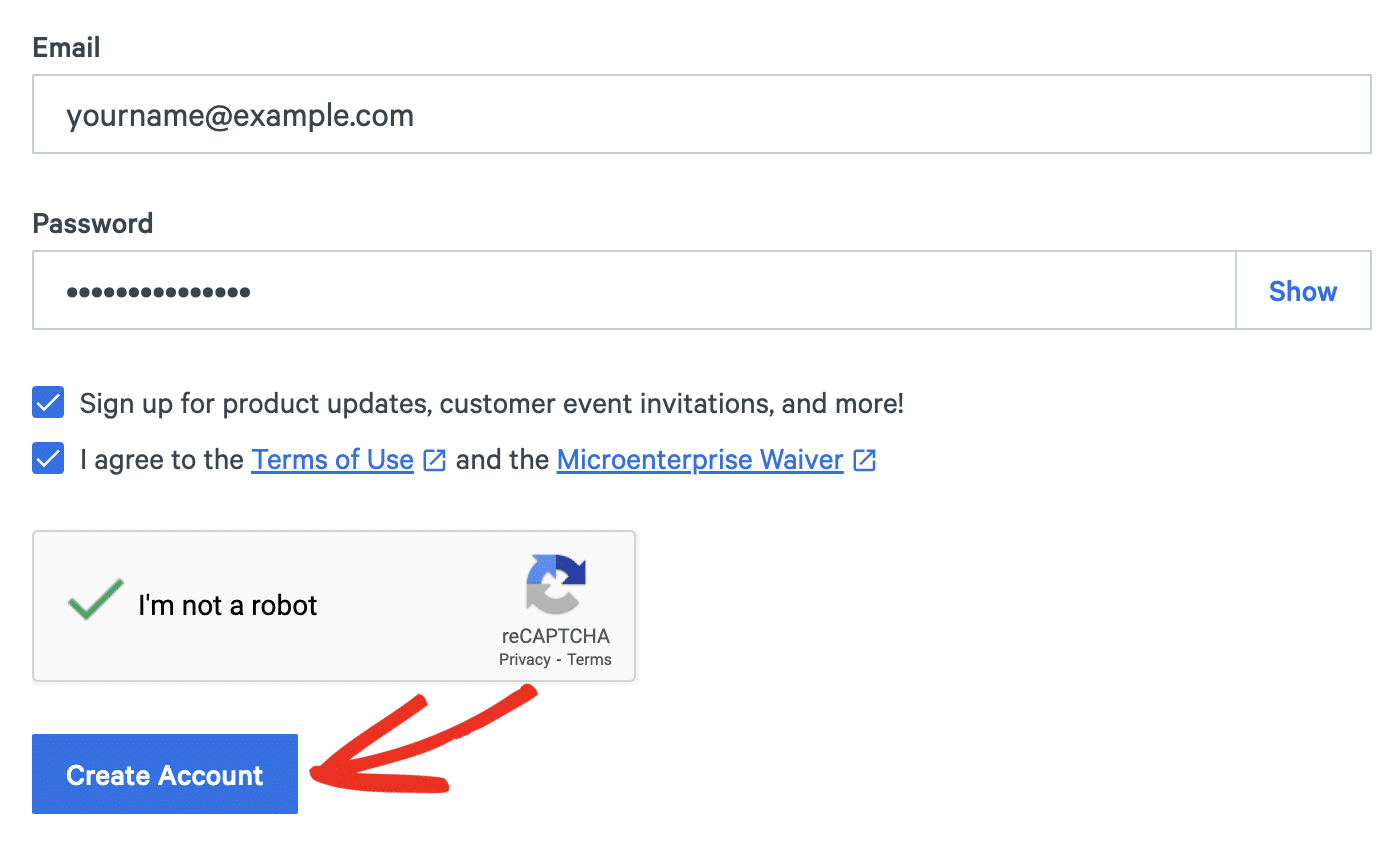
Next, enter your personal and business information to create your account. Once done, click the Create Account button to proceed.
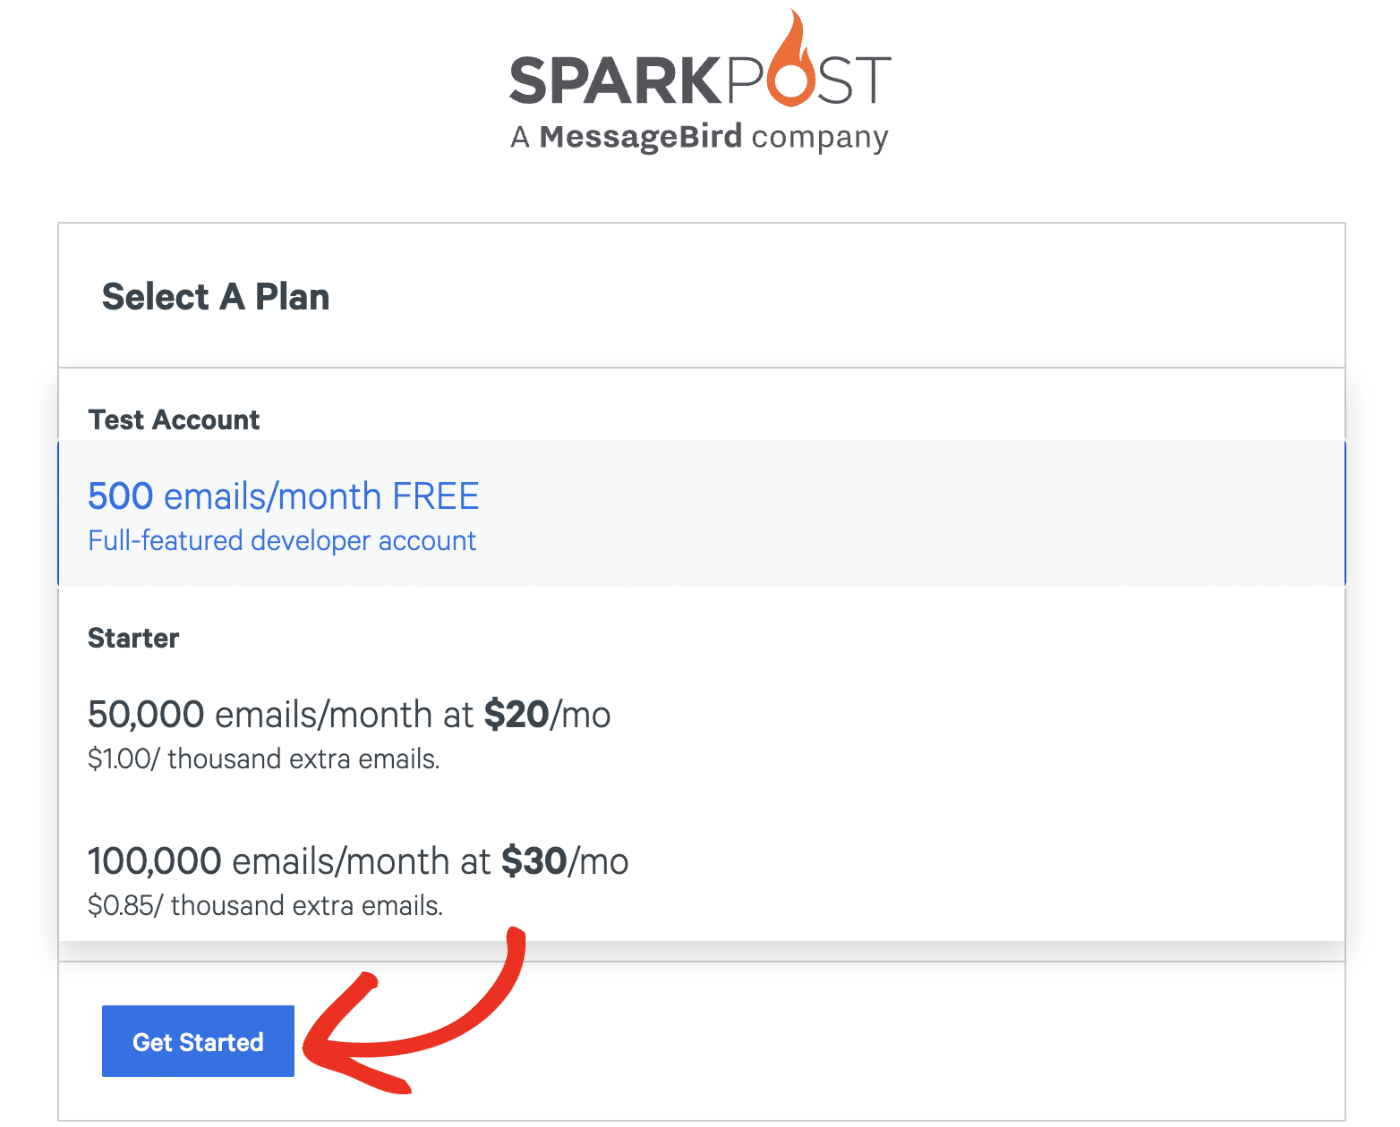
After your account is created, you’ll need to select a plan. The Test Account allows you to send 500 emails monthly. Go ahead and click the Get Started button after choosing a plan.
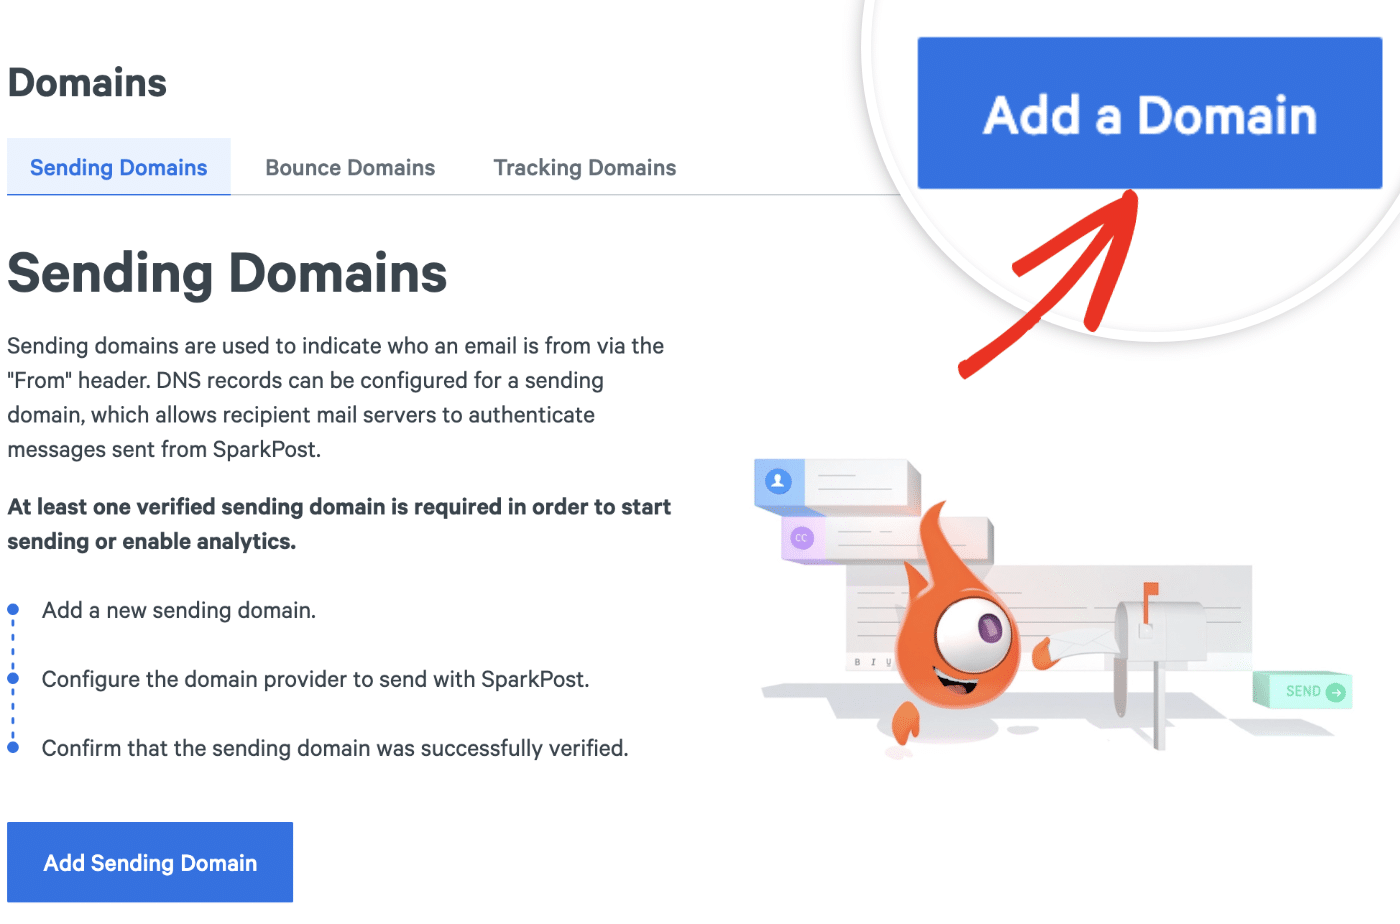
2. Adding Your Sending Domain
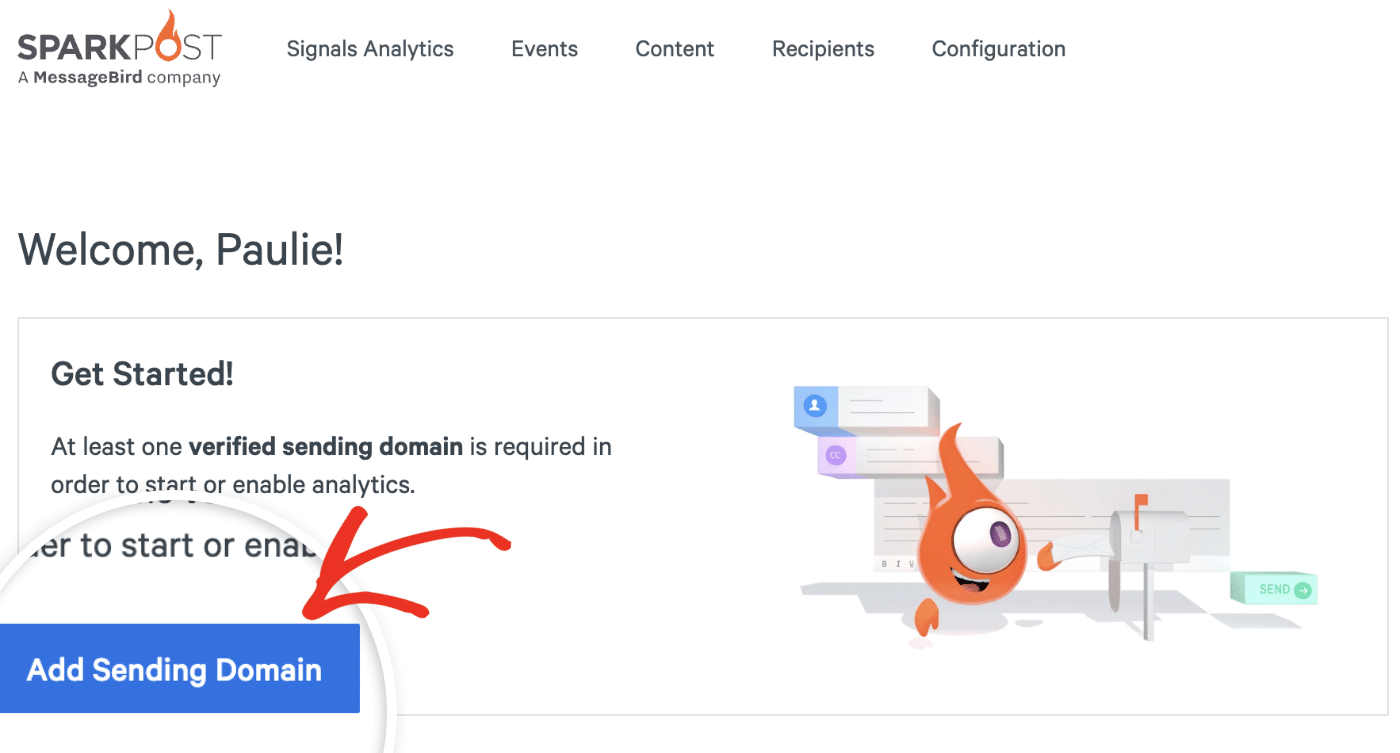
From your SparkPost dashboard, click the Add Sending Domain button.
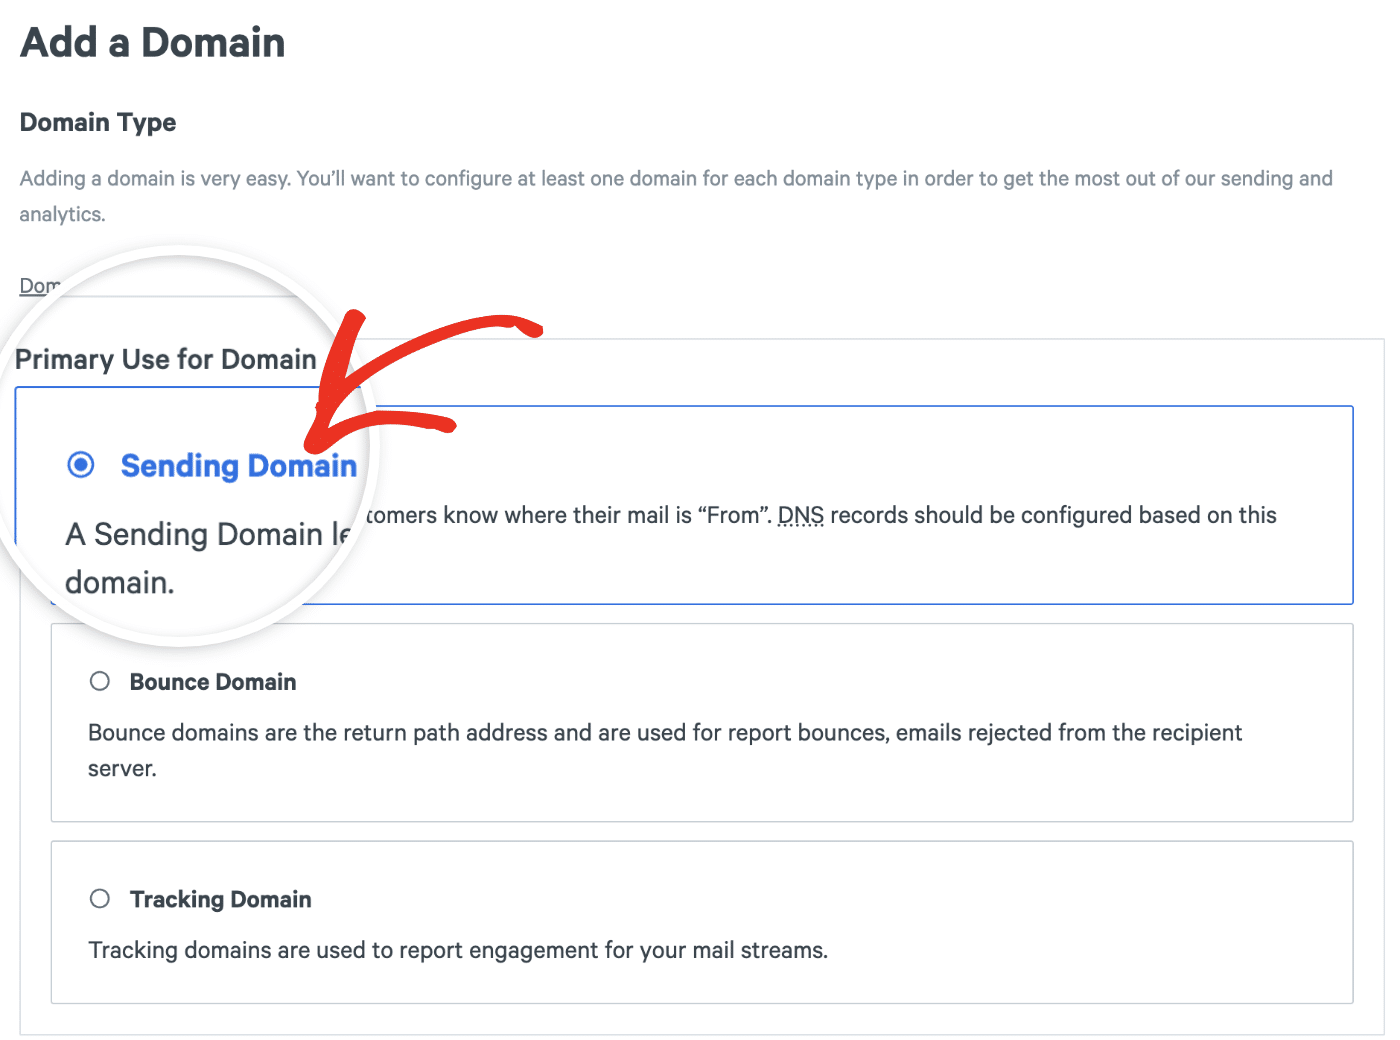
Next, select the Add a Domain button located at the top right side of the page.
Then select the type of domain you want to add. We suggest using the default Sending Domain option.
You can verify a subdomain in SparkPost and use an email address at that subdomain as the From Email in your Easy WP SMTP settings.
We recommend using this option to ensure your subdomain’s reputation as an email sender is separate from your root domain’s.
Using a Subdomain as Your Sending Domain
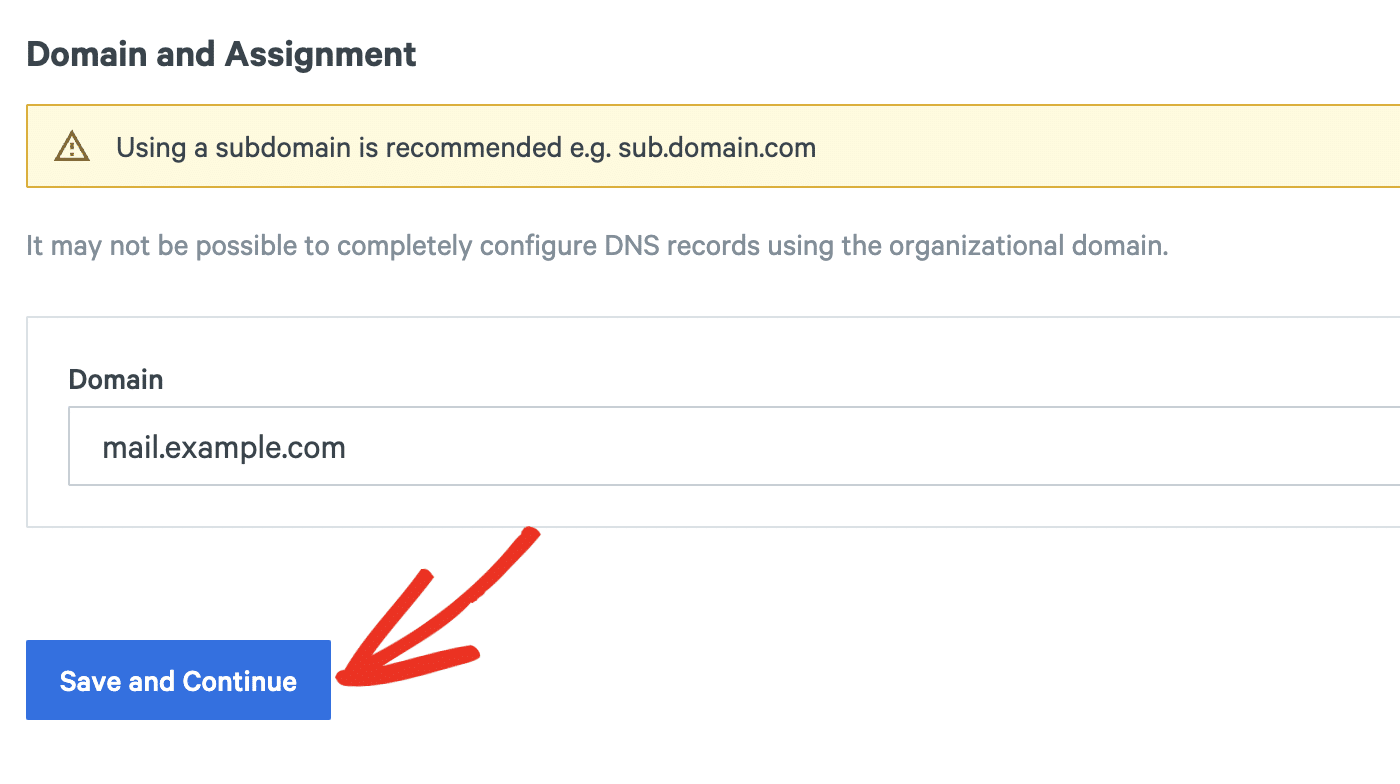
Once you’ve added a new sending domain to your Sparkpost account, enter your email subdomain in the field provided. This is the web address you’ll be sending emails from, and you’ll need an email address at this subdomain to complete the rest of the steps in this tutorial.
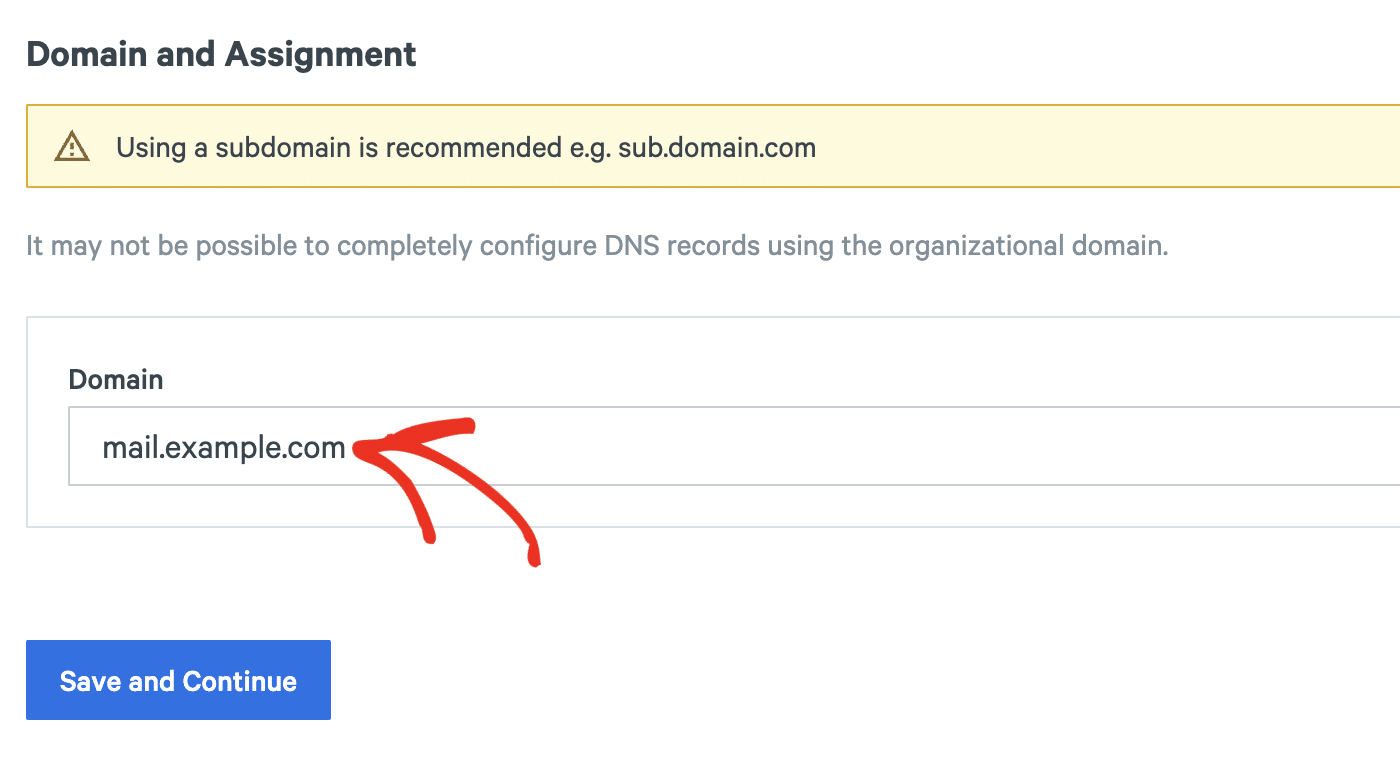
Click on Save and Continue to add this subdomain to your SparkPost account.
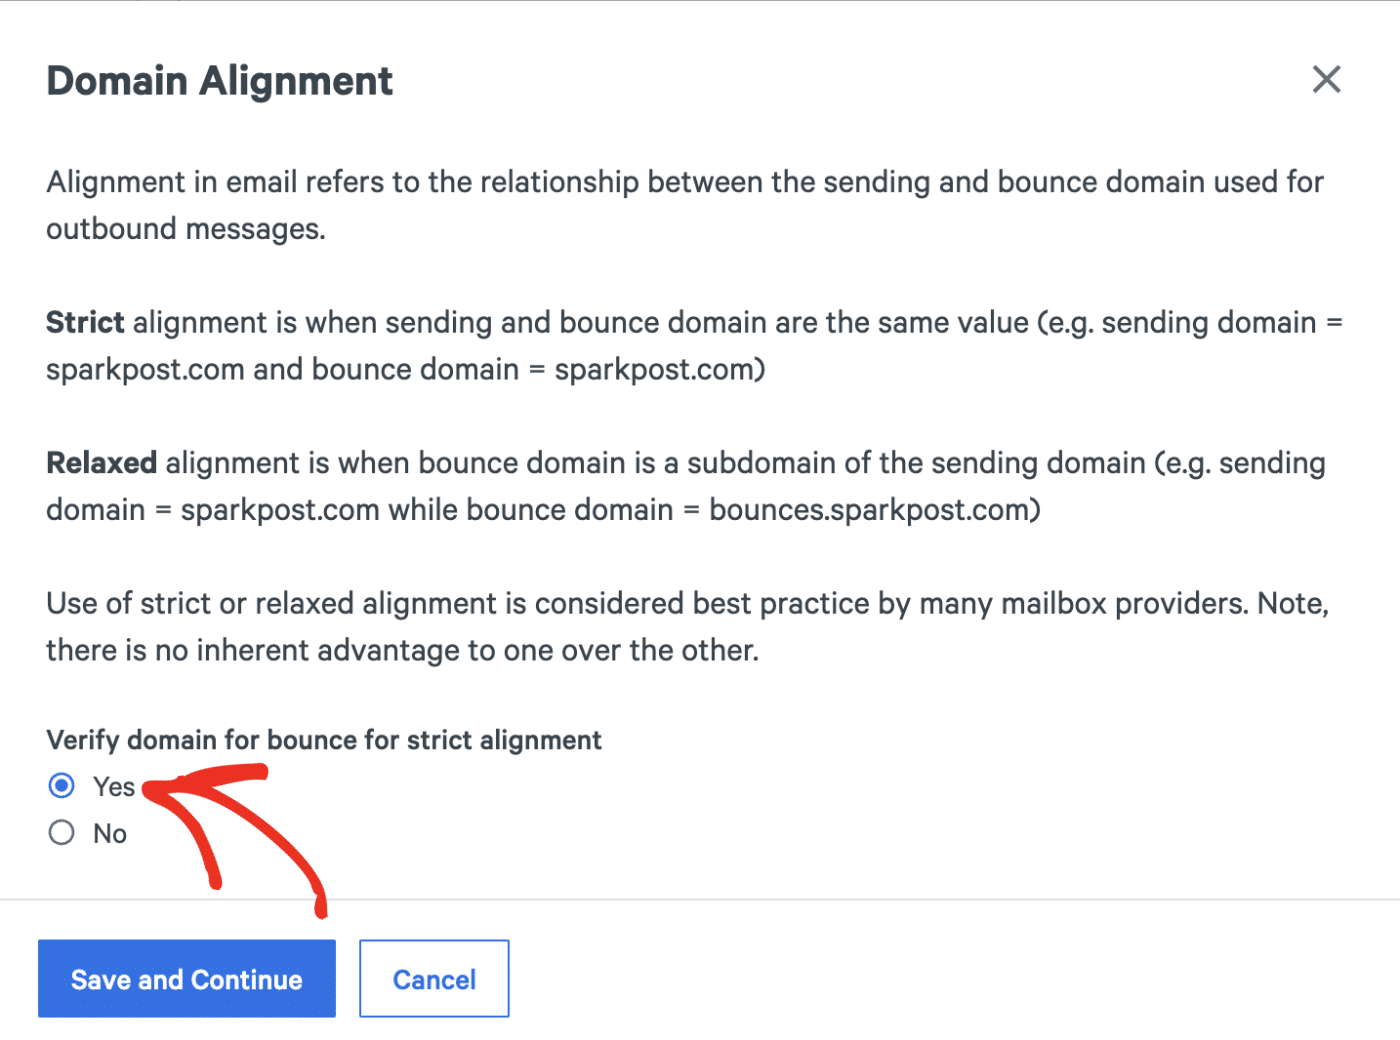
Domain Alignment
After saving your subdomain, an overlay will appear requesting you to select your domain alignment preferences.
For subdomains, we recommend using the Strict alignment option. This option sets your sending and bounce domain to the same value.
Go ahead and select Yes under Verify this domain for bounce for strict alignment to choose this option.
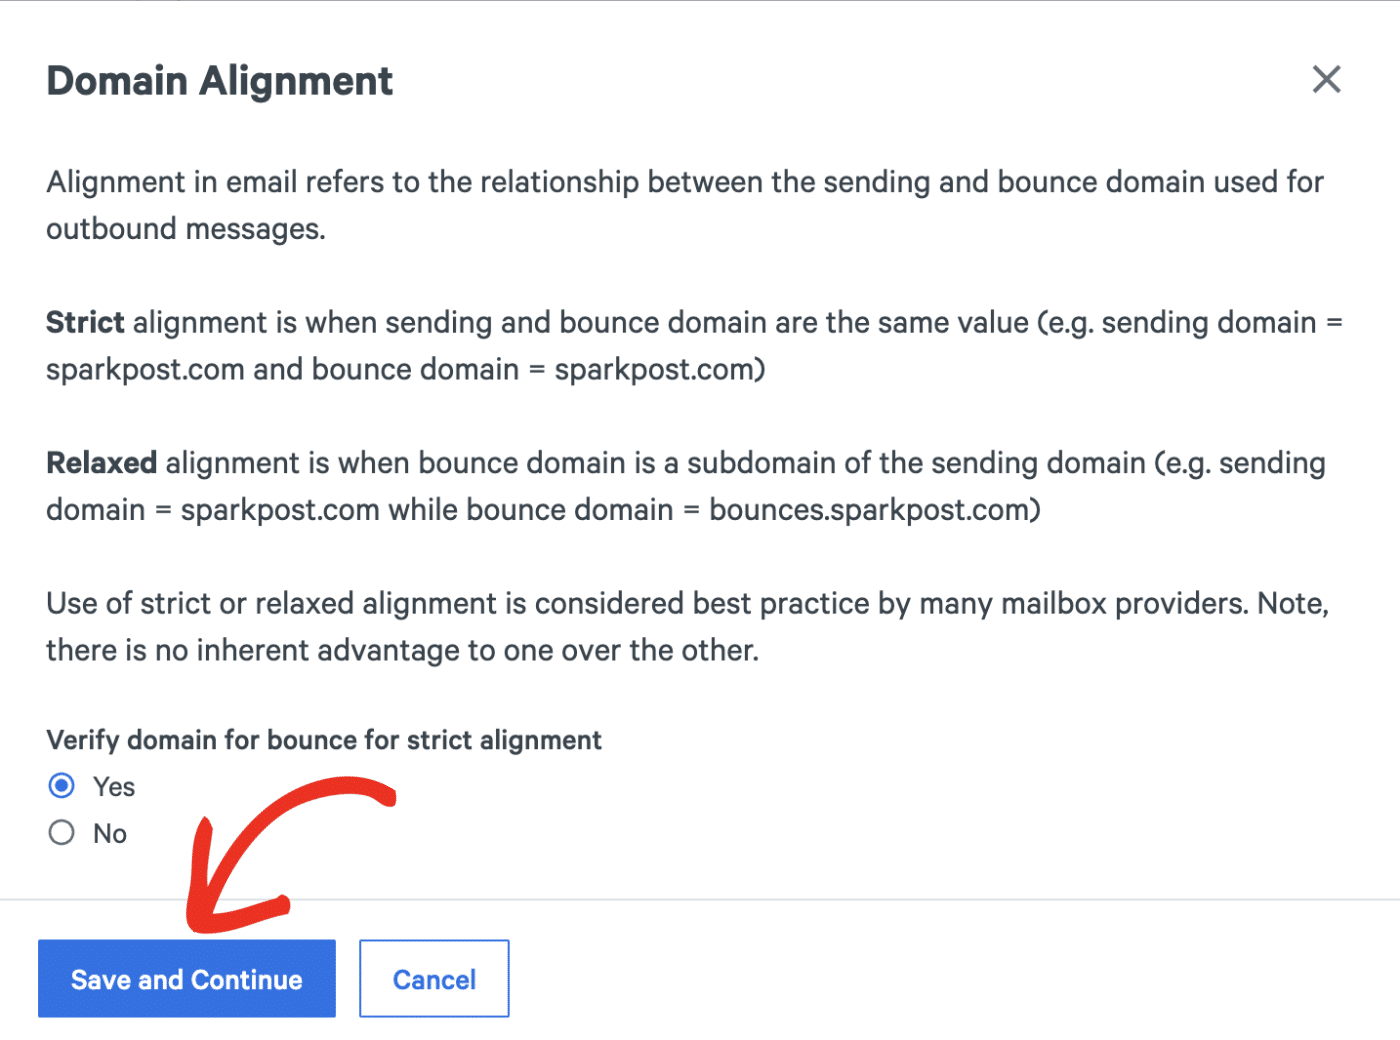
After selecting your domain alignment preference, click the Save and Continue button to proceed.
Verifying Your Sending Domain
Next, you’ll need to verify your sending domain. SparkPost provides 2 DNS (TXT and CNAME) records you need to add to your domain’s DNS settings. This is essential to verify your domain ownership and improve email deliverability.
Note: Not sure how to add the DNS records needed to verify your subdomain in SparkPost? For guidance on this process, please see WPBeginner’s tutorial on adding DNS records.
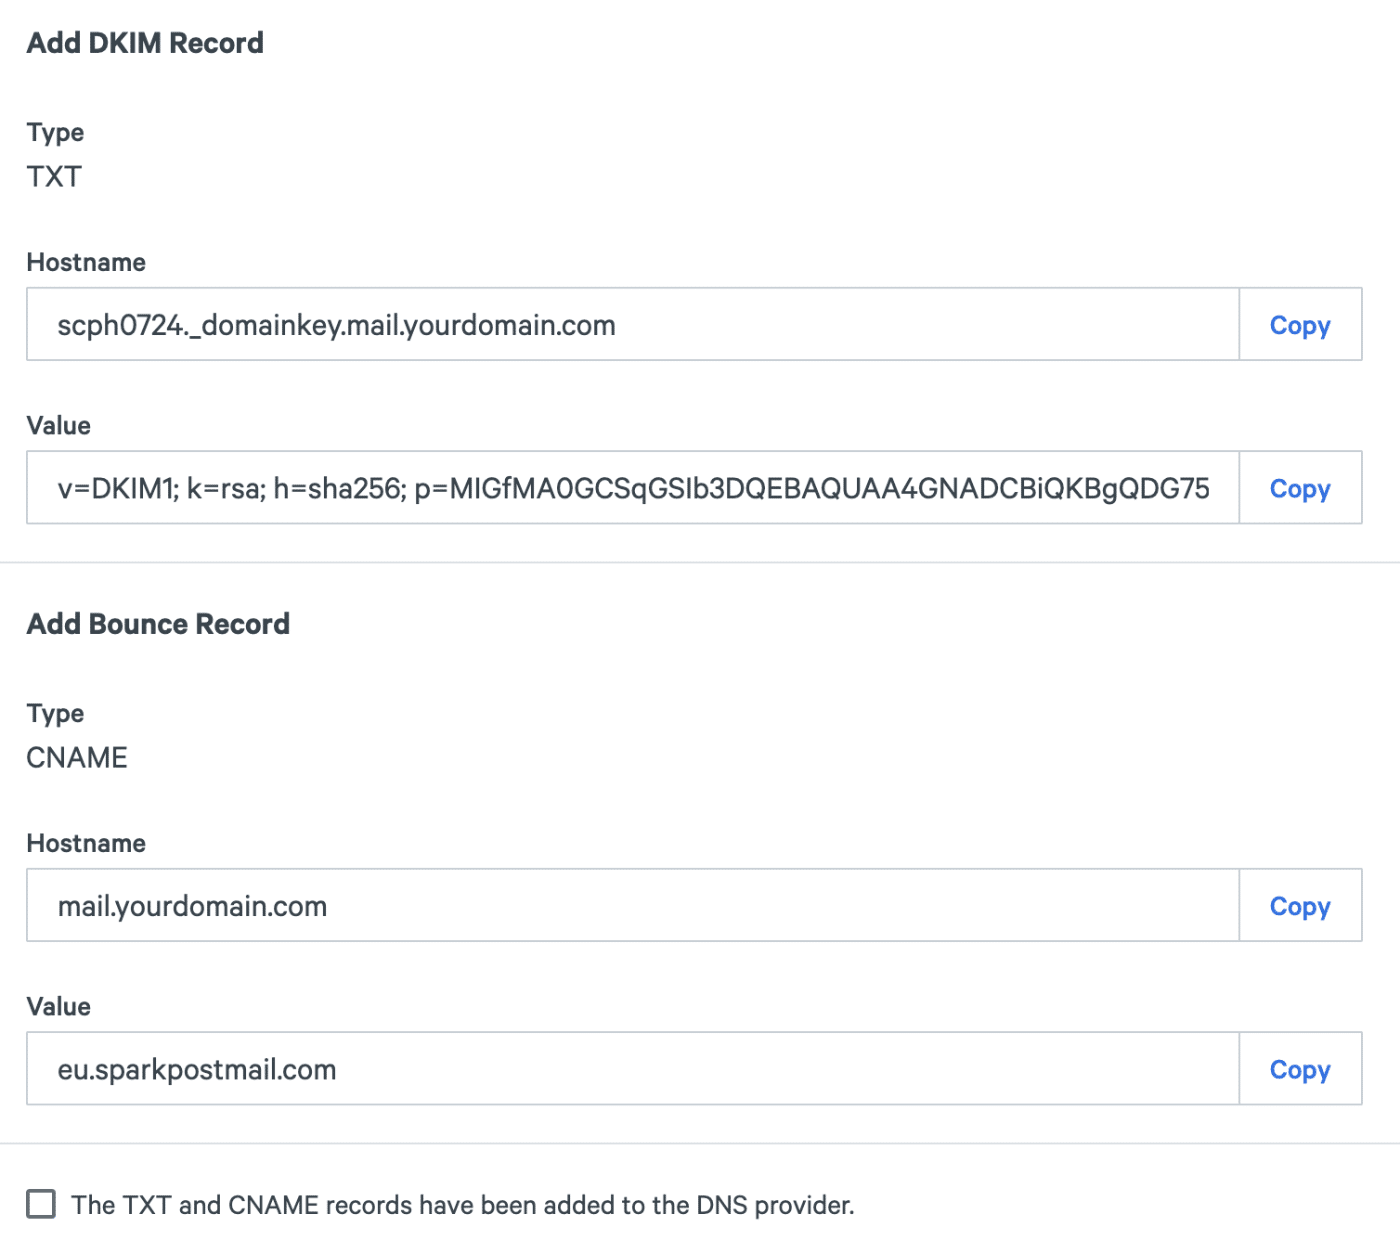
Note: You’ll need to add the DNS records provided by SparkPost to your root domain’s DNS settings to verify your subdomain.
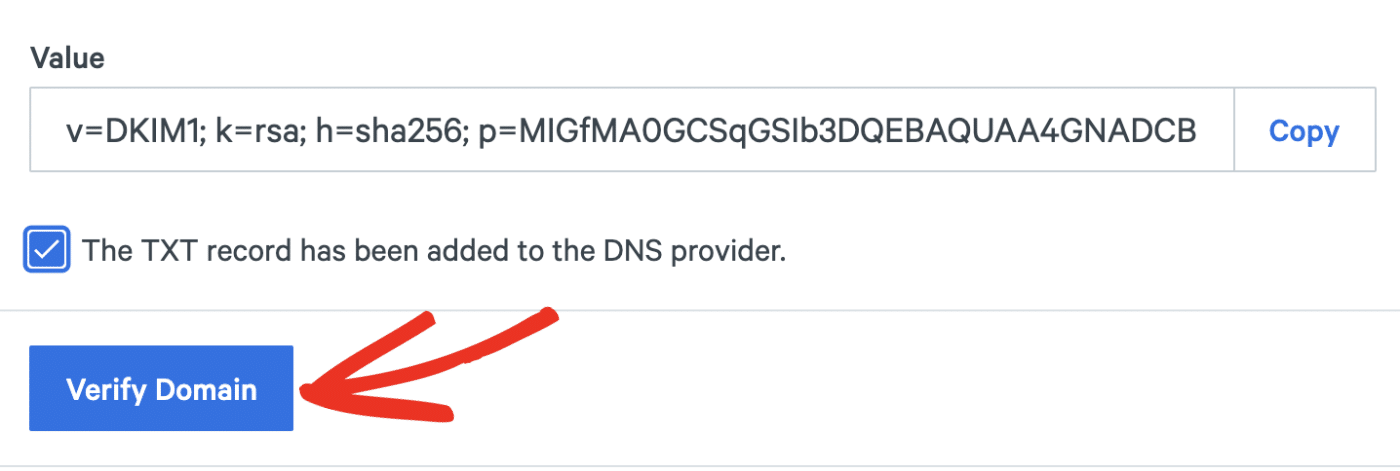
After adding the records, check the option next to The TXT and CNAME records have been added to the DNS provider. Then click the Verify Domain button.
SparkPost will carry out its compliance checks for your sending domain. This process can take up to 24 hours to complete and requires your DNS records to be updated.
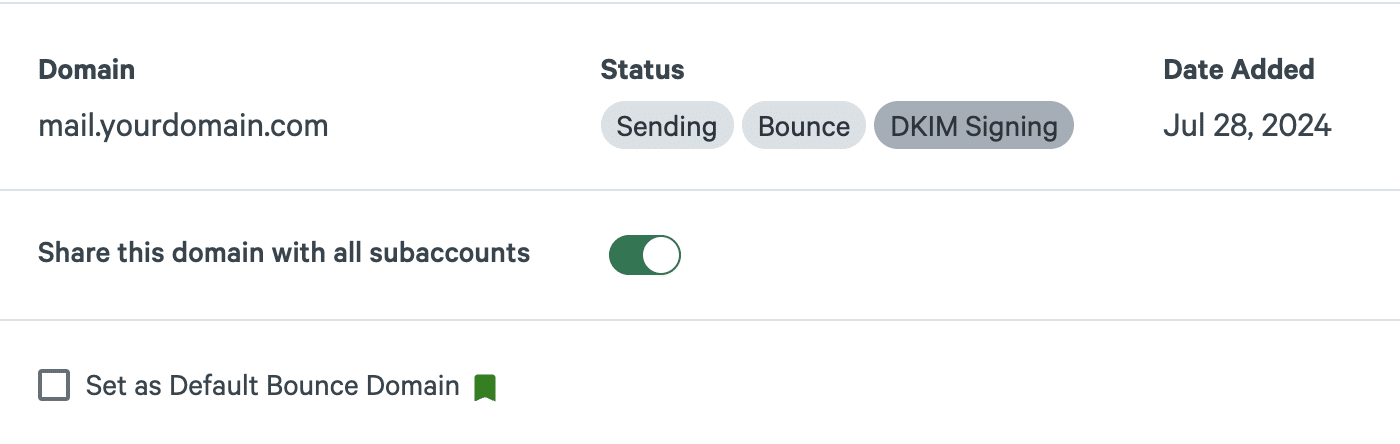
When your subdomain passes the checks, you’ll see 3 status markers in your SparkPost account’s Domains list: Sending, Bounce, and DKIM Signing.
Note: DNS settings can take up to 48 hours for changes to propagate. If you’ve completed the steps above and your subdomain still isn’t verified, wait and check back later. Meanwhile, you can proceed with the other steps in this guide.
3. Creating Your SparkPost API Key
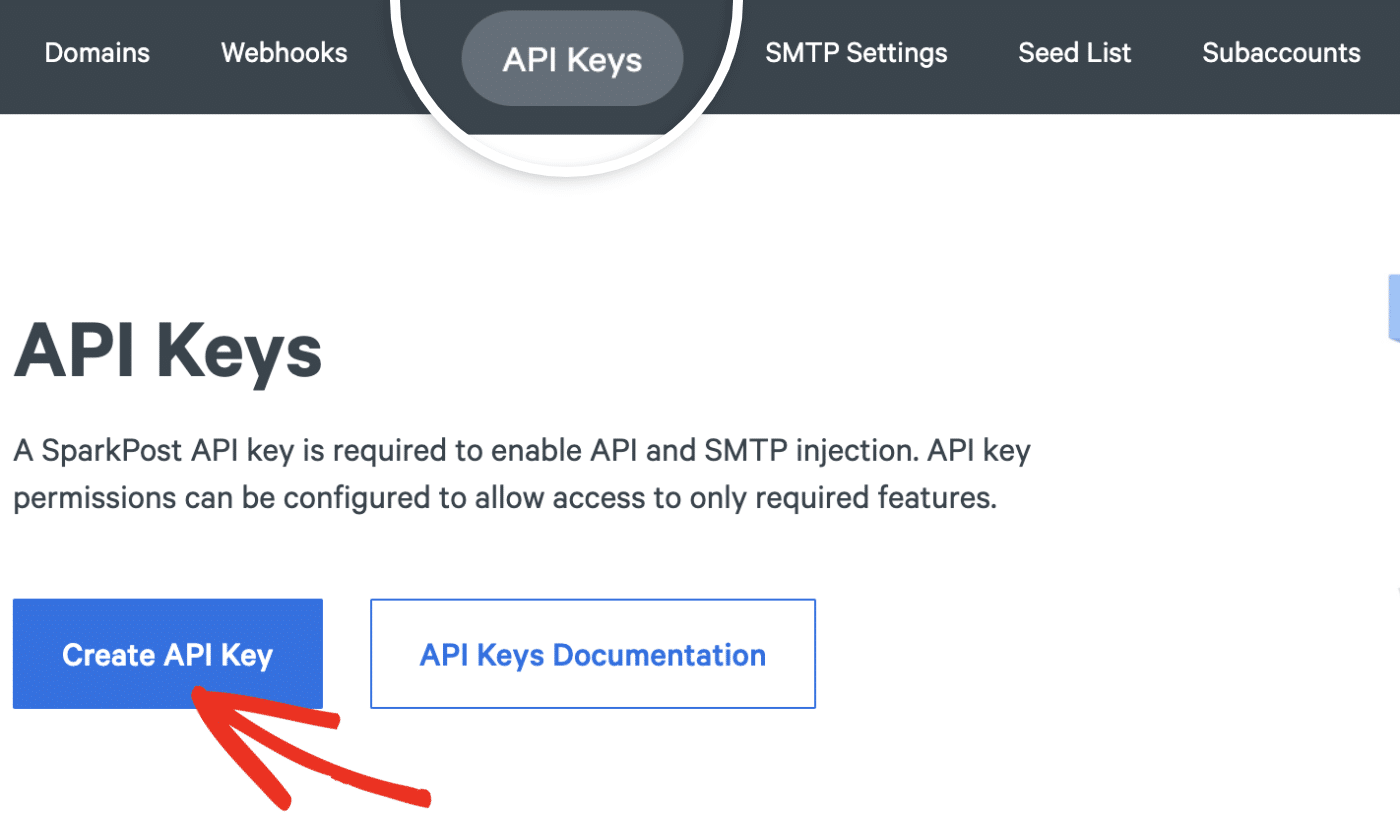
Easy WP SMTP requires an API key to connect with your SparkPost account. To generate an API key, select the API Keys tab in the menu at the top of your SparkPost account dashboard. Then click on Create API Key to proceed.
Next, you’ll need to enter a name for your API key in the API Key Name field. We recommend leaving the API Permissions option set to All. Once done, click on Create API Key to generate your key.

This will direct you to a new page with your generated SparkPost API key. Go ahead and click the Copy button to copy your API key.
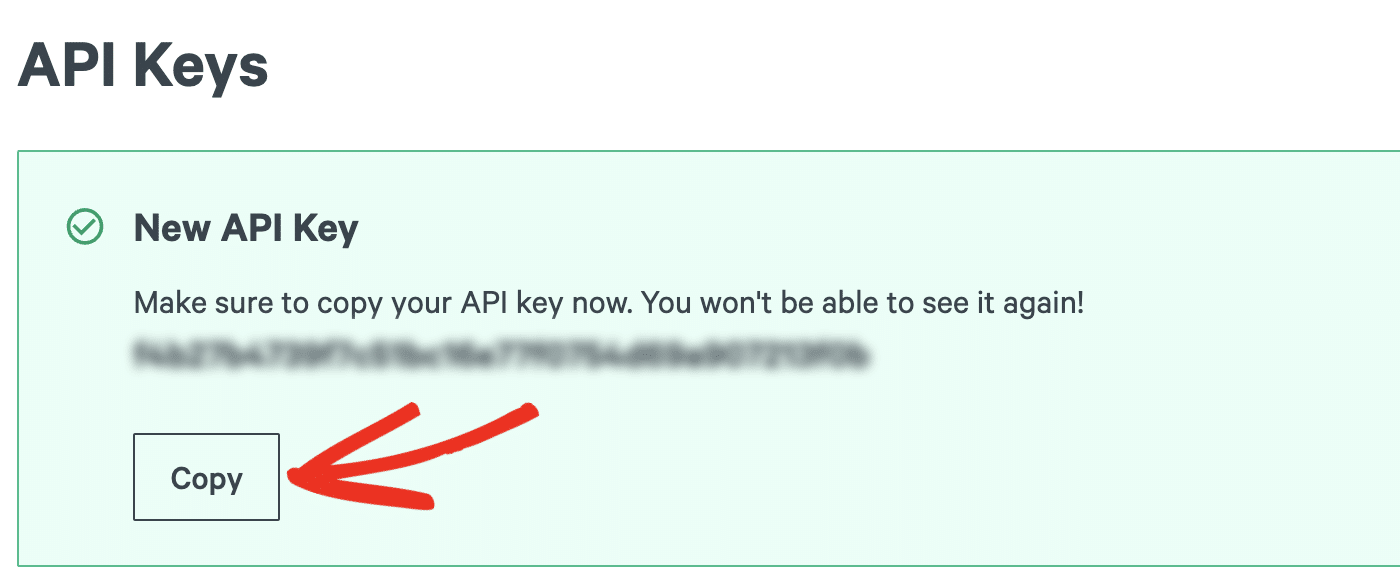
Note: You won’t be able to access the API key after closing this page. We recommend saving it in a secure location in case you need to refer to it. Otherwise, you’ll need to create a new API key following the steps above.
4. Setting Up Easy WP SMTP
Before you get started, be sure to install and activate the Easy WP SMTP plugin on your WordPress site.
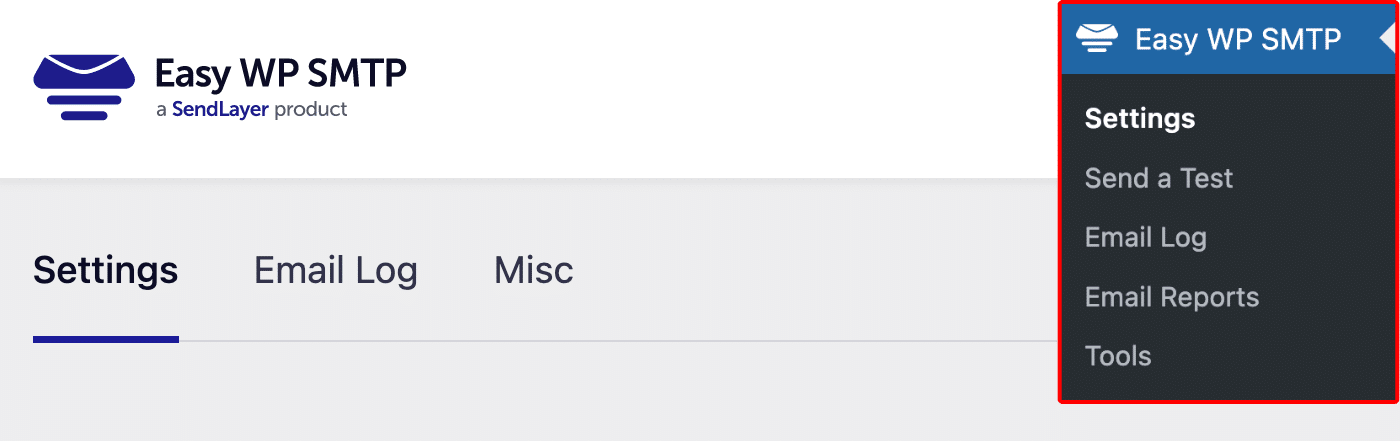
After setting up your SparkPost account, you can configure Easy WP SMTP on your WordPress site. To do so, log in to your WordPress site and go to Easy WP SMTP » Settings.
In the next steps, we’ll go through the available settings you’ll need to complete.
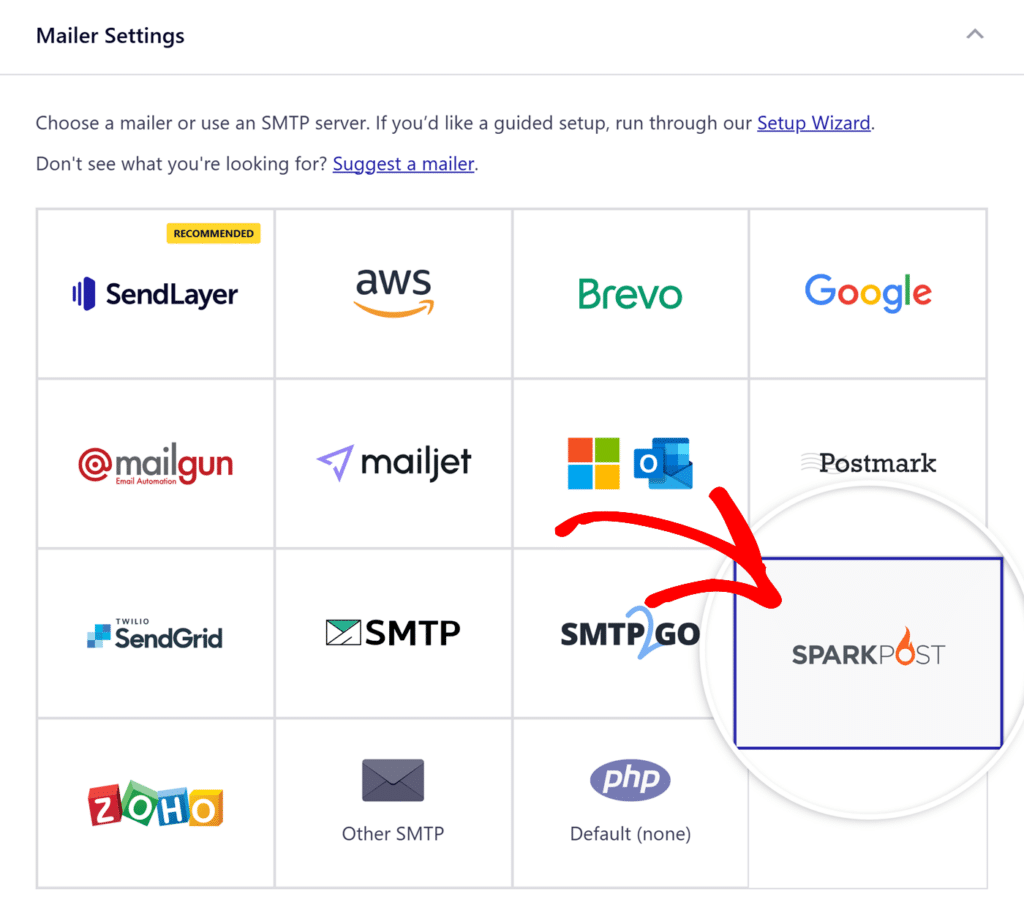
Mailer Settings
In the Mailer section, select SparkPost as your mailer. After that, additional options specific to this mailer will appear.
API Key
You’ll need to paste the API key you created into the API Key field. For this, return to the browser tab with your SparkPost account open. Then copy the API key you generated and paste it into the API Key field.
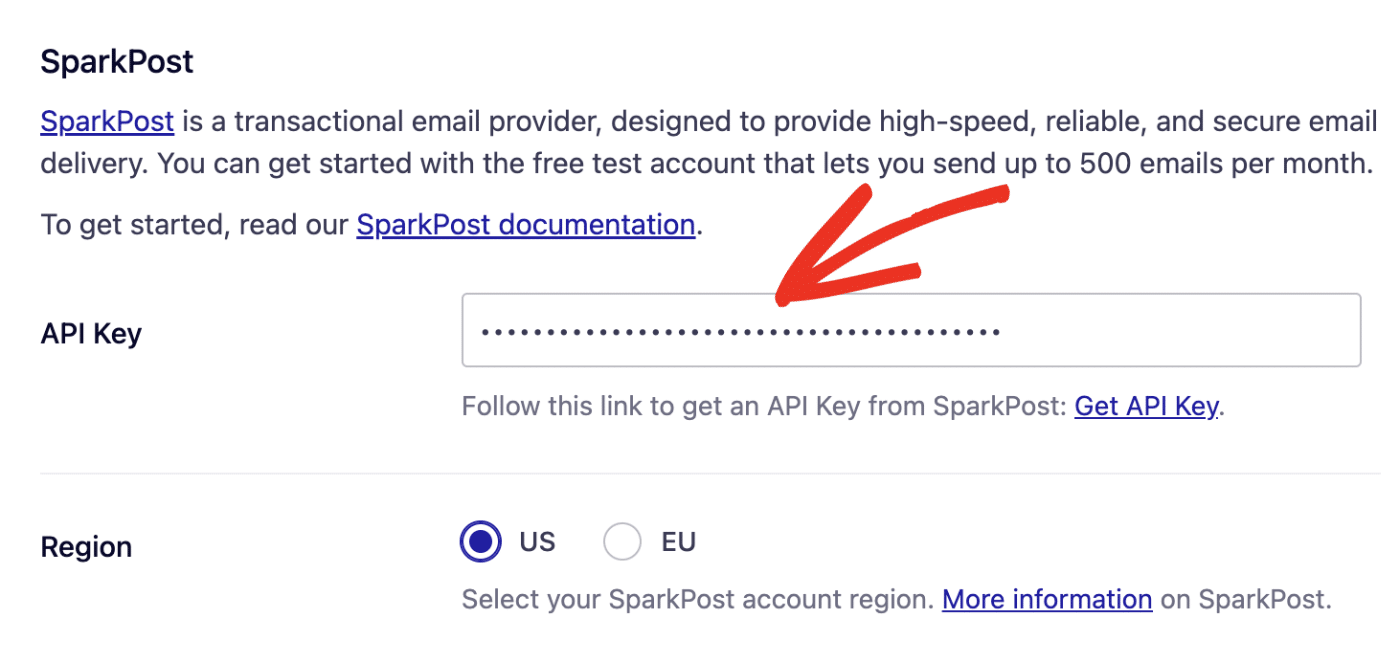
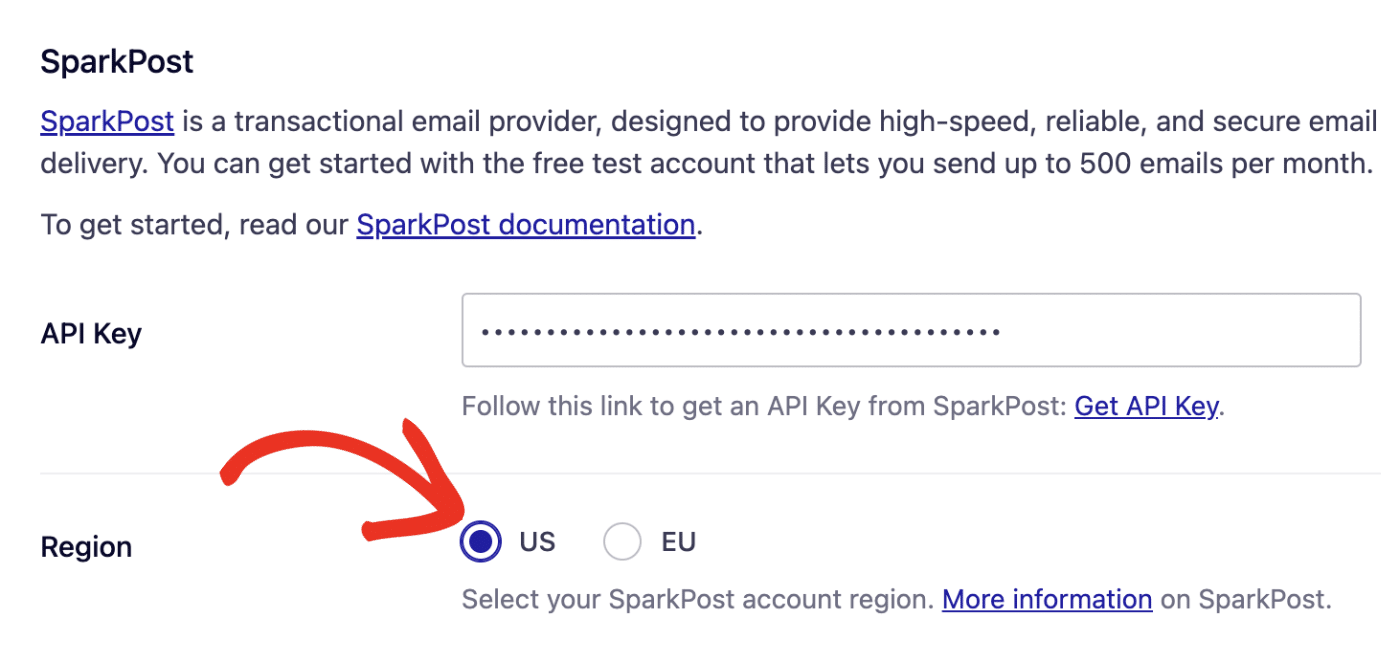
Region
Next, you’ll need to choose a region from the Region section. This region needs to match the one you selected when creating your SparkPost account.
General Settings
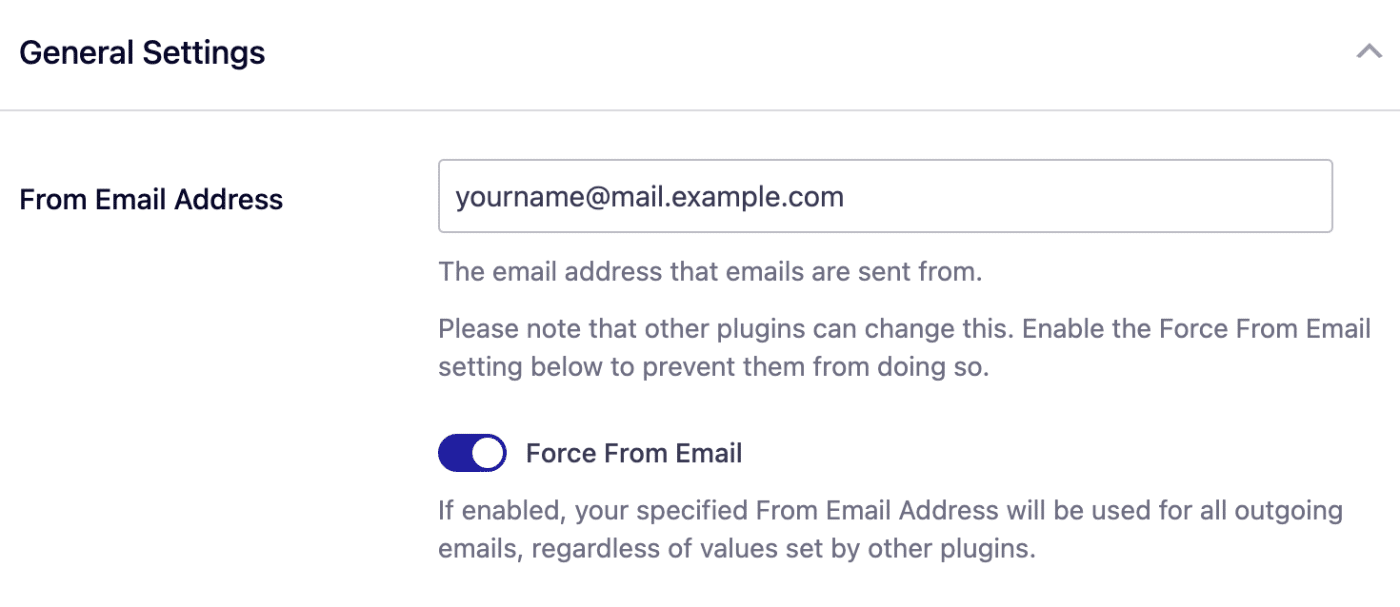
From Email
The From Email is the email address that your WordPress site’s emails are sent from. For emails to be delivered correctly, the email domain must match the subdomain you verified in SparkPost. For example, if you authorized mail.example.com as your domain, the From Email must contain @mail.example.com.
We also recommend enabling the Force From Email box. This option ensures your From Email will be used for all emails sent from your site, ignoring values set by other plugins.
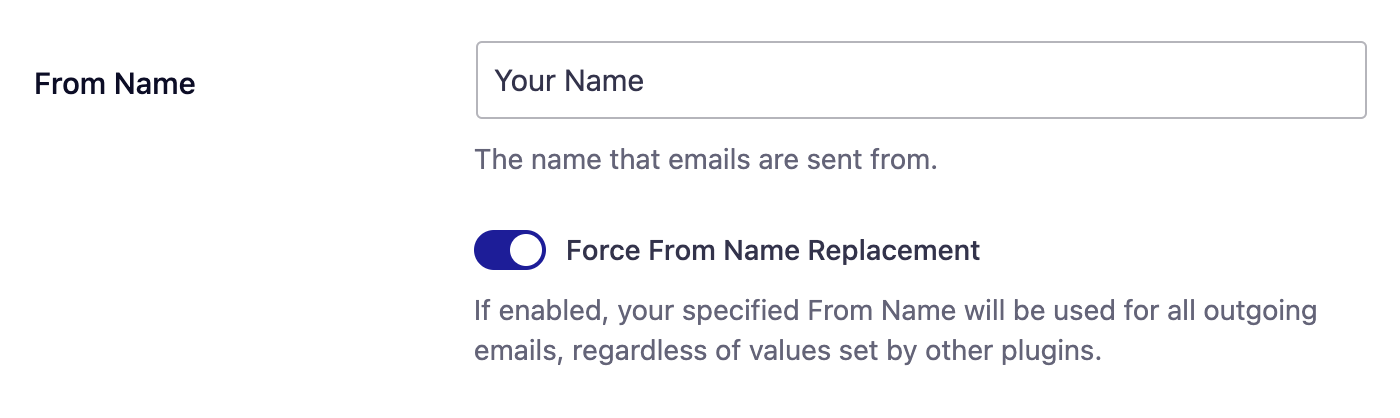
From Name
The From Name is the name that appears in the emails sent from your site, letting the recipient know who sent the email. By default, the From Name is set to your site’s name. However, you can change the name to whatever you’d like.
Similarly, you can enable the Force From Name toggle to apply the settings site-wide
Backup Connection
Configuring a Backup Connection is an optional step in your SparkPost mailer setup. However, to further improve email deliverability, we recommend configuring an additional connection to serve as a backup in case your Primary Connection fails.
Note: For information on sending emails through different connections based on specific rules, please refer to our Smart Routing tutorial.

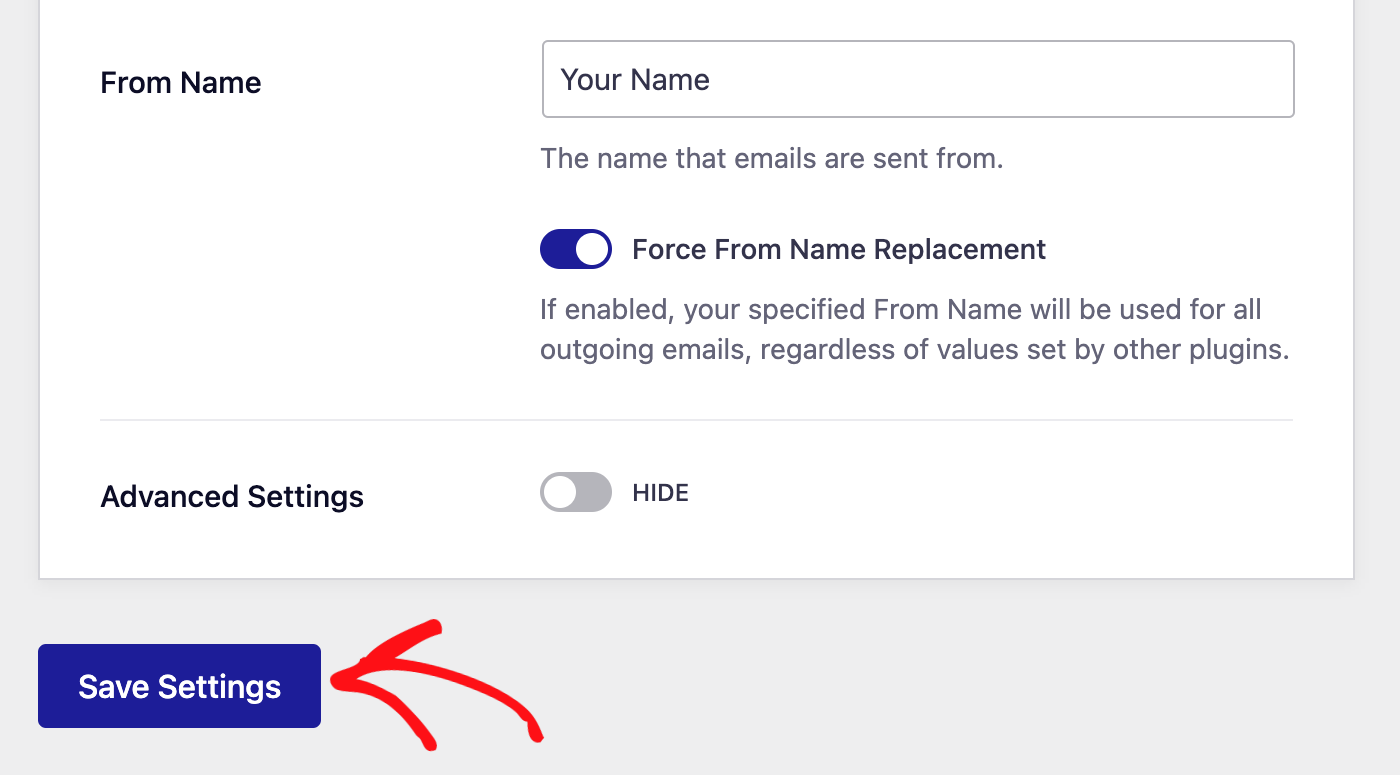
When you’re done with the configuration, be sure to save your settings by clicking the Save Settings button.
5. Sending a Test Email
To ensure everything is working correctly, you can use the Email Test tool in Easy WP SMTP to send a test email. For more details, see our tutorial on sending a test email.
That’s it! You’ve now successfully set up the SparkPost mailer with Easy WP SMTP.