In this tutorial, we’ll show you how to improve email deliverability with the MailerSend mailer in Easy WP SMTP.
Before you begin, you’ll need to ensure Easy WP SMTP is installed and activated on your WordPress site.
1. Setting Up Your MailerSend Account
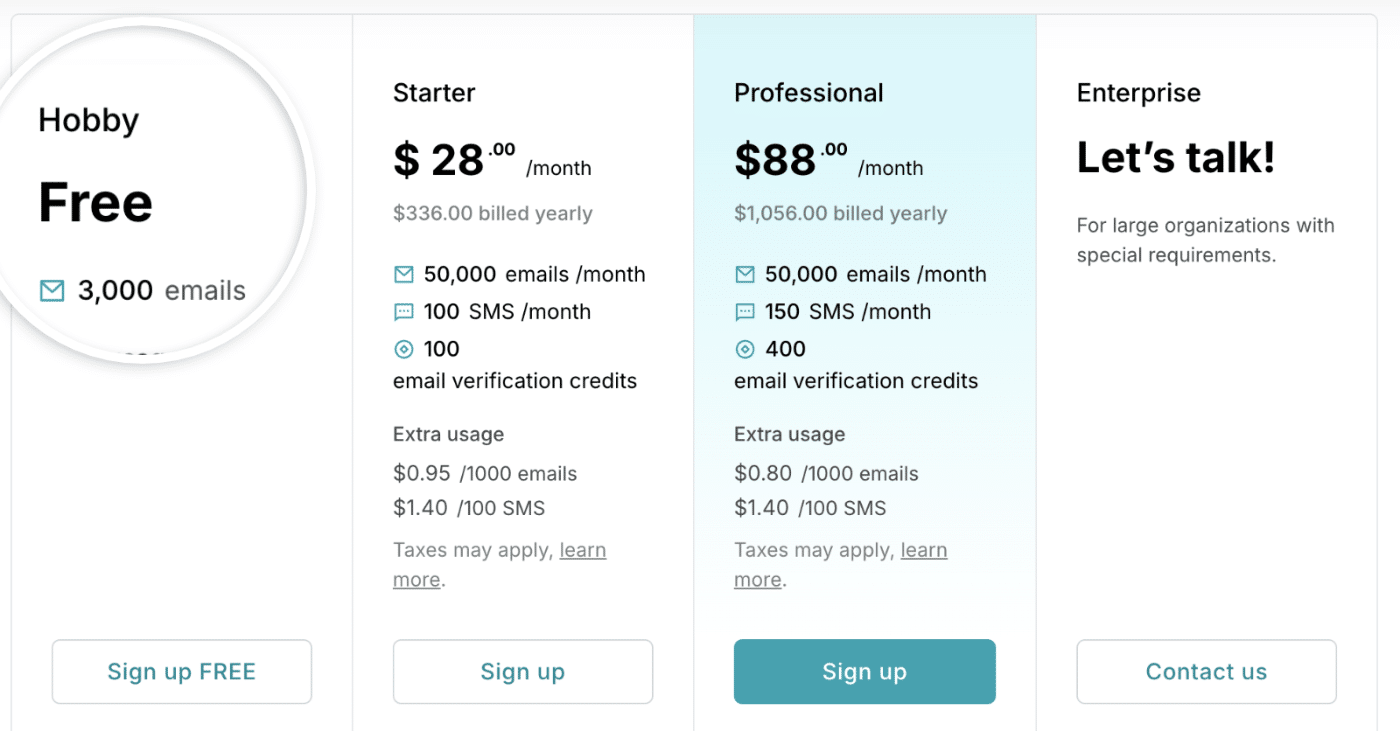
To start, you’ll need to create a MailerSend account (if you don’t have one already). For this, visit MailerSend’s pricing page and choose the plan that best fits your needs.
For this example, we’ll choose their Hobby plan. However, the setup process will be the same regardless of your chosen plan.
After creating your account, you’ll be directed to your MailerSend account dashboard to begin setting up your account.
2. Authorizing Your Domain
This process verifies that you own the domain you’re sending from and helps improve your email deliverability.
Adding Your Sending Domain
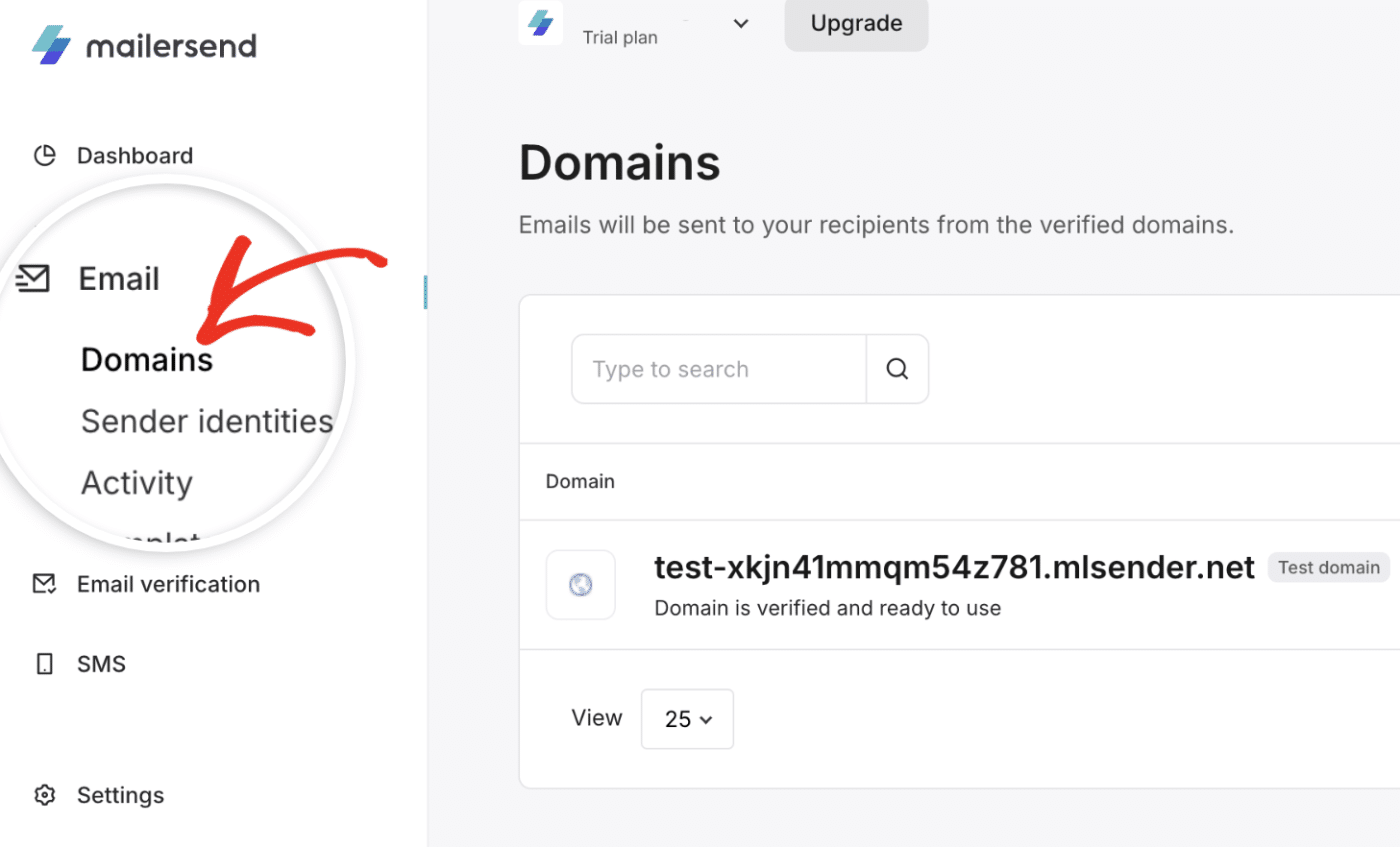
First, you’ll need to add and verify your domain in MailerSend. To do so, log in to your MailerSend account and go to Email » Domains.
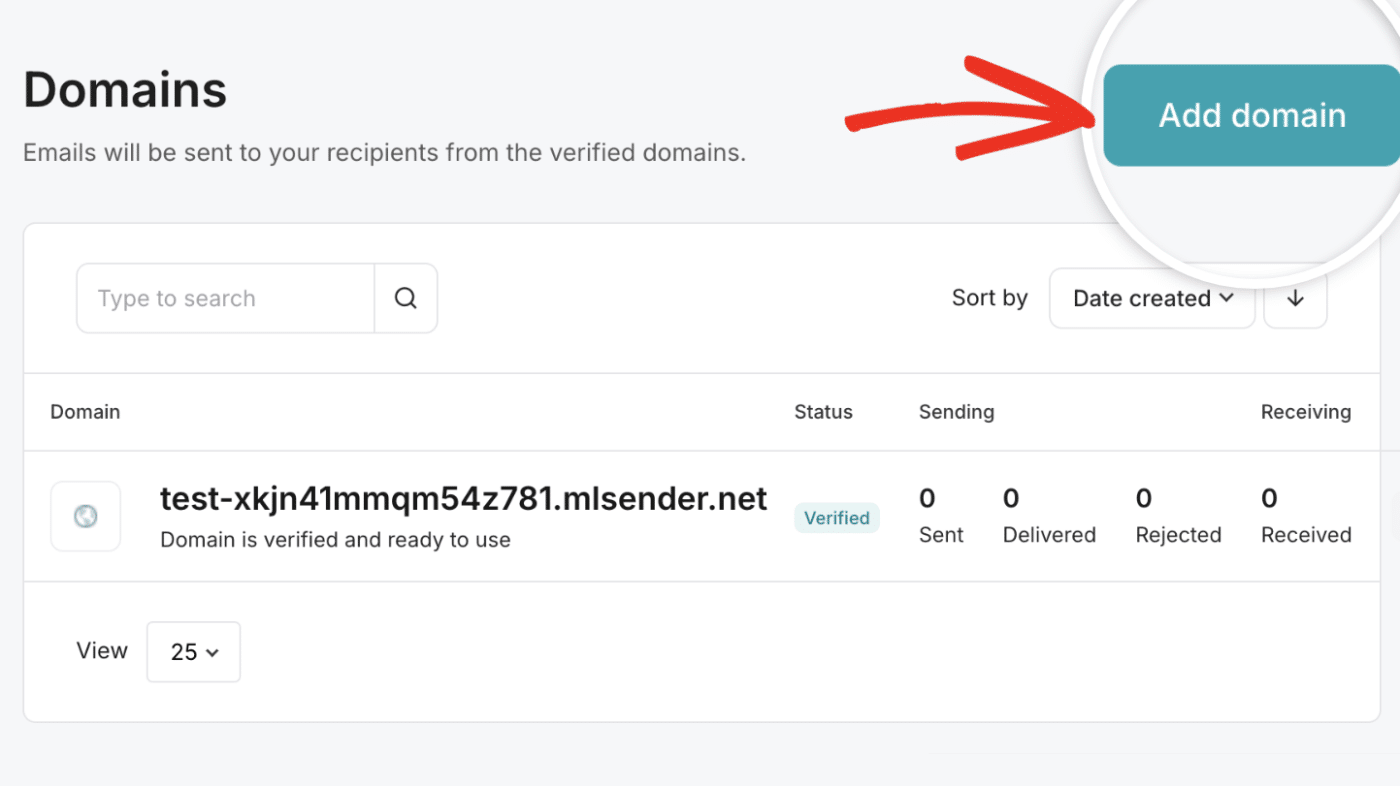
Here, you’ll see your test domain details. To add a new domain, click the Add domain button.
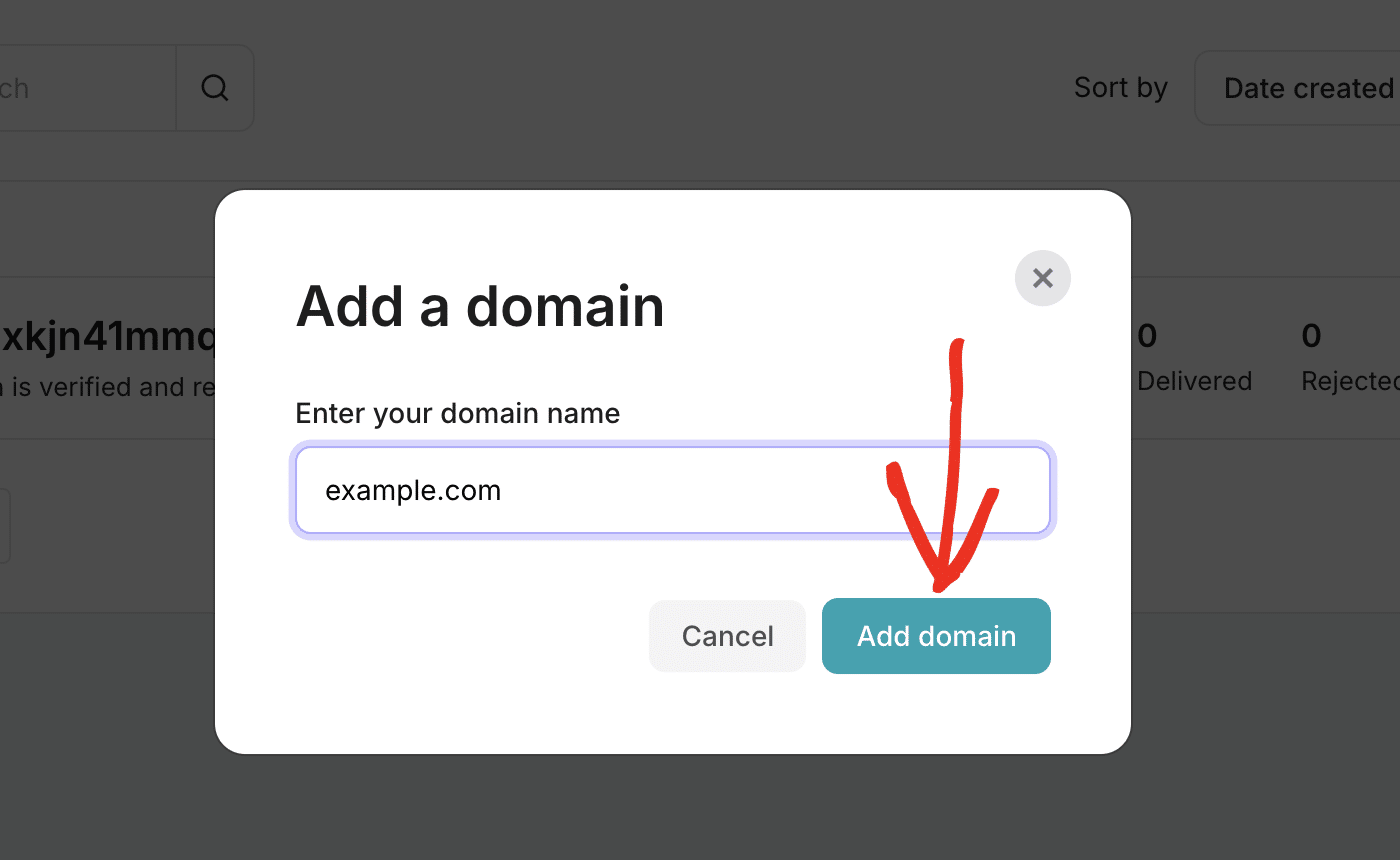
In the pop-up that appears, enter your domain name and click Add domain to proceed.
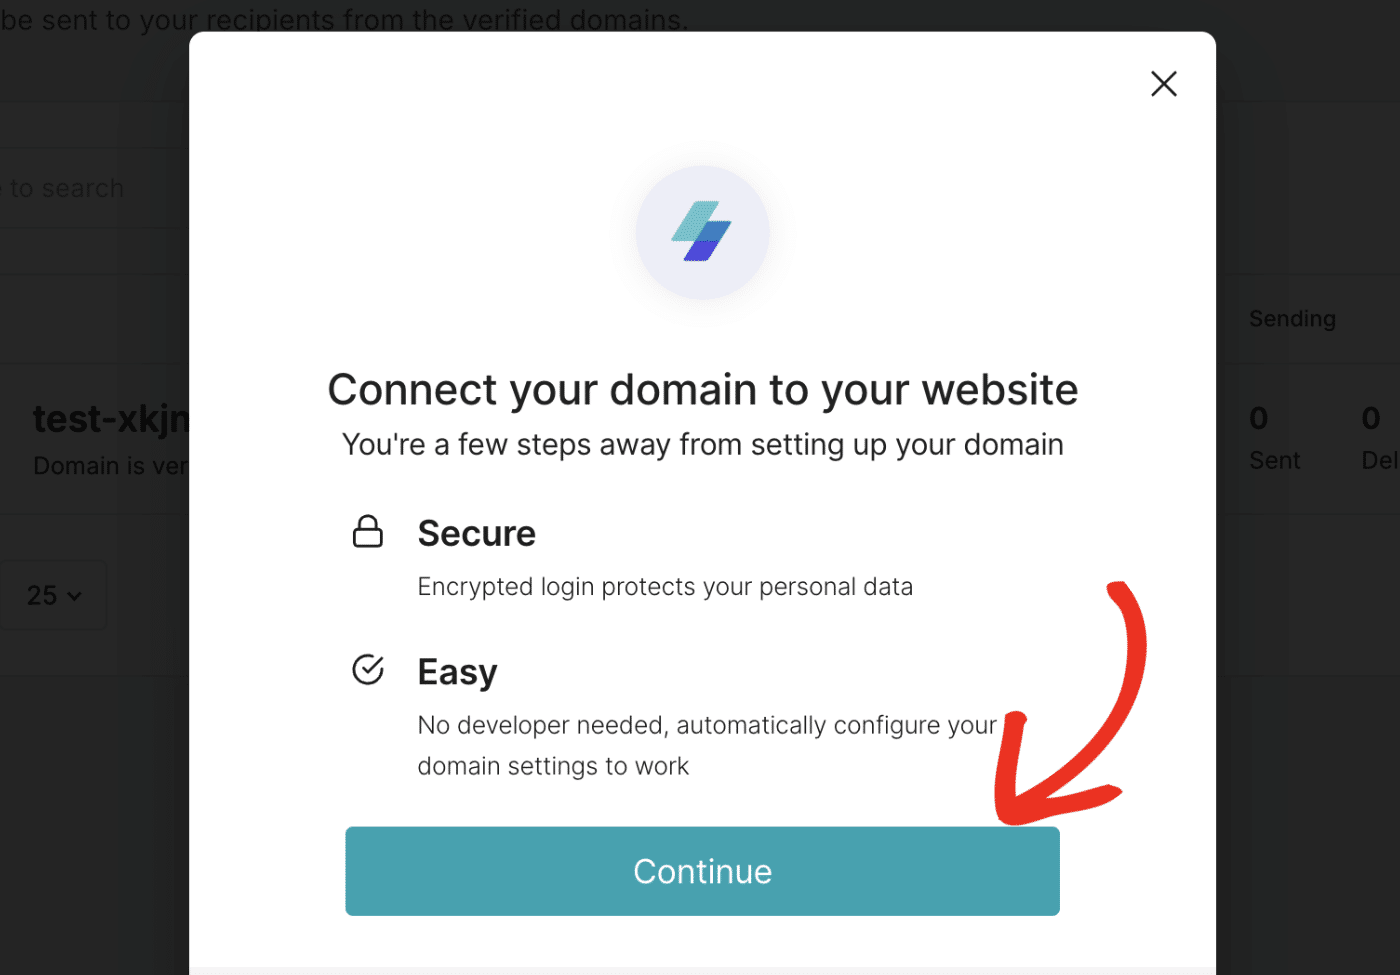
Then, click the Continue button to proceed.
MailerSend will take a moment to detect your domain host and suggest DNS record settings based on your domain hosting provider.
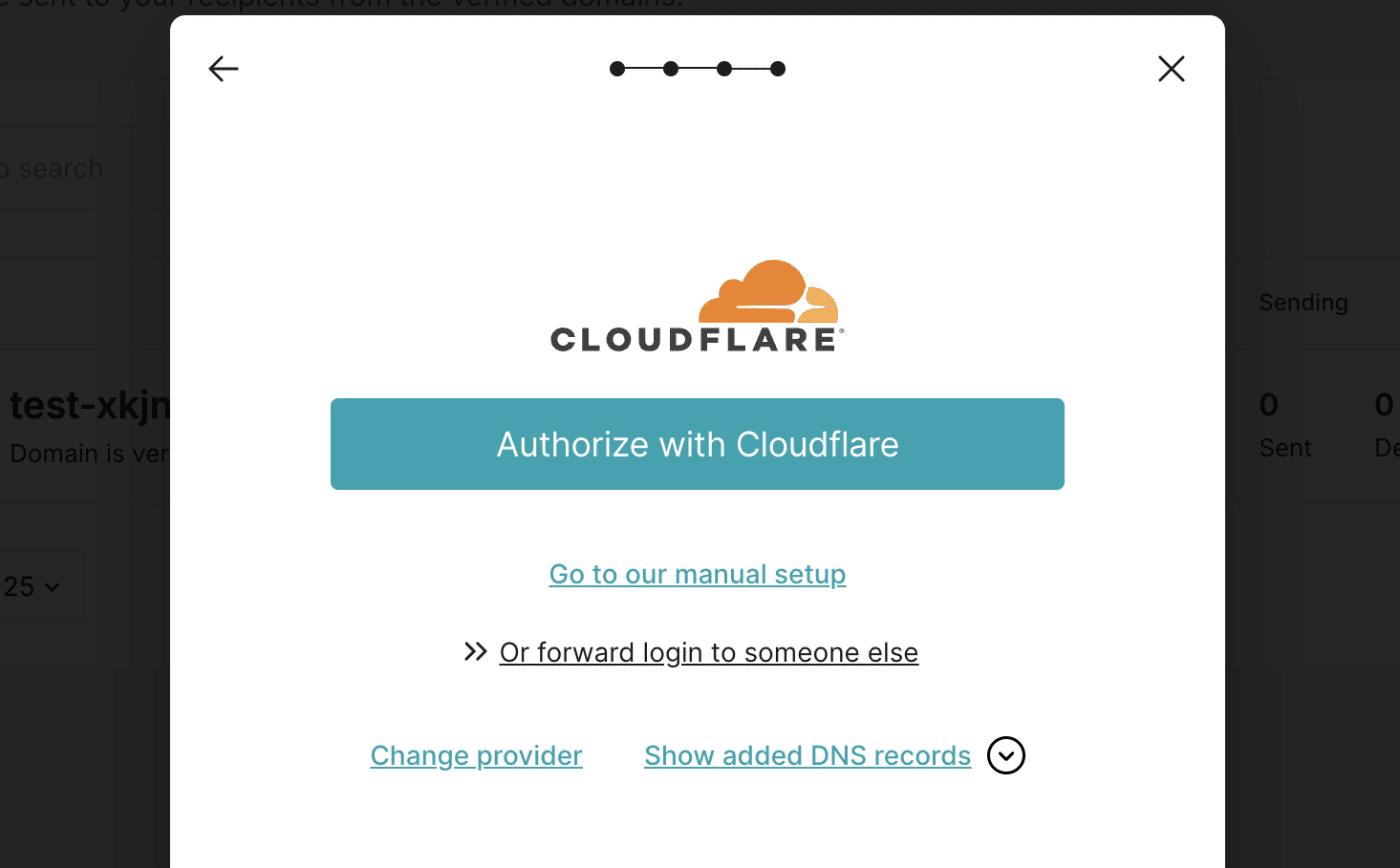
After confirming your domain host, you’ll be presented with two validation methods.
The first option is straightforward and requires you to log in to your domain host’s account and authenticate your MailerSend account.
Alternatively, you can use their manual verification method to validate your sending domain. This method requires you to add DNS records to your domain settings.
We’ll cover both methods in the guide. For this tutorial, we’ll use Cloudflare as the domain host. However, the steps are similar for most domain registrars.
Validating Your Domain With One-Click
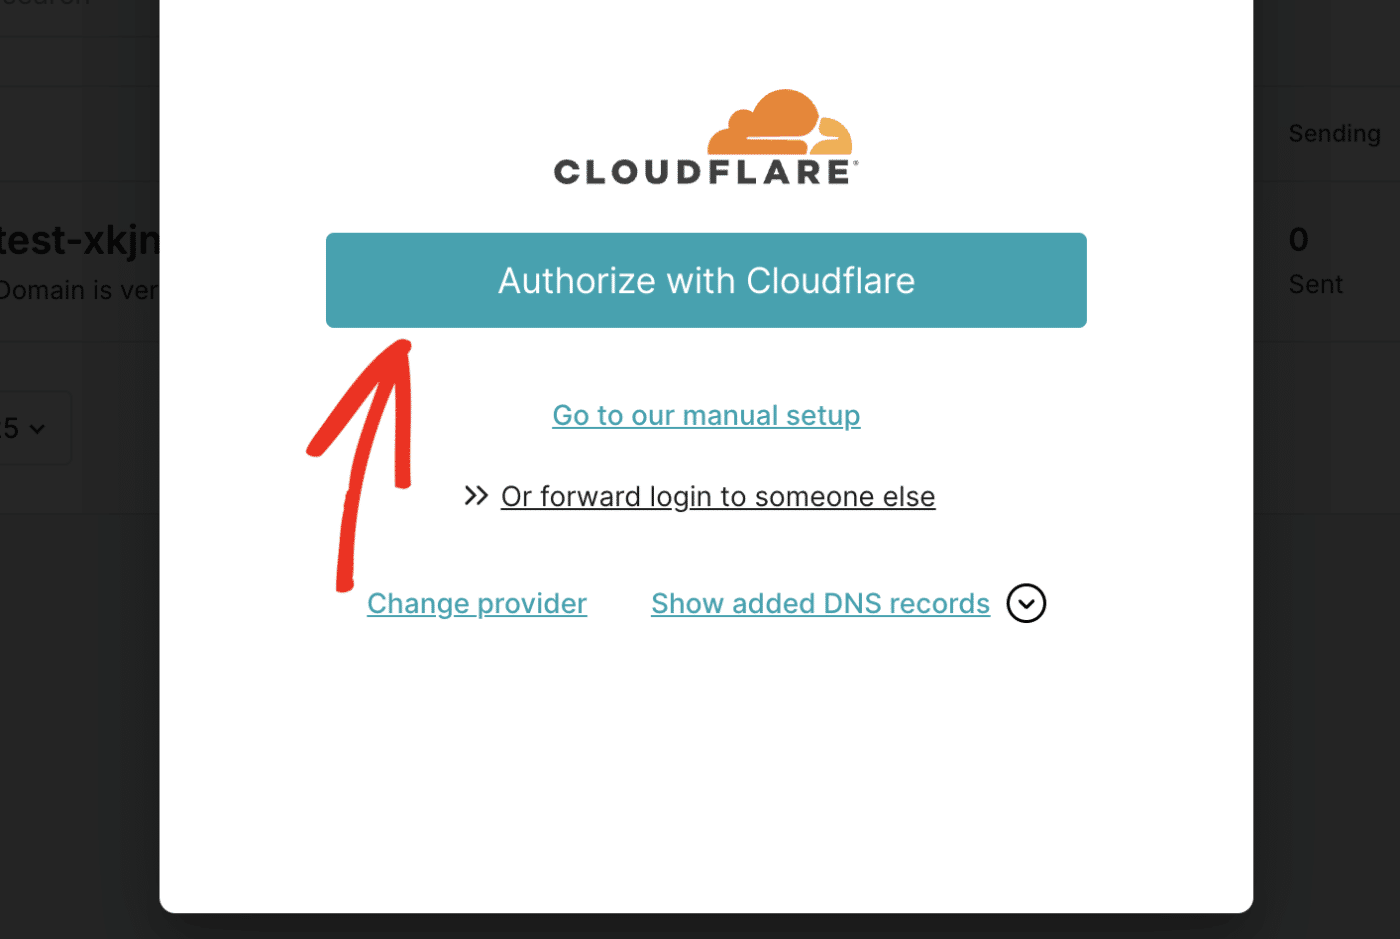
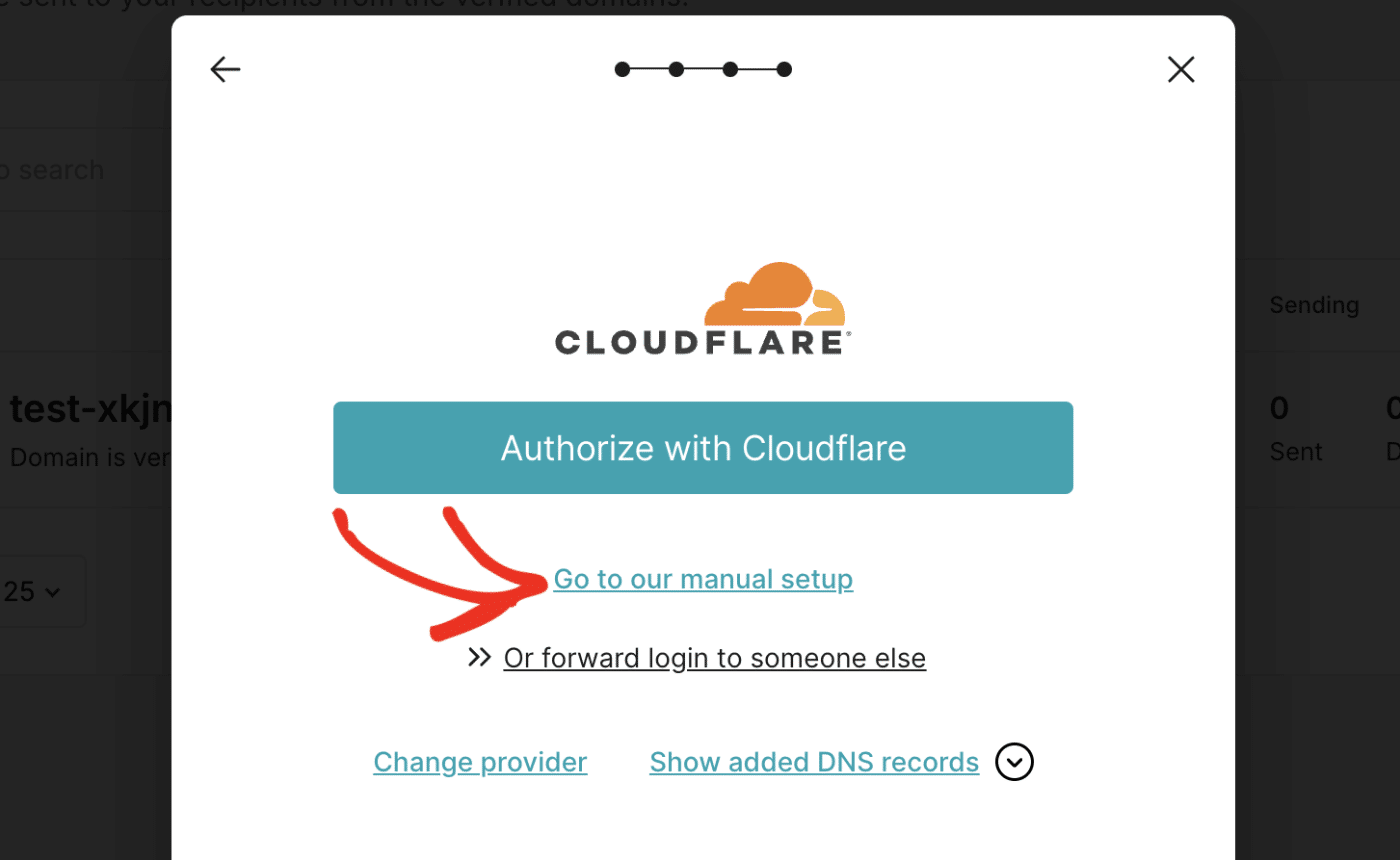
To use the one-click method, click the Validate with Cloudflare button to proceed.
Note: The exact text you’ll see on the button varies depending on your domain host. Also, this method isn’t available for all domain registrars. You’ll need to use the manual verification method if you don’t see the option to verify with one click.
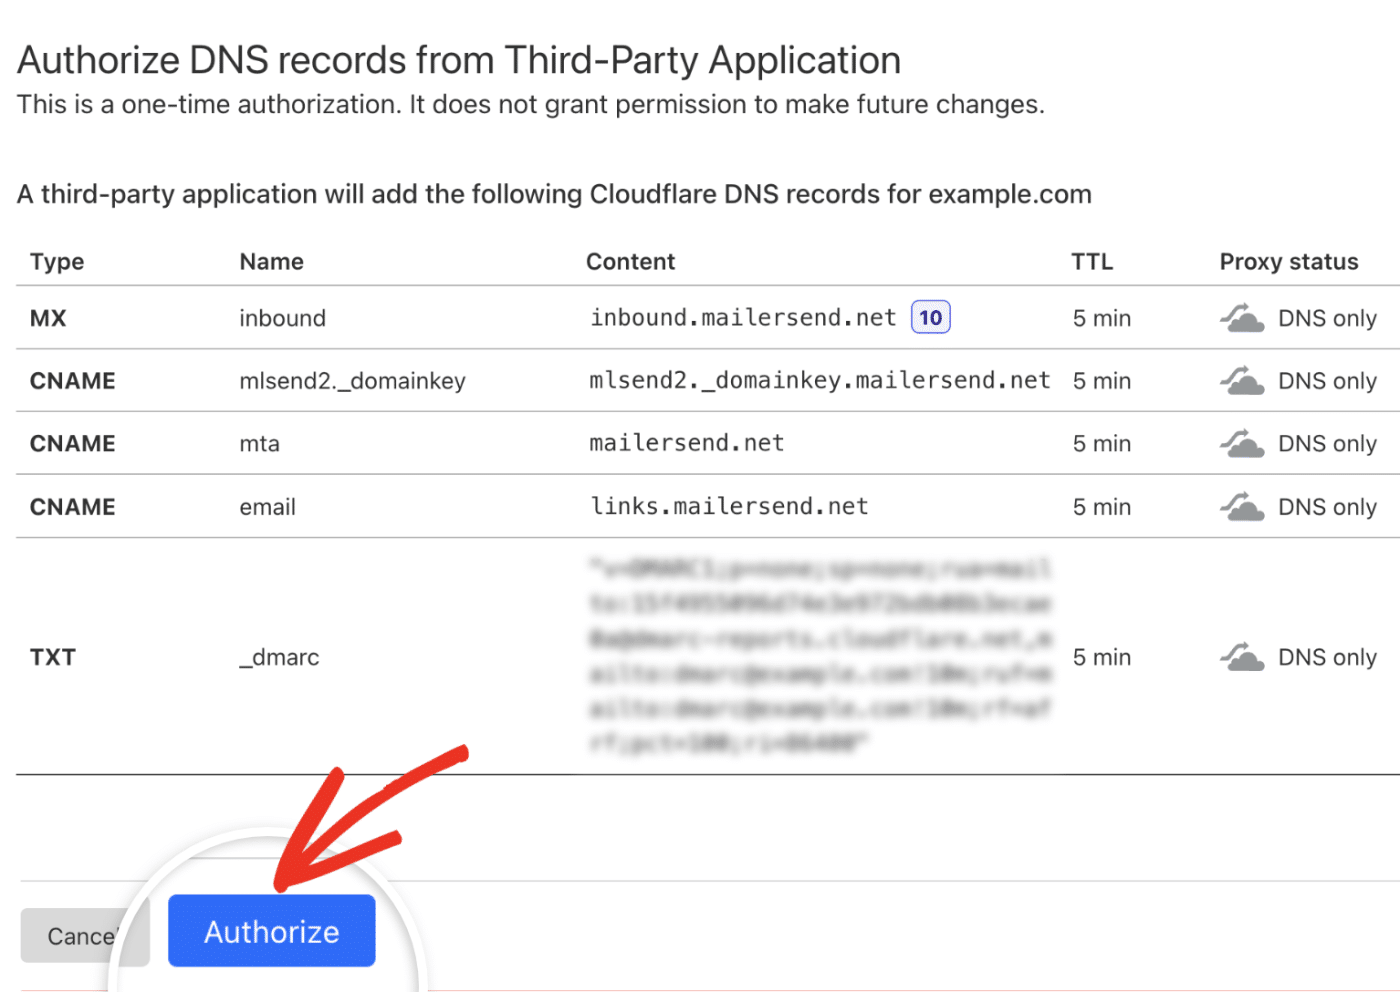
After clicking the button, you’ll be directed to your domain host’s dashboard. MailerSend will request permission to automatically add the required DNS records to your DNS settings. Go ahead and click the Authorize button to proceed.
Manually Verifying Your Sending Domain
If you prefer not to grant a third-party application access to your DNS settings, you can manually add the DNS records provided by MailerSend. To proceed, click the Go to our manual setup link.
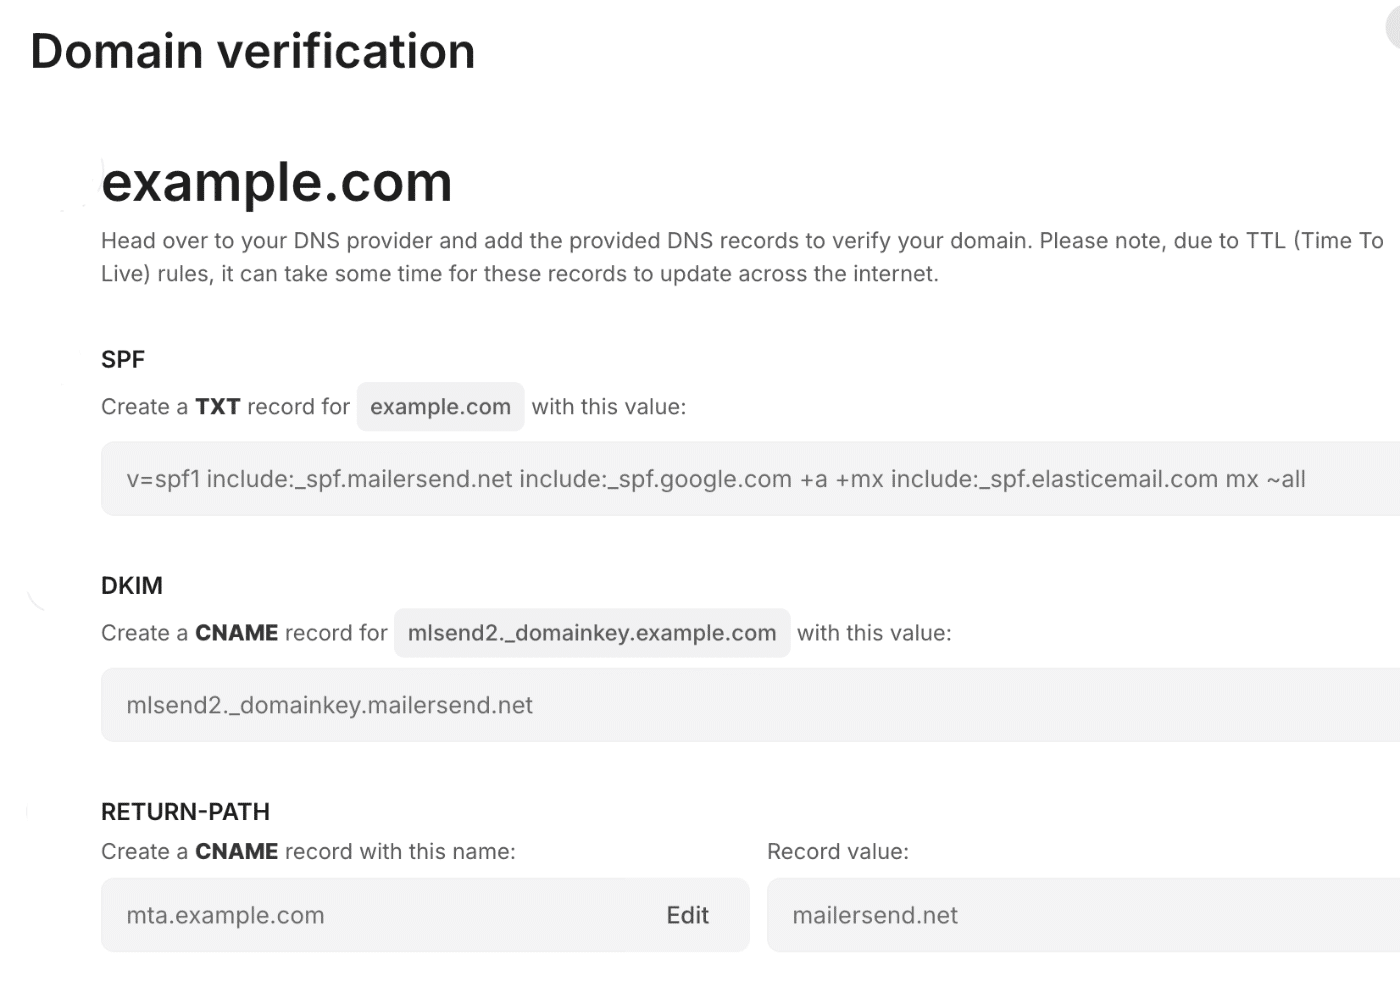
This will direct you to a page with all the DNS records you need to add for your domain verification.
Note: If you’re unsure where to find your site’s DNS settings or feel uncertain about making changes, please contact your site’s hosting provider before making adjustments.
Or, for more details, you can check out SendLayer’s tutorial on DNS settings.
Once you’ve located your domain’s DNS, you’ll need to add the 3 records MailerSend provides to your DNS settings.
Verifying Your DNS Records
After adding the DNS records, you’ll need to wait a few minutes for the DNS changes to propagate. Keep in mind that it might take up to 48 hours in some cases.
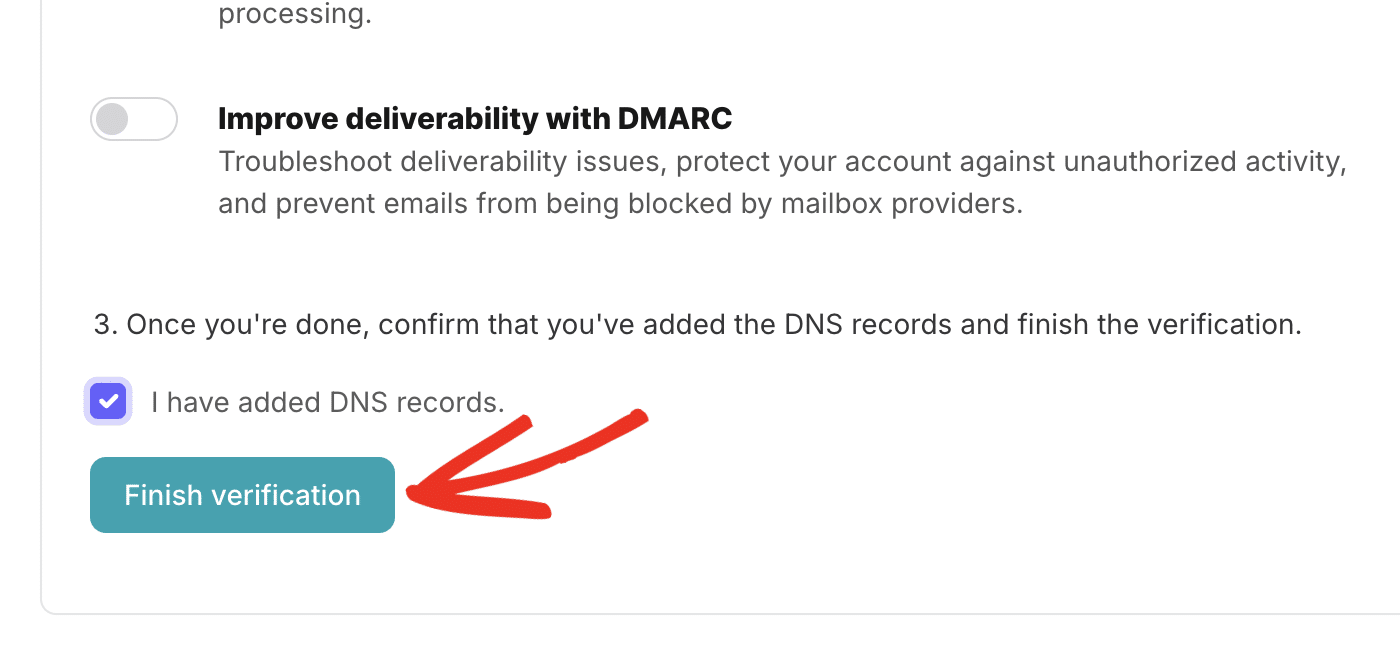
Next, scroll down and select the I have added DNS records checkbox.
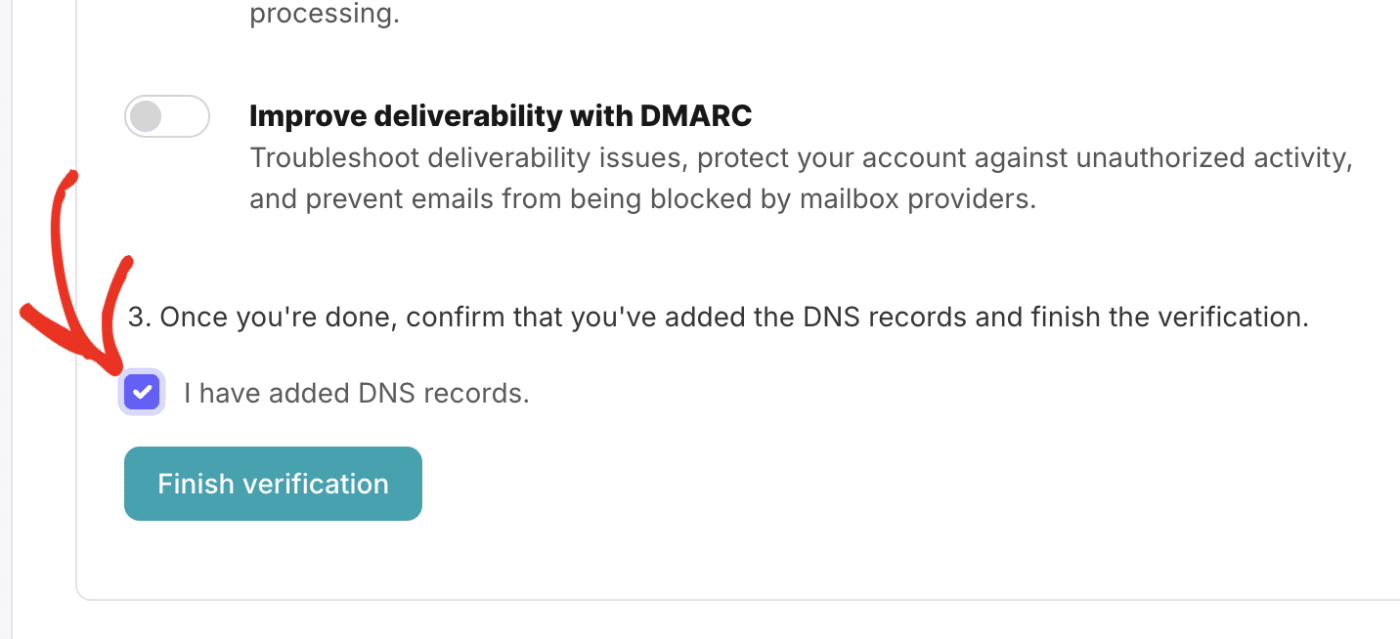
After that, click the Finish verification button to continue.
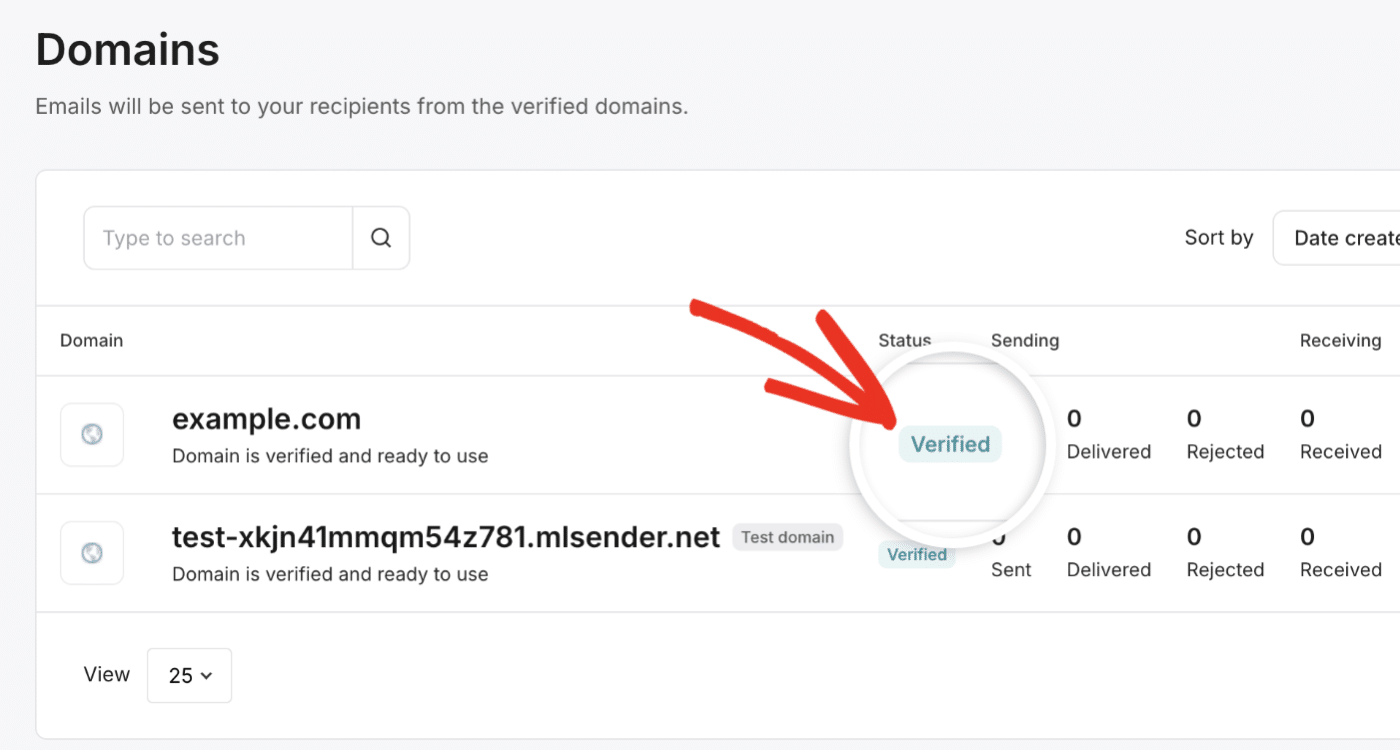
If your DNS records are propagated, you’ll see a Verified status next to the domain.
However, there’s no need to wait on this just yet! You can move ahead to the next step while you wait for this verification to complete. Just be sure to keep this tab or window open, as we’ll need it a little later.
3. Configuring Easy WP SMTP Settings
Once you’ve set up your MailerSend account, you can configure Easy WP SMTP to use MailerSend for sending emails.
To get started, navigate to Easy WP SMTP » Settings from your WordPress dashboard.

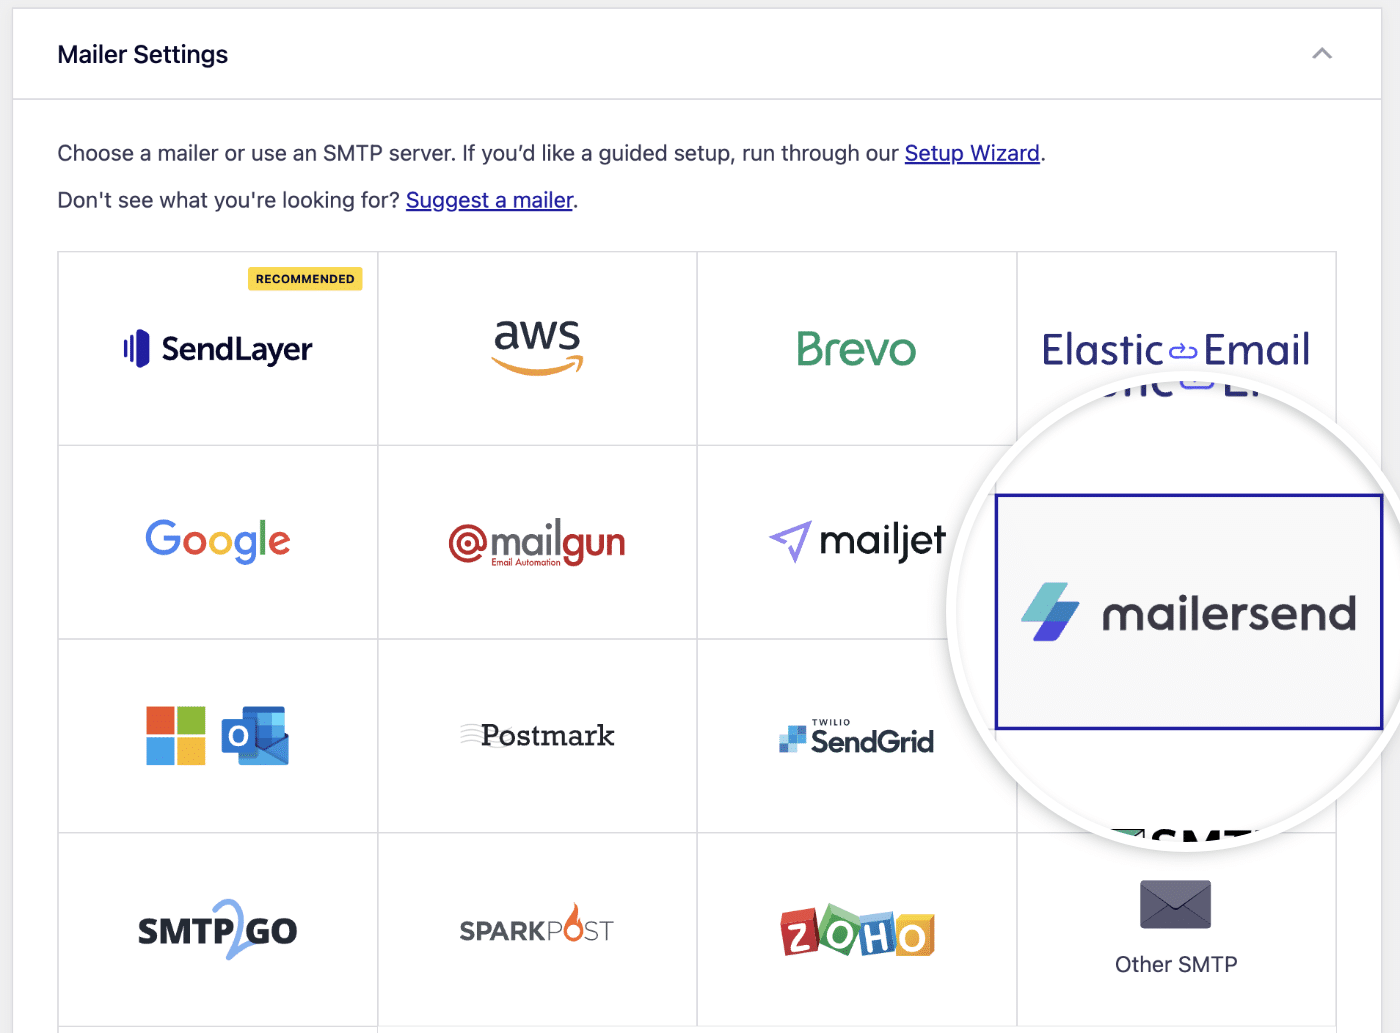
Mailer Settings
Next, scroll down to the Mailer Settings section and select MailerSend from the list of available mailers.
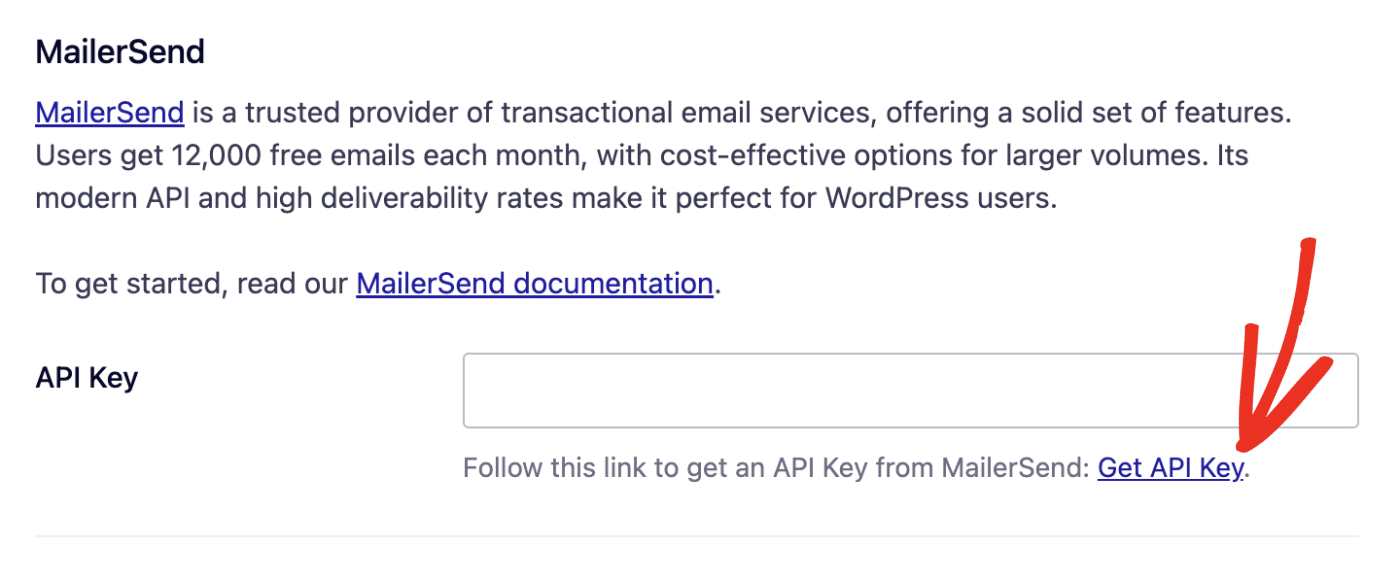
API Key
Once you’ve chosen MailerSend as your mailer, you’ll need to enter your API Key. To create your API key, click the Get API Key link.
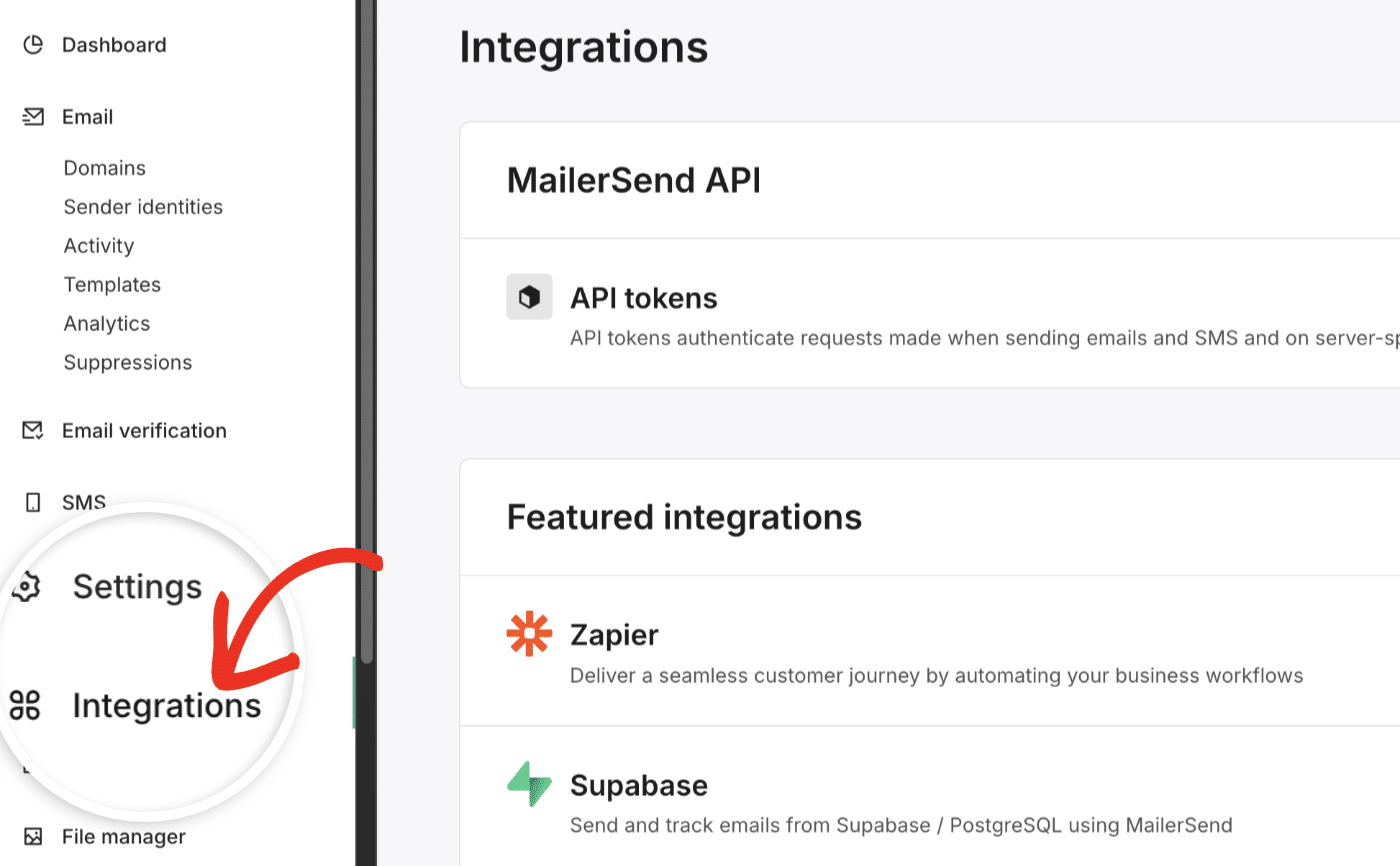
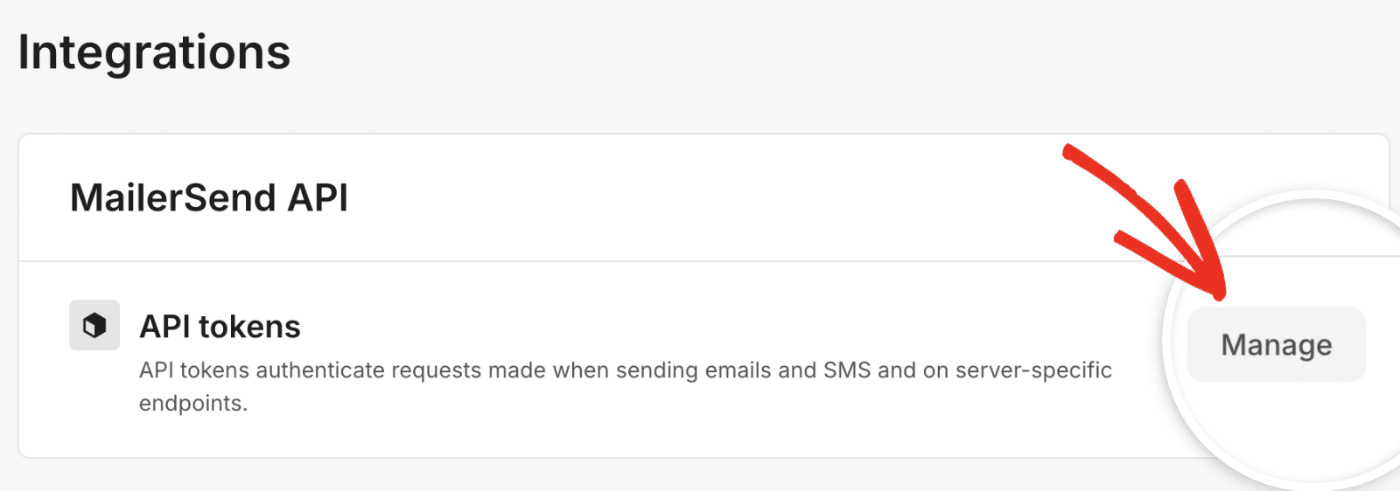
Alternatively, you can access this page from your MailerSend account by navigating to the Integrations page.
Then click on the Manage button next to API tokens.
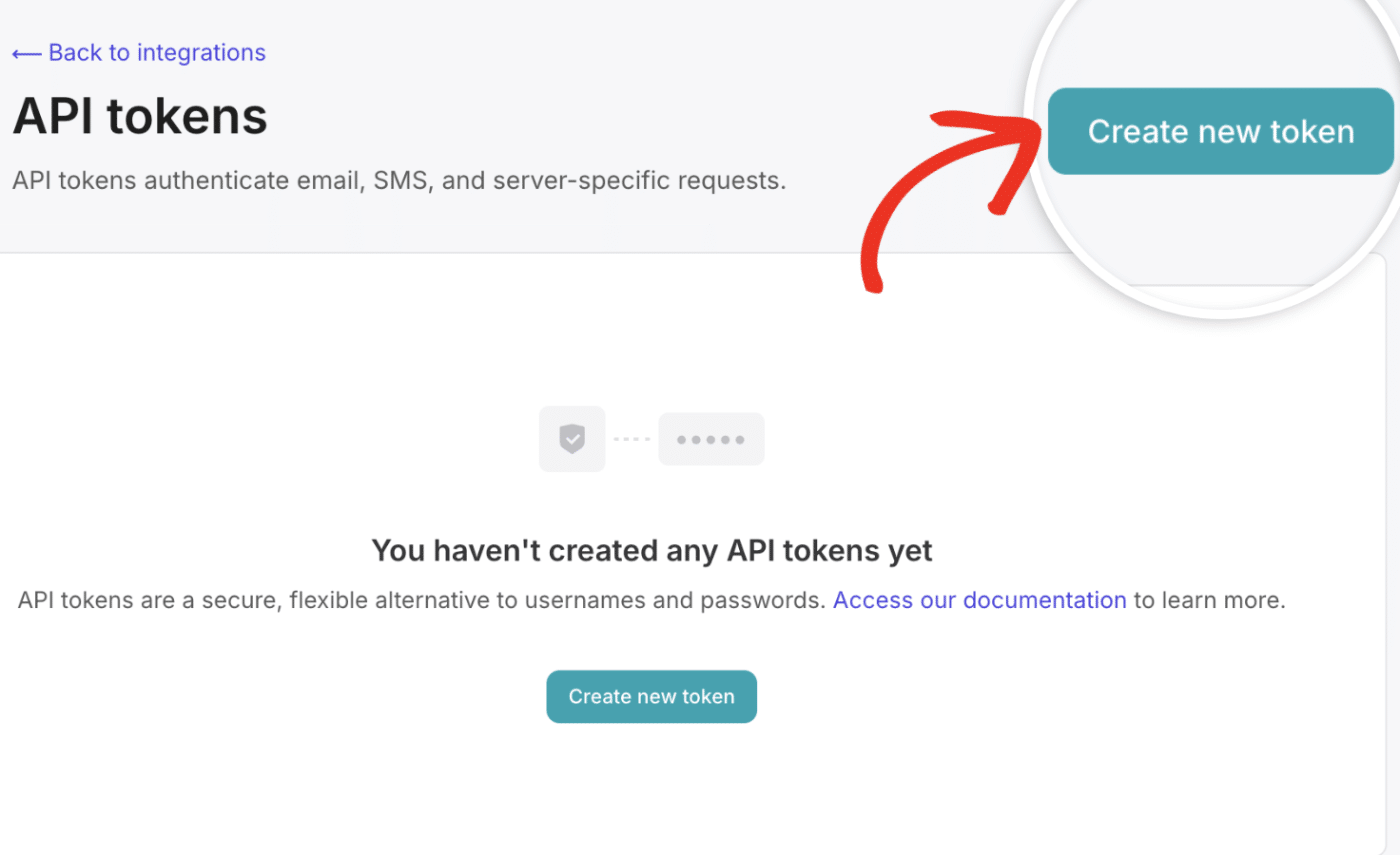
In the API tokens screen, you’ll see all your available API keys. To create a new key, click the Create new token button.
In the New API token page, you’ll need to specify a name for your token. This is for internal purposes only, so you can use any name you like.
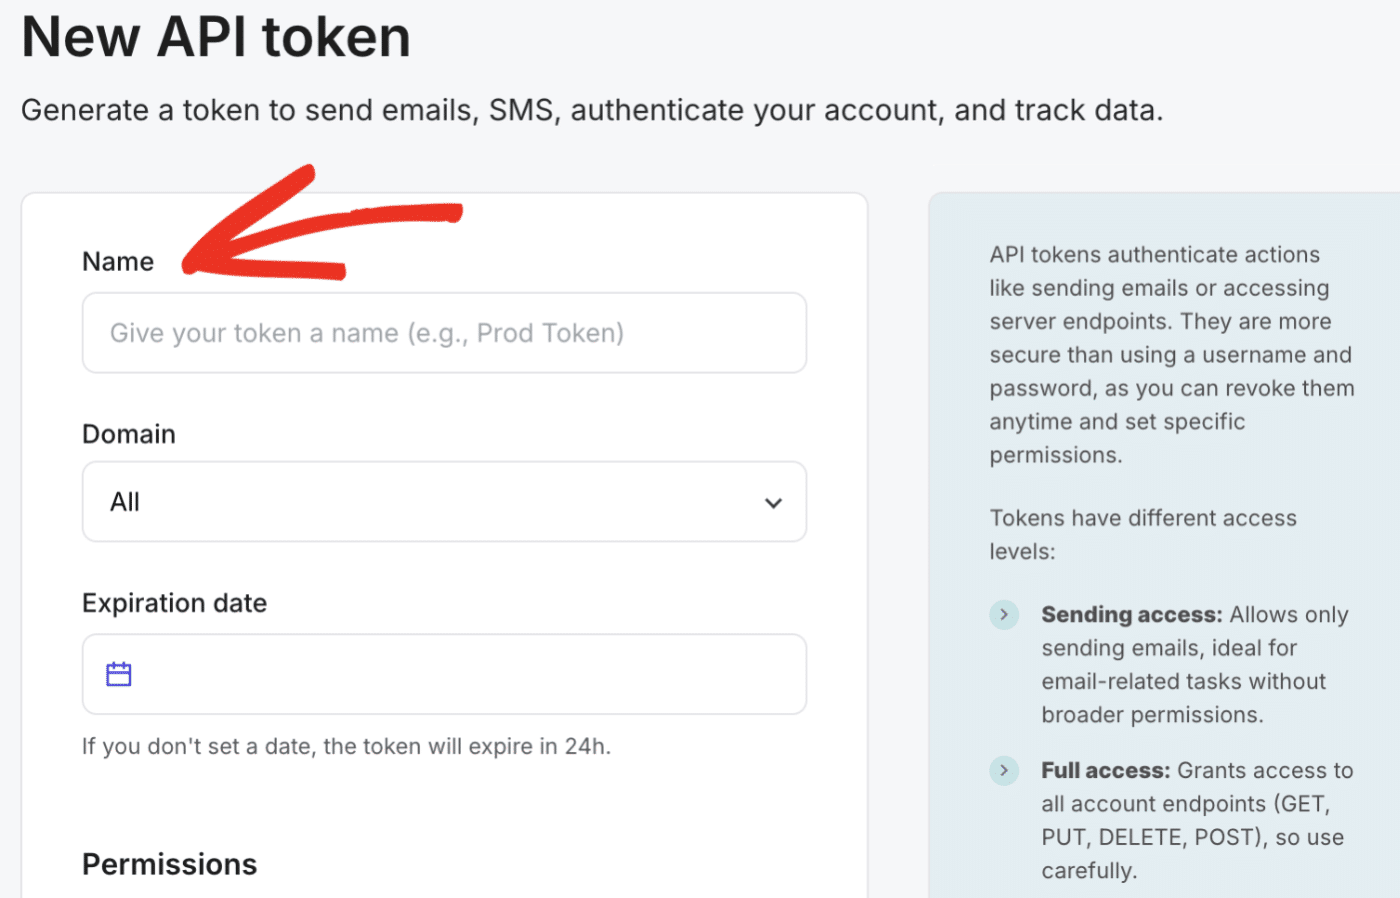
Next, you can choose the domain you’d like to restrict the API key to from the Domain dropdown. Leaving it set to All will make your API key usable for all domains on your account.
In the Expiration date field, choose a future date like a 1-year or 2-year validity period. If you don’t specify a date, the API token will expire after 24 hours.
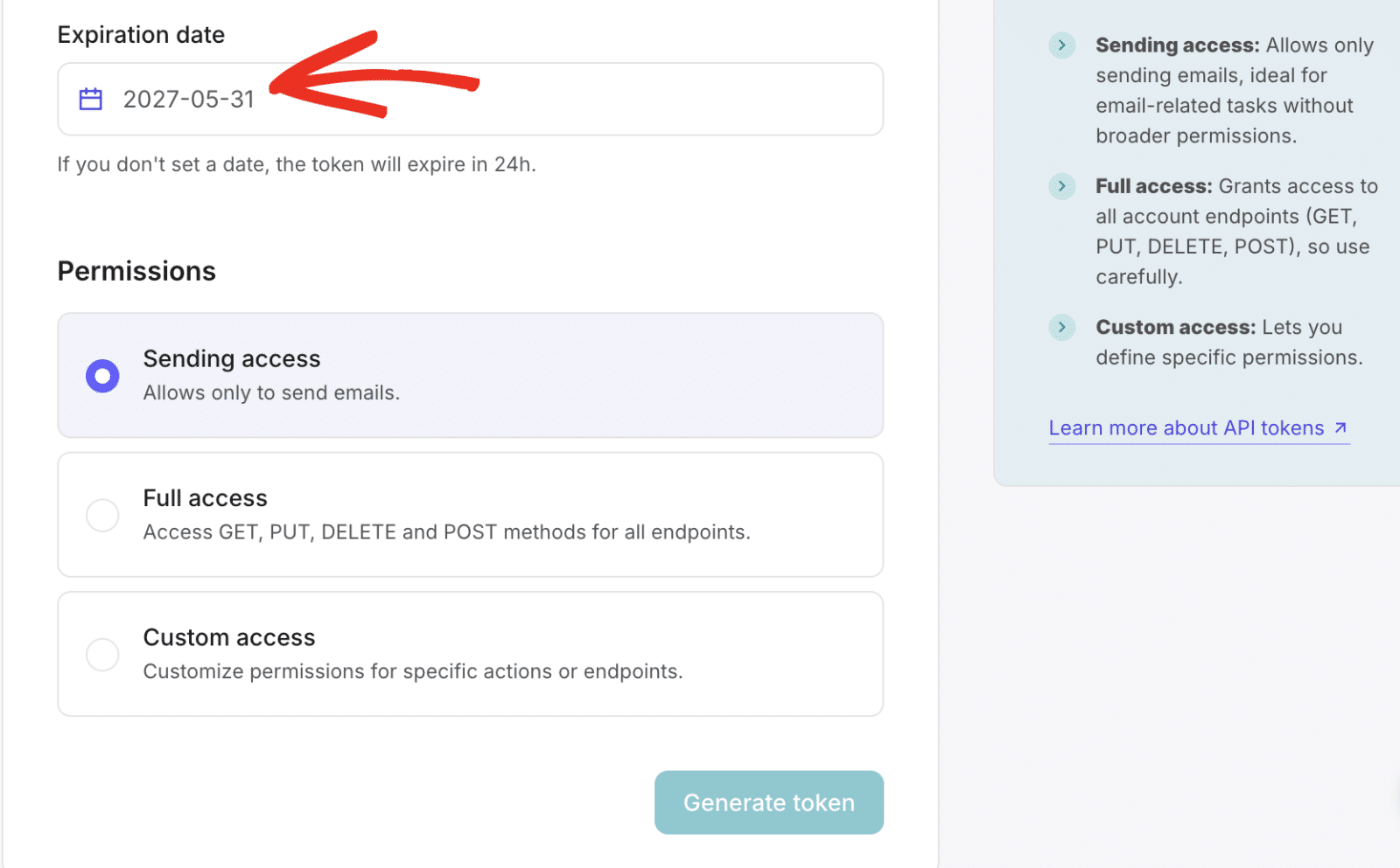
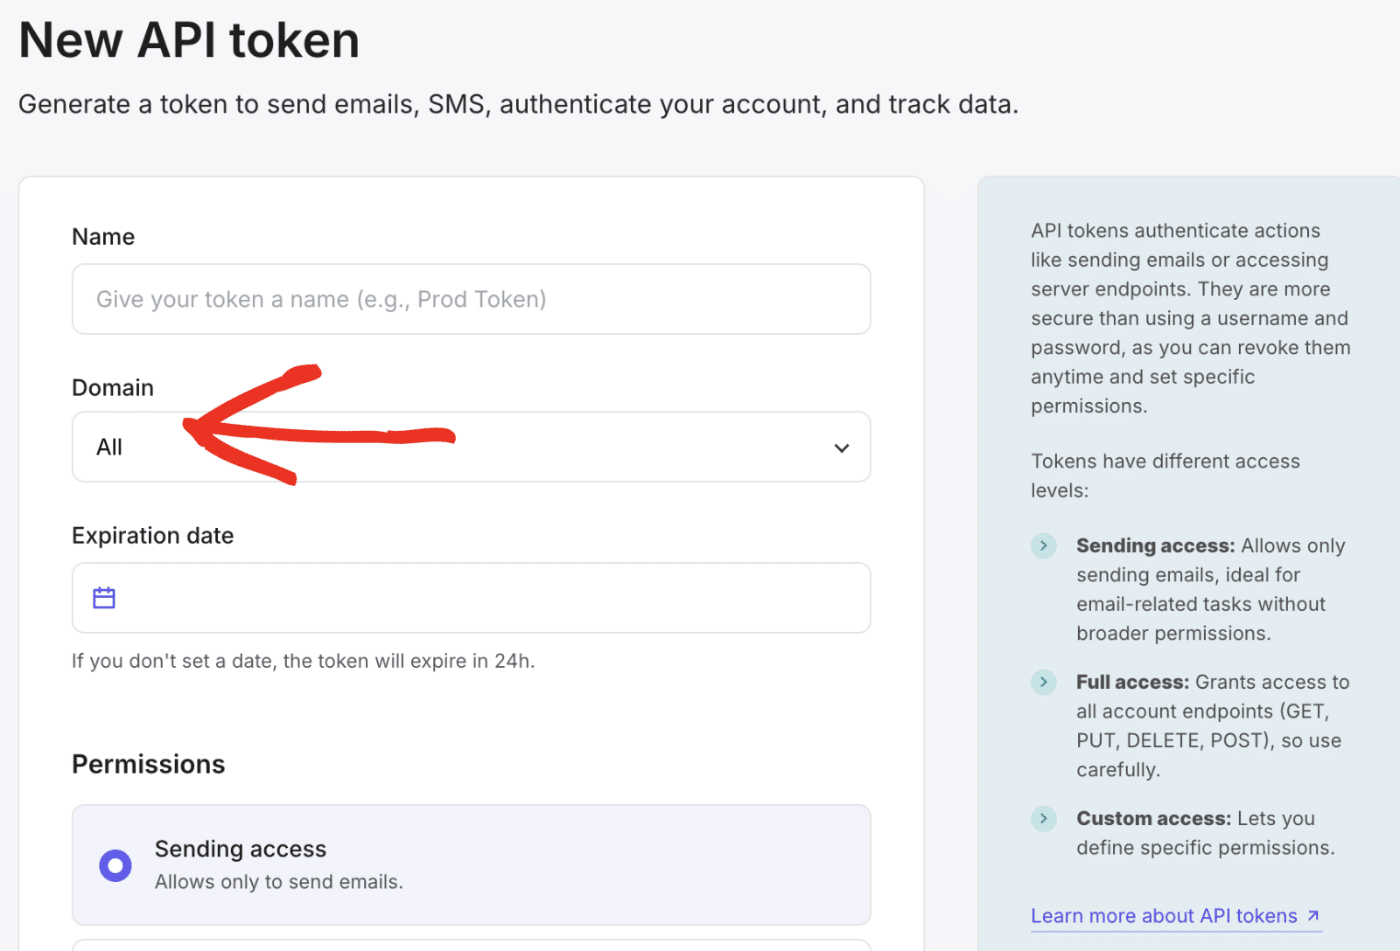
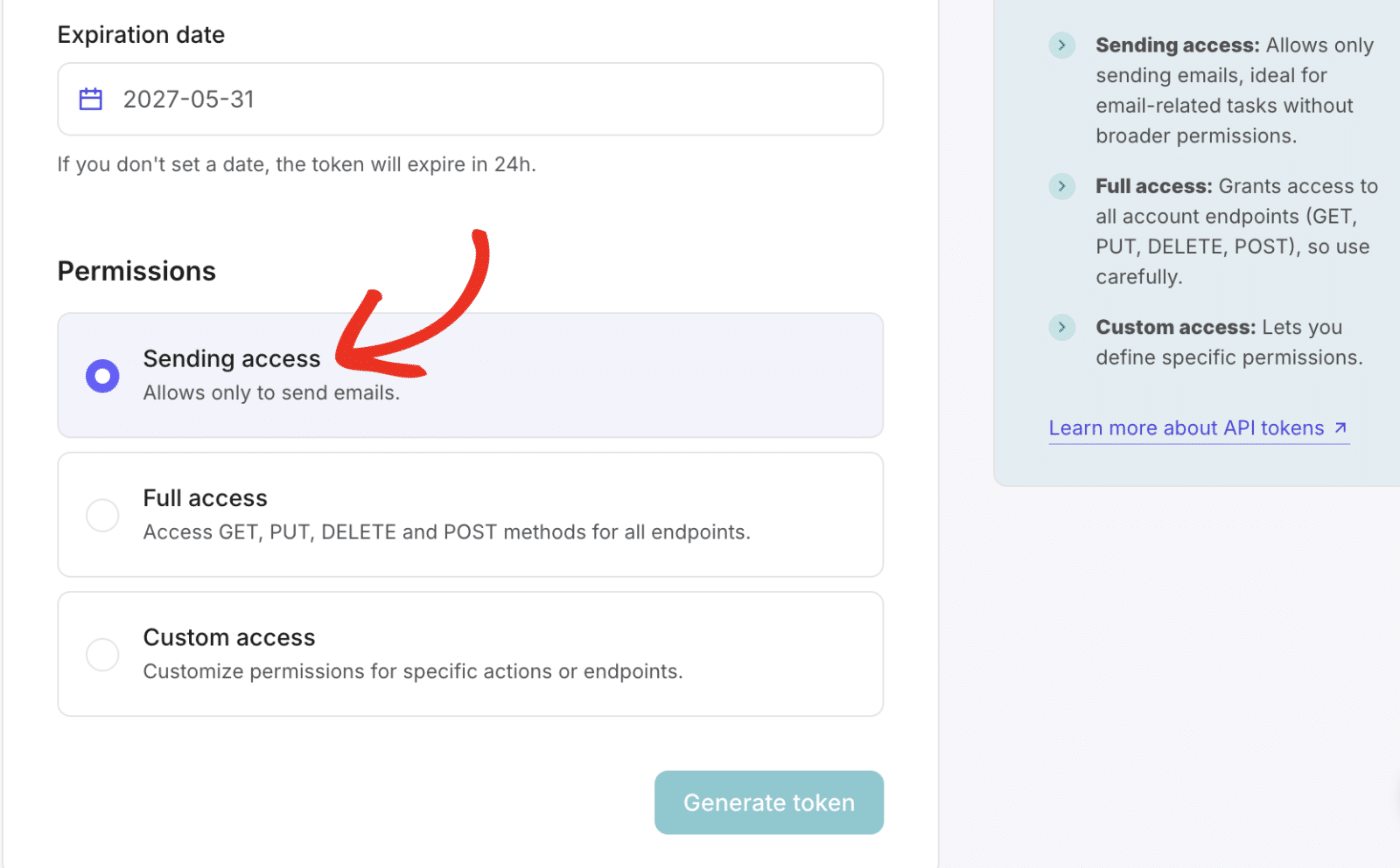
You can leave the Permissions option set to Sending access. This will limit the API key access to only sending emails.
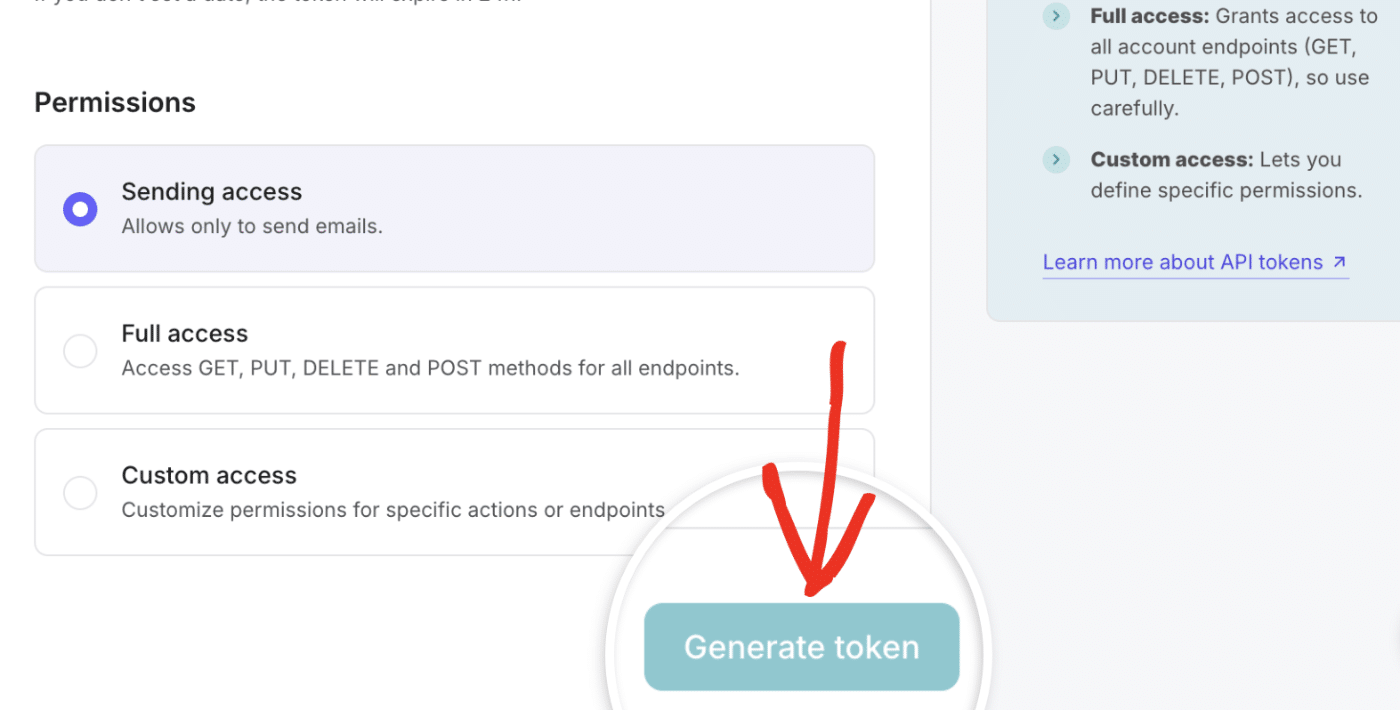
Once done, click Generate token to create your API key.
This will generate an API key for your account. Click on the generated token to copy its value.
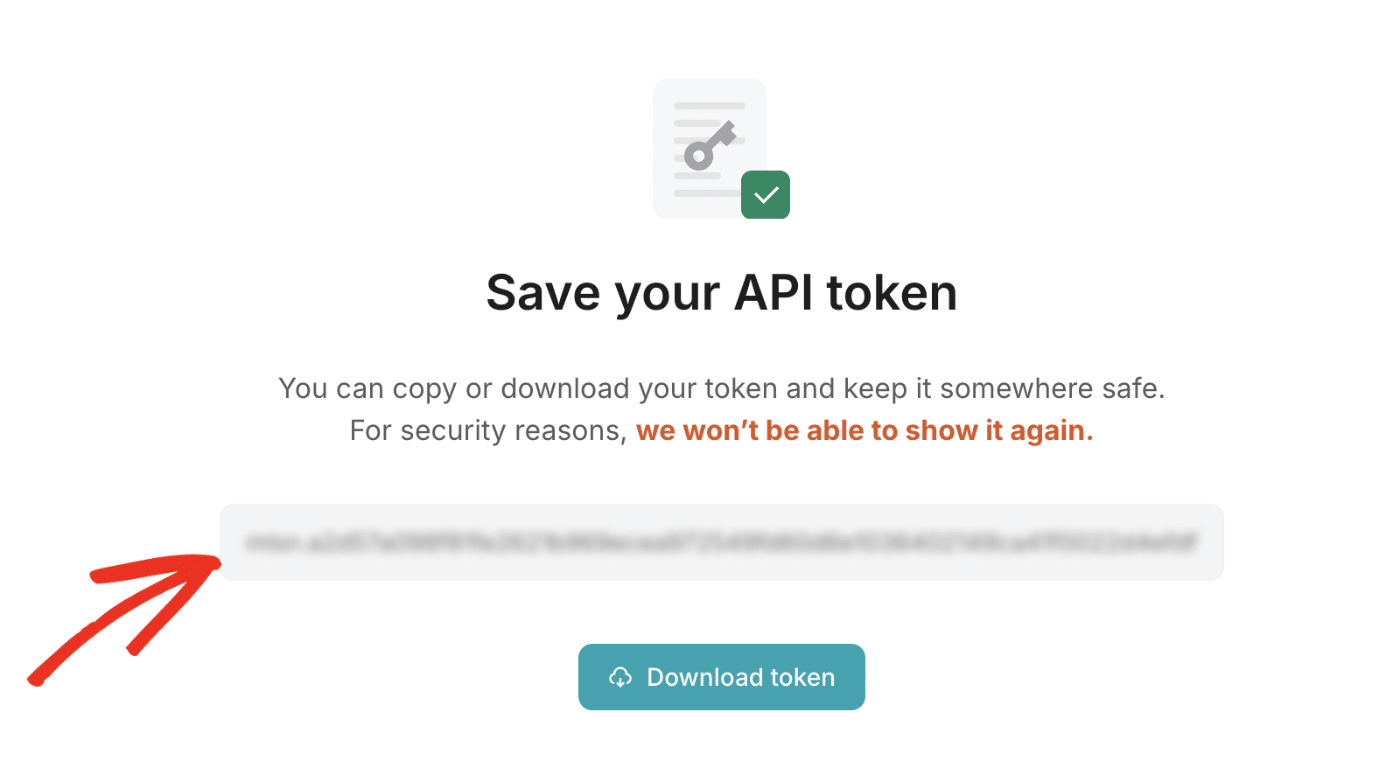
Note: You won’t be able to access the API key after closing this page. Be sure to back it up securely in case you need to refer to it again.
After copying the API token, return to your WordPress site’s Easy WP SMTP settings page. Then paste the key you just copied from MailerSend into the API Key field.
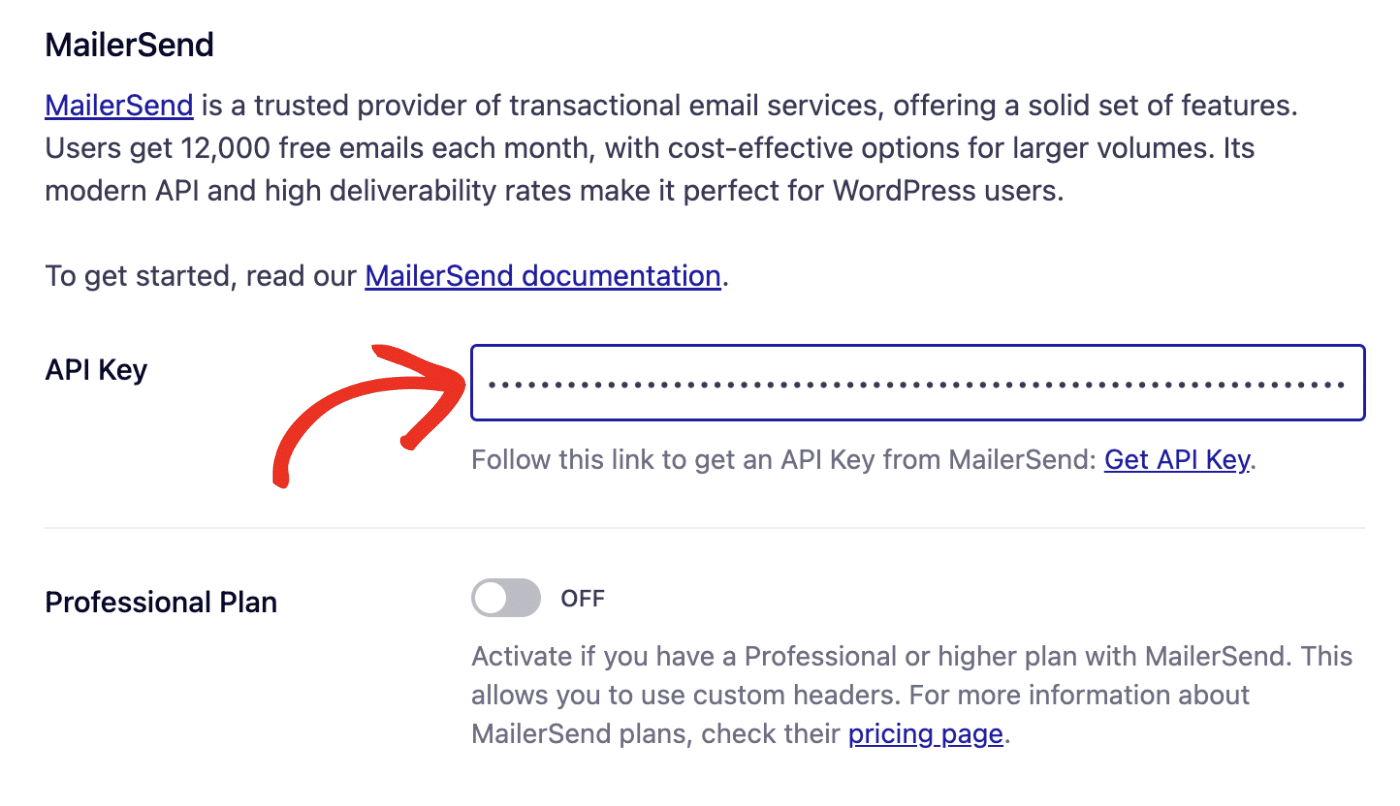
Note: If you have a paid MailerSend account, you can enable the Professional Plan option. This allows you to customize your WordPress site’s email headers.
General Settings
From Email Address
By default, the From Email Address field will be filled with your site’s admin email.
You can use any valid domain-specific email address for the From Email Address (e.g. [email protected]).
You also have the option to enable the Force From Email if you want the From Email Address to be the same site-wide.

From Name
The From Name is the name that appears in the emails sent from your site, letting the recipient know who sent the email. By default, the From Name is set to your site’s name. However, you can change the name to whatever you’d like.
Similarly, you can enable the Force From Name toggle to apply the settings site-wide.

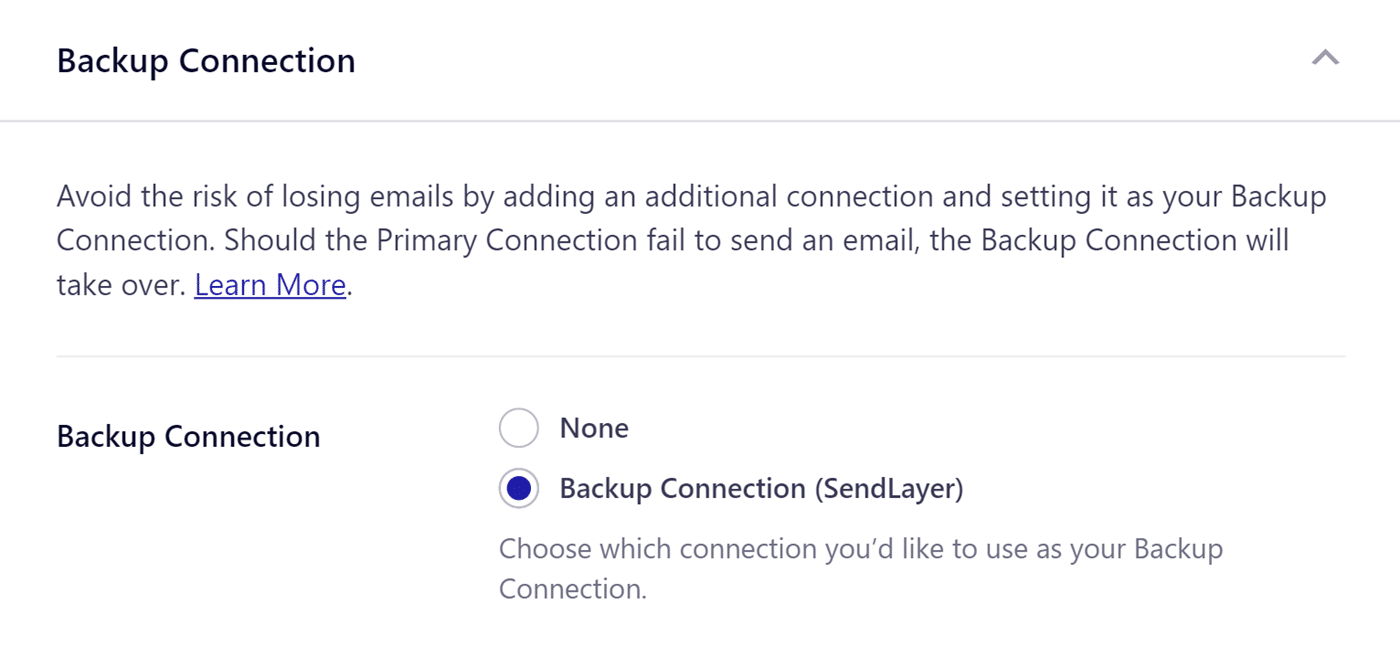
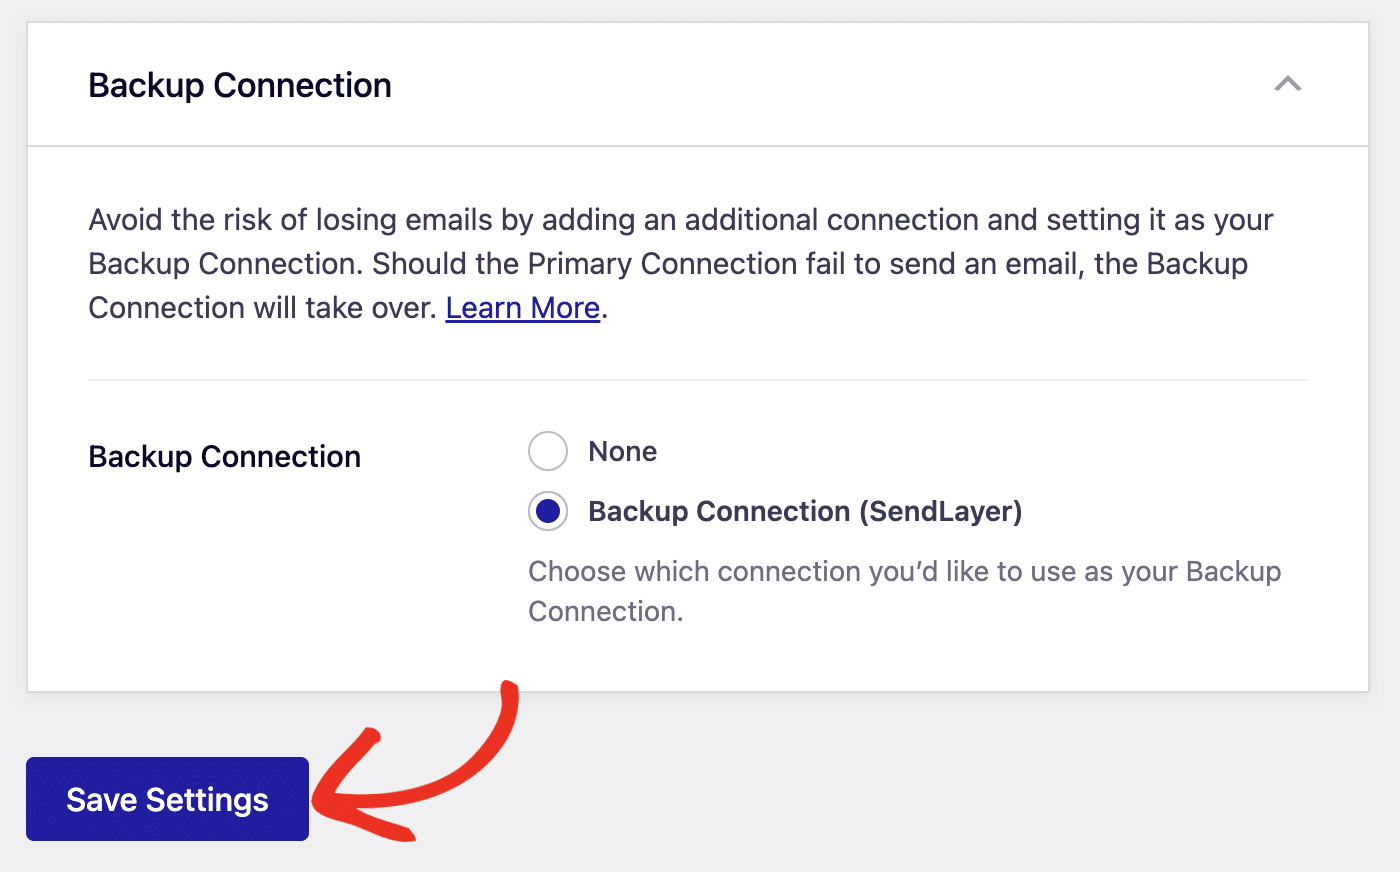
Backup Connection
Configuring a Backup Connection is an optional step in your MailerSend mailer setup. However, to further improve email deliverability, we recommend configuring an additional connection to serve as a backup in case your Primary Connection fails.
Note: If you’d like to learn how to send emails through different connections based on specific rules, please refer to our Smart Routing tutorial.
Once you’re done configuring the mailer settings, be sure to click Save Settings to register your changes.
That’s it! You’ve successfully set up the MailerSend mailer with Easy WP SMTP.