In this tutorial, we’ll cover how to set up the SendLayer mailer in Easy WP SMTP using the Quick Connect feature.
Before getting started, make sure Easy WP SMTP is installed and activated on your WordPress site.
1. Selecting SendLayer as Your Mailer
To get started, go to Easy WP SMTP » Settings from your WordPress dashboard.

Scroll down to the Mailer Settings section. From the list of available mailers, click SendLayer to select it.

After selecting SendLayer, its connection options appear below the mailer picker. Click Quick Connect to begin setting up your SendLayer account.

2. Creating Your SendLayer Account
A SendLayer popup window opens. Fill in your Email, First Name, Last Name, and Password, then click Sign Up.
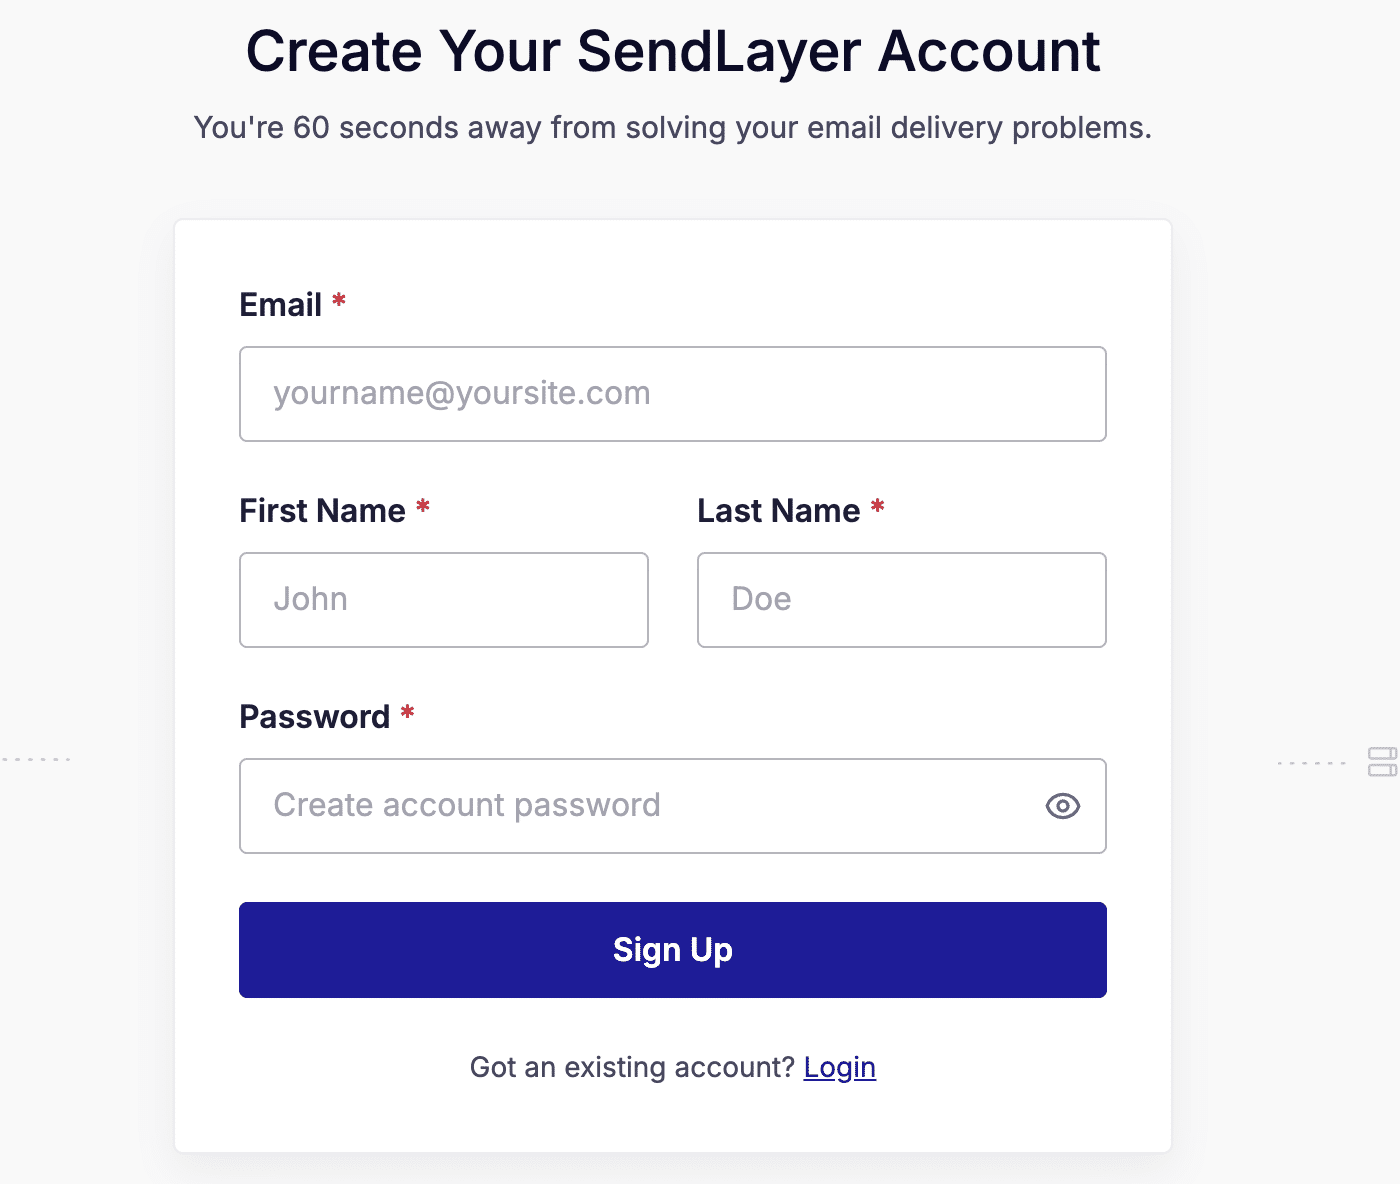
Note: If you already have a SendLayer account, click the Login link at the bottom of the form to sign in instead of creating a new account.
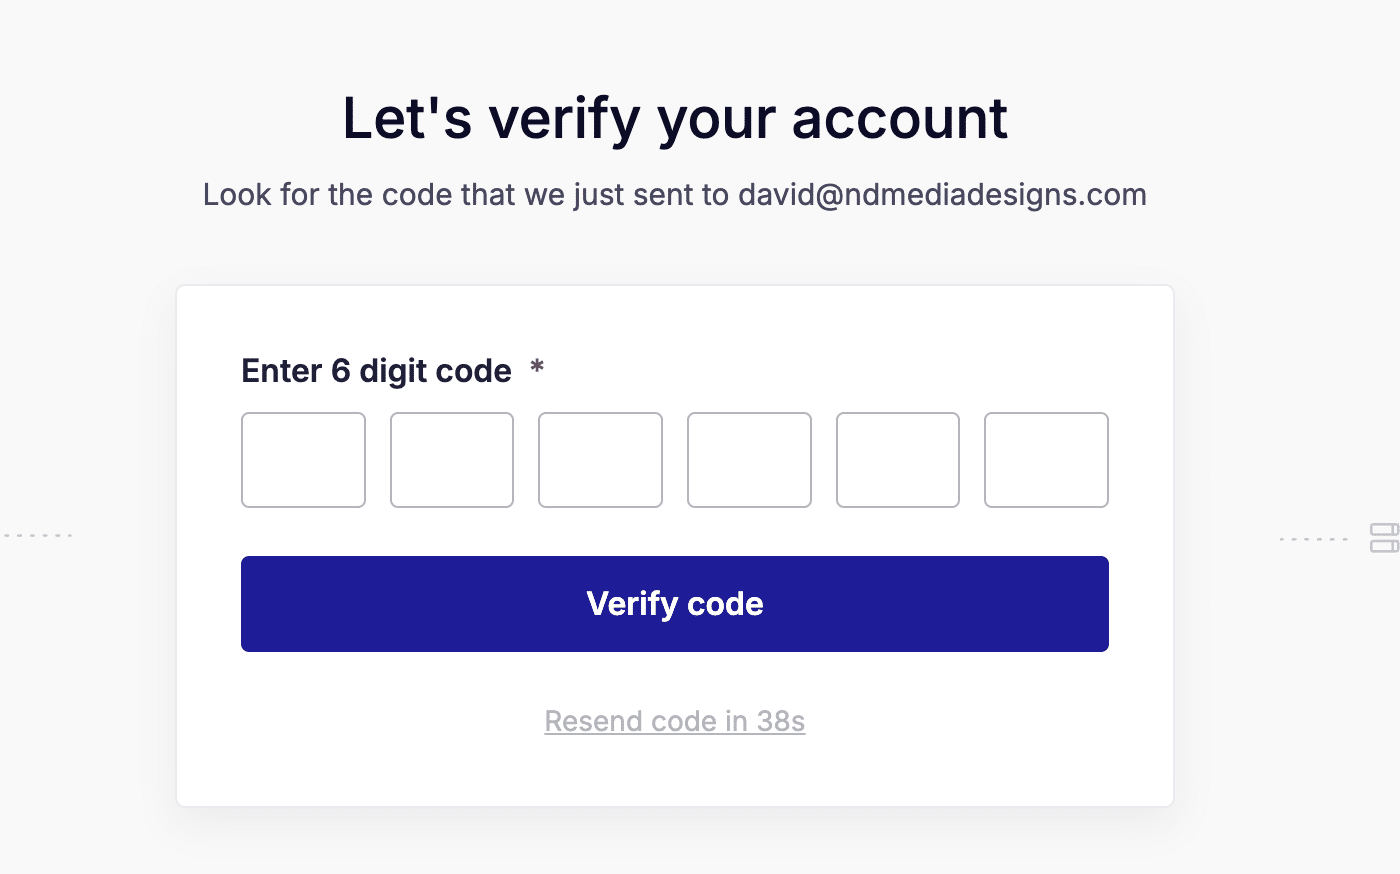
After clicking Sign Up, SendLayer sends a 6-digit verification code to the email address you provided. Enter the code in the boxes, then click Verify code.
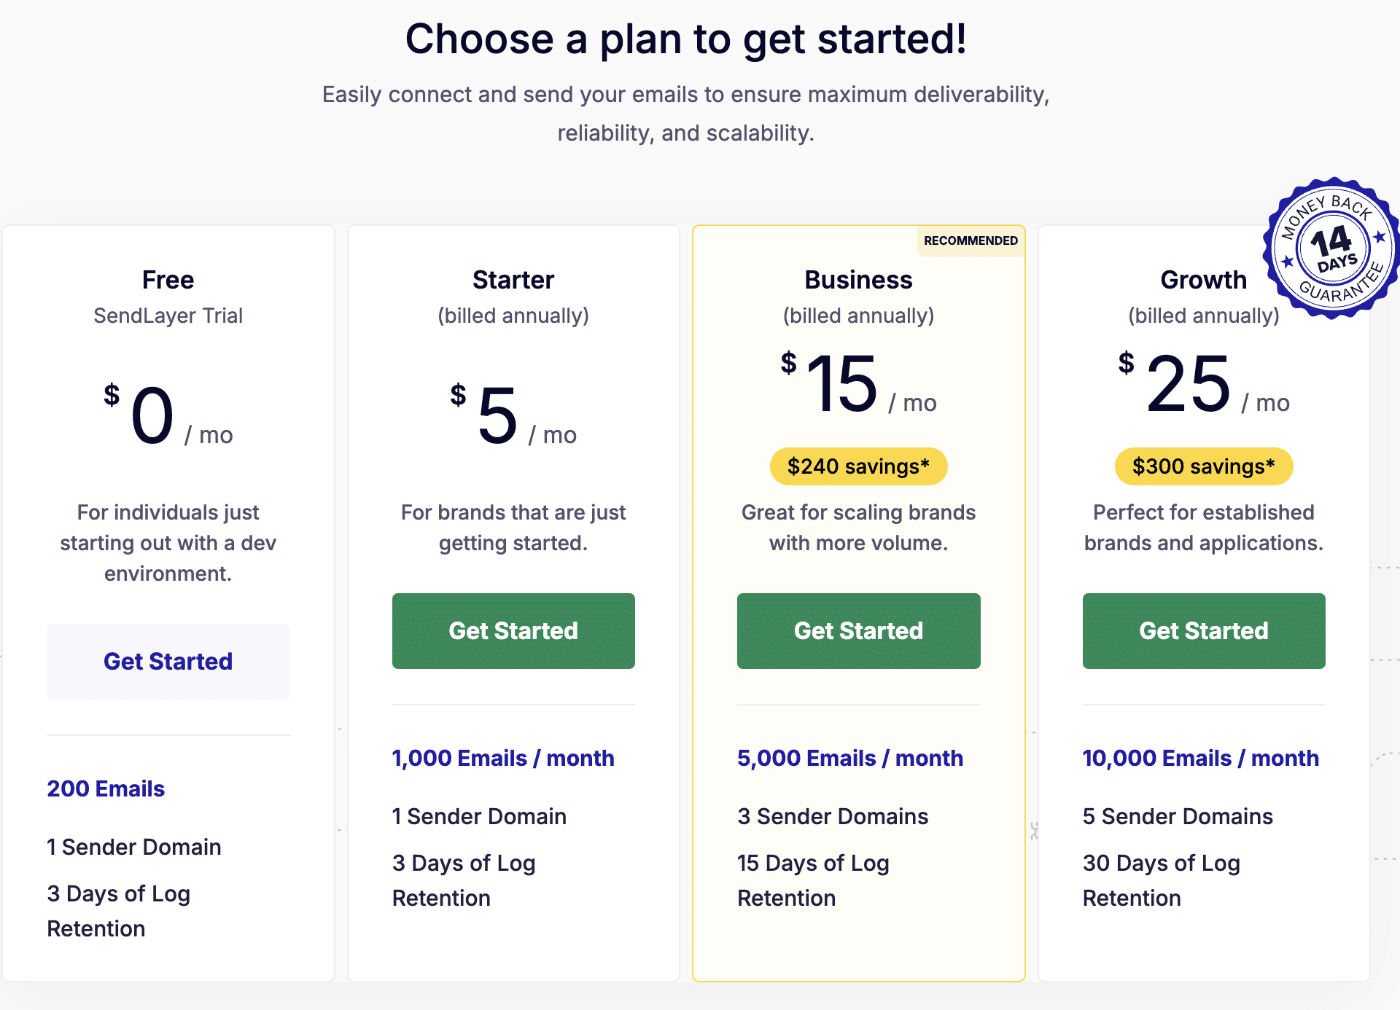
Once your account is verified, choose a SendLayer plan. The Free plan includes 200 emails and 1 sender domain, which is a great way to get started.
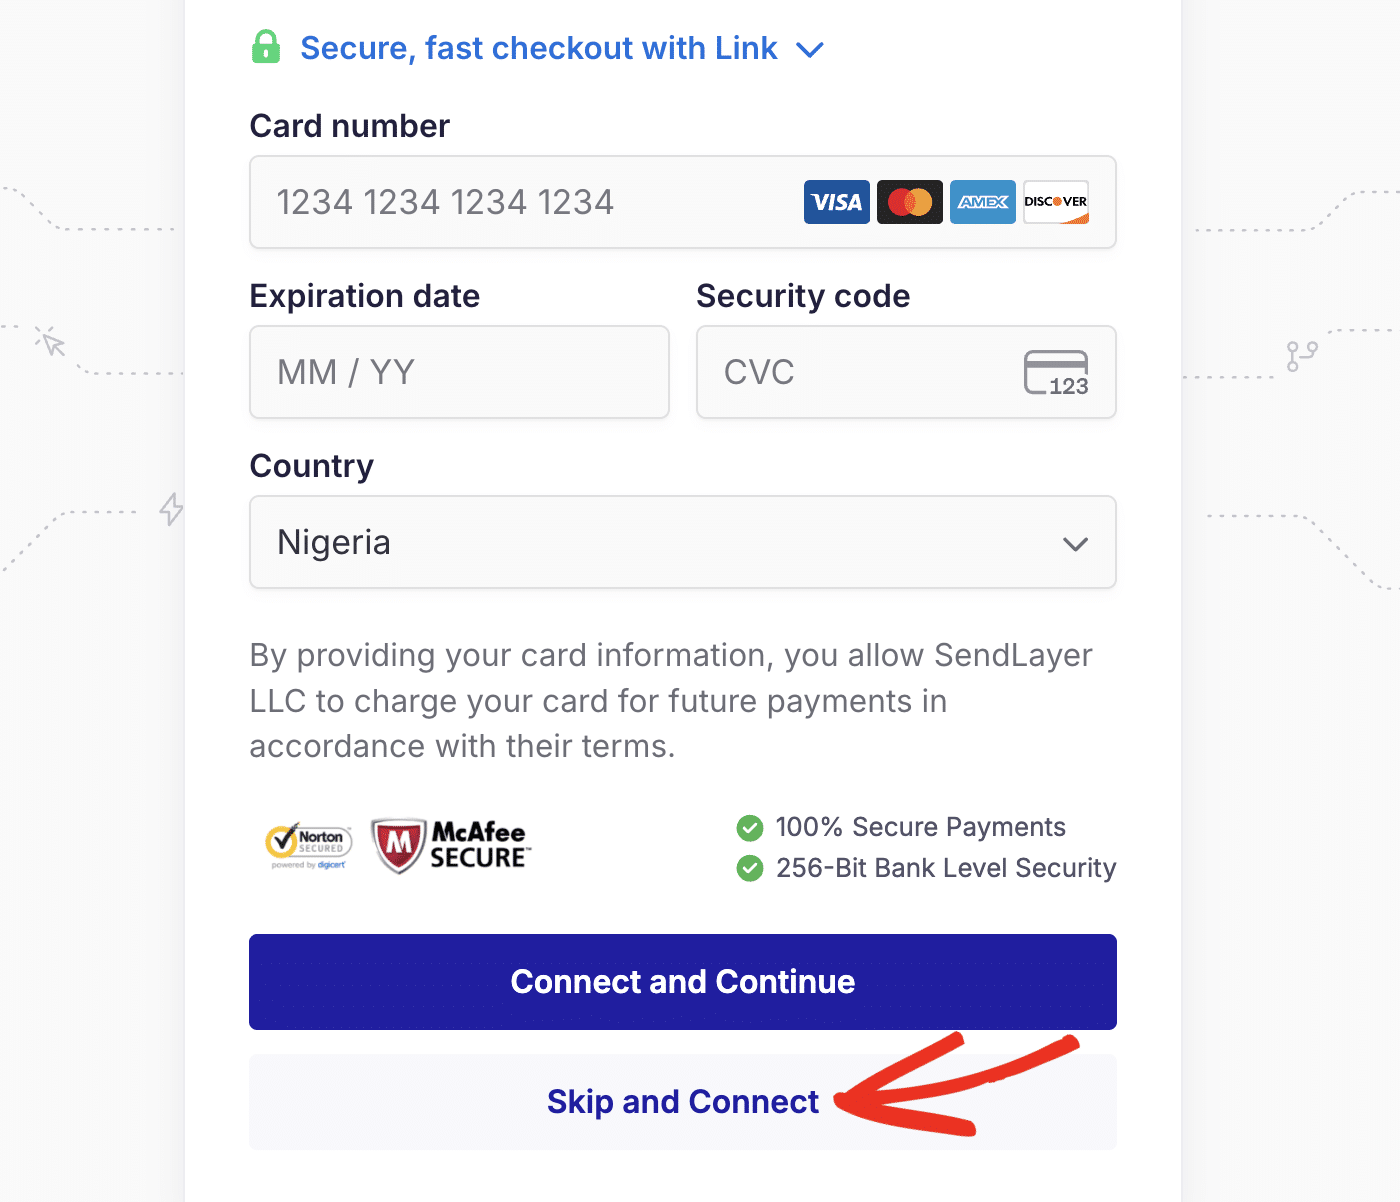
On the next screen, you’ll be asked to enter payment details to enable automatic upgrades when your free emails run out. To skip this and connect now, click Skip and Connect.
After that, choose the Shared Domain option and click Connect.
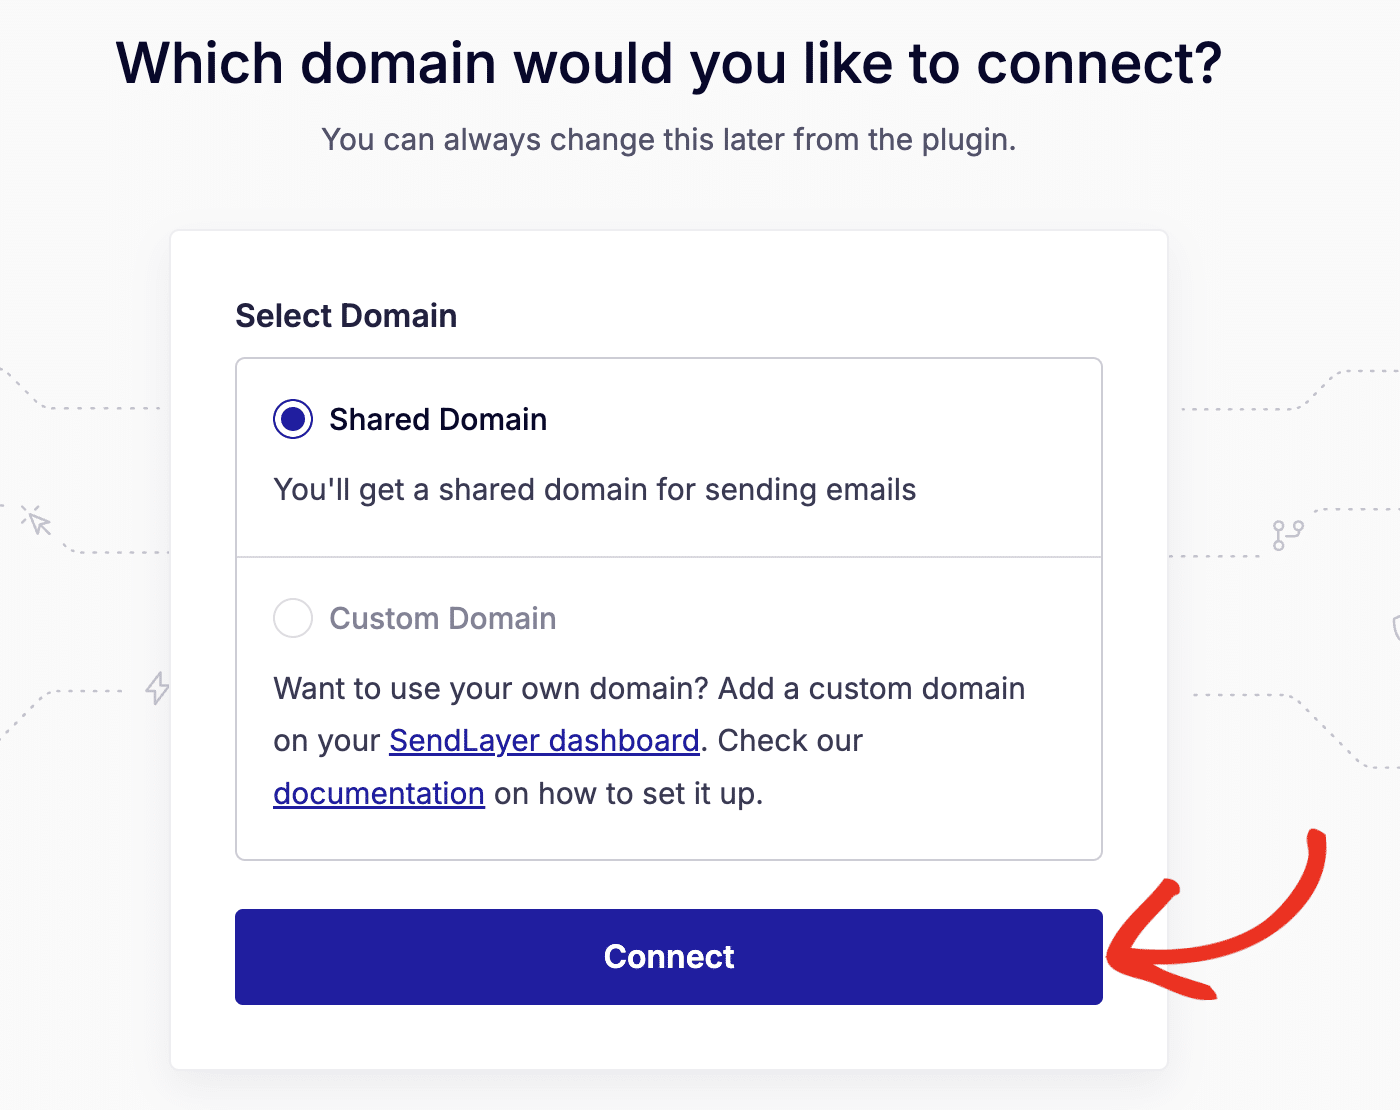
When selected, SendLayer creates a verified shared domain for your account. You should see a success notification once the process completes.

3. Configuring Easy WP SMTP Settings
After the pop-up closes, you’ll be redirected back to the Easy WP SMTP settings page. The setup creates a shared domain, generates an API key, and automatically connects your site to the SendLayer mailer.
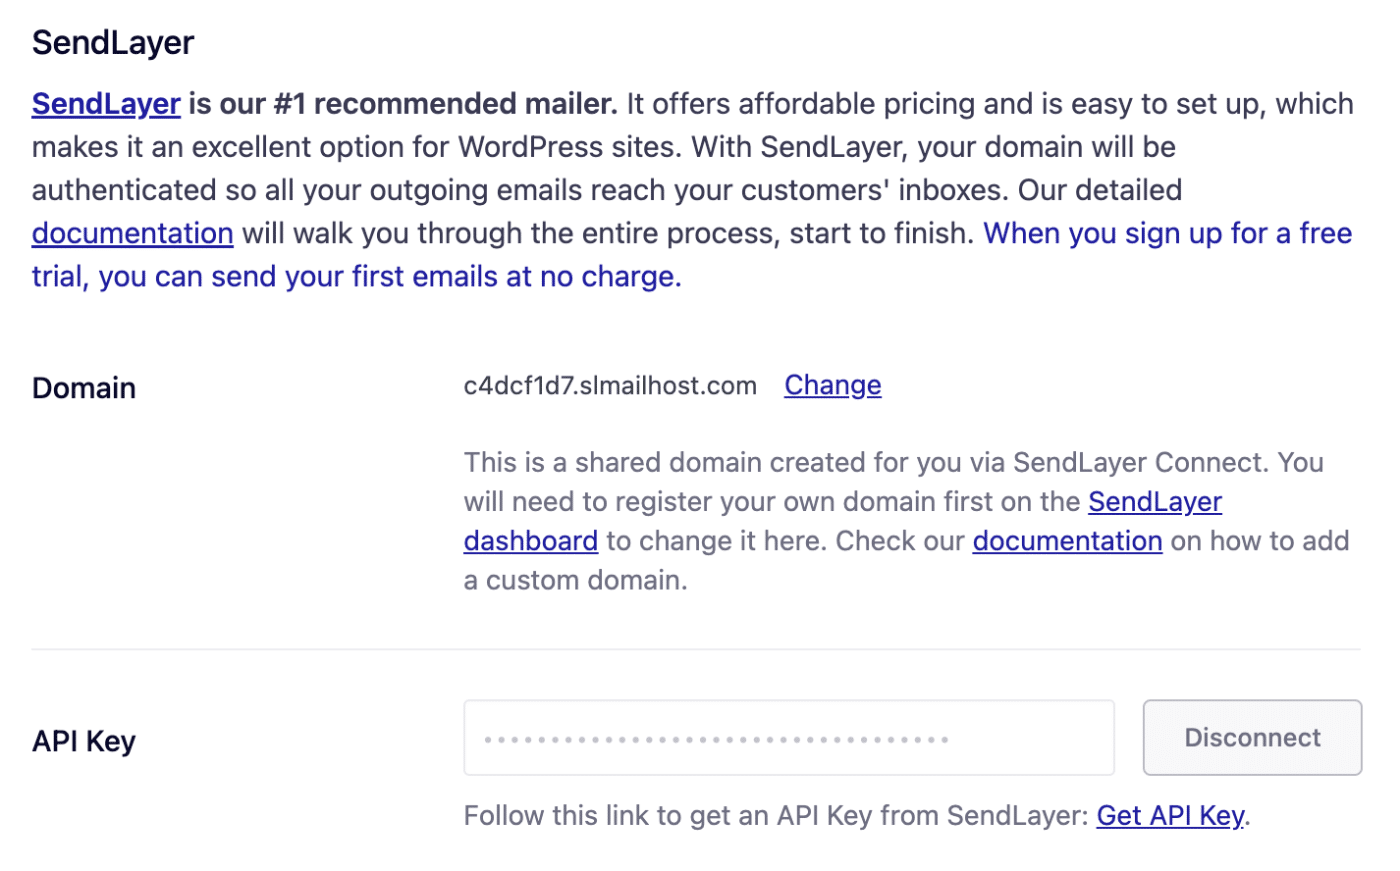
Note: The Domain field shows a shared SendLayer domain automatically created for your account. To send from your own domain, first register it in the SendLayer dashboard and then click Change to update the domain here.
General Settings
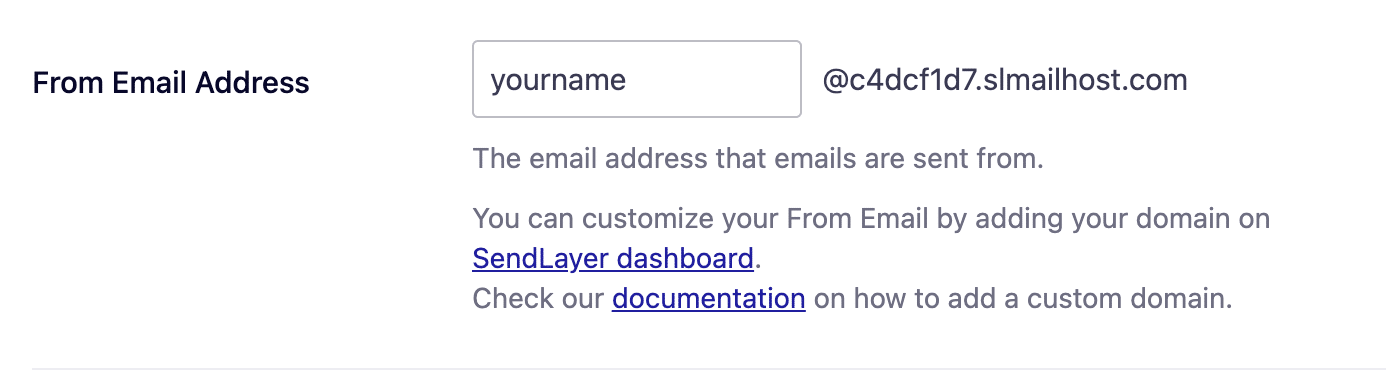
From Email Address
The From Email Address is the email address your WordPress site’s emails are sent from. After Quick Connect, this field is automatically populated with your username and your shared SendLayer domain.
Update the username portion to match the name or role you want emails to come from, such as [email protected].
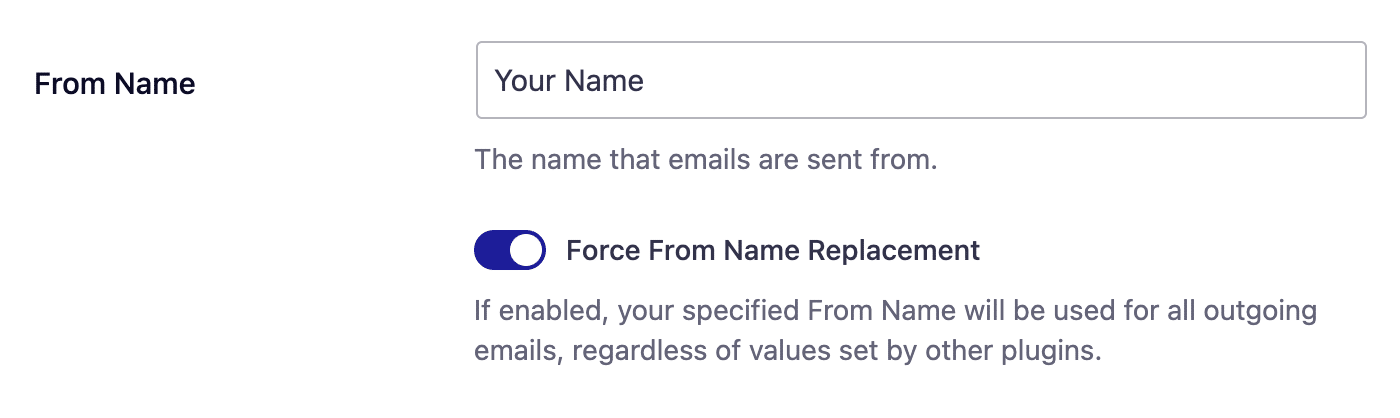
From Name
The From Name is the name that appears in the emails sent from your site, letting the recipient know who sent the email. By default, the From Name is set to your site’s name. However, you can change the name to whatever you’d like.
Similarly, you can enable the Force From Name toggle to apply the settings site-wide.
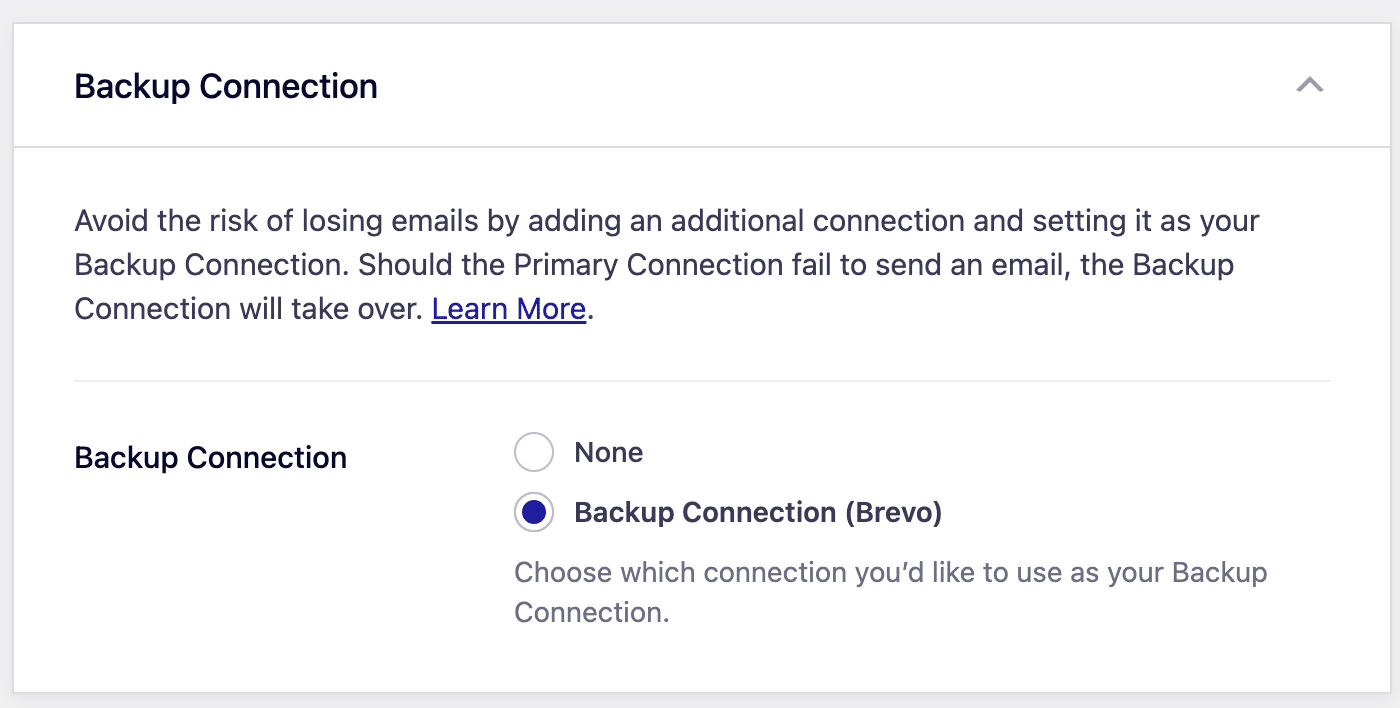
Backup Connection
Configuring a Backup Connection is an optional step in your Brevo mailer setup. However, to further improve email deliverability, we recommend configuring an additional connection to serve as a backup in case your Primary Connection fails.
Note: If you’d like to learn how to send emails through different connections based on specific rules, please refer to our Smart Routing tutorial.
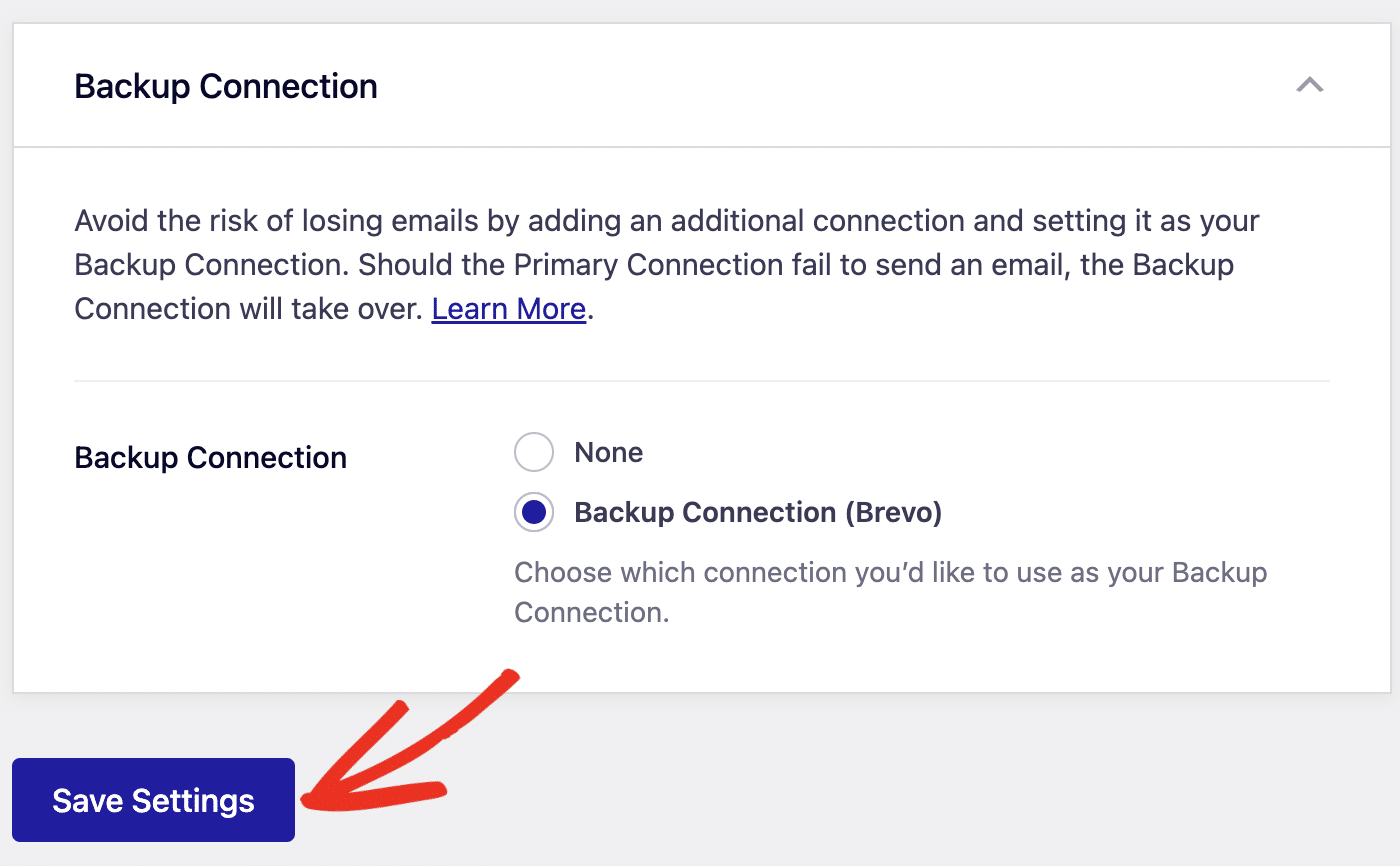
Once you’re done configuring the general settings, be sure to click Save Settings to save your changes.
That’s it! You’ve now successfully connected SendLayer to Easy WP SMTP using Quick Connect.