In this tutorial, we’ll cover how to use the SMTP2GO mailer with Easy WP SMTP.
Before getting started, you’ll need to ensure Easy WP SMTP is installed and activated on your WordPress site.
Configuring Your SMTP2GO Account
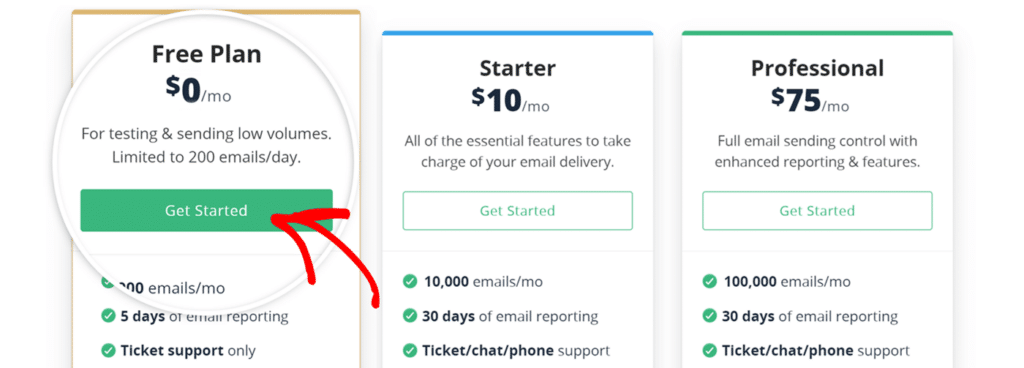
To use SMTP2GO, create an account and verify your sender domain. Start by visiting SMTP2GO’s pricing page and choosing a plan (we’ll use the Free Plan for this guide). Click Get Started to begin account creation.
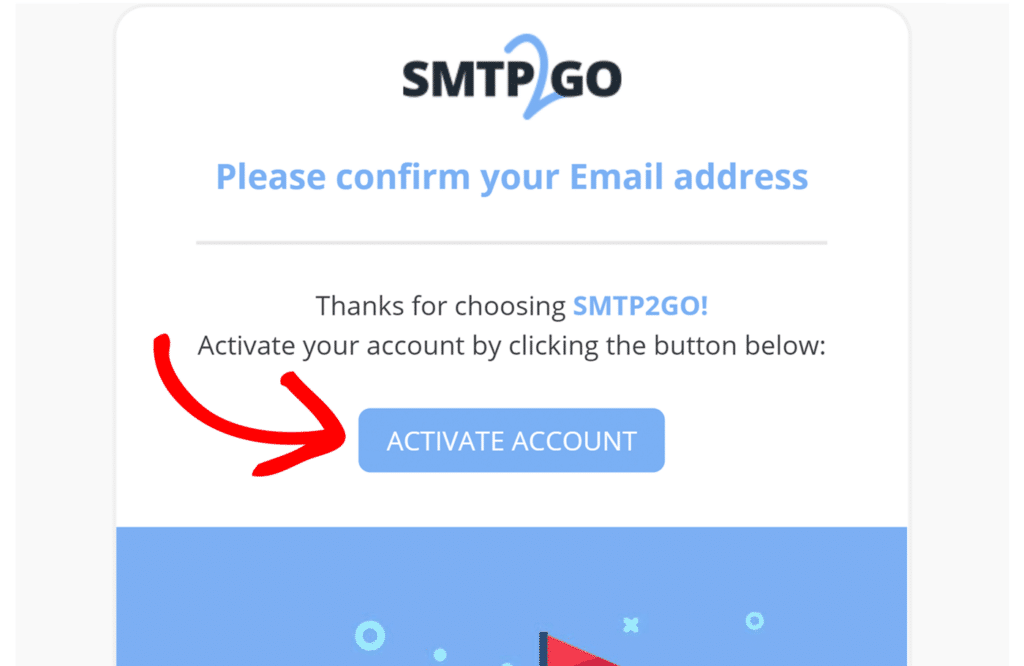
Enter your email address and check your inbox for an activation email. Then, click the ACTIVATE ACCOUNT button in the email to complete the registration.
Adding Your Verified Sender
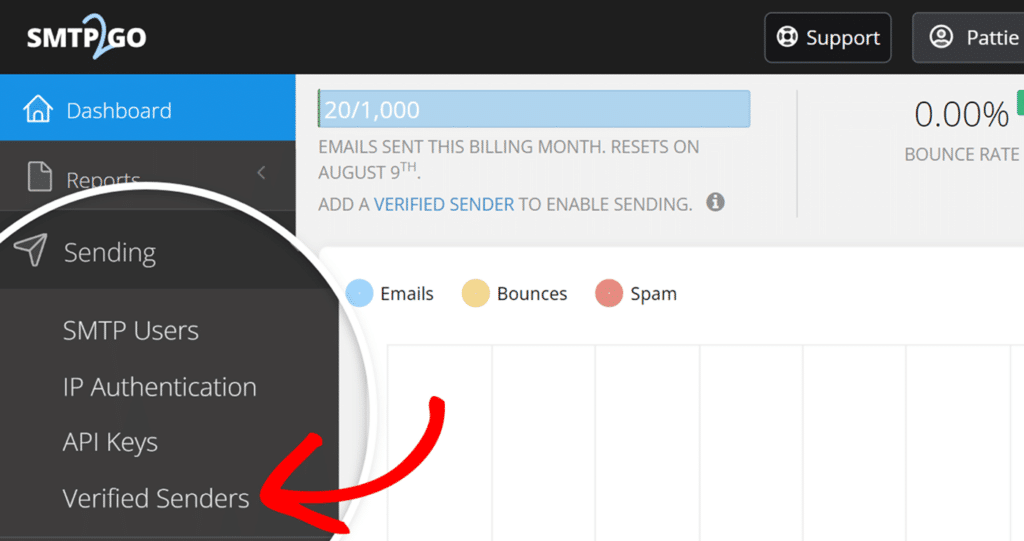
Now that your account is set up, the next step is to add and verify your sender domain. In your SMTP2GO dashboard, navigate to Sending » Verified Senders.
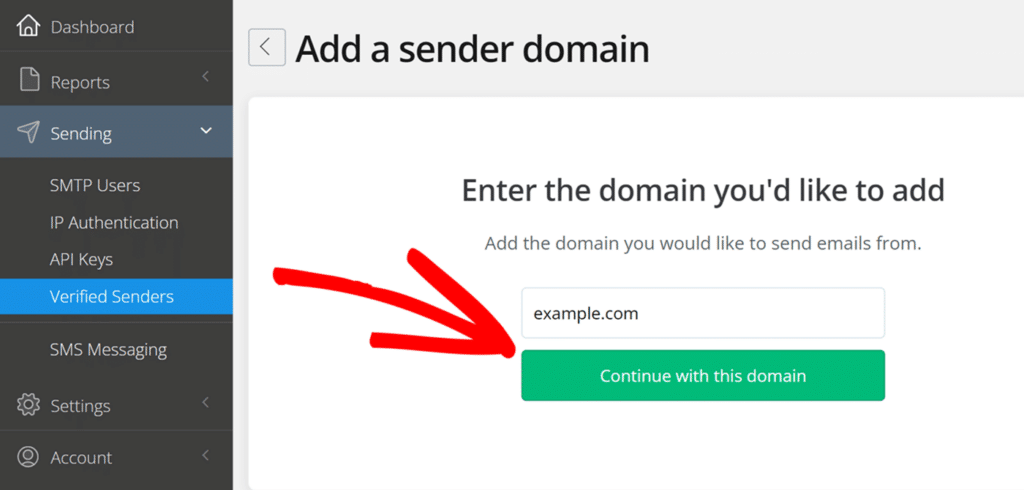
From there, click on the Add a sender domain button.
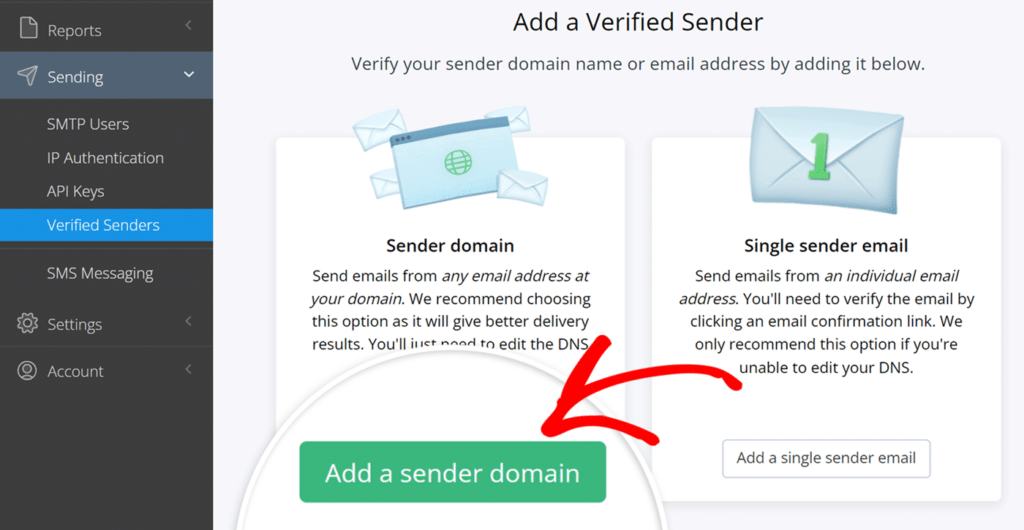
Then, enter the domain you’ll use for sending emails, then click Continue with this domain.
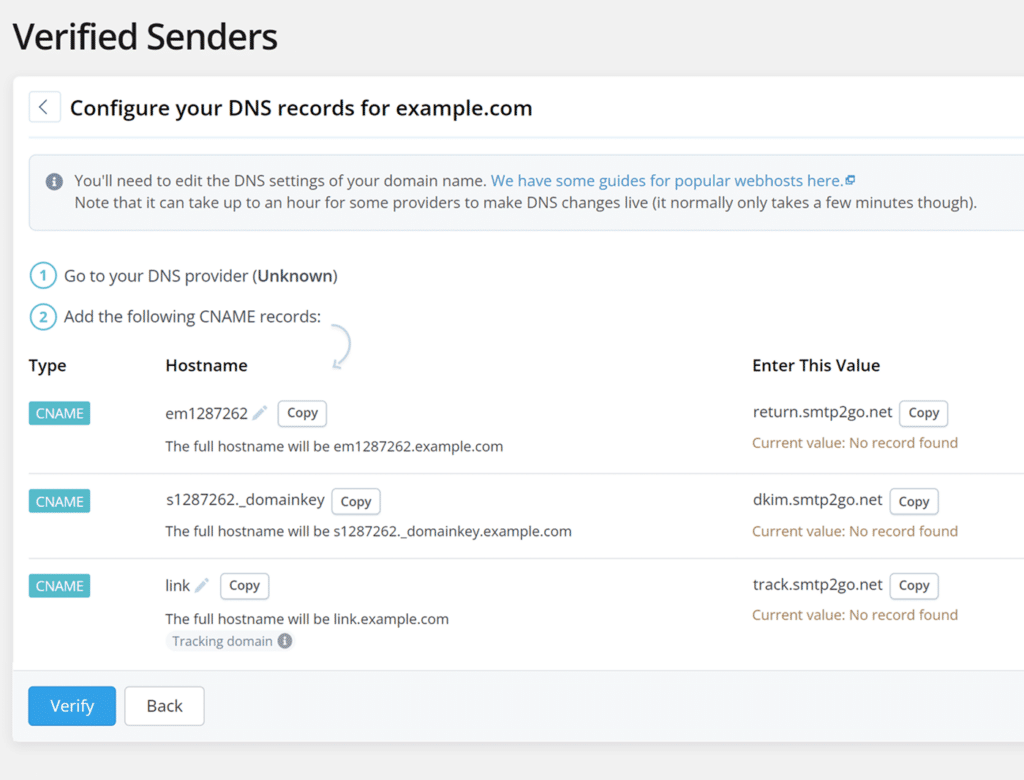
Adding DNS Records
After confirming your domain, SMTP2GO will provide you with three CNAME records to add to your domain’s DNS settings. This authorization process is crucial for protecting site owners and visitors, and ensures reliable email delivery.
To add these records, you’ll need to open a new browser tab or window. Then log in to the service where you purchased your site’s domain (which is most often your site’s hosting provider) and locate your site’s DNS settings.
Once there, look for an option to add a new record. Add the three CNAME records provided by SMTP2GO, copying them exactly as they appear in your SMTP2GO account.
Verifying Your DNS Changes
DNS changes can take 24-48 hours to propagate, though sometimes verification occurs more quickly. You can try clicking the Verify button as a quick test.
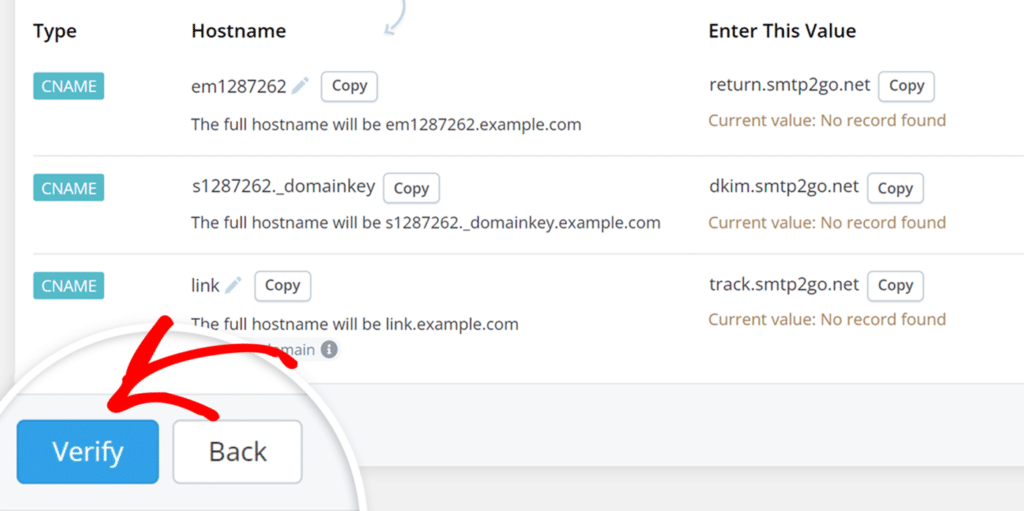
However, you don’t need to wait for this verification to complete before moving to the next step. Just keep this tab open for later use.
Configuring Easy WP SMTP Settings
Once you’ve authorized your domain in SMTP2GO, you can go ahead and configure your Easy WP SMTP settings. To access the settings from the WordPress dashboard, go to Easy WP SMTP and click on the SMTP Settings tab.

In the following steps, we’ll cover how to configure each of the settings on this page.
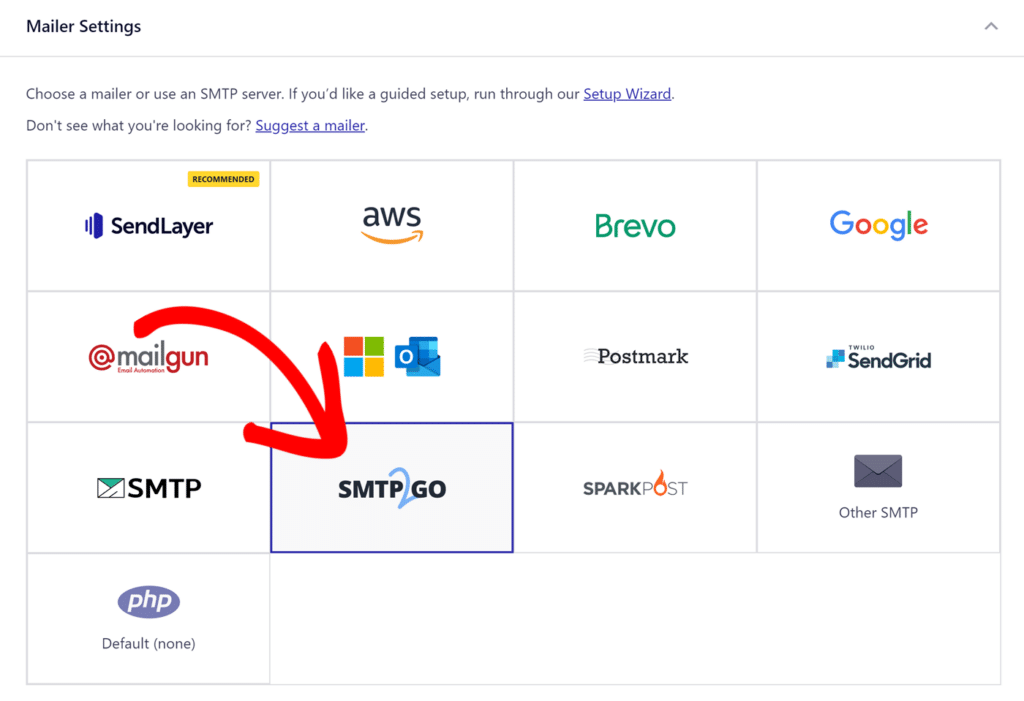
Mailer Settings
Select SMTP2GO as the mailer to use with Easy WP SMTP.
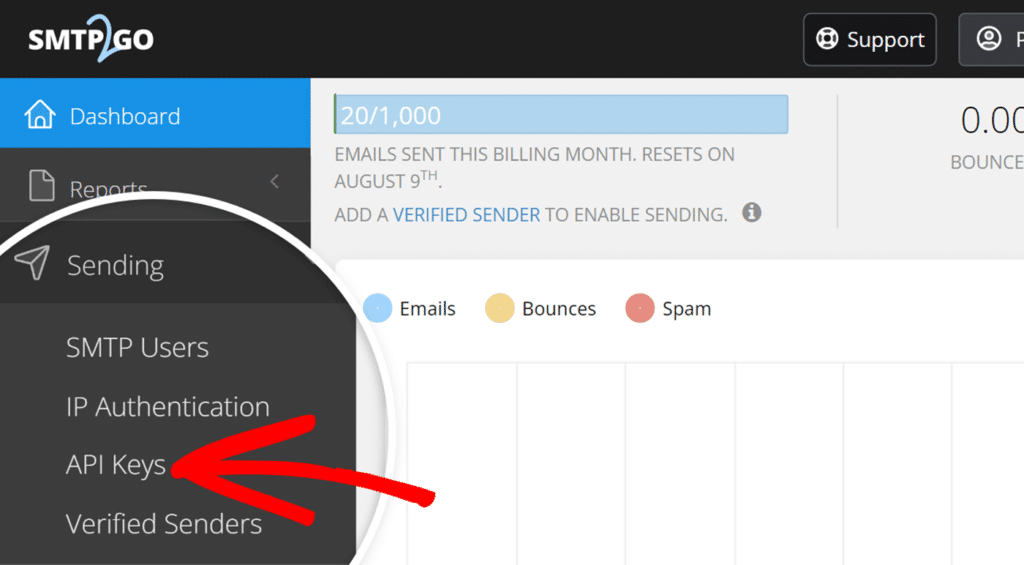
API Key
To get your API Key, head back to the browser tab with your SMTP2GO dashboard open. Then, from the left sidebar, go to Sending » API Keys.
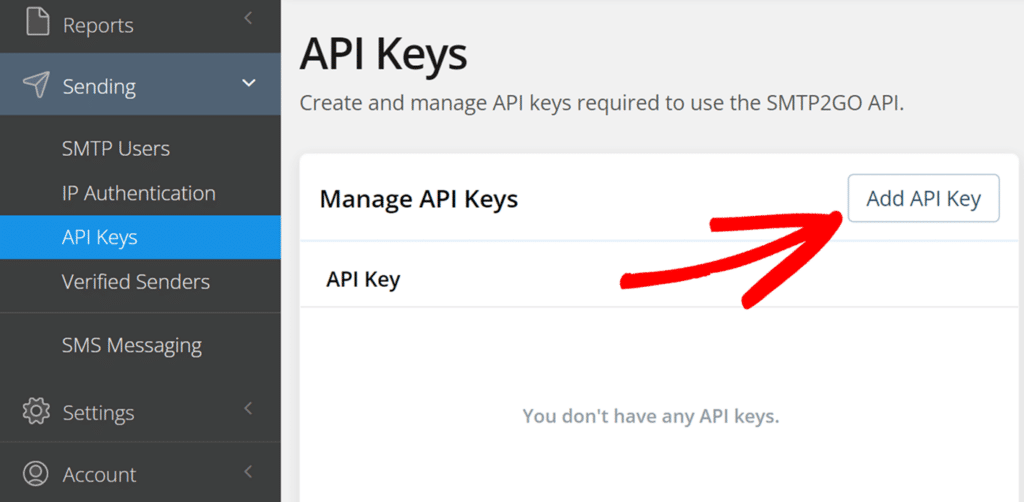
On the API Keys page, you’ll see a list of your existing API keys if you have any. To create a new key, click the Add API Key button in the top right corner.
A popup window will appear with several options. The API Key field will be automatically populated with a generated key. In the Description field, enter a name to help you remember what this key is for. For the Rate Limit, you can leave this as Unlimited and check the Use default box unless you want to set a specific limit.
When you’re ready, click the Save button to create your new API key.
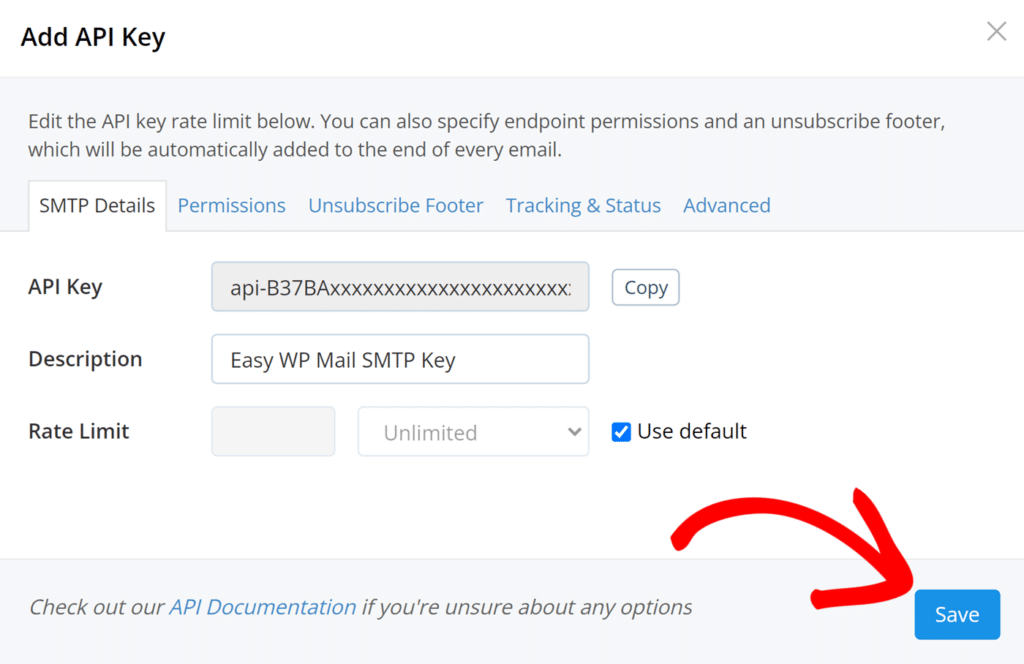
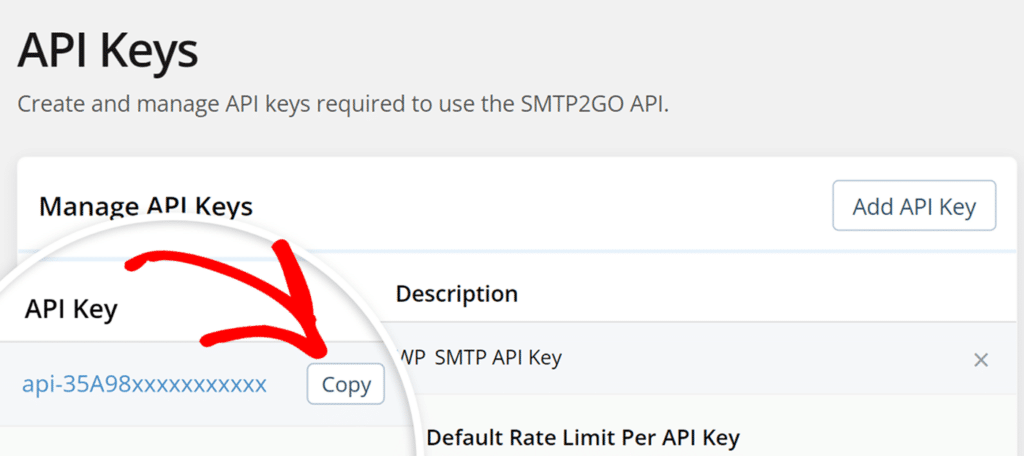
Make sure to copy the API key after saving as you’ll need this key to configure Easy WP SMTP in the next steps.
General Settings
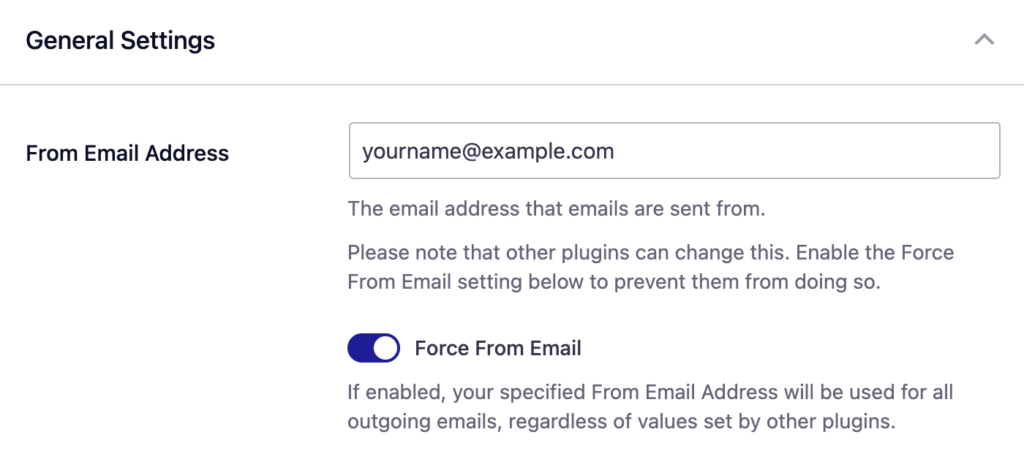
From Email
The From Email is the email address that your WordPress site’s emails are sent from. To prevent email delivery issues, this email address must match the sending domain you authorized in SMTP2GO. For example, if you authorized example.com as your domain, the From Email must contain @example.com.
We also strongly recommend enabling the Force From Email toggle. If enabled, your From Email will be used for all emails sent from your site, ignoring values set by other plugins.
From Name
The From Name is the name that appears in the emails sent from your site, letting the recipient know who sent the email. By default, the From Name is set to your site’s name. However, you can change the name to whatever you’d like.
Similarly, you can enable the Force From Name toggle to apply the settings site-wide.

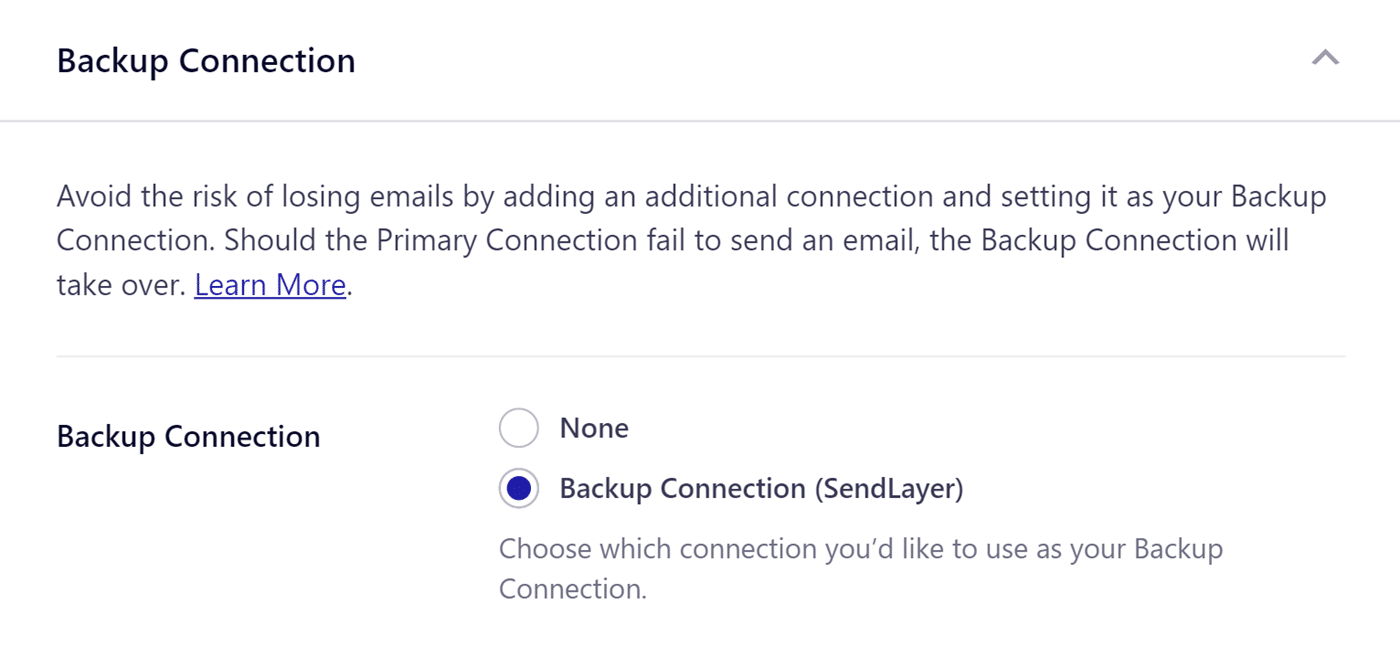
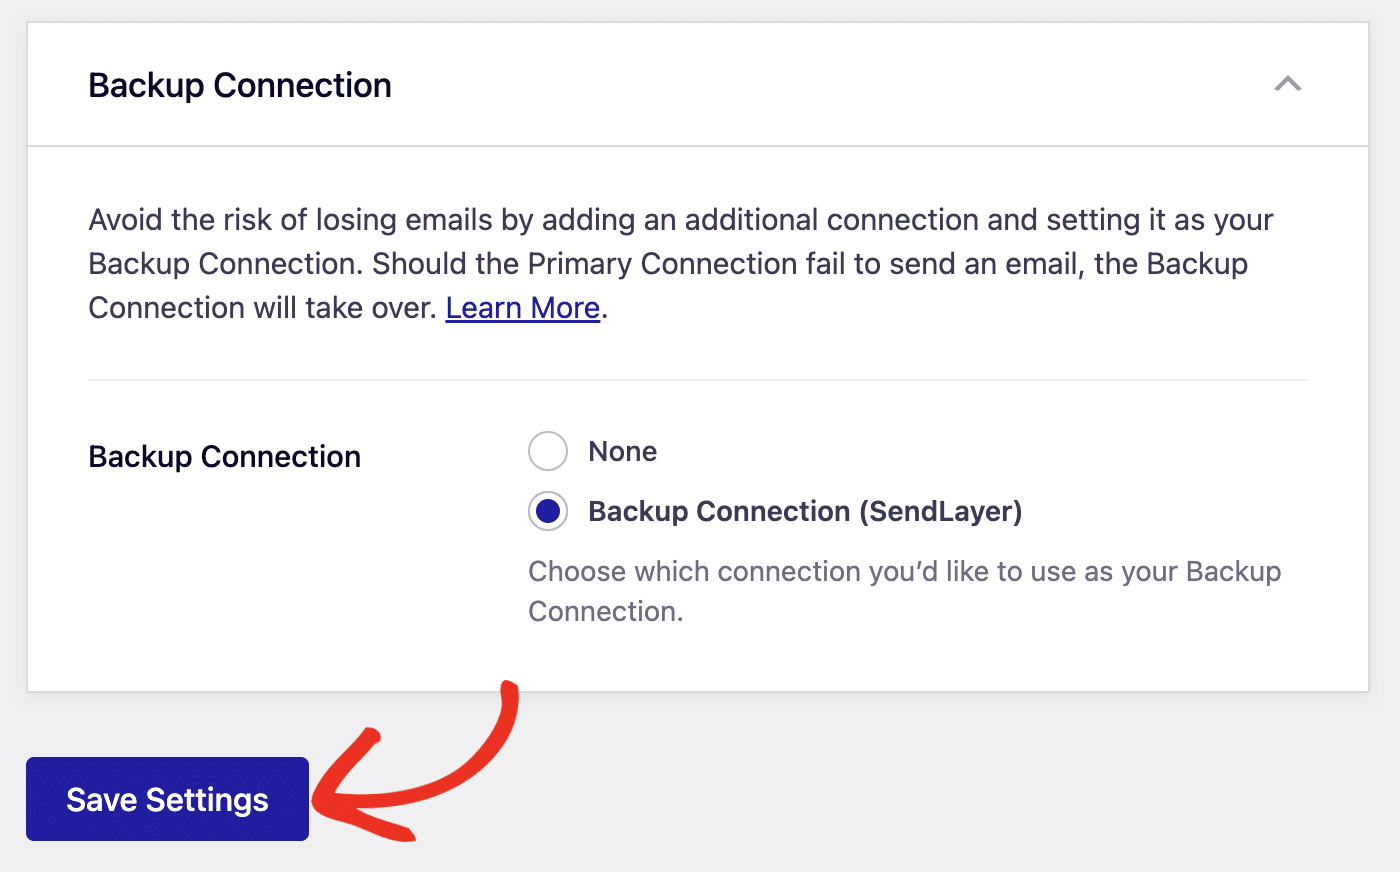
Backup Connection
Configuring a Backup Connection is an optional step in your SMTP2GO mailer setup. However, to further improve email deliverability, we recommend configuring an additional connection to serve as a backup in case your Primary Connection fails.
Note: If you’d like to learn how to send emails through different connections based on specific rules, please refer to our Smart Routing tutorial.
Once you’re done configuring the general settings, be sure to click Save Settings to save your changes.
That’s it! Now you know how to set up Easy WP SMTP with the SMTP2GO mailer.