In this tutorial, we’ll cover how to set up the Easy WP SMTP plugin with the Postmark mailer.
1. Setting Up Your Postmark Account
To get started, you’ll need an account with Postmark. This account will connect to your WordPress site to ensure your emails are delivered.
Postmark offers a free developer account that lets you send up to 100 emails monthly. If you already have an account with Postmark, simply log in to your account. Otherwise, head to Postmark’s pricing page to create your account.
If you’d like to purchase a paid account, use their cost calculator to estimate your total monthly charges. However, you can click on the Start free trial button to get started with a trial account.

After creating your account, Postmark will send a verification email to the address you provided during the signup process.
You’ll need to click the Confirm Sender Signature button in the verification email.

After that, a Sender Signature will be automatically created for this email address.
Requesting Account Approval
Once you’ve verified your email address and logged in to your account, click the Request approval button to verify your account.

You’ll need to enter additional information about your account/business before submitting the approval request.
Once you’ve submitted your request, Postmark will manually review your account before approving it. This is done to prevent bot accounts from using their platform.
Account approval typically takes about 24 hours to complete. You can proceed with the setup while you wait for approval.
Note: You won’t be able to send emails to addresses outside of your verified domain until your account is approved. Please see Postmark’s documentation for more details.
2. Creating a Sender Signature
A Sender Signature is a domain or email address authorized in Postmark to send emails on your behalf.
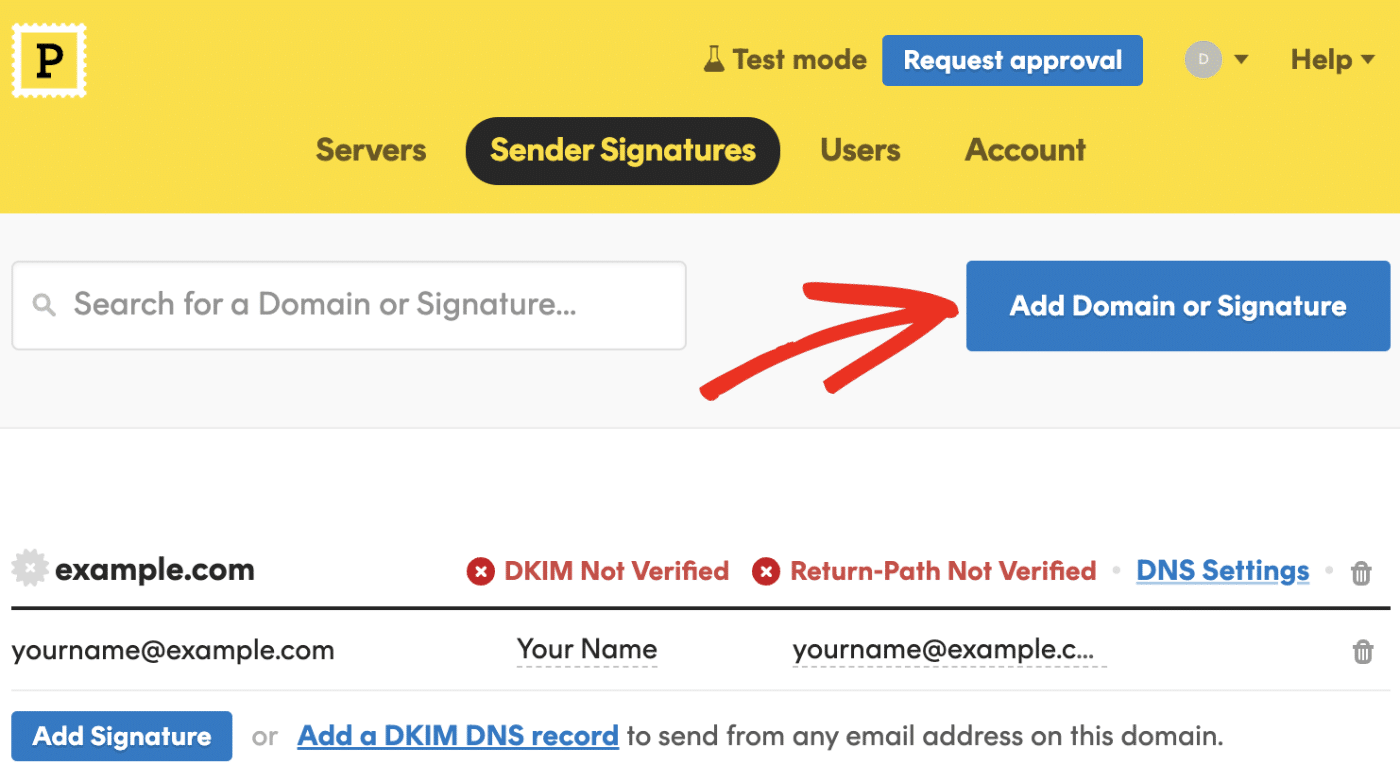
To create one for your account, click on Sender Signatures at the top of your Postmark account dashboard.

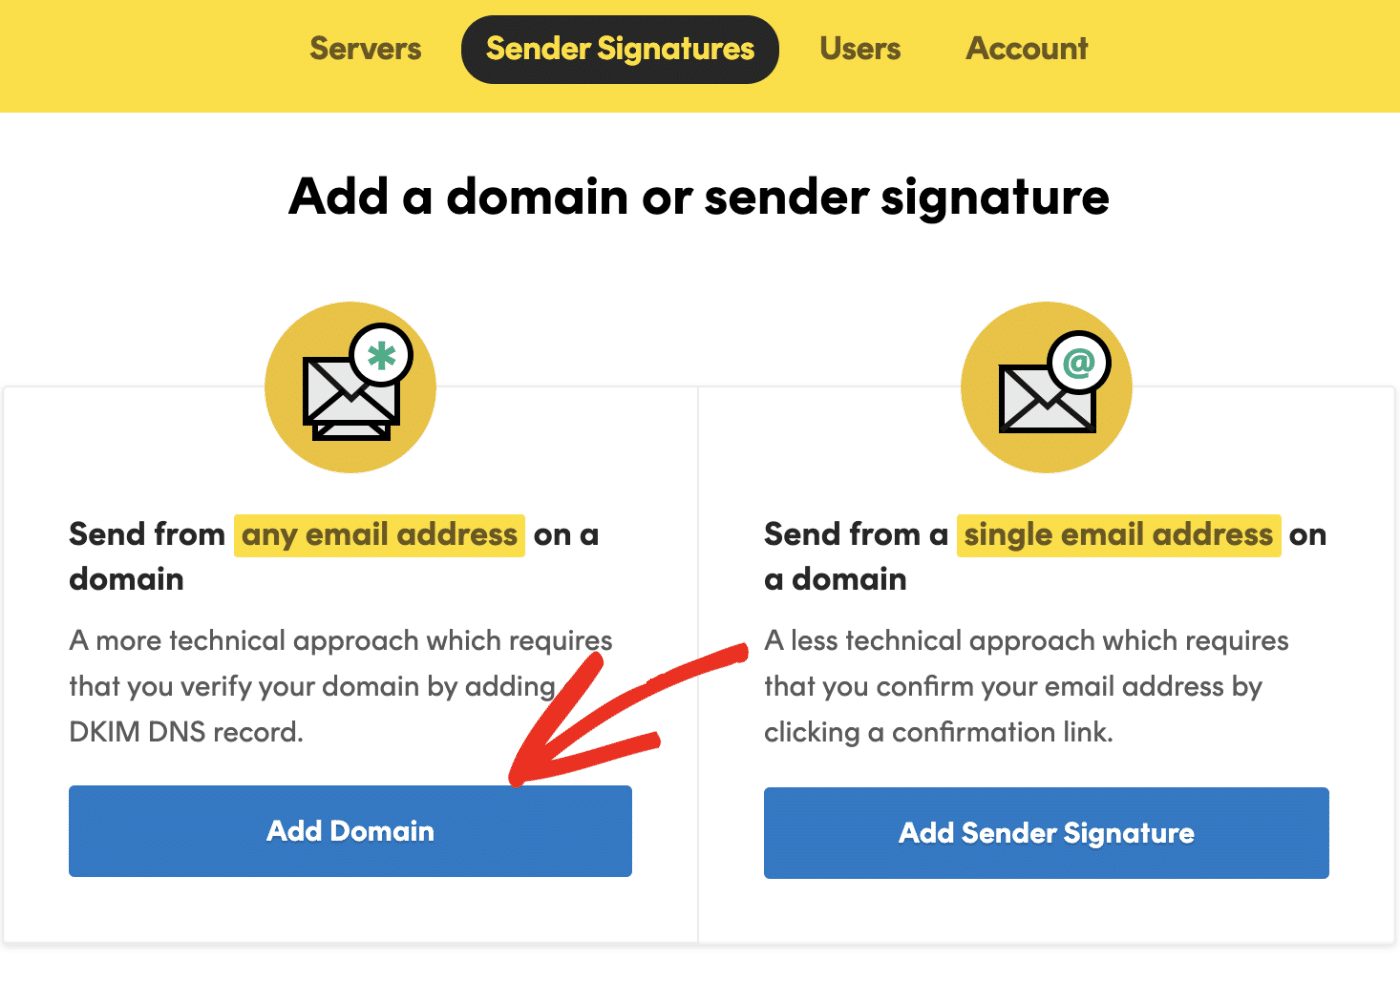
After that, click the Add Domain or Signature button to proceed.
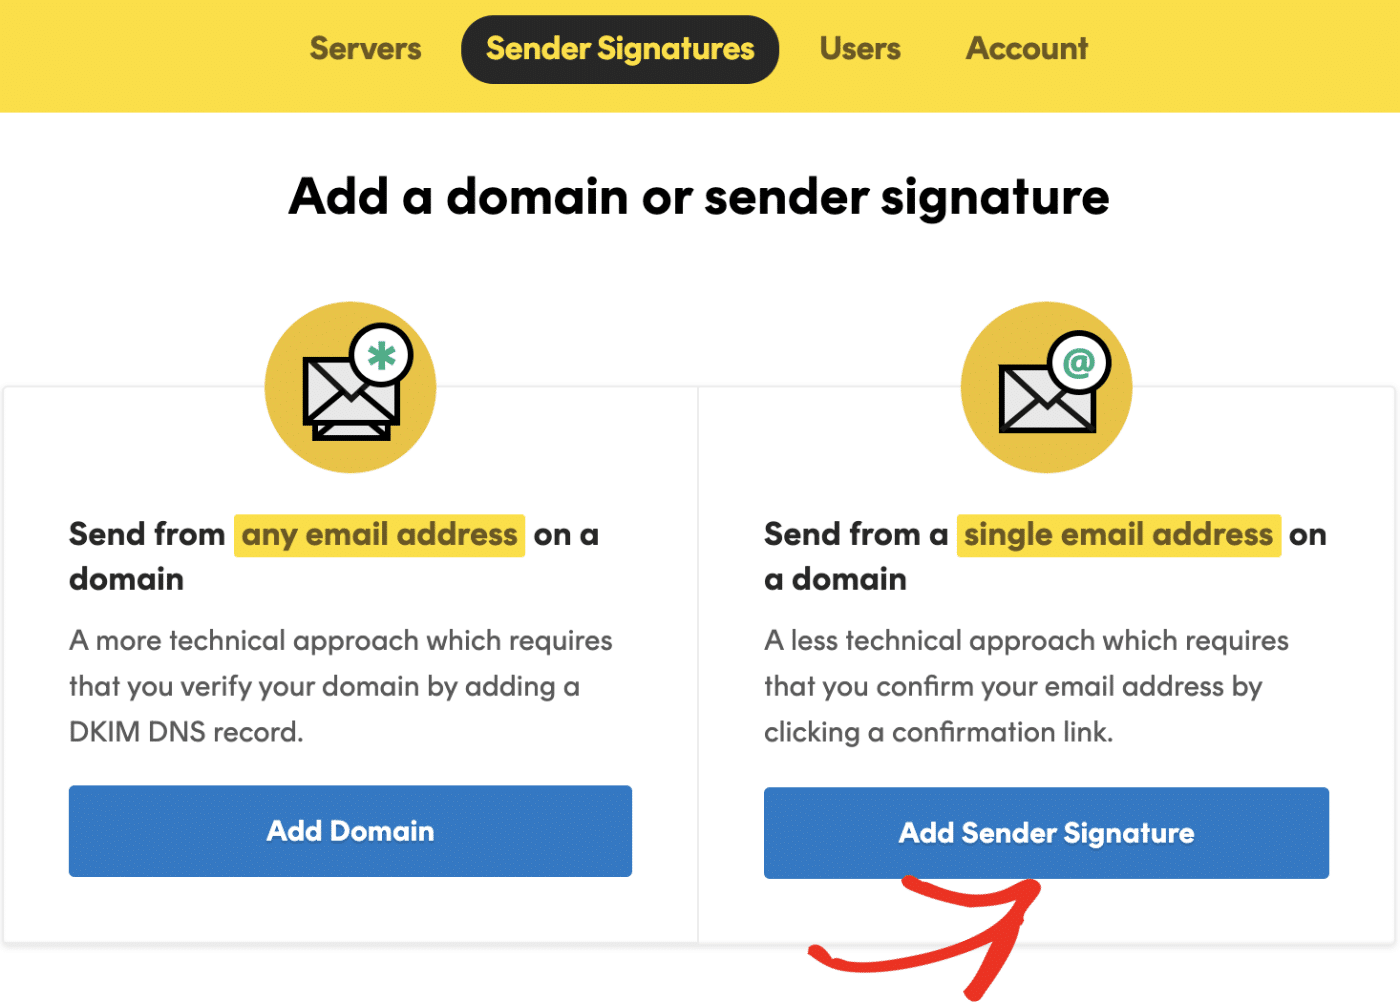
Adding a New Sender Signature
Although the email address you used during the registration process has been added as a Sender, you can add as many as you like to your account. If you’d like to verify a single email address for sending emails, choose the Add Sender Signature option.
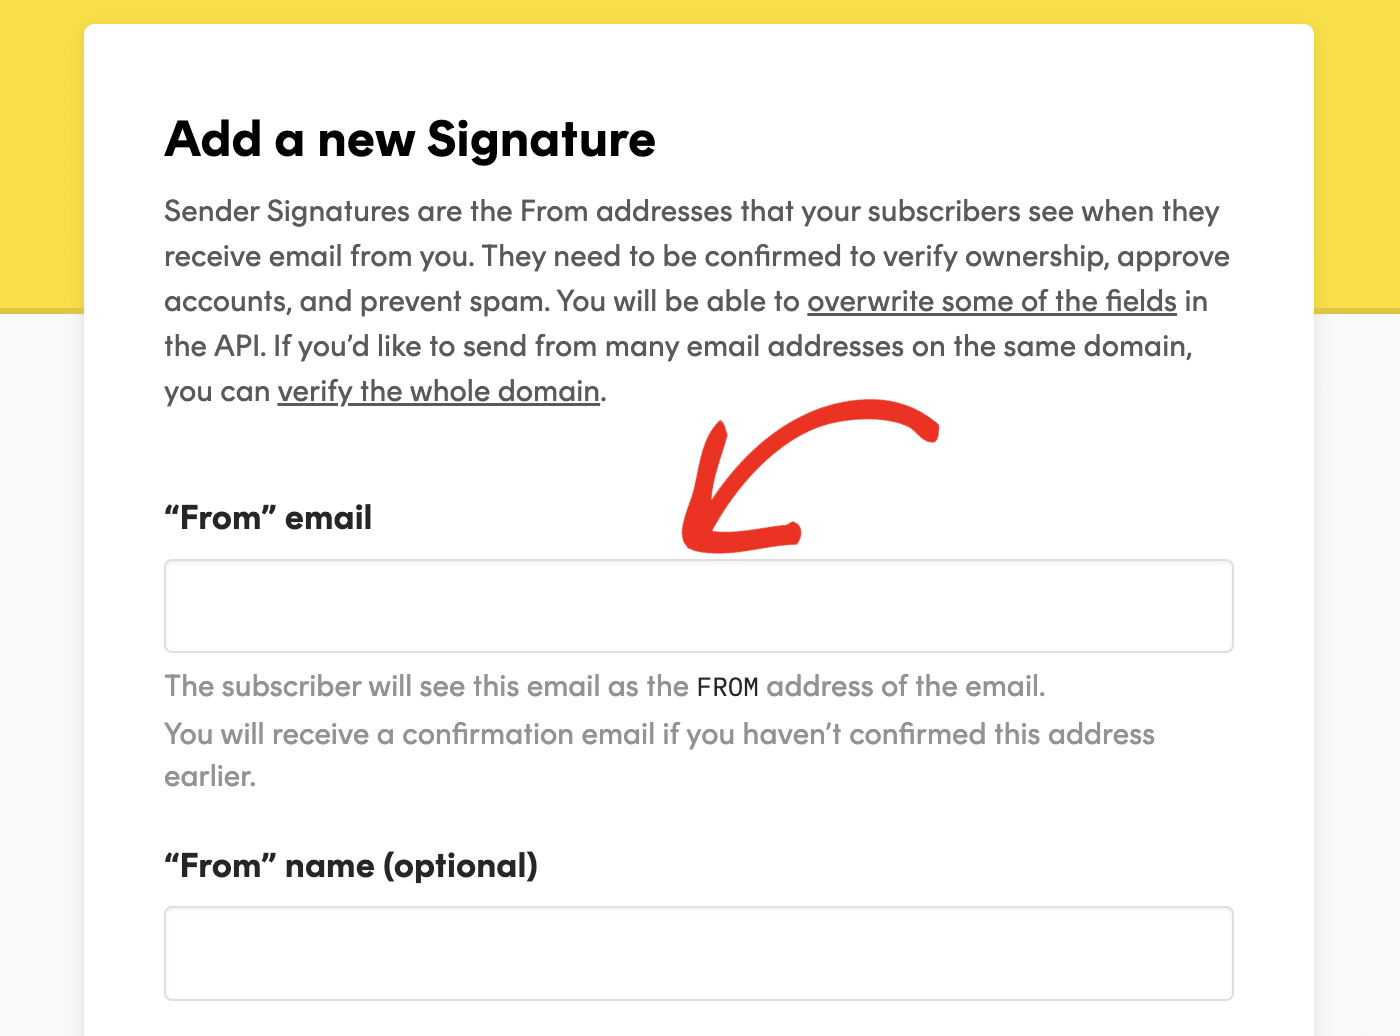
You’ll be directed to a page with a short form to fill out. You’ll need to enter the email address you wish to add in the “From” email field. Then you can specify a name in the “From” name field.
Once you’re done, click the Create Signature button to add your email.
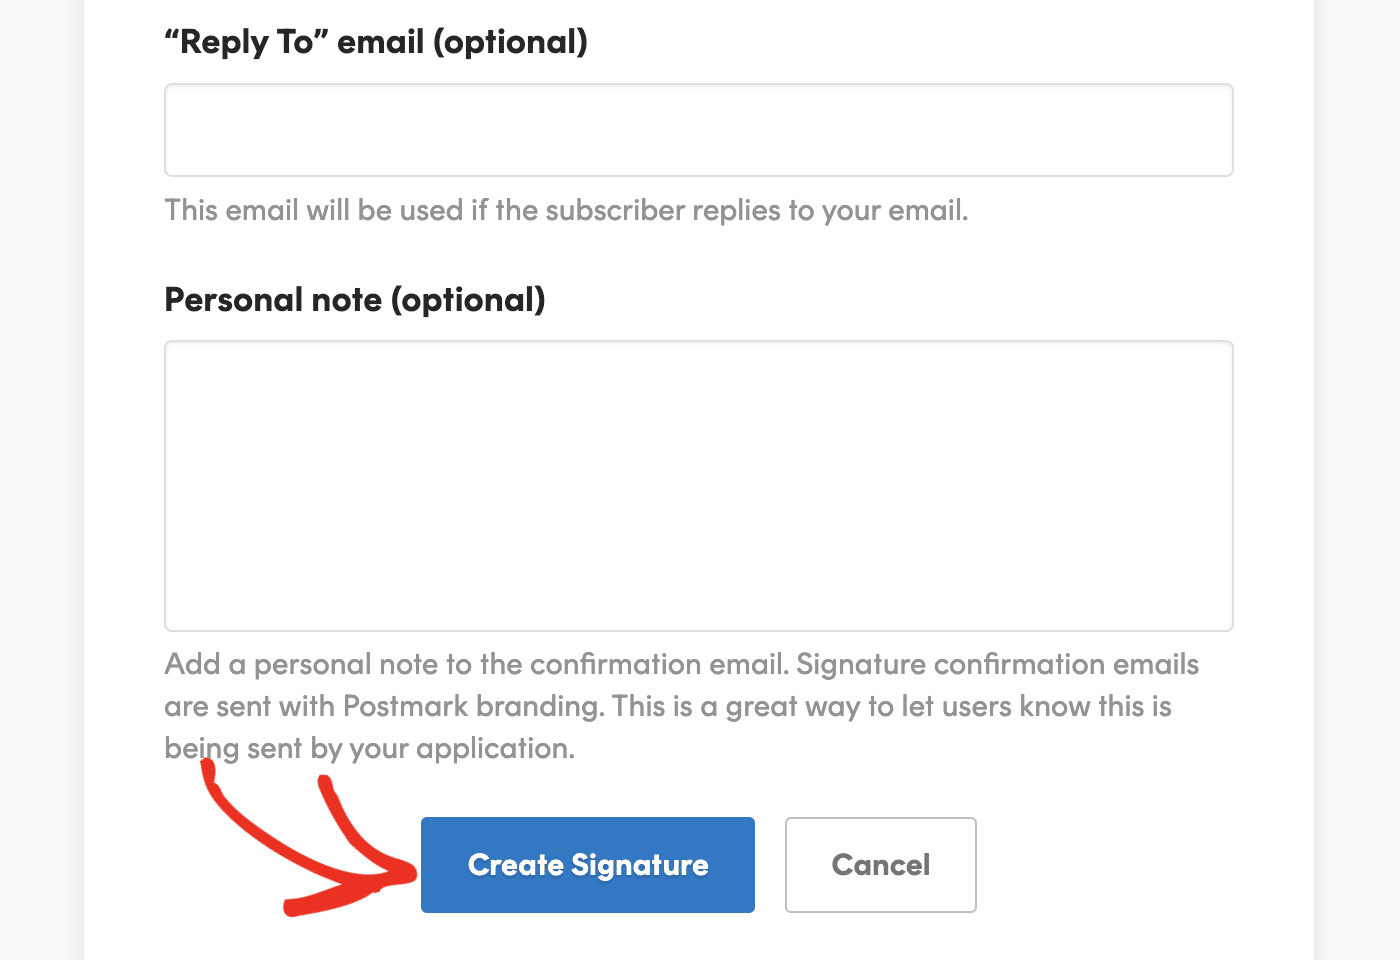
After that, check the inbox of the email you added and click the Confirm Sender Signature button to complete the setup.
Note: You can complete your Postmark mailer setup with the Sender Signature for a single email address. However, we suggest adding a domain instead to improve your domain reputation and email deliverability.
Verifying Your Domain
To add and verify a new domain, click the Add Domain button.
Note: With Postmark, you can choose to verify a subdomain and use an email address at this subdomain to complete your Easy WP SMTP setup. This approach ensures your sending domain’s reputation is separate from that of your root domain.
In the overlay that appears, enter the domain you wish to verify. Then click the Verify domain button to proceed.

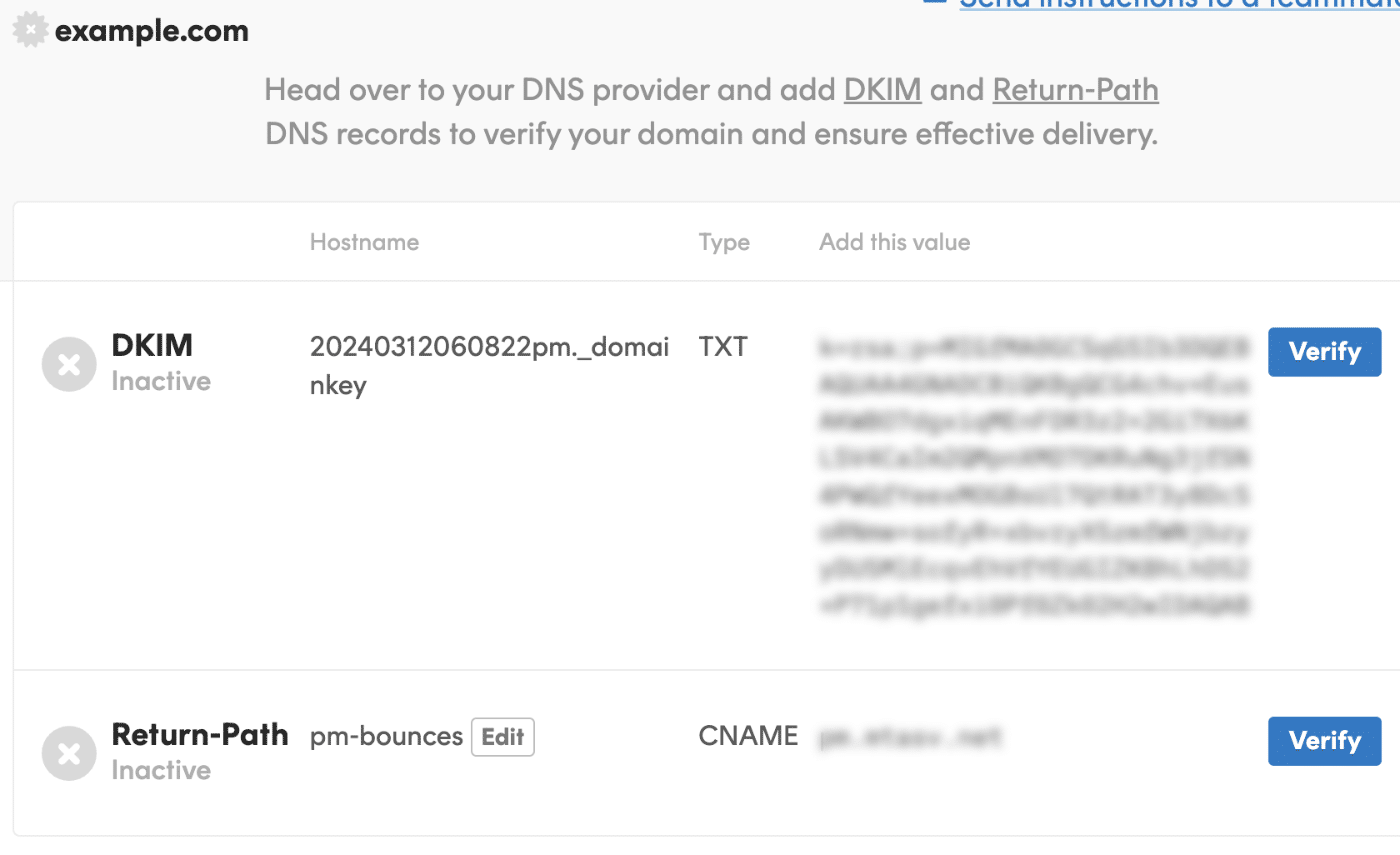
After clicking on this button, Postmark will provide DNS records to add to your domain’s DNS settings.
We recommend opening a new browser tab or window for this step. In the new browser window, log in to your domain registrar’s website and locate your site’s DNS settings.
Note: If you’re unsure how to locate your site’s DNS settings, we recommend contacting your domain host for guidance before making any changes.
Adding Your DNS Records
After locating the DNS settings, you’ll need to add the DKIM (TXT) and Return-Path (CNAME) records generated by Postmark. When adding the records, ensure you copy them properly from your Postmark account.
Note: Postmark doesn’t require you to add the Return-Path record to your site’s DNS settings to verify your domain. However, we recommend adding it as it improves email deliverability.
Once you’re done adding the DNS records, click the Verify button next to each record to check if the records have propagated.
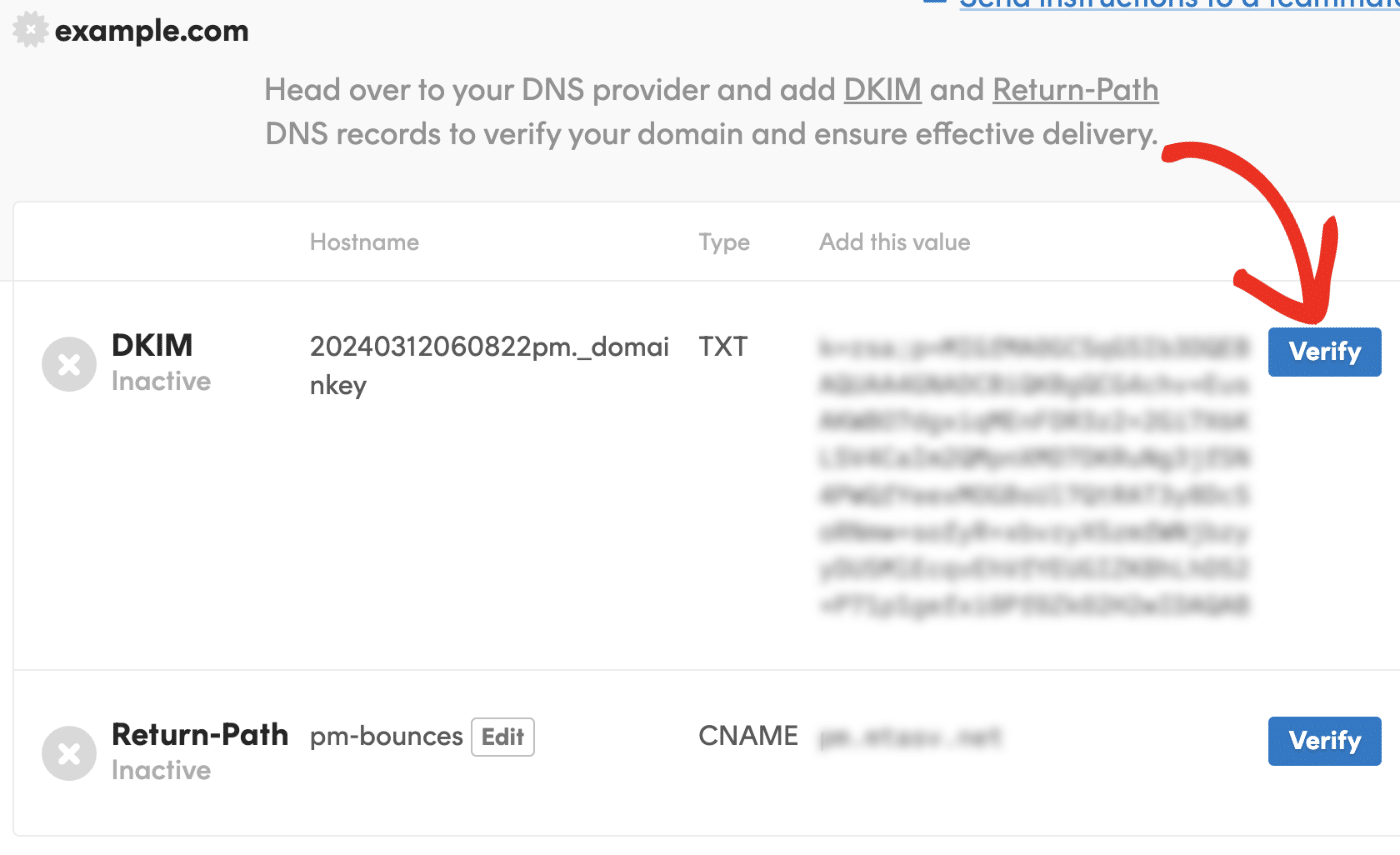
If the records have been added successfully, you’ll see a green checkmark and a Verified message next to each DNS record.
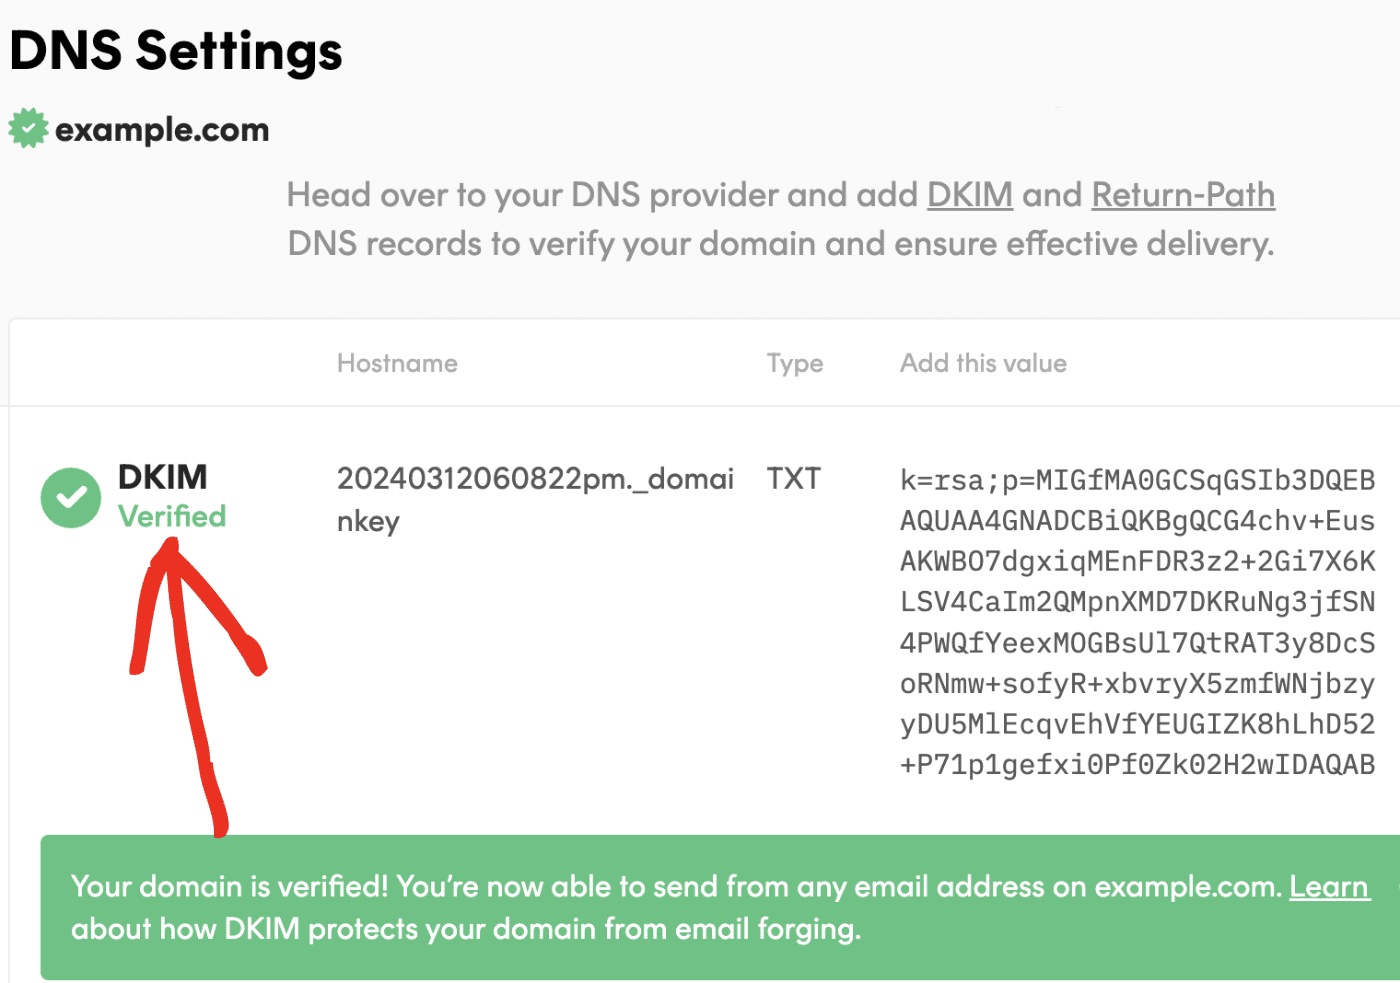
Note: DNS records can take up to 48 hours to propagate. If you try to verify your domain in Postmark and it doesn’t work, wait and try again. Meanwhile, you can continue setting up Easy WP SMTP.
3. Configuring Easy WP SMTP Settings
After adding your domain to Postmark, you can proceed to configure Easy WP SMTP settings. Before you get started, be sure to install and activate the Easy WP SMTP plugin on your WordPress site.
To access the settings, log in to your WordPress admin area, then go to Easy WP SMTP » Settings.

In the following steps, we’ll go through each of these settings in detail.
Mailer Settings
To start, select the Postmark option from the list of available mailers. After making your selection, more settings related to this mailer will appear.

Server API Key
Postmark automatically generates an API key for your account after verifying your email. You’ll need to paste this API key in the Server API key field to connect your Postmark account with Easy WP SMTP.
Retrieving Your API Key
To retrieve your API keys, return to your Postmark account and click on the Servers tab.

After that, select the server name you intend using to send emails. For our tutorial, we’ll use the default (My First Server) option. However, you can use any server you’ve created in Postmark.

Note: Servers help to organize the emails you send out. For instance, you might set up separate servers for different WordPress sites. To learn more, check out Postmark’s documentation on managing servers.
In your server’s dashboard, click on API Tokens.

You’ll see your API key in the Server API tokens field. Go ahead and copy this key.

Then head back to the browser tab with your Easy WP SMTP settings open and paste the value into the Server API Token field.

Message Stream ID (Optional)
If you’d like, you can add a Message Stream ID from your Postmark account.
To optimize email deliverability, it is beneficial to separate your transactional emails (like your password reset or account verification emails) from marketing or bulk emails (like your newsletters or promotions).
Postmark Message Streams help you do this. If you’re using Easy WP SMTP to only send transactional emails, enter Postmark’s Transactional Stream in this setting. If you’re sending bulk emails, you’ll want to add a Broadcast Stream.
Note: To learn more about creating and using Message Streams, see Postmark’s documentation on sending emails through Message Streams.
To locate a Message Stream ID in your Postmark account, select the Servers tab in your dashboard and click on your server’s name. After that, you’ll see a list of existing Message Streams, including the Default Transactional Stream.

Click on the Message Stream you want to use. On the next screen, look for the Stream ID at the top of the page.

Copy this, then return to your Easy WP SMTP settings and paste it into the Message Stream ID field.

Note: Easy WP SMTP will use the Default Transactional Stream if you leave this option blank.
General Settings
From Email Address
By default, the From Email Address field will be filled with your site’s admin email.
If you’ve set up a single Sender Signature in Postmark, the From Email Address should match your Sender Signature. You can also use any email address at the domain you verified in your Postmark account.
If you’d like, you can enable the Force From Email option to use the From Email Address across your site.

From Name
The From Name is the name that appears in the emails sent from your site, letting the recipient know who sent the email. By default, the From Name is set to your site’s name. However, you can change the name to whatever you’d like.
Similarly, you can enable the Force From Name toggle to apply the settings site-wide.

Backup Connection
Configuring a Backup Connection is an optional step in your Postmark mailer setup. However, to further improve email deliverability, we recommend configuring an additional connection to serve as a backup in case your Primary Connection fails.
Note: For information on sending emails through different connections based on specific rules, please refer to our Smart Routing tutorial.

When you’re done with the configuration, be sure to click the Save Settings button to save your changes.

That’s it! You’ve now successfully set up the Postmark mailer with Easy WP SMTP.