Want to relax while our team sets up SMTP for you? With White Glove Setup for Easy WP SMTP, you won’t need to worry about following a detailed tutorial. Instead, our experienced team will do all the work for you.
This guide describes how White Glove Setup works so that you’ll know exactly what to expect.
Purchasing White Glove Setup
Note: The Elite license in Easy WP SMTP qualifies you for White Glove Setup. If you purchased this license level, you can proceed to redeem your White Glove Setup.
Getting started with our White Glove Setup is simple. You can request this service when purchasing a new license or even at a later time from your account area.
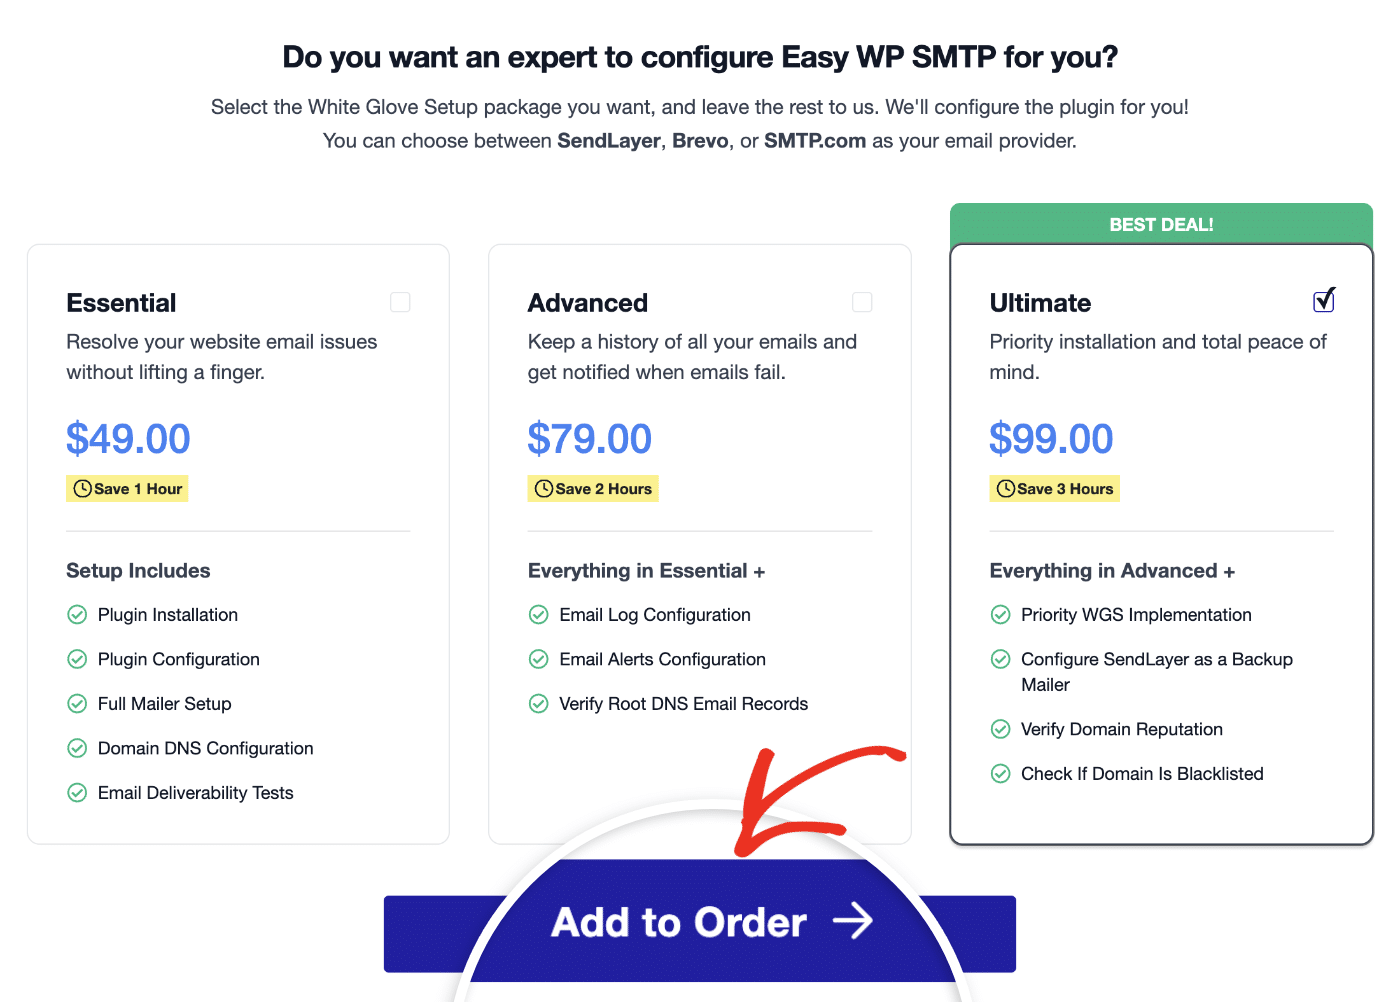
If you’re buying a new license, you’ll be presented with White Glove Setup options before proceeding to checkout. You’ll see three service levels to choose from: Essential, Advanced, and Ultimate.
Select your preferred package and click Add to Order to proceed to checkout.
If you didn’t select the White Glove Setup during your initial purchase or if you’ve already purchased a license, you can still request White Glove Setup from your account dashboard.
To do so, log in to your Easy WP SMTP account and click the Purchase White Glove Setup button.

Note: Each White Glove Setup purchase applies to just one website. If you need the service for multiple sites, you can purchase it multiple times regardless of your license level. For example, even if you have a Pro license and decide to transfer it to another domain, you can repurchase White Glove Setup for the new site.
Redeeming White Glove Setup
After you’ve completed the purchase for the White Glove Setup, you’ll be redirected back to your Easy WP SMTP account page.
Once there, click on the Redeem White Glove Setup button from the Overview tab.

This will open the White Glove Setup Application form. Here, we’ll gather all of the details needed to complete the setup process for you.
Note: You can also redeem the White Glove Setup from the Billing tab of your Easy WP SMTP account.

Here’s a full list of all of the details collected in this form:
- About You: Basic details to make sure our support team contacts the right person.
- Name
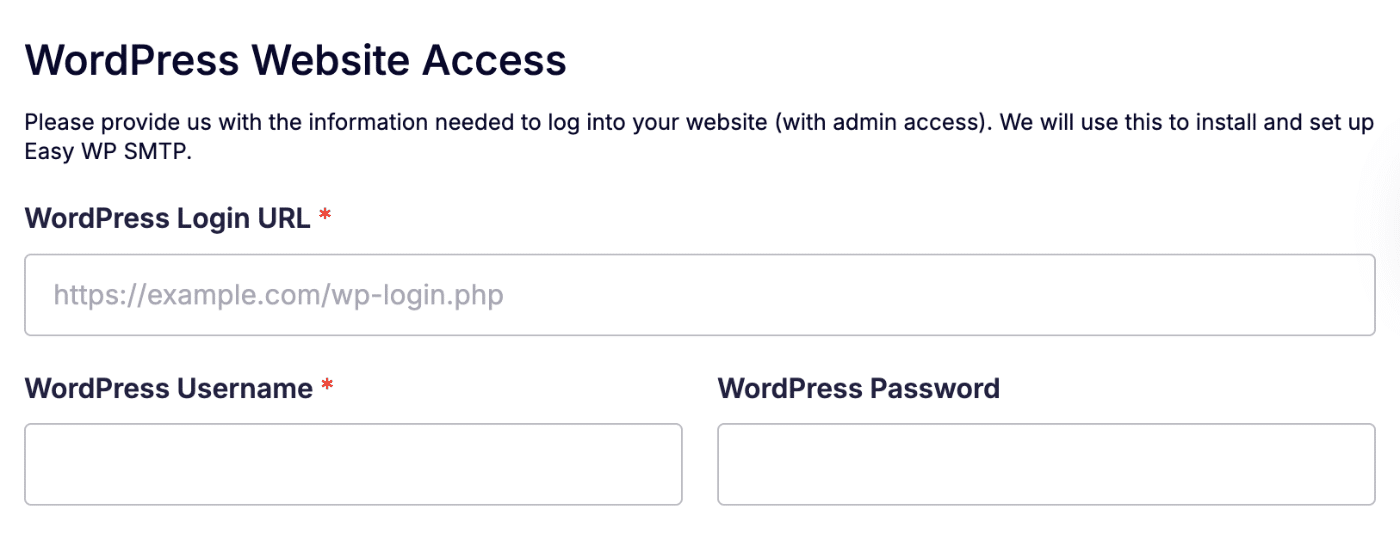
- WordPress Website Access: We’ll use this information to install and configure Easy WP SMTP on your site. You can share credentials for a temporary admin account here.
- WordPress Login URL
- WordPress Login Username and Password
Next up, you get a choice of which mailer you’d like our team to set up for you: SendLayer, SMTP.com, or Brevo (Sendinblue). All of these options have an excellent track record for reliability.
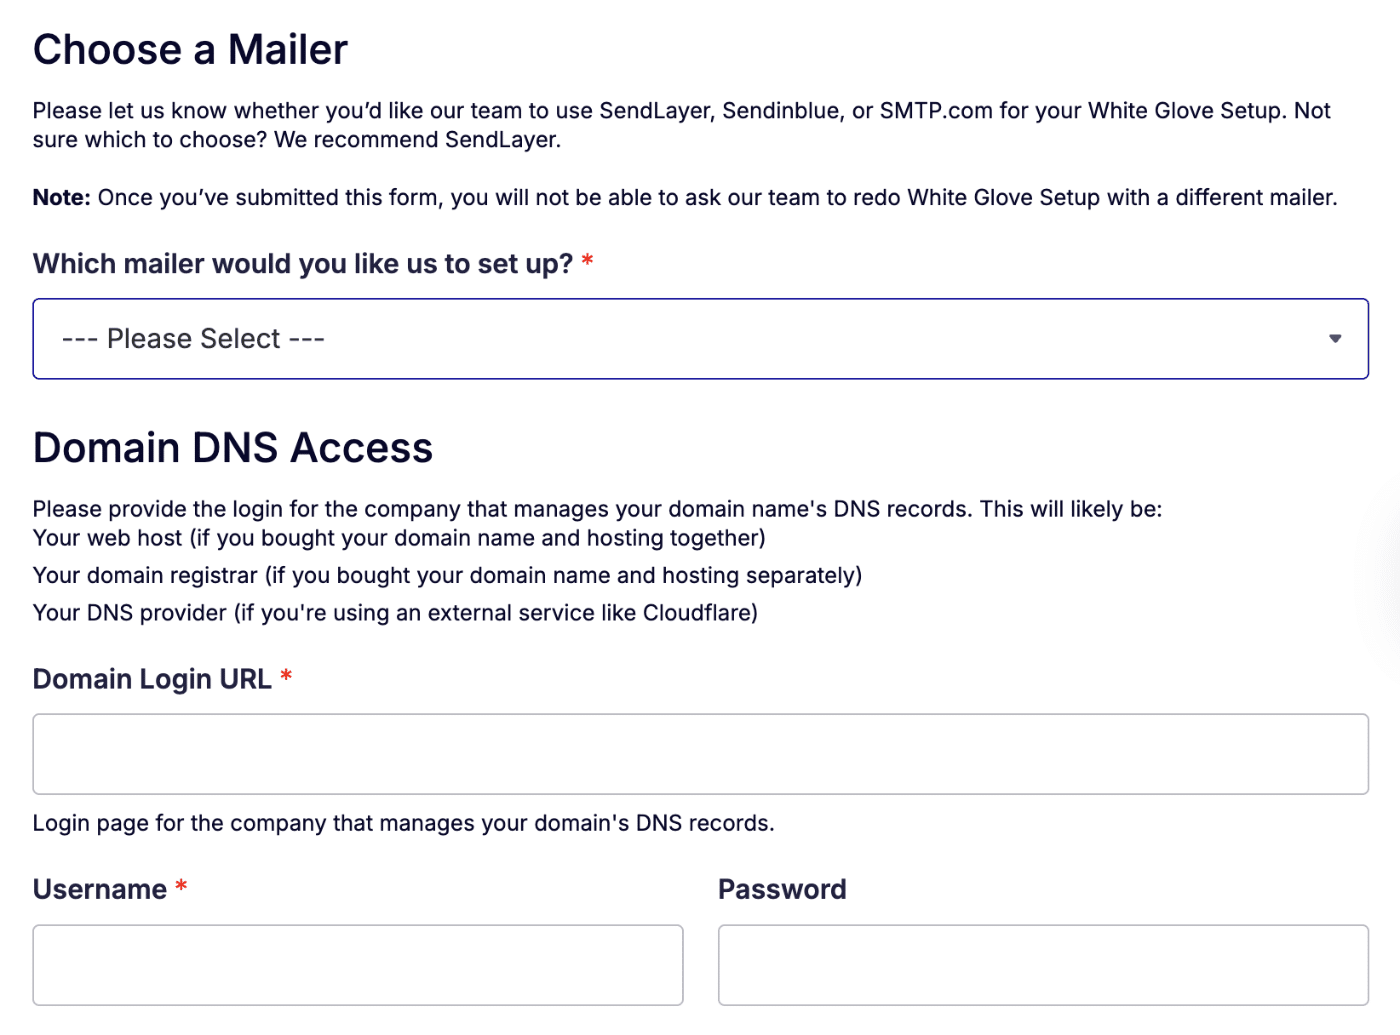
Based on the mailer you choose, our form will automatically update to request the required details to set that specific option up for you.
- SendLayer Access
- SendLayer Login Email and Password
- Brevo (Sendinblue) Access
- Follow the instructions provided in the White Glove Setup Application form, then check the box next to, I have sent the invite for this Brevo user.
- SMTP.com Access
- SMTP.com Login Email and Password
- Domain DNS Access: SendLayer, SMTP.com, and Brevo (Sendinblue) all require DNS changes to improve email delivery. The details we need to complete this step are usually the login credentials for where your site is hosted (e.g., GoDaddy, Bluehost, Siteground, etc).
- DNS Login URL
- DNS Username and Password
- Account Access Permission
- Other Information: Finally, we’ll ask for a few more details so we can configure your mailer’s settings in Easy WP SMTP.
- Desired “From Email” Address: This is the default email address your website will send emails from. It must be at your domain name. Common emails are [email protected], [email protected], [email protected], etc.
- Desired “From Name”: This is the default name your website emails will use. Often it is your name or a variation of your company’s name (e.g., Acme Corp, Acme Corp Team, Acme Corp Support, etc).
After you’ve submitted the form, our team will test your login credentials to ensure that everything works as expected. Then we’ll dive into the setup process.
Note: During setup, we’ll add DNS records required for the mailer to work. In some cases, it can take 24-48 hours for these new records to be recognized. If we expect this to take some time, then we’ll send you an email with a quick update.
After we’ve completed the setup process, we’ll also send a test email to ensure that everything is working properly. Then we’ll reach out to let you know that the setup is complete.
That’s it! Now you know how to request White Glove Setup with Easy WP SMTP.
Still unsure about any part of this process? Please feel free to reach out to our support team with any questions you might have. We’d be happy to help!