Email authentication is essential for keeping your communications secure and ensuring they reach the intended recipients.
DMARC (Domain-based Message Authentication, Reporting, and Conformance) is one of the most effective tools for this.
It helps protect your domain from spoofing and phishing attempts by verifying that emails sent from your domain are legitimate.
In this guide, you’ll learn what a DMARC record is, why it’s critical for your domain’s security, and the exact steps to create and add one to your domain.
What is DMARC and Why is it Important?
DMARC, which stands for Domain-based Message Authentication, Reporting, and Conformance, is a protocol designed to protect your domain from being misused.
It works by ensuring that emails claiming to come from your domain are actually authorized. This prevents phishing or spoofing attempts.
Additionally, DMARC gives you insights into how your domain is being used by providing detailed reports.
These reports allow you to identify and address potential issues, such as misuse or misconfigured email systems, before they escalate.
If you’re using Easy WP SMTP to manage your WordPress emails, it can notify you if DMARC isn’t properly configured for your domain.
Go to Easy WP SMTP » Send a Test after logging into your WordPress account. Once there, use the form on the Email Test page to send a test email.
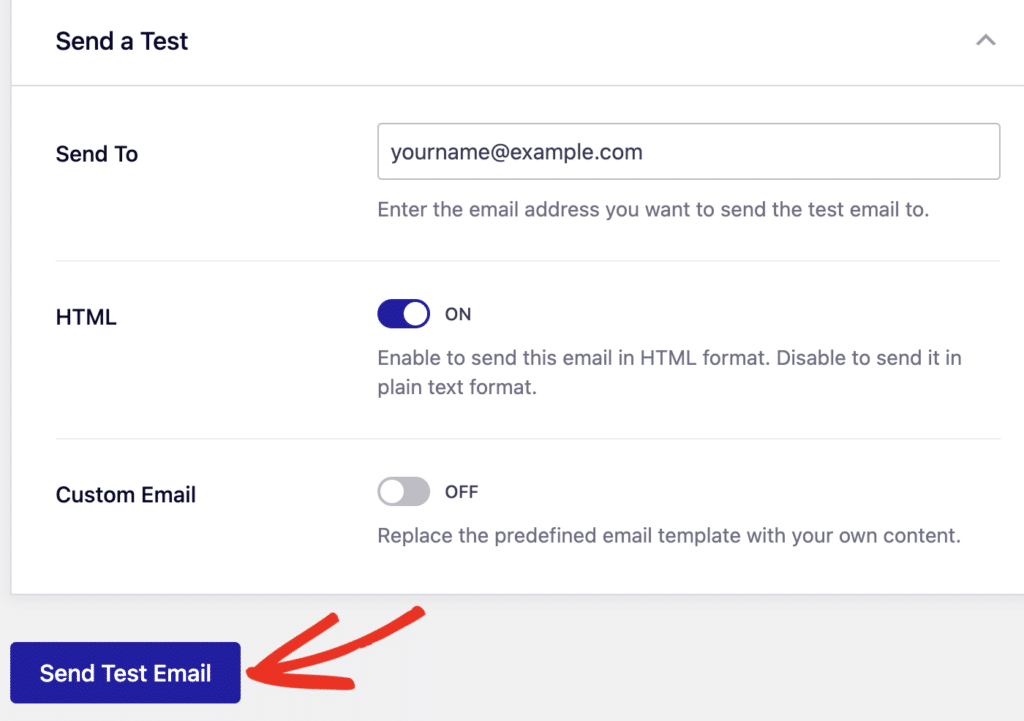
If one of the necessary DNS entries is missing from your website, you will probably get the warning below after sending the email.

When you scroll down, you’ll see a warning that reads: It doesn’t look like DMARC has been set up on your domain…

Prerequisites Before Creating a DMARC Record
Before jumping into creating a DMARC record, there are a few essential steps to cover. These ensure your domain is prepared and set up to support DMARC properly.
Understand SPF and DKIM Setup
SPF and DKIM are the foundation for DMARC to work effectively.
- SPF (Sender Policy Framework): This record tells receiving email servers which mail servers are allowed to send emails on behalf of your domain. Without it, your emails might be flagged as suspicious or rejected altogether.
- DKIM (DomainKeys Identified Mail): This adds a digital signature to your email headers, ensuring the message hasn’t been tampered with during delivery.
DMARC uses the results from SPF and DKIM checks to determine whether an email is authentic.
If you don’t have SPF and DKIM set up yet, you’ll need to create these records first in your DNS settings.
These two protocols work together with DMARC to improve email security and prevent phishing or spoofing attempts.
How to Create a DMARC Record
Creating a DMARC record involves a few clear steps that help ensure your emails are authenticated properly and protect your domain from being misused. Here’s a step-by-step guide based on my experience.
1. Choose a Policy (None, Quarantine, Reject)
The policy you select determines how receiving mail servers handle emails that fail DMARC checks:
- None: This is the starting point. It doesn’t take any action on failing emails but allows you to collect data and monitor your email traffic.
- Quarantine: Emails that fail DMARC checks will be sent to the recipient’s spam folder instead of their inbox.
- Reject: This is the strictest option, rejecting all emails that don’t pass authentication. Use this when you’re confident about your email setup.
If you’re just setting up DMARC, I recommend starting with none to review reports and ensure everything is working as expected. Once you’re comfortable, you can move to quarantine or reject.
2. Define Your Reporting Options
DMARC allows you to receive reports that help you monitor email activity:
- Aggregate Reports (rua): These provide an overview of all the emails sent from your domain and their authentication results. Use an email address where you want to receive these reports, like [email protected].
- Forensic Reports (ruf): These give detailed data on emails that failed DMARC checks, including header information. Be cautious with these as they may include sensitive details.
You can specify these options in your DMARC record using the rua and ruf tags. For example:
rua=mailto:[email protected]; ruf=mailto:[email protected]
3. Create the DMARC TXT Record
Now it’s time to create the DMARC record and add it to your DNS settings. Here’s the basic format:
v=DMARC1; p=none; rua=mailto:[email protected]Let’s break it down:
- v=DMARC1: This specifies the DMARC version.
- p=none: This defines the policy, which in this case is none.
- rua=mailto:[email protected]: This is where you’ll receive aggregate reports.
Note: A single domain shouldn’t contain more than one DMARC record. regardless of whether a subdomain is being used. Therefore, make sure there isn’t an existing DMARC record before continuing.
How to Add the DMARC Record to Your Domain
To begin, you need to edit the DNS settings for your domain and add a DMARC record. DNS is essentially a set of rules that directs servers to your site content, email mailbox, and other resources.
To make changes to your DNS, you or the domain owner must log into the provider managing your domain’s DNS zone. If you’re unsure where to find your DNS settings, here are a few places to check:
- Your web hosting control panel: If your domain and hosting were purchased together, the DNS is likely managed by your hosting provider. Log into your hosting account and look for a section labeled DNS or DNS Zone.
- Your DNS registrar: If the domain was bought on its own, the DNS is probably handled by the company you bought it from.
- Your CDN provider: If you’re using a content delivery network like Cloudflare, your DNS records will be managed through the CDN settings.
For this guide, I’ll show how to add a DMARC record using Cloudflare as an example manually, but the steps to configure DMARC are pretty similar across different registrars or host.
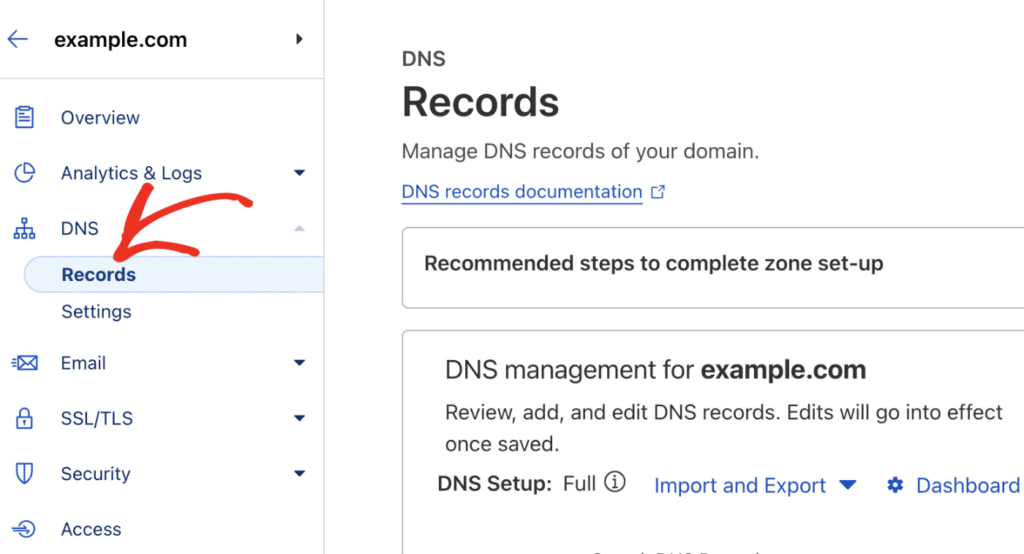
Creating a DMARC record may be done in two ways: either manually adding a DMARC TXT record to your domain server or using Cloudflare to generate one. Both approaches will be discussed below.
Option 1: Manually Adding a DMARC Record (Any Host)
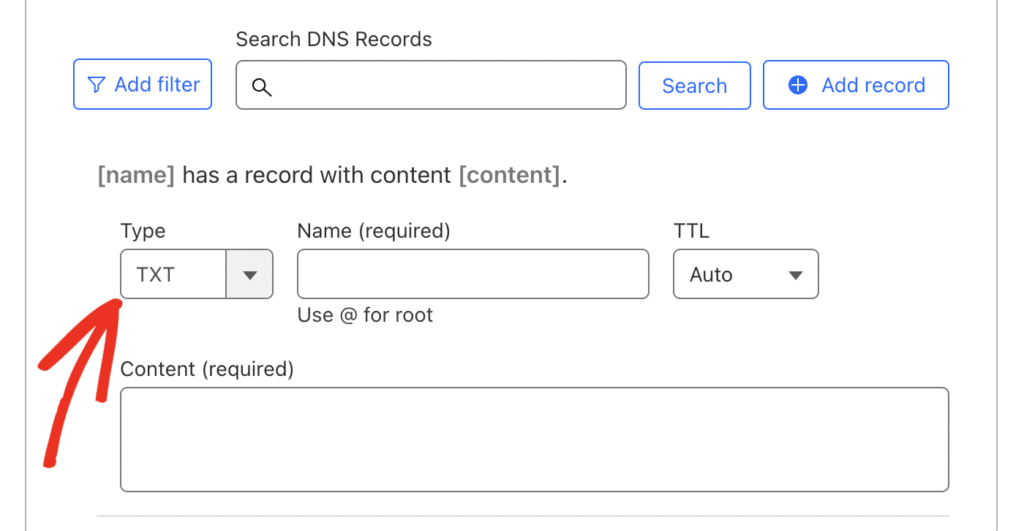
On Cloudflare’s DNS Management page, click the Add record button to start creating your DMARC record.
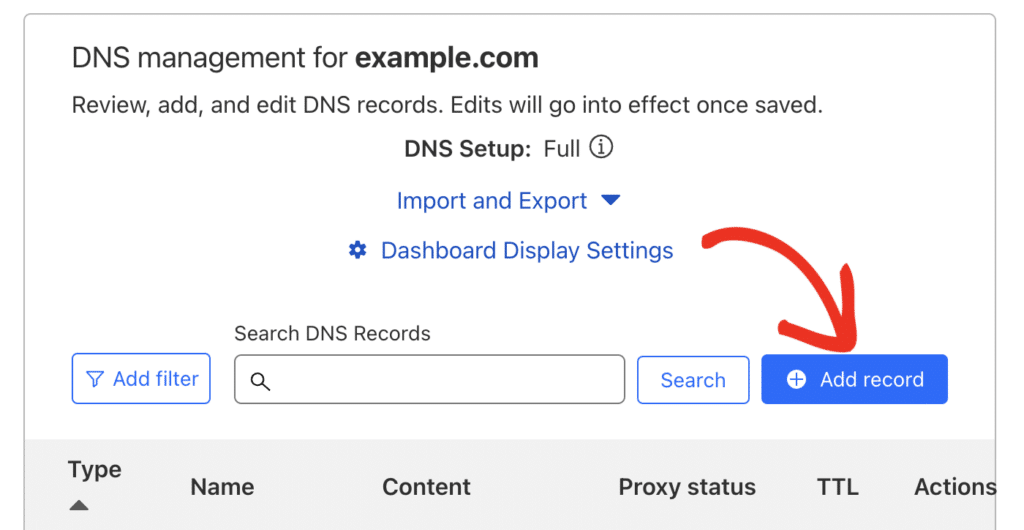
From the Type dropdown, select TXT, which is the required format for adding DMARC records for all registrars and hosts.
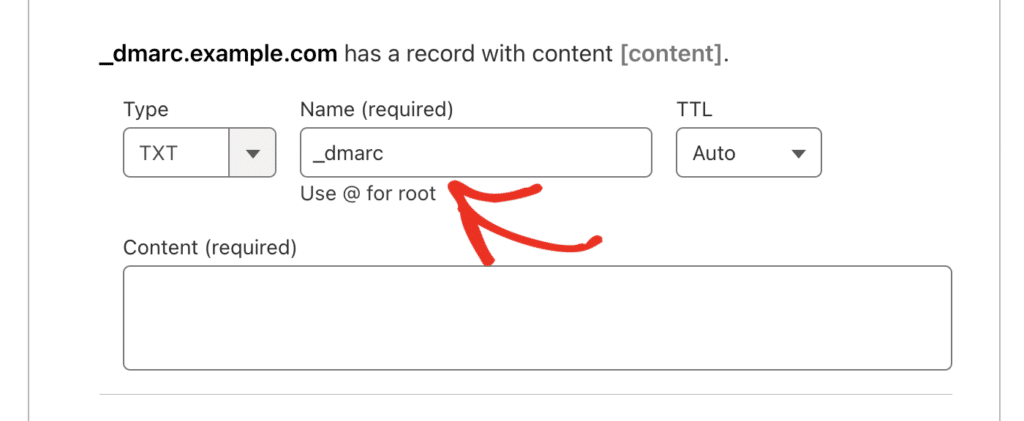
After that, enter _dmarc. in the Name field, making sure to include the period (dot) at the end.
Some hosts will either delete the period or display an error since they don’t require it. If so, you can use _dmarc without the period without risk.
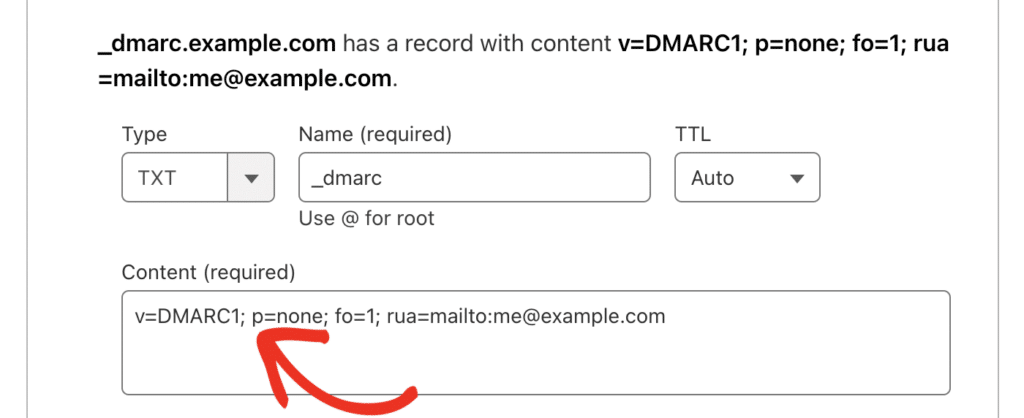
Next, in the Content field, paste the following DMARC record:
v=DMARC1; p=none; fo=1; rua=mailto:[email protected]
- The p=none policy is a relaxed setting that allows all emails to deliver but still sends reports. This is ideal for monitoring. If you notice issues or suspicious reports, you can update this policy to a stricter one, like quarantine or reject.
- The rua=mailto: field specifies where your DMARC reports will be sent. Use the email address provided by your email server, or if unavailable, your own domain’s email address.
- The fo=1 setting generates forensic reports whenever the DMARC record doesn’t align with your DKIM and SPF records.
Note: The forensic rule isn’t mandatory and can be left out if your SMTP relay doesn’t require it. Your DMARC record will still work without it.
So after pasting in the rule, here’s our finished DMARC record:
TTL (Time to Live) determines how long DNS information stays active before refreshing.
It’s best to leave it on Auto (about 4 hours), but if only fixed options are available, 24 hours or 14400 seconds is fine.
After entering all the record details, click Save to update your DNS settings.

Option 2: Generating a DMARC Record (Cloudflare Users)
If you’re using a CDN like Cloudflare to host your domain, you can quickly generate a DMARC record. Cloudflare provides tools to create DNS records for SPF, DKIM, and DMARC.
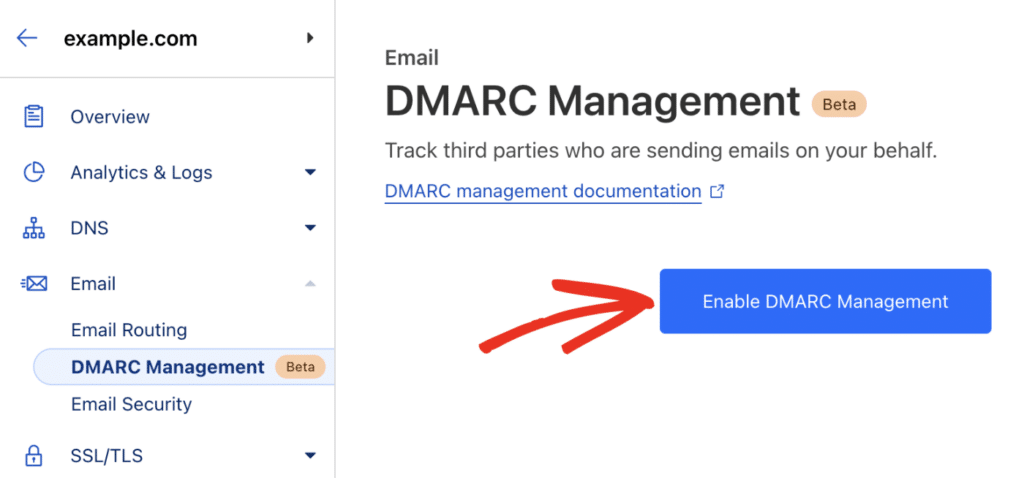
To get started, go to Email » DMARC Management in the left-hand menu of your Cloudflare dashboard.

If it’s your first time on this specific page, click on Enable DMARC Management to activate the feature.
Once you’re on the DMARC Management page, you’ll see information about your domain’s email performance.
To proceed, click on View records to check any existing records for your domain.
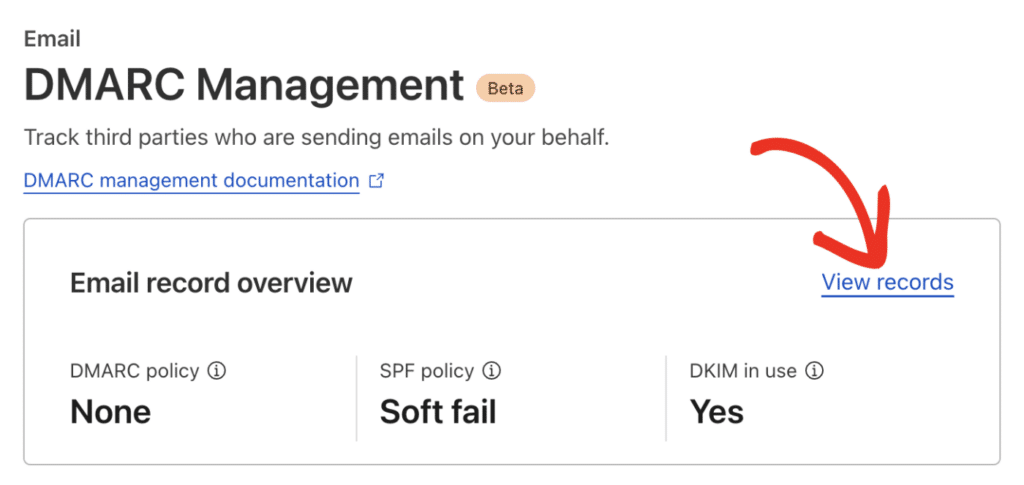
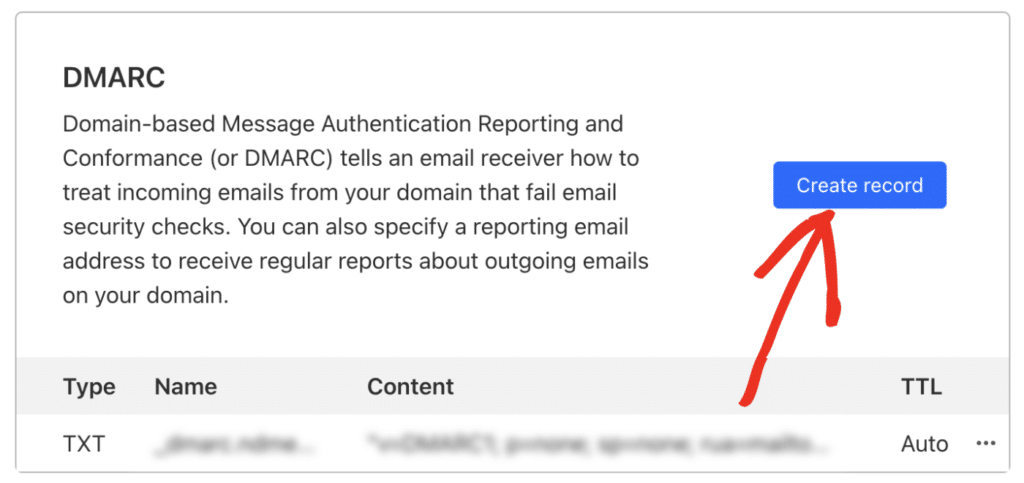
From here, you can create and manage SPF, DKIM, and DMARC records for your domain. Scroll down to the DMARC section and select Create record.
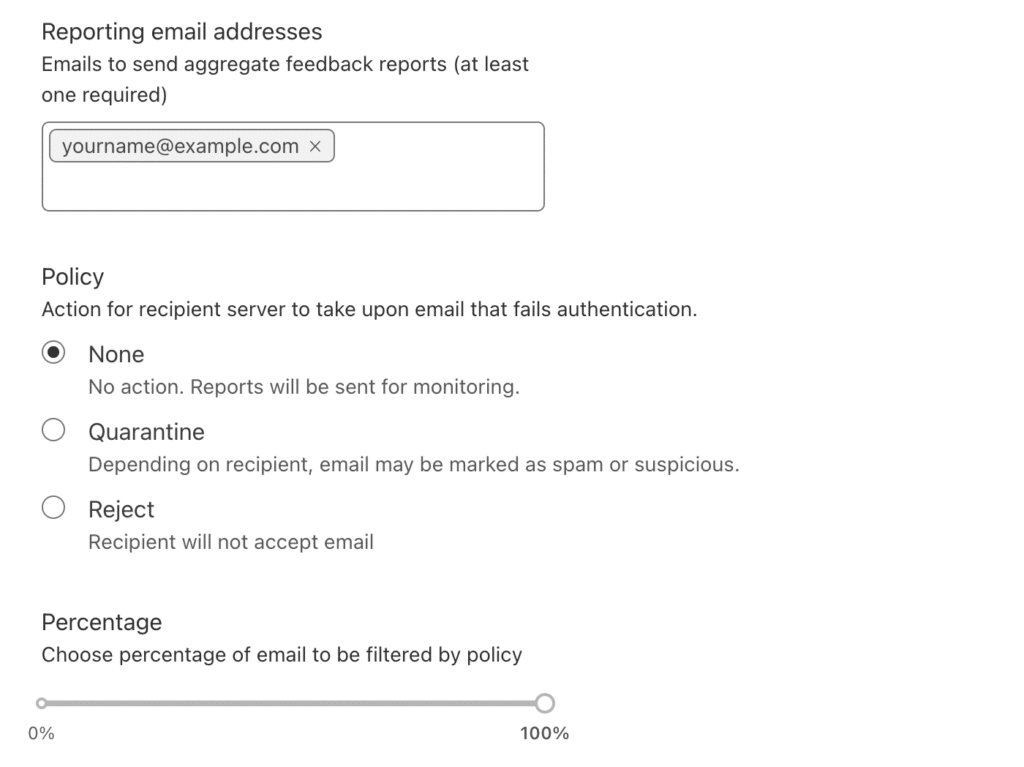
Next, you’ll configure the options for your DMARC record. Cloudflare provides an easy-to-use interface to set these up. Here’s a breakdown of the available settings:
- Reporting email addresses: Specify the email addresses where DMARC reports will be sent.
- Policy: Choose the DMARC policy that fits your needs. Options include None, Quarantine, or Reject.
- Percentage: Define the percentage of emails to filter based on your policy.
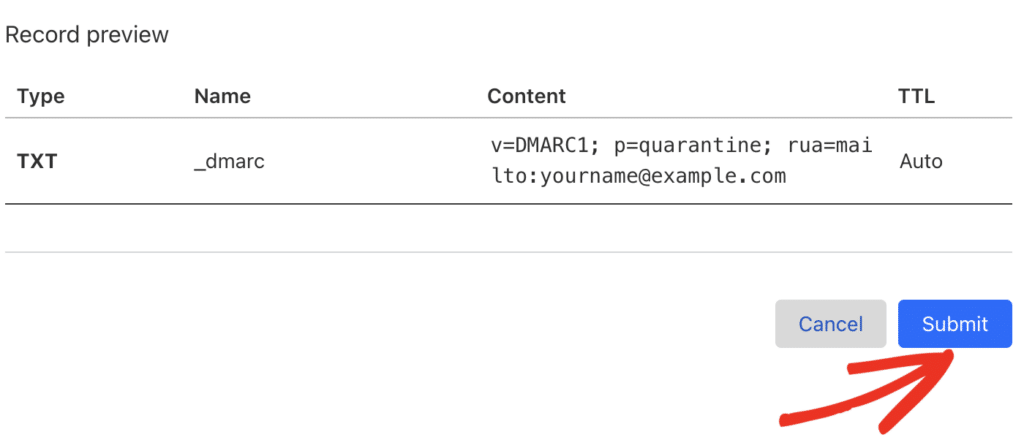
Once you’ve configured the settings, you’ll see an overview of the record you’re about to create. Review the details and click Submit to generate your DMARC record.
Note: It may take up to 48 hours for DNS records to propagate fully. If you test your DMARC setup and see a “record not found” message, it’s likely still propagating.”
Testing and Monitoring Your DMARC Setup
Testing and monitoring your DMARC setup is essential to ensure it works as expected and protects your domain effectively.
Once your DMARC record has been added, you’ll need to wait for the DNS changes to propagate.
While this typically takes up to 48 hours, services like Cloudflare often process changes in just a few minutes.
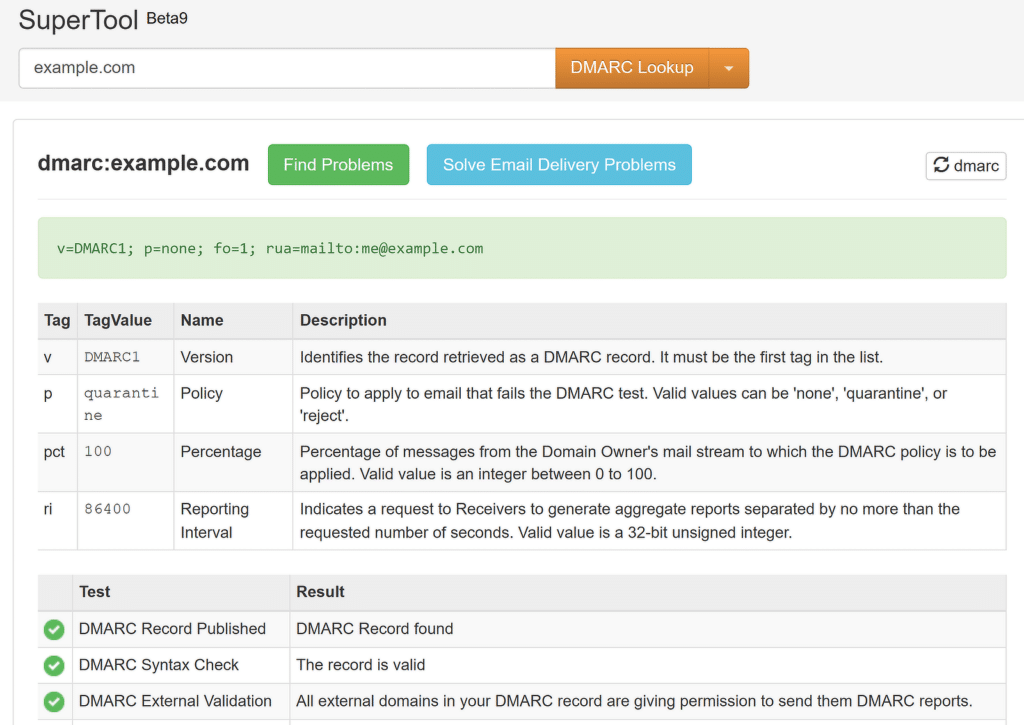
After the propagation period, verify the added record using a tool like MXToolbox. Use their DMARC checker to confirm your rule is visible.
If everything is configured correctly, you’ll see your DMARC record appear in a green bar, indicating it’s functioning as intended.
For additional verification, you can send a test email with Easy WP SMTP to check your DNS records, including DMARC, automatically.

If the record is set up correctly, you’ll receive a confirmation message showing that the DMARC rule passed successfully.
FAQs on How to Create a DMARC Record
Creating a DMARC record is a popular topic of interest among our readers. Here are answers to some common queries about it:
What should be in a DMARC record?
A DMARC record should include essential components like the version (v=DMARC1), the policy (p=) that determines how to handle emails failing authentication (e.g., none, quarantine, or reject), and the reporting email address (rua=) for receiving feedback reports.
Optional fields like pct= (percentage of emails to apply the policy to) can also be included.
What is a DMARC record generator?
A DMARC record generator is a tool that helps you create a properly formatted DMARC record without manual effort.
It lets you specify your domain policies and reporting preferences, and then provides the correct record syntax to add to your DNS.
Can you set up DMARC for free?
Yes, you can set up DMARC for free. Most domain registrars and hosting providers allow you to create and manage DNS records at no extra cost.
Free online tools can also help you generate a DMARC record.
What happens if you don’t have a DMARC record?
Without a DMARC record, your domain is vulnerable to spoofing and phishing attacks.
Unauthorized senders can misuse your domain, which may damage your reputation and lead to poor email deliverability.
Setting up DMARC helps protect your domain and ensures email security.
That’s it! Now you know how to create a DMARC record and add it to your domain.
Next, learn how to set up automatic emails effectively so you can keep your visitors engaged and informed without having to lift a finger every time.
