Are you considering moving from the free version of Easy WP SMTP to a paid license? Upgrading to Easy WP SMTP Pro unlocks additional features, more mailer choices, and exclusive support access.
This guide will walk you through the process of upgrading from the free version to Easy WP SMTP Pro.
Purchasing an Easy WP SMTP License
To begin, visit our Upgrade page. This page will display all features available with each license level so that you can determine which license is the best fit.
When you’ve determined which license has the features you’d like, you can click the Get Started button to begin the checkout process.
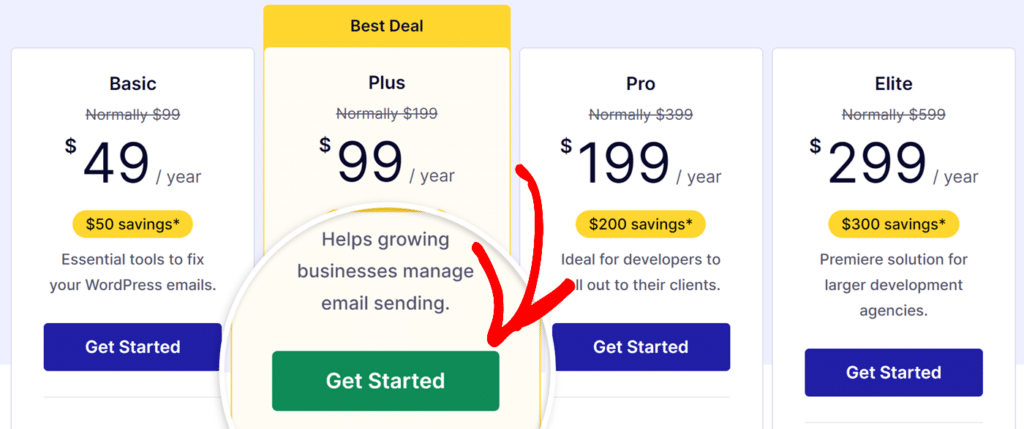
Currently, a 50% off discount is automatically applied for the first year of all new licenses. Within the checkout, the discount code should already be in place for you.
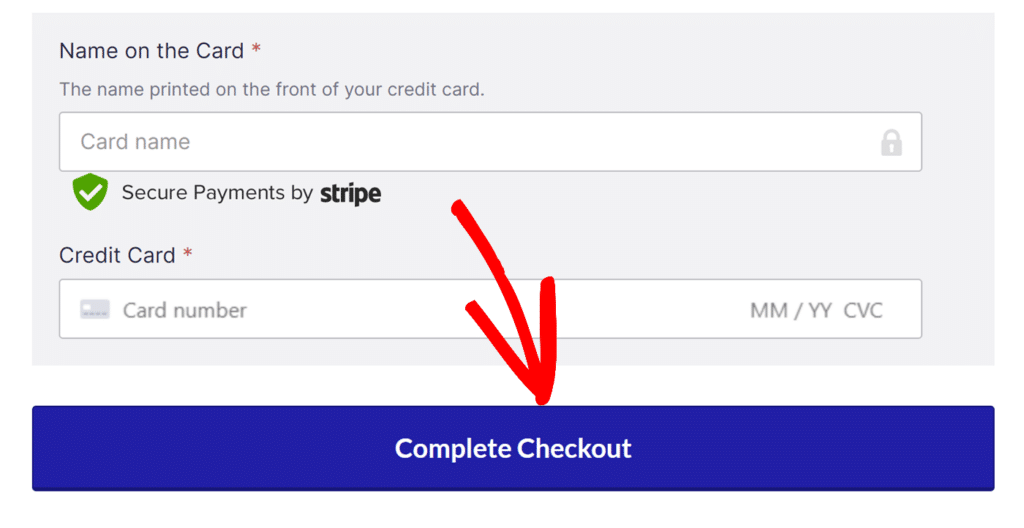
The last step is to enter your payment details and create a Easy WP SMTP account. Your account will provide access to the paid plugin download, so you’ll need this a little later in this tutorial.
When all of the fields are complete, click the Complete Checkout button to complete the order.
You will immediately be sent an email receipt of your purchase, delivered to the email address you use to create your Easy WP SMTP account.
Installing Easy WP SMTP Pro
Having purchased a license, you’re now ready to install the paid version of the Easy WP SMTP plugin and complete the upgrade.
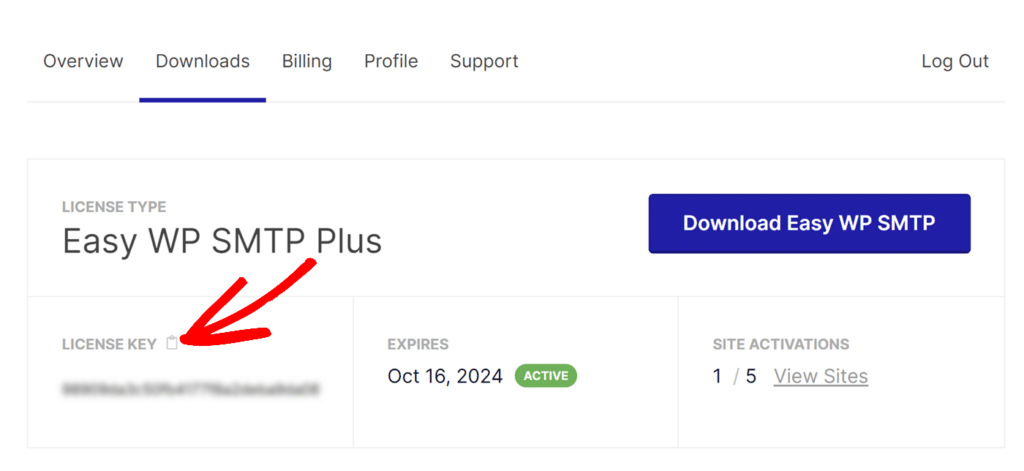
Start by clicking on the Downloads tab in your account area. You will see your license details there, including your license key. Copy this key and then return to your WordPress site to proceed.
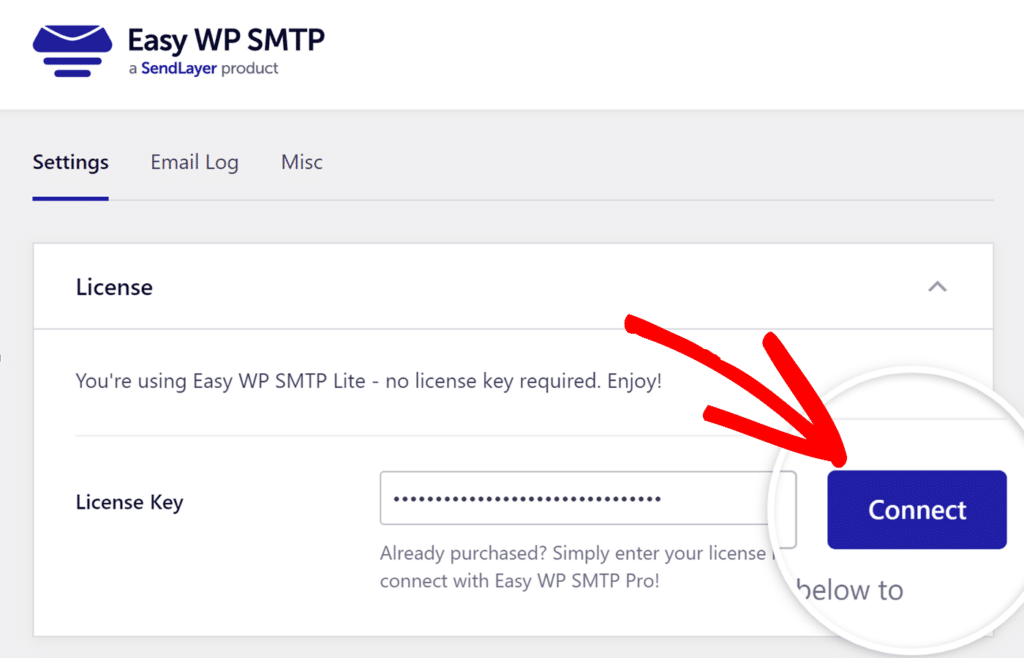
Within your site’s admin area, navigate to Easy WP SMTP » Settings to open up your Easy WP SMTP settings. Then, within the License Key field, paste the license key you just copied.
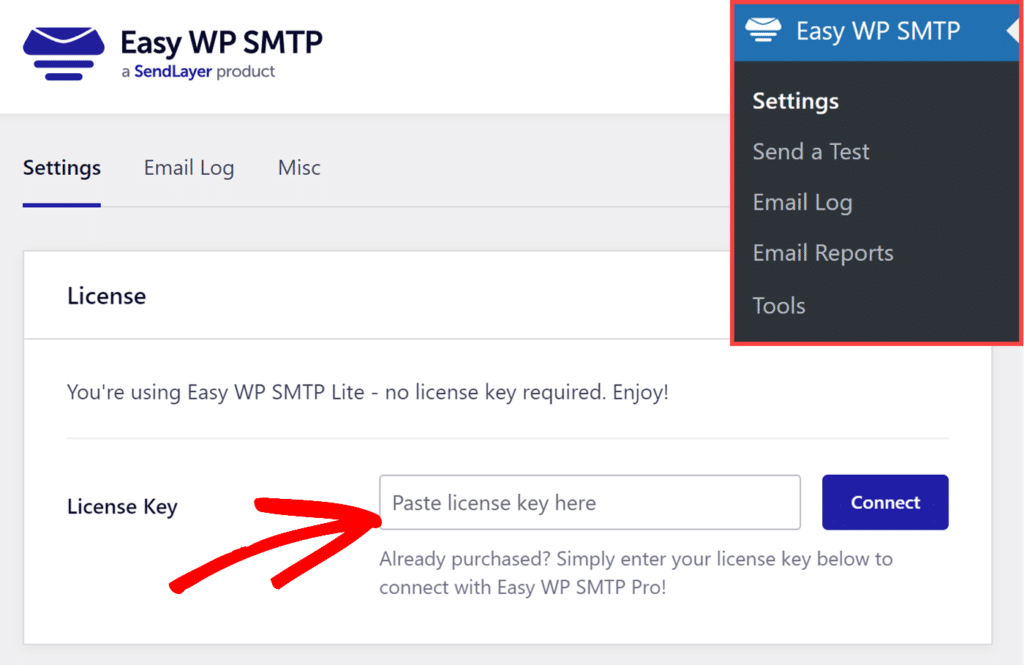
Then, go ahead and click the Connect button.
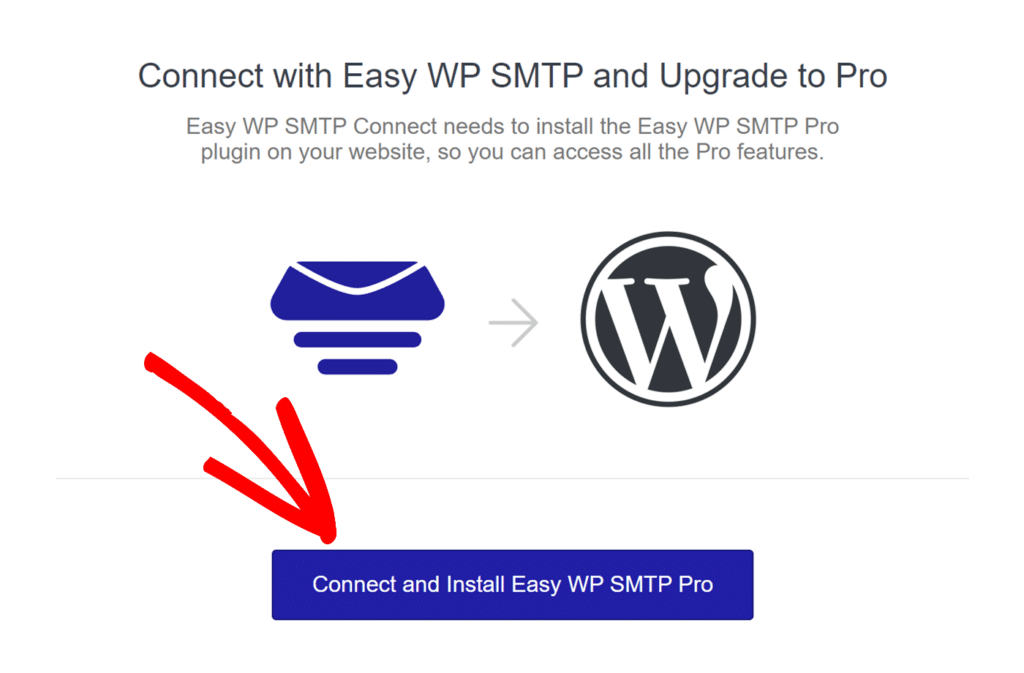
This will direct you to the Easy WP SMTP setup wizard, which handles the automatic installation and activation of the paid plugin version on your site without requiring any additional steps from you.
To initiate the installation process, click the Connect and Install Easy WP SMTP Pro button.
Once the installation process has successfully finished, you’ll see a Success message appear on the screen.
Frequently Asked Questions
Below, we’ve answered some of the top questions about upgrading from our lite to pro.
When I try to use the setup wizard, I get a notice that says “There was a problem installing the plugin. Please install Easy WP SMTP Pro manually”. What does this mean?
Some hosting providers don’t support one-click installs of plugins, so if this error message appears, you’ll need to manually install the Easy WP SMTP plugin on your site.
For more details on how to manually install a plugin, please be sure to check out our guide on how to install and activate Easy WP SMTP.
That’s it! You’ve now installed the paid version of Easy WP SMTP, and have access to additional features.