Are you struggling with email deliverability issues on your WordPress site?
Do you want to ensure that important notifications, customer communications, and transactional emails are reaching their intended recipients? Look no further!
In this step-by-step guide, I’ll walk you through the easiest way to view WordPress email logs and improve your site’s email performance.
Introduction to WordPress Email Logs
WordPress, by default, doesn’t provide a built-in way to log emails sent from your site.
This can make it challenging to track important communications, diagnose delivery issues, or ensure that your site is functioning as expected. That’s where an email logging plugin can come in useful.
Email logging is the process of recording information about every email sent from your WordPress site. This information may include:
- Recipient email addresses
- Subject lines
- Email content
- Sending status (success or failure)
- Timestamp of when the email was sent
- Technical details like headers and SMTP information
By implementing email logging, you gain valuable insights into your site’s email activity and can quickly identify and resolve any issues that arise.
Why You Should View WordPress Email Logs
Email logging isn’t just a nice-to-have feature – it’s a critical tool for maintaining the health and functionality of your WordPress site. Here’s why:
Troubleshooting Delivery Issues
Without logs, it’s nearly impossible to determine why an email wasn’t received. Was it never sent? Did it fail to deliver? Email logs provide the answers, helping you pinpoint the exact cause of delivery failures.
Ensuring Important Notifications Reach Recipients
From password reset emails to order confirmations, many critical site functions rely on email. Logging helps you verify that these essential messages are being sent and delivered successfully.
Compliance and Record-Keeping
Depending on your industry, you may be required to maintain records of certain communications. Email logs provide an audit trail that can be crucial for compliance purposes. You can also use your logs to backup emails sent from your site, save form data safely in the WordPress database, and keep a record of any information sent by email from your site.
Improving Email Deliverability
By analyzing your email logs, you can identify patterns in successful and failed deliveries. This information can help you optimize your email settings and improve overall deliverability rates.
Detecting Unusual Activity
A sudden spike in email activity could indicate a security issue, such as a compromised form being used to send spam. Email logs allow you to quickly detect and respond to such anomalies.
How to View WordPress Email Logs
Now that you understand the importance of email logging, let’s take a look at how you can view your email logs in WordPress with an SMTP plugin.
Easy WP SMTP is the easiest way to see your email logs in the WordPress dashboard. This plugin not only improves email deliverability but also provides useful logging features.
To enable WordPress email logging, you’ll need a paid license for Easy WP SMTP. So first, head over to the pricing page and purchase the license that’s most suitable for the number of sites you want to use it on.
1. Download and Install Easy WP SMTP
Now that you’ve secured your Easy WP SMTP license, it’s time to get the plugin up and running on your WordPress site. Follow these steps to ensure a smooth installation process:
Downloading the Plugin
To get started, log into your Easy WP SMTP account dashboard and click on the Downloads tab.
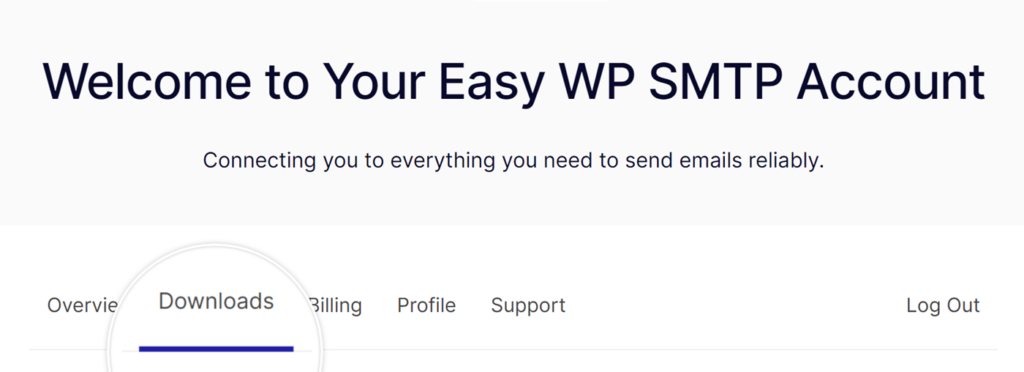
Here, you’ll see a list of your active licenses. Click the Download Plugin button.
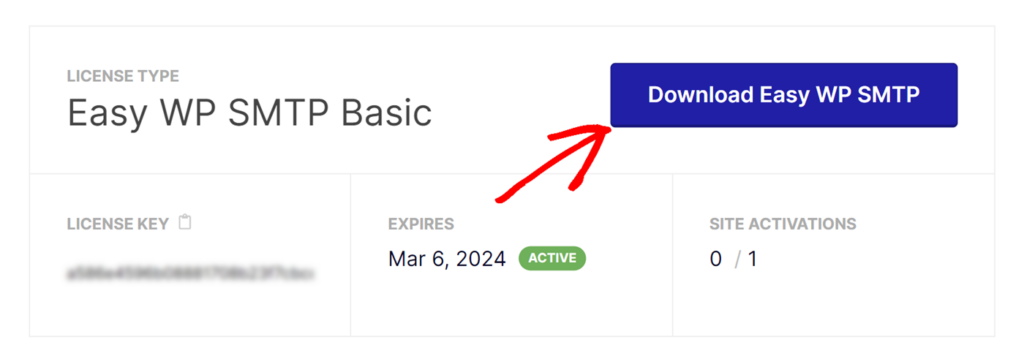
This will start the download of a compressed (.zip) file containing the Easy WP SMTP plugin.
Uploading and Activating the Plugin
Next, log in to your WordPress admin panel.
In the left sidebar navigate to Plugins » Add New.
At the top of the page, look for and click the Upload Plugin button.
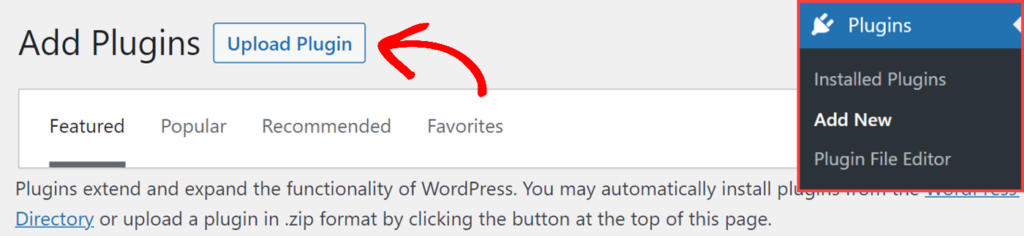
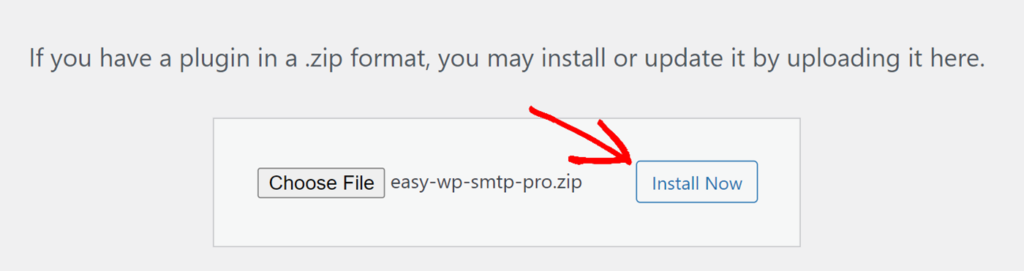
On the plugin upload page, click the Choose File button and navigate to and select the Easy WP SMTP .zip file you downloaded earlier.
After selecting the file, click Install Now.
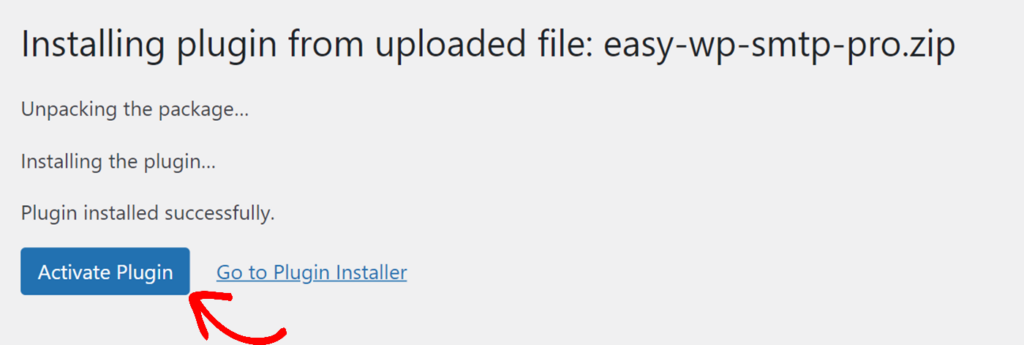
WordPress will process the file and install the plugin. This may take a few moments. Once installation is complete, you’ll see a success message.
Click the Activate Plugin button to enable Easy WP SMTP on your site.
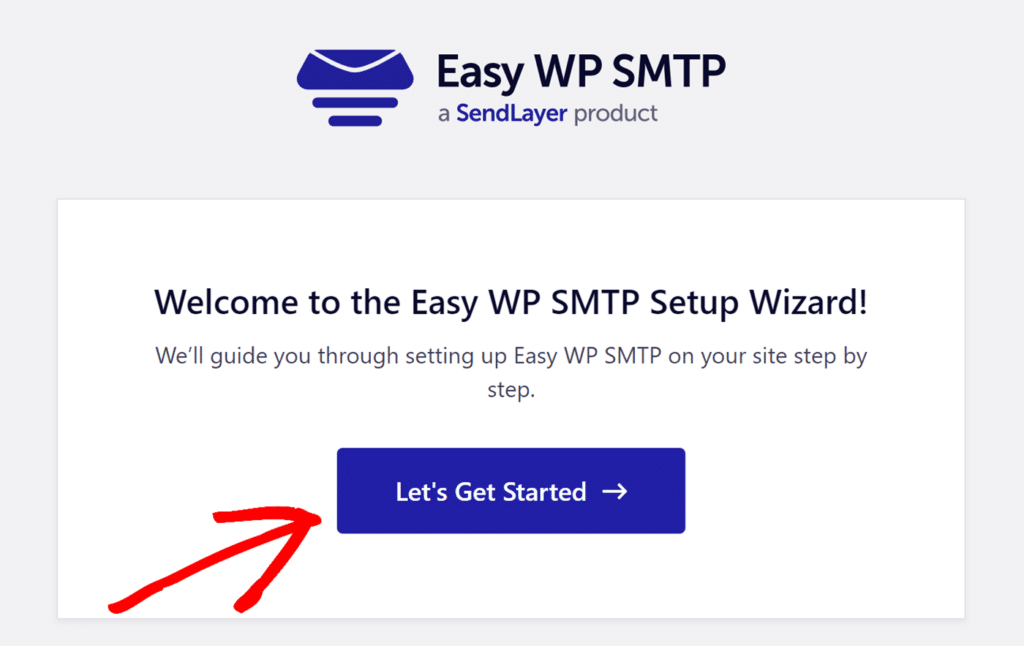
Congratulations! You’ve successfully installed and activated Easy WP SMTP. You’re now ready to configure the plugin and start improving your WordPress email deliverability.
2. Configure SMTP Settings
After activation, you’ll need to configure your SMTP settings.
Easy WP SMTP comes with a setup wizard that walks you through the steps of configuring it to work with your email service.
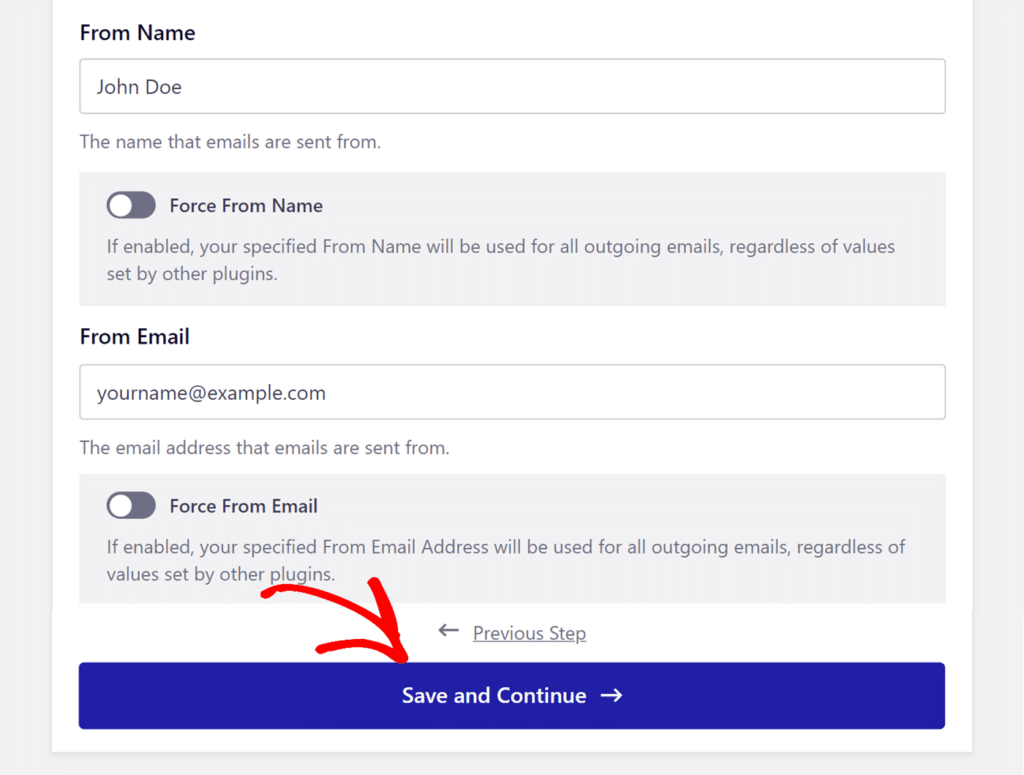
Information you’ll need to enter includes:
- From Name: The name that will appear as the sender of emails from your site.
- From Email: The email address your site emails are sent from. This must match the domain you’ve authorized to send emails.
- API Key: If you’re using SendLayer, SMTP.com, Brevo, or Mailgun to send your email, the API key allows Easy WP SMTP to communicate with your email service.
Some email services also require extra information such as the region your server is in, and additional IDs and authentication.
If you’re using the Other SMTP option, you’ll need to add your SMTP credentials rather than an API key. These include:
- SMTP Host: The outgoing server listed in your email provider’s SMTP settings.
- Encryption: The type of encryption used for your SMTP connection, such as TLS, SSL, or none.
- SMTP Port: The port your provider uses for SMTP connections.
- Authentication: This option turns authentication on or off. Most providers require it to be on.
- SMTP Username: Your SMTP username.
- SMTP Password: Your SMTP password.
Note: The Other SMTP option stores login credentials within WordPress, potentially accessible to other administrators. We recommend using Easy WP SMTP’s more secure mailer options.
Once you’ve finished configuring your mailer, you can click the Save and Continue button to continue with setup in the wizard.
3. Setting Up Email Logs
You can turn on email logging in the next stage of the wizard.
You can also enable other features of the plugin including error tracking, weekly email summary, and complete email reports.
To activate WordPress email logs with the most detailed information available, make sure to check both the Detailed Email Logs and Complete Email Reports options.

After clicking the Save and Continue button, you’ll see more options for configuring your email logs.
You can choose what information to save in your logs including:
- All email content
- File attachments
- Track when an email is opened
- Track when a link in an email is clicked

The wizard will attempt to send a test mail to make sure everything is set up correctly, and you’re done!
If you’ve previously installed Easy WP SMTP, you can also activate email logging or adjust the configuration of your email log in the Email Log tab of the plugin settings.

In this tab, you’ll also find the option to set your Log Retention Period.

If you want, you can set a specific timeframe (from one day to one year) after which email logs will be automatically deleted.
Congratulations! You’ve now set up comprehensive email logging for your WordPress site.
3. View WordPress Email Logs in Easy WP Mail SMTP
With logging enabled, you can now access valuable information about your site’s email activity. Here’s how to view and interpret your logs:
Accessing the Email Log
In your WordPress dashboard, go to Easy WP SMTP » Email Log
You’ll see a list of all logged emails, with the most recent at the top.

Viewing Detailed Email Log Information
For more in-depth information about a specific email, click View Log next to the email in question.

You’ll see additional details such as:
- Full email content and subject
- Date and time of creation
- Sender and recipient email addresses
- Delivery status
- Mailer
- Attachments
- Plugin or process that sent the email
- If the email was opened or clicked

There’s also a Technical Details section where you can see the full email headers and the source of the process that generated the email.
On this screen you can also print or export the email.
Searching and Filtering Logs
To find specific emails or analyze patterns, there are several ways you can navigate your email logs:
Use the search bar to look for emails by recipient, subject, or content.

Use the date range selector to view emails from a specific time period

You can also use the links at the top of the log to display only Delivered, Pending, or Failed emails.
Using the WordPress Email Log for Troubleshooting
Email logs are an invaluable tool for diagnosing and resolving common WordPress email problems. Here are some issues you might encounter and how to use logs to solve them:
Emails Not Being Sent
If you’re not seeing any log entries:
- Check if logging is enabled
- Verify that your SMTP settings are correct
- Test your email function using Easy WP SMTP’s email test feature
Emails Failing to Deliver
If logs show emails being sent but not received:
- Check the status and any error messages in the log
- Verify the recipient’s email address
- Check if your emails are being marked as spam
- Attempt to resend the emails from your WordPress site (each log entry in Easy WP SMTP includes a link to resend the email)
Delayed Email Delivery
If emails are taking a long time to reach recipients:
- Look for patterns in the timestamps of sent emails
- Check if your server is throttling email sending
- Consider using a dedicated SMTP service for improved delivery times
Spam Classification
If your emails are being marked as spam:
- Review the email content logged to ensure it’s not triggering spam filters
- Check that your SMTP settings include proper authentication
- Consider using a reputable email service provider
Frequently Asked Questions About Email Logs
Here are some of the most common questions Easy WP SMTP users ask us about email logs:
Why aren’t my WordPress emails being sent?
There could be several reasons, including incorrect SMTP settings, server restrictions, or plugin conflicts. Check your email logs for error messages and verify your Easy WP SMTP configuration.
How long should I keep my email logs?
It depends on your needs and any applicable regulations. Generally, 30-90 days is sufficient for troubleshooting purposes. If you need to retain logs longer for compliance reasons, consider regularly exporting and archiving them.
Can I log emails sent by other plugins?
Yes, Easy WP SMTP can log emails sent by most WordPress plugins that use the standard wp_mail() function. However, some plugins might use their own email sending methods, which may not be captured in the logs.
Is it safe to log email content?
While logging email content can be useful for troubleshooting, it may pose privacy and security risks. Only enable content logging if necessary, and be sure to manage access to your logs carefully.
How can I improve my email deliverability?
Use a reputable SMTP service, authenticate your emails properly, avoid spam trigger words in your content, and maintain a clean email list. Regularly review your email logs to identify and address any delivery issues promptly.
What should I do if I see a lot of failed emails in my logs?
A: Investigate the error messages in the logs, check your SMTP settings, and verify recipient email addresses. If the issue persists, contact Easy WP SMTP support, your hosting provider, or SMTP service for assistance.
Can I automatically delete old email logs?
Yes, Easy WP SMTP allows you to set a log retention period. Logs older than the specified period will be automatically deleted.
How can I tell if my emails are being opened?
Easy WP SMTP Pro includes email tracking features that can show you when emails are opened. You can see this information in your email logs.
Remember to regularly review your logs, keep your email configurations up to date, and follow best practices for email management. This way, you’ll be well-equipped to handle any email challenges that come your way.
That’s it! Now you know how to view WordPress email logs
Next, are you struggling with email sending issues in WordPress? Take a look at our guide to troubleshooting email delivery failures in WordPress.