Ensuring your emails reach their intended recipients is more crucial than ever. With Gmail’s increasingly stringent filtering systems, understanding and monitoring your email deliverability has become essential for any business or website owner.
Google Postmaster Tools is a free suite of monitoring tools that provides valuable insights into how your emails perform with Gmail users.
In this post, I’ll walk you through the process to show you how to set up Google Postmaster Tools for the first time, and give you some tips for ongoing monitoring and best practices to optimize your email deliverability long term.
Understanding Google Postmaster Tools
Google Postmaster Tools is a free service that helps senders analyze their email performance, spam rates, and domain reputation specifically for Gmail recipients.
Given that Gmail commands over 30% of the email client market share as of 2024, these insights are invaluable for any business sending bulk emails.
Key Benefits of Postmaster Tools
Google Postmaster Tools serves as your window into email performance, helping you understand and improve how your messages interact with Gmail’s ecosystem.
While the setup is straightforward, the insights it provides are powerful, especially as email filtering becomes increasingly sophisticated. With this tool you can:
- Monitor spam complaints and domain reputation
- Track email authentication status
- Identify delivery errors and issues
- Improve overall email deliverability
- Access detailed performance metrics
Who Needs Postmaster Tools?
| Sender Type | Should Use Postmaster Tools? | Primary Benefits |
| E-commerce Sites | Yes | Monitor transaction emails, marketing campaigns |
| Newsletter Publishers | Yes | Track deliverability, reduce spam complaints |
| Small Businesses | Yes* | Maintain sender reputation, ensure delivery |
| Personal Bloggers | Optional | Monitor growth, prepare for scaling |
| Large Enterprises | Essential | Complex email monitoring, reputation management |
*Recommended if sending more than 100 emails per day
Volume Requirements
While Google suggests Postmaster Tools works best for senders delivering more than 5,000 emails daily, it can be valuable for smaller senders who:
- Regularly communicate with Gmail users
- Send marketing newsletters
- Operate e-commerce platforms
- Plan to scale their email operations
How To Set Up Google Postmaster Tools – Step-by-Step Guide
Setting up Google Postmaster Tools is a straightforward process that anyone can complete in about 10-15 minutes. While it might seem technical at first, don’t worry – I’ll walk through each step in detail.
The setup process consists of three main phases: initial access, domain verification, and DNS configuration.
1. Initial Setup
Getting started with Postmaster Tools requires a Google account and just a few clicks. Here’s how to begin:
Navigate to the Google Postmaster Tools website.
If you’re not already logged in, sign in using your Google account credentials – preferably the same account you use for other Google services like Analytics.
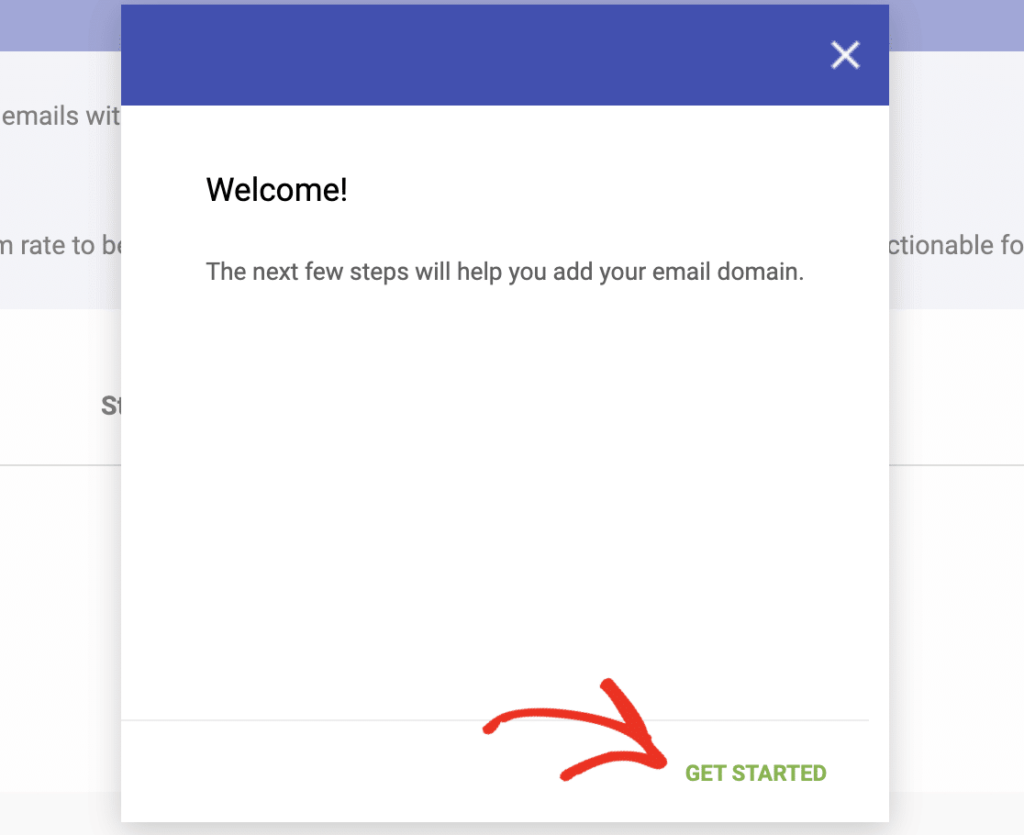
Once logged in, you’ll see a welcome screen. Click the “Get Started” button to begin the setup process.
2. Domain Verification
Now comes the important part – telling Google which domain you want to monitor. This step is crucial for ensuring you have the authority to access data for your domain:
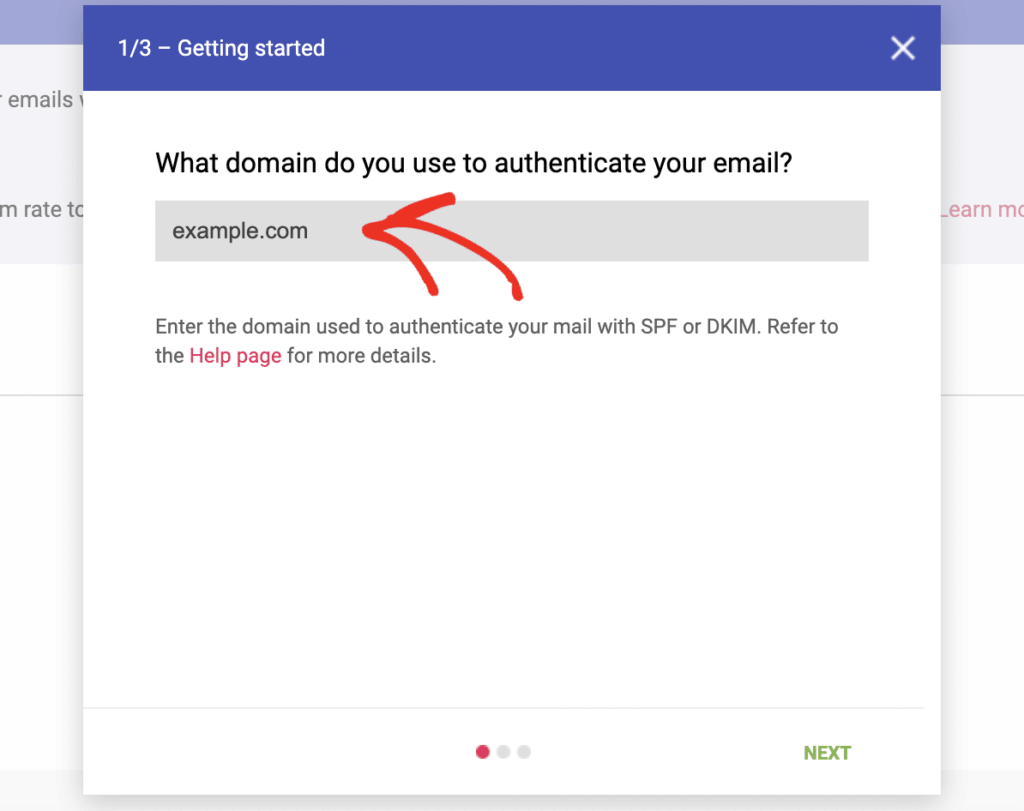
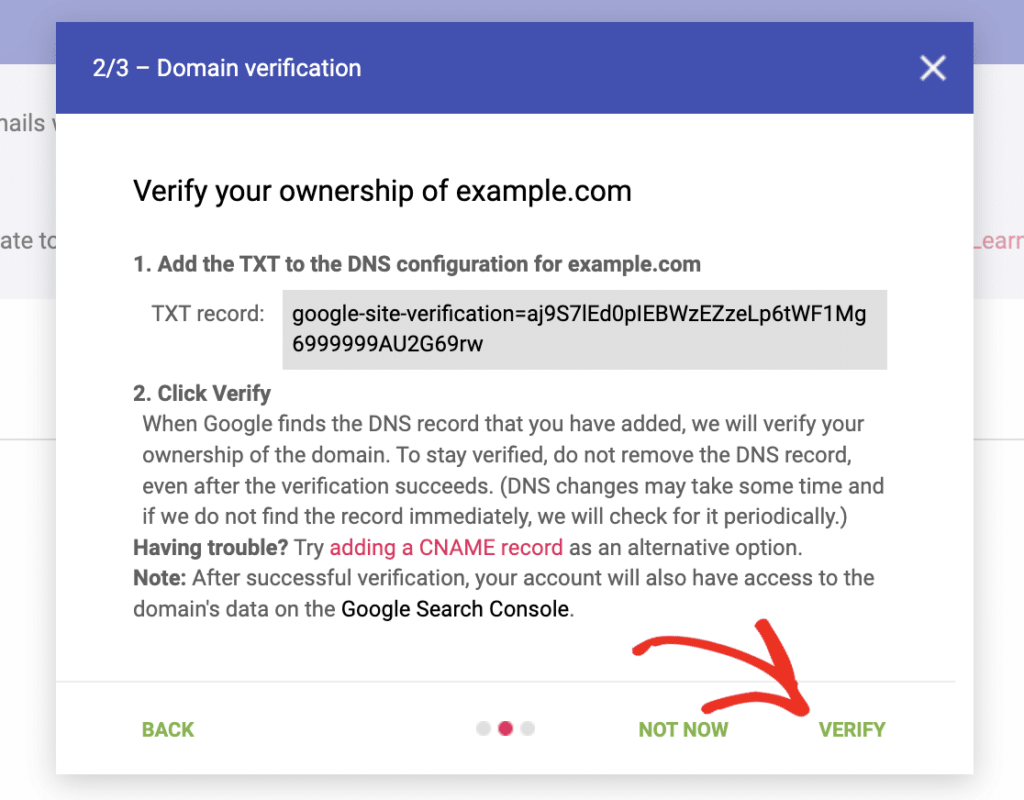
In the domain registration field, enter your sending domain name (typically your main website domain, like example.com).
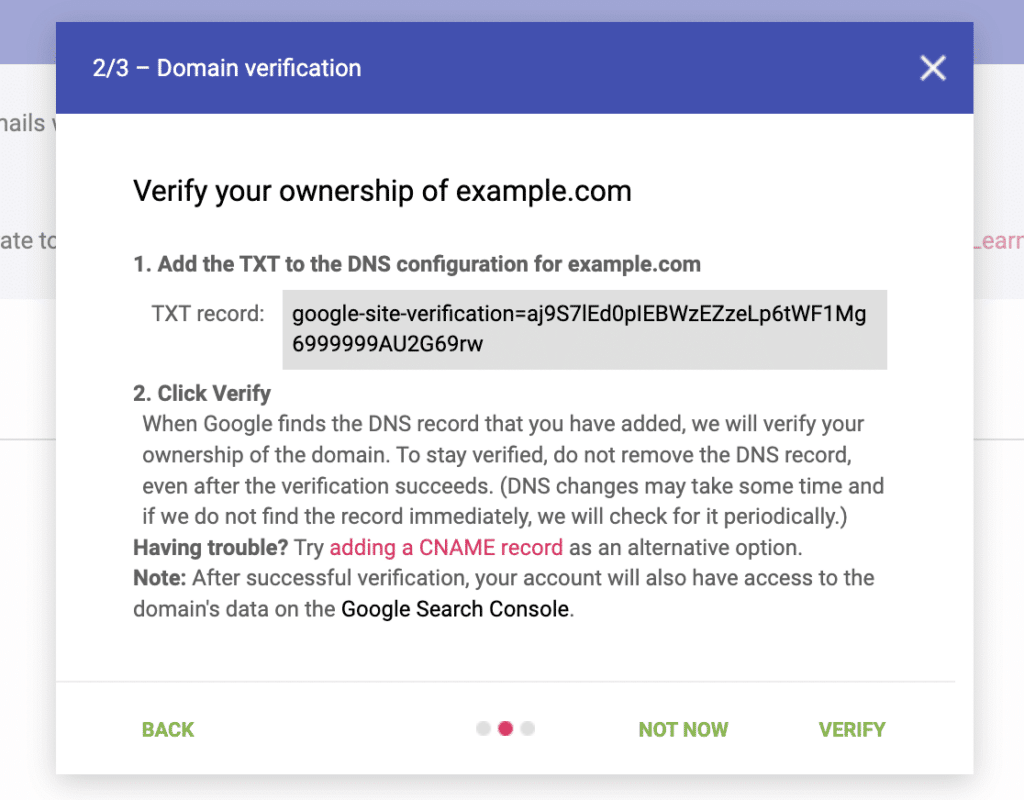
Google will then present you with three verification options:
- TXT Record (Recommended): The most reliable method, requiring a simple DNS update
- HTML File Upload: Requires uploading a verification file to your web server
- Google Analytics: Available if you already have Analytics set up for your domain
We strongly recommend using the TXT record method as it’s the most stable and easiest to maintain long-term.
3. DNS Configuration
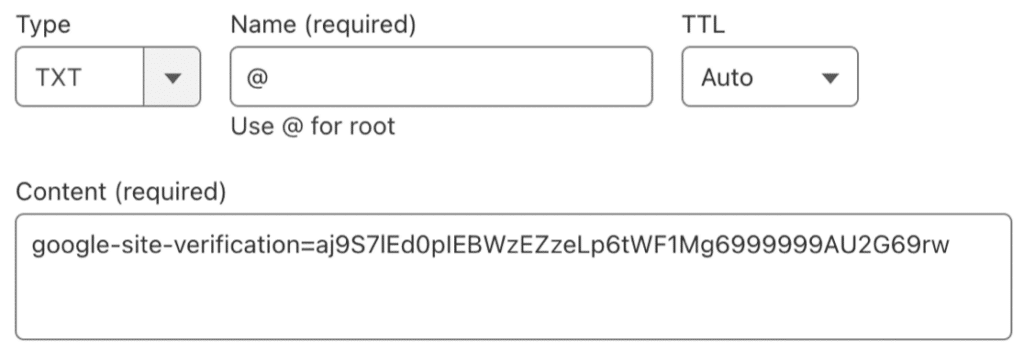
If you’ve chosen the recommended TXT record verification method, you’ll need to add a special record to your domain’s DNS settings:
The actual process of adding this record will depend on your domain registrar or DNS provider. You’ll need to:
- Log into your domain provider’s control panel
- Locate the DNS settings or zone editor
- Add a new TXT record using the values provided by Google
- Save your changes
Pro Tip: DNS propagation times can vary significantly depending on your provider. While Cloudflare users might see changes take effect within minutes, traditional DNS providers typically require 24-48 hours for full propagation. Don’t worry if verification doesn’t work immediately – it’s perfectly normal to wait a few hours.
Verification Confirmation
After adding your DNS record, return to the Postmaster Tools setup page and click the “Verify” button. Google will check for the presence of your verification record. Once confirmed, you’ll see a success message and can begin accessing your email performance data.
Remember that while waiting for verification, you can still explore the Postmaster Tools interface and familiarize yourself with the various reports and metrics available. Just keep in mind that no data will appear until both verification is complete and you’ve sent enough emails for Google to generate meaningful statistics.

Understanding Your Postmaster Dashboard
When you first log into Google Postmaster Tools, you’ll be presented with a comprehensive dashboard containing various metrics about your email performance.
Let’s break down each key metric to help you understand what you’re looking at and how to interpret the data effectively.
1. Spam Complaint Rate
Your spam complaint rate is one of the most critical metrics to monitor, as it directly impacts your sender reputation and deliverability.
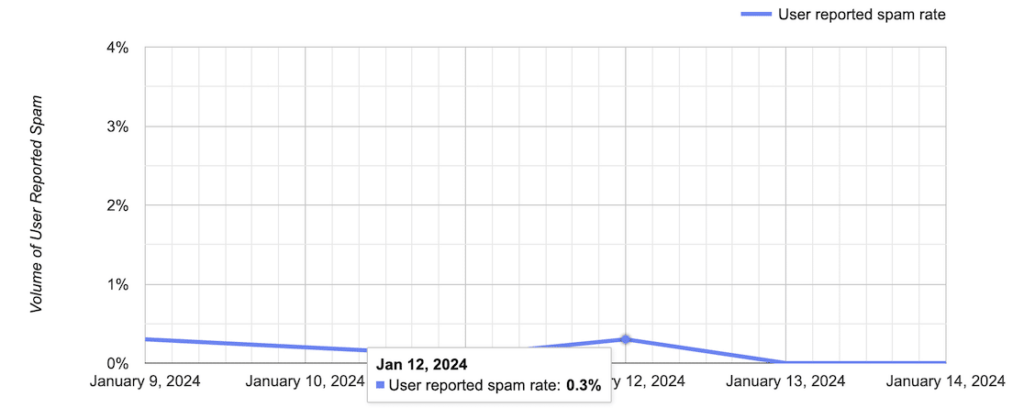
This metric shows how many of your emails recipients marked as spam.
Target Metrics:
- Ideal Rate: Below 0.1%
- Warning Threshold: 0.3%
- Critical Level: Above 0.5%
How It’s Calculated: Spam Complaint Rate = (Number of Spam Reports / Total Emails Sent) × 100
What to Watch For:
- Sudden spikes in spam rates
- Consistent upward trends
- Rates exceeding 0.3% for more than three consecutive days
2. Domain Reputation
Your domain reputation is like a credit score for your email sending domain. It’s a crucial indicator of how Gmail views your overall email program.
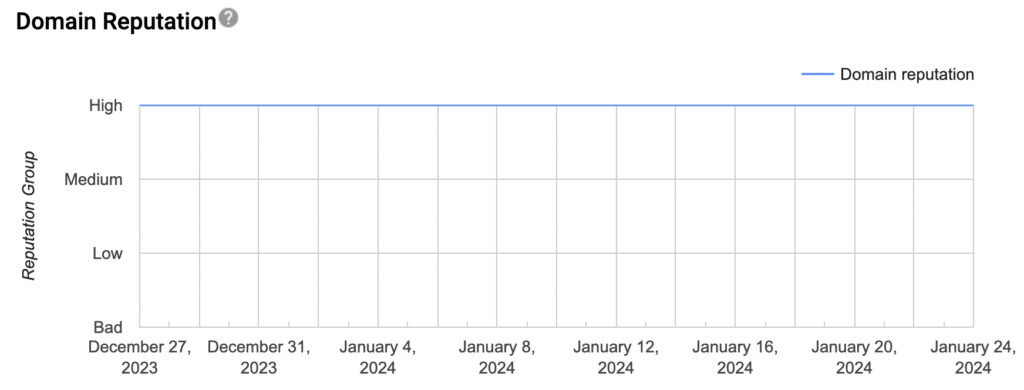
| Rating | Description | Action Needed | Common Causes |
| High | Excellent standing; emails likely to reach inbox | Maintain current practices; document successful strategies | Consistent sending, good engagement, low complaints |
| Medium | Good standing but room for improvement | Monitor metrics closely; implement best practices | Mixed engagement, occasional spam reports |
| Low | Poor standing; deliverability at risk | Immediate action required; review sending practices | High complaint rates, poor engagement, sudden volume changes |
| Bad | Critical issues; severe deliverability problems | Urgent intervention needed; may need expert help | Spam traps, blocklists, very high complaint rates |
3. IP Reputation
IP reputation focuses specifically on the sending IP address rather than your domain name. This metric is particularly crucial if you’re using:
- Shared hosting environments
- Email service providers
- Multiple sending IPs
Understanding IP reputation requires special attention, particularly because it can be more volatile and complex than domain reputation.
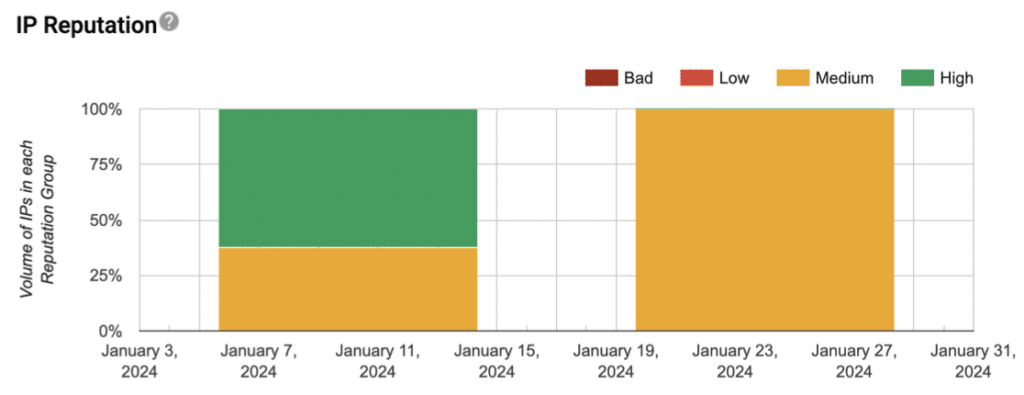
When you’re using a shared IP address, your reputation is intertwined with other senders using the same IP – meaning their sending practices can directly impact your deliverability.
This shared responsibility makes it crucial to monitor your IP reputation closely, as changes can occur much more rapidly than domain reputation, often within hours rather than days or weeks.
Additionally, Google considers your IP’s historical sending patterns when calculating its current reputation, which means maintaining consistent, positive sending practices is essential for long-term deliverability success
4. Authentication Results
Authentication results show how well your emails pass various security checks. These technical metrics are crucial for maintaining good deliverability.
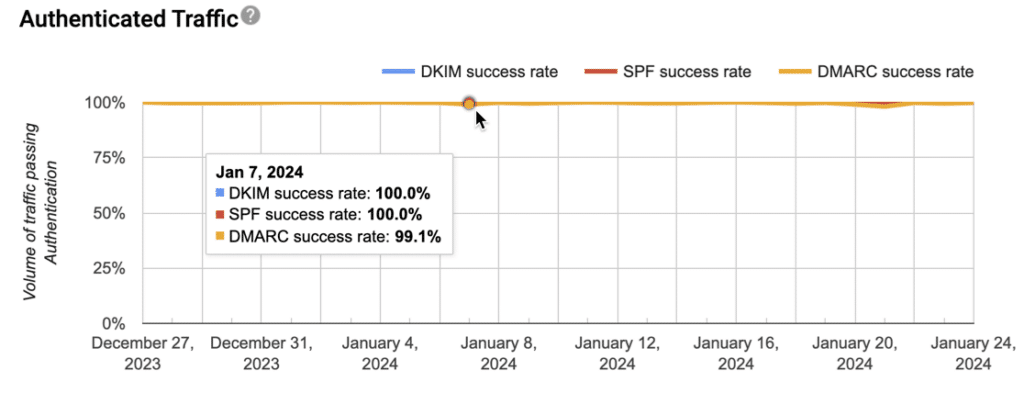
SPF (Sender Policy Framework)
- Verifies authorized sending servers
- Prevents email spoofing
- Should maintain 100% pass rate
DKIM (DomainKeys Identified Mail)
- Ensures email hasn’t been tampered with
- Provides cryptographic authentication
- Critical for establishing trust
DMARC (Domain-based Message Authentication)
- Combines SPF and DKIM
- Provides clear handling instructions
- Protects against spoofing and phishing
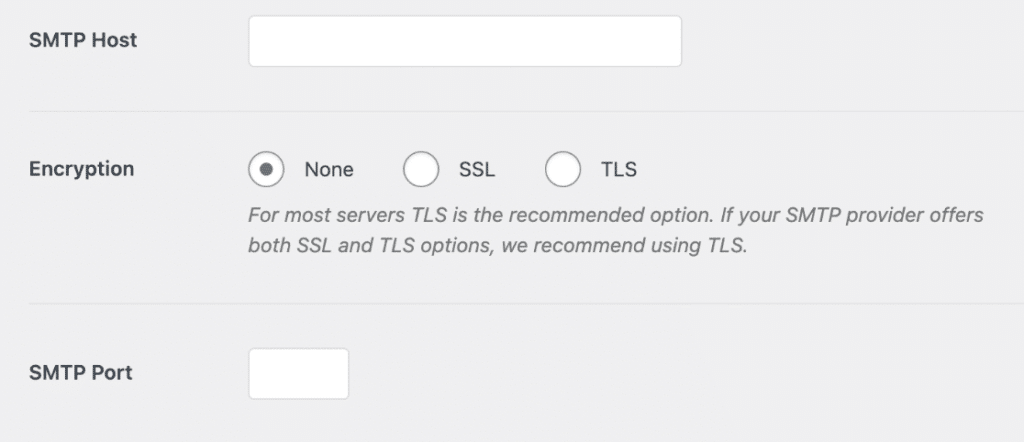
5. Encryption
Your encryption data ensures you’re using up-to-date connection protocols for your email. If it’s at less than 100%, you should check the email settings for any websites or apps that are sending email from your domain and make sure you’re using a TLS connection which is more secure than SSL.
Delivery Errors
The Deliver Errors report shows you if any of your emails have failed or been temporarily delayed.
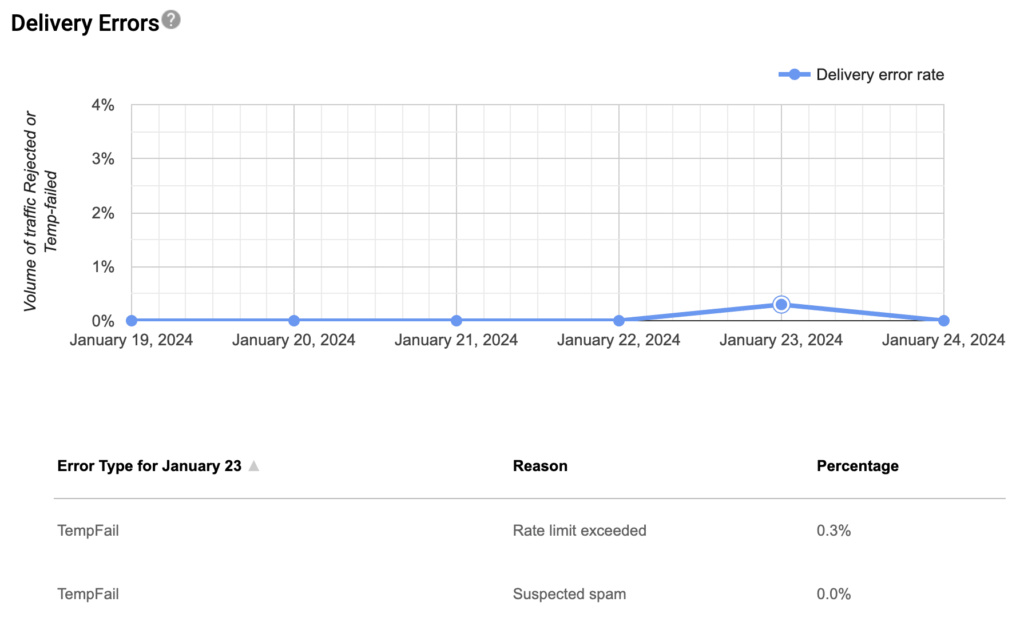
Here you can also see the reason for the failure, which is invaluable for troubleshooting.
Best Practices for Monitoring and Improving Email Deliverability
Your email deliverability strategy should rest on four key pillars: regular monitoring, proper authentication, list hygiene, and content quality. Let’s explore each of these areas in detail.
Monitoring Google Postmaster Tools
Setting up a consistent monitoring schedule is crucial for maintaining email deliverability health.
Your daily checks should focus on spam rates, as these can indicate immediate issues that need attention.
On a weekly basis, review your domain reputation to spot any concerning trends. Authentication results should be examined bi-weekly to ensure your security protocols remain effective, while IP reputation trends can be tracked monthly to understand longer-term patterns.
Pro Tip: Create a simple tracking spreadsheet to monitor these metrics over time. This historical data can be invaluable for identifying trends and troubleshooting issues when they arise.
Authentication Framework
Think of email authentication as your digital ID card – it proves to Gmail that your emails are really from you. There are three main pieces you need to set up:
First, add an SPF record – this is like a guest list that tells Gmail which servers are allowed to send emails from your domain.
Then set up DKIM signing, which acts like a digital signature on your emails to prove they haven’t been tampered with.
Finally, add a DMARC policy that tells Gmail what to do if an email fails these security checks.
You don’t need to be a technical expert to implement these – most email service providers offer simple tools or step-by-step guides to help you set them up. Once all three are in place, your emails have the best chance of reaching your recipients’ inboxes.
Optimizing Content Quality
The quality of your email content directly affects whether your messages reach the inbox or land in spam.
Just like a good reputation in real life, building trust with email requires consistency and good practices. Try to send emails on a regular schedule rather than all at once – for example, if you usually send 1,000 emails per week, don’t suddenly jump to 10,000 without gradually building up to it.
When writing your emails, watch out for words and phrases that might trigger spam filters. Common triggers include writing in ALL CAPS, using too many exclamation marks (!!!!), or using phrases like “Act Now!” or “Limited Time Offer!!!”
Instead, write your emails like you’re having a conversation with your reader. Include valuable content they’ll want to read, and make sure your subject lines accurately reflect what’s in the email.
The unsubscribe link in your emails is more important than you might think. Make it easy to find – usually at the bottom of the email in clear text. When someone wants to stop receiving your emails, they should be able to do it with one or two clicks.
If people can’t find the unsubscribe button, they’re more likely to mark your email as spam instead, which hurts your reputation with Gmail. Remember, it’s better to have someone unsubscribe than to mark you as a spammer.
Pro Tip: Consider creating a pre-send checklist that covers these best practices. Before launching any significant email campaign, run through this checklist to ensure you’re following all the key deliverability guidelines.
Troubleshooting Common Issues
Even the most careful email senders sometimes run into delivery problems. Let’s look at the two most common issues you might face and how to fix them.
Dealing with High Spam Rates
If you notice your spam rates climbing above the recommended 0.1%, don’t panic – there are several steps you can take to address this.
Start by looking at how you’re building your email list. Are you buying email lists or using old contact databases? This often leads to spam complaints because these people haven’t specifically asked to hear from you. Instead, focus on growing your list organically through your website or customer interactions.
One of the most effective ways to prevent spam complaints is to implement double opt-in for new subscribers. This means when someone signs up for your emails, they need to confirm their subscription by clicking a link in a verification email. While this extra step might mean fewer initial subscribers, the ones you do get are much more likely to engage with your emails and less likely to mark them as spam.
Regular list cleaning is another crucial step. Look for subscribers who haven’t opened your emails in the last 3-6 months and consider removing them from your list. It might seem counterintuitive to remove subscribers, but inactive email addresses can harm your sending reputation or turn into spam traps over time.
Fixing Poor Domain Reputation
If Google Postmaster Tools shows your domain reputation dropping from “High” to “Medium” or lower, it’s time to take action.
First, check your authentication settings – make sure your SPF, DKIM, and DMARC records are properly configured and haven’t expired.
Next, review your recent sending practices. Did you suddenly increase your sending volume? Are you sending to old lists? Have you changed your email content significantly? Any of these changes could trigger reputation issues.
Sometimes, the best approach is to temporarily reduce your sending volume while you identify and fix the underlying problems. For example, if you usually send to 100,000 subscribers, try cutting back to your most engaged 25,000 until your reputation improves.
Don’t forget to check if your domain has ended up on any email blacklists. You can use free blacklist checking tools online to see if this is affecting you, and most blacklists have instructions for getting removed if you find yourself listed.
Frequently Asked Questions
Here are some of the most common questions we see about using Google Postmaster Tools:
How long does it take to see data in Postmaster Tools?
Once verified, data typically appears within 24-48 hours if you’re sending sufficient email volume.
Can I see individual email delivery status?
No, Postmaster Tools provides aggregate data only. For individual tracking, use your email service provider’s tools.
What’s the minimum email volume needed?
While Google recommends 5,000 emails daily for meaningful data, you can start using it with lower volumes.
How often is data updated?
Most metrics are updated daily, though some may have a 24-48 hour delay.
Can I track emails to non-Gmail users?
No, Postmaster Tools only provides data for emails sent to Gmail users.
What’s the difference between IP and Domain reputation?
IP reputation relates to the server sending your emails, while domain reputation is specific to your sending domain name.
Can multiple team members access Postmaster Tools?
Yes, you can grant access to team members through Google Workspace permissions.
Now that you understand how to use Google Postmaster Tools to monitor and improve your email deliverability, you might want to consider implementing Easy WP SMTP on your WordPress site.
This plugin uses the SMTP protocol to send your WordPress email, improving deliverabiliy, and reducing the risk of being marked as spam.
With features like detailed sending logs and failure alerts, Easy WP SMTP can help ensure your emails consistently reach their intended recipients.
That’s it! Now you know how to set up Google Postmaster Tools
Next, do you know what to do if your SMTP server goes down? See our guide to best practices for handling SMTP outages for a simple guide to preparing for and dealing with unexpected email downtime.
