Are you trying to figure out how to send transactional emails with WordPress that actually make it to your users’ inboxes?
If you’re running any kind of WordPress website – from a simple blog to a full-fledged online store – you know how crucial it is for your automated emails to land in the right place, not get lost in spam folders or disappear entirely.
In this guide, I’ll show you exactly how to set up your WordPress site to send transactional emails reliably using Easy WP SMTP and SendLayer. I’ll also walk you through everything you need to know about optimizing your WordPress email system.
Understanding WordPress Transactional Emails
Let’s start by explaining exactly what transactional emails are. Unlike marketing emails that follow different email design trends and that you send to promote your latest product or blog post, transactional emails are automated messages triggered by specific actions on your WordPress site.
Your WordPress site can be set up to send transactional automated emails for many purposes. Here are some of the most common:
| Category | Example Emails |
|---|---|
| Authentication-related |
Password reset notifications Two-factor authentication codes Email address verification messages |
| User Account Notifications |
New account welcome emails Profile update confirmations Account security alerts |
| eCommerce Communications |
Order confirmations Shipping notifications Payment receipts Refund confirmations |
| Content Interaction |
Comment notifications Form submission confirmations Subscription confirmations |
In all of these situations, your WordPress site can automatically send an email to the person performing an action like completing checkout or requesting a password reset (and sometimes an email will be sent to the website administrator or other specified email addresses too.)
These transactional emails are absolutely essential for maintaining trust with your users and keeping your site running smoothly.
The problem? If you’re using WordPress’s default email system, there’s a good chance your transactional emails aren’t reaching the inbox. This means your users might be left wondering if their order went through, unable to reset their password, or waiting for important information that never arrives.
I’ll show you how to fix this problem once and for all. By the end of this guide, you’ll know exactly how to:
- Set up a transactional email service that actually works
- Keep your important messages out of spam folders
- Track whether your emails are being delivered
- Troubleshoot any email problems that come up
Why WordPress’s Default Email System Is Letting You Down
Here’s something most WordPress users don’t realize until they start having issues: WordPress’s built-in email system is pretty bare-bones.
WordPress uses a basic system called wp_mail() to send emails through your hosting server. While it’s a simple solution that can work for small and simple sites, many WordPress users experience problems with not receiving emails from their site.
Let’s take a closer look at some of the main issues with relying on the native wp_mail() function in WordPress:
Your Emails Might Not Be Sending At All
Firstly, many hosting providers completely block or severely limit email sending from their servers.
They do this to prevent spammers from abusing their systems (which is good!), but it also means your legitimate emails might be blocked too.
This can create serious problems for your website’s communications. Your important emails might completely fail to send without any notification of the failure. Even when they do send, delivery times can be frustratingly inconsistent – emails that should arrive in seconds might take hours to reach your users.
The reliability of the wp_mail() function is also unpredictable: you might find your emails working perfectly one day, only to discover they’re failing to deliver the next. Without proper monitoring tools, you won’t even know there’s a problem until users start complaining about missing notifications.
Your Emails Look Suspicious to Mail Providers
Email authentication helps receiving email servers to confirm that messages really came from the sender they claim to and haven’t been intercepted in transit.
Without proper email authentication, your emails can look suspicious to email provider. In fact, many of the biggest email providers like Gmail and Outlook now completely block unauthenticated email.
WordPress’s default system doesn’t include crucial authentication methods like:
- SPF (which proves an email is really from your domain)
- DKIM (a digital signature for your emails)
- DMARC (an extra layer of security)
The result? Even if your emails do send, they’re much more likely to land in spam folders or get blocked entirely.
No Way to Monitor Email Performance
The default WordPress email system provides no tracking or monitoring capabilities, which makes it almost impossible for you to monitor the emails sent from your site. You have no visibility into crucial metrics about your transactional emails such as:
- Whether emails are being successfully delivered
- The number of emails that bounce back
- Whether emails are being opened
- Specific delivery failures and their causes
This lack of monitoring makes it difficult to identify and fix email delivery problems before they impact your users.
Without this important deliverability information, you won’t know if important notifications like password resets, order confirmations, or membership communications are actually reaching your users until they contact you about missing emails.
How to Send Transactional Email With WordPress & Easy WP SMTP
If you’ve been struggling with WordPress email delivery, Easy WP SMTP is your solution. It’s built to be the simplest SMTP plugin for WordPress with easy setup and reliable email delivery.
Instead of relying on your hosting server’s limited email capabilities, Easy WP SMTP lets you connect your WordPress site to professional email delivery services.
Think of it as upgrading from a basic mail service to a premium delivery system – one that ensures your emails actually reach their destination and gives you proof of delivery.
Why Use a Professional Email Service?
Transactional email delivery services solve all the problems I discussed earlier:
- Their servers are specifically designed and optimized for sending transactional emails
- You bypass any email restrictions from your hosting provider
- Your emails get proper authentication and benefit from the service’s strong sending reputation
- Delivery rates are much higher, with most emails landing in the inbox, not spam
In this tutorial, I’ll show you how to send transactional email with WordPress and SendLayer, which is one of Easy WP SMTP’s recommended email providers.
However, you can use any other email service supported by Easy WP SMTP, including:
- SendLayer
- Brevo
- Mailgun
- SMTP.com
- Gmail
- Microsoft Outlook / 365
- Amazon SES
- Postmark
- SparkPost
- SMTP2GO
- Zoho Mail
- Other SMTP email service
Easy WP SMTP Pro also allows you to set up multiple email services for backup and smart email routing.
While you can use the free version of Easy WP SMTP to send transactional email from your WordPress site, you might want to consider the Pro version for the option to set up additional and backup email services and several other features including:
- Email Logs: Keep track of all emails sent from your site, including details like timestamps and delivery status.
- Email Failure Alerts: Get notified of email delivery issues via email, Slack, Microsoft Teams, or SMS to address problems quickly.
- Open and Click Tracking: Monitor recipient engagement with data on email opens and link clicks.
- Resend Failed Emails: Quickly resend emails that didn’t go through, directly from your email log.
- Backup Mailer Options: Set up a secondary SMTP relay or transactional email service to handle emails if your primary service fails.
- Smart Email Routing: Automatically route emails through different email providers.
- Email Rate Limiting: Set custom limits on the number of emails sent per minute, hour, day, week, or month to comply with your email provider’s restrictions.
- WordPress Email Controls: Manage which WordPress-generated emails are sent, allowing you to disable unnecessary notifications and reduce inbox clutter.
Step-by-Step Setup Guide: Easy WP SMTP with SendLayer
Now that you understand why proper email delivery is crucial, let me walk you through exactly how to set up your WordPress site to send reliable transactional emails. In this tutorial, I’ll show you how to use SendLayer with Easy WP SMTP.
I’ve chosen SendLayer for this guide because it offers several significant advantages for WordPress users:
- Excellent Free Trial – SendLayer offers a 30-day free trial with 100 emails per day, giving you plenty of time to test the service. After that, plans start at just $5/month for 2,000 emails.
- Simple Integration – SendLayer’s API makes it incredibly easy to connect with Easy WP SMTP. You won’t need any technical expertise to get it working.
- Superior Delivery Rates – With delivery rates consistently above 99%, SendLayer ensures your important emails actually reach their destination.
- Real-time Analytics – Unlike many other services, SendLayer provides detailed delivery tracking and opens/clicks statistics even on their basic plan.
While I’m using SendLayer in this tutorial, the basic steps will be similar if you prefer a different email service provider. Easy WP SMTP works seamlessly with most major SMTP and transactional email providers including Amazon SES, Gmail, or Microsoft 365.
Let’s get started with the setup…
1. Installing Easy WP Mail SMTP
To get started, first you need to install the Easy WP SMTP plugin on your WordPress site.
Navigate to Plugins » Add New in your WordPress dashboard
Search for “Easy WP SMTP”
Click “Install Now” followed by “Activate”
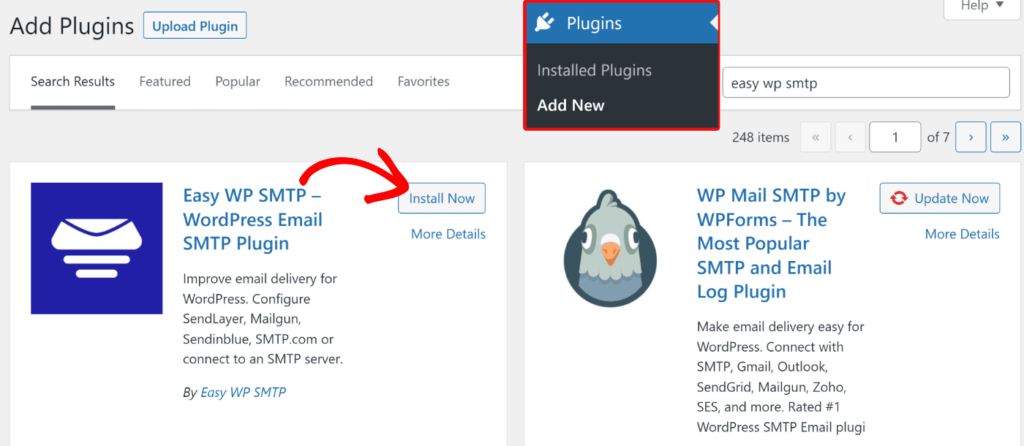
Before you can set up the plugin you’ll need details of the email service you want to use, so we’ll come back to to complete Easy WP SMTP setup after creating a SendLayer account.
2. Creating Your SendLayer Account
First, you’ll need to create your SendLayer account and get it properly configured:
Visit SendLayer’s website and click on the Get Started With SendLayer button.
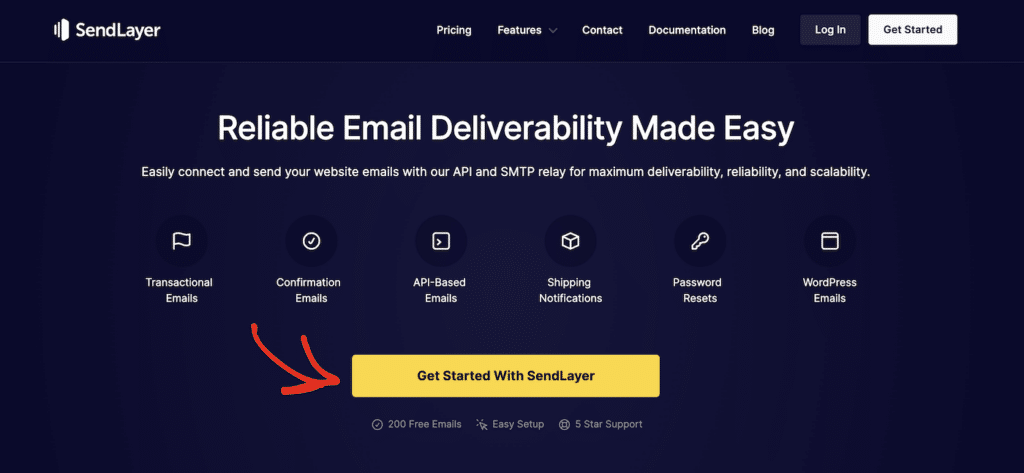
Next, choose your plan. The free trial gives you 100 emails per day for 30 days. After the trial, plans start at $5/month for 2,000 emails. You can access the free trial by clicking the Try our SendLayer free trial link at the bottom of the pricing table.
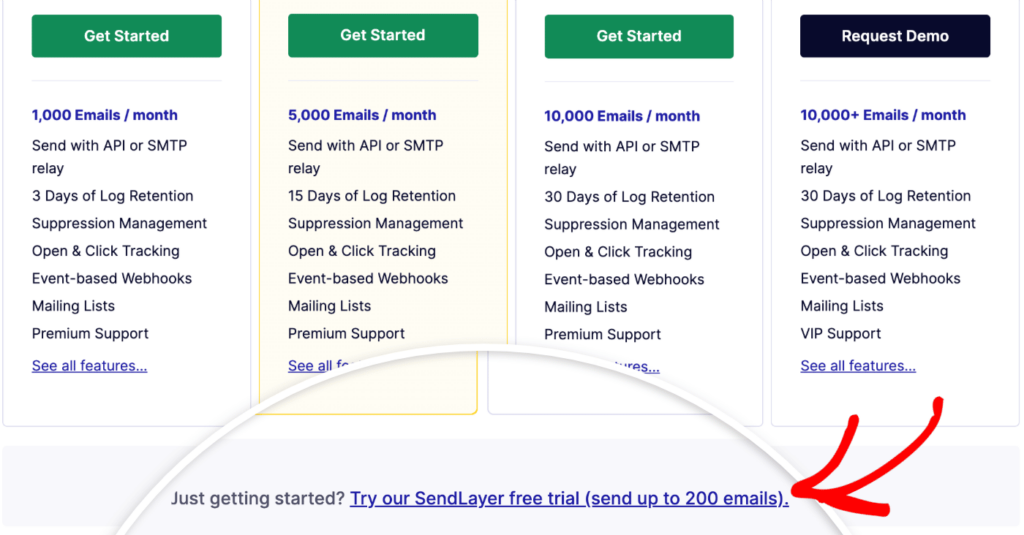
You’ll need to add a credit card for account verification but your account won’t be charged while you’re on the free trial.
After creating your SendLayer account, you’re ready for the next phase of setup – domain authentication.
3. Adding Your Domain to SendLayer
Next, you’ll need to authenticate the domain you want to use to send email with SendLayer. This should match the domain of your WordPress website.
Domain authentication involves creating DNS records that you add to your web hosting settings. SendLayer provides detailed DNS setup instructions for popular hosting providers.
To get started with the process, log into your SendLayer dashboard and click the Add domain button at the top of the page.
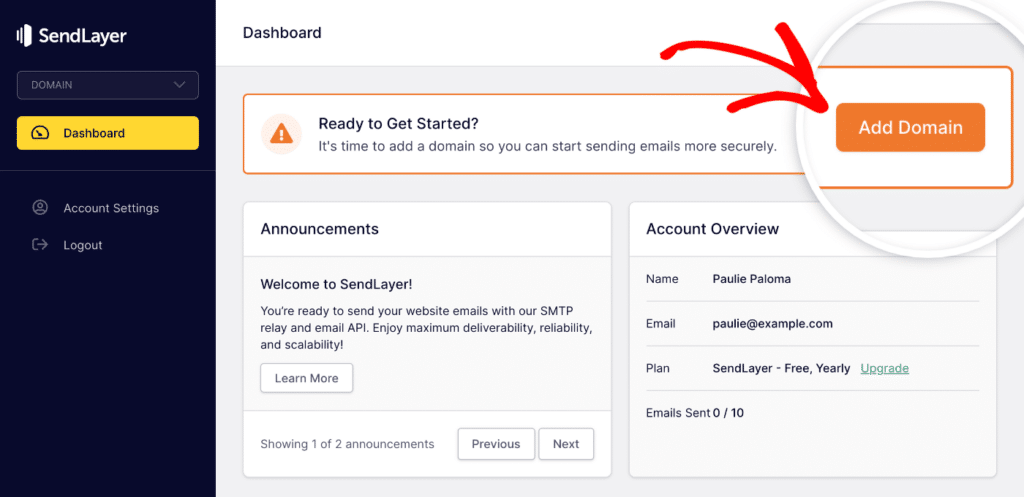
Once you’ve added your domain, SendLayer will generate 5 new DNS records for you to add to your hosting settings.
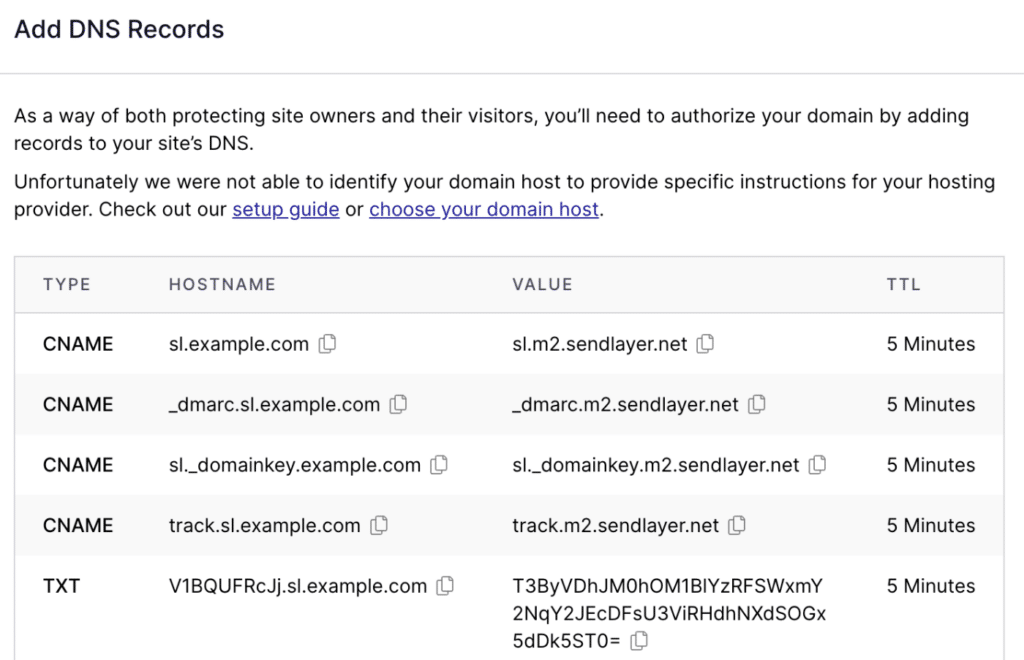
Next, you’ll need to add these records to your DNS settings. You can follow SendLayer’s guide to completing domain setup for more help with this.
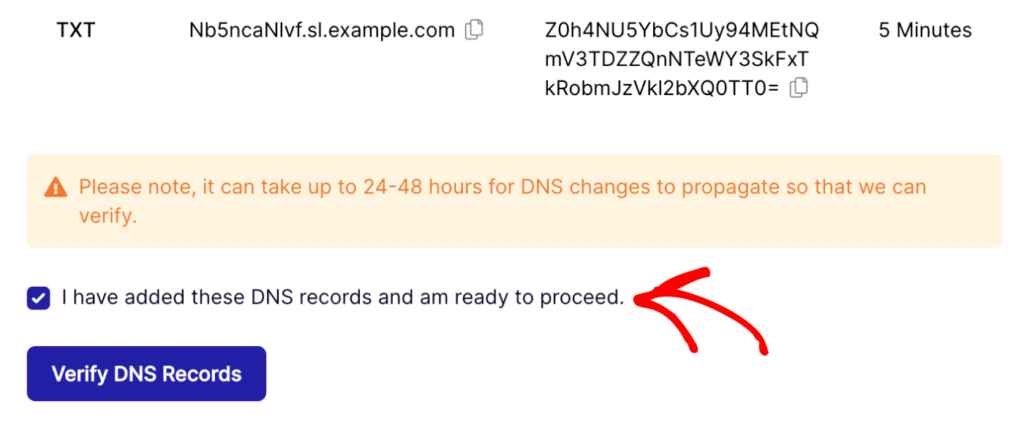
After adding your DNS records, check the box on the SendLayer dashboard to confirm and click the Verify DNS Records button. Depending on your web host, your DNS records may be verified within a few minutes or you may need to wait up to 48 hours.
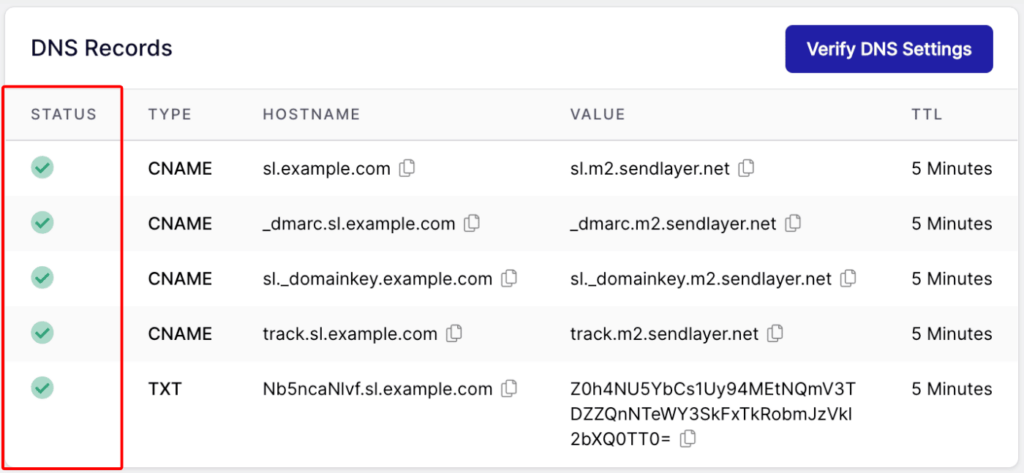
You can check if your domain has finished verification by navigating to Settings in your SendLayer dashboard and clicking the DNS Records & Settings tab.
Once your domain has been authorized, you’ll see a green checkmark next to each DNS record.
4. Accessing Your SendLayer API Key
Once you’ve completed your domain setup with SendLayer, you need to copy your API key. Easy WP SMTP will use this API key to connect your WordPress site to SendLayer.
Sendlayer automatically creates an API key when you create your account. You can access it from the API Keys tab from your SendLayer settings.
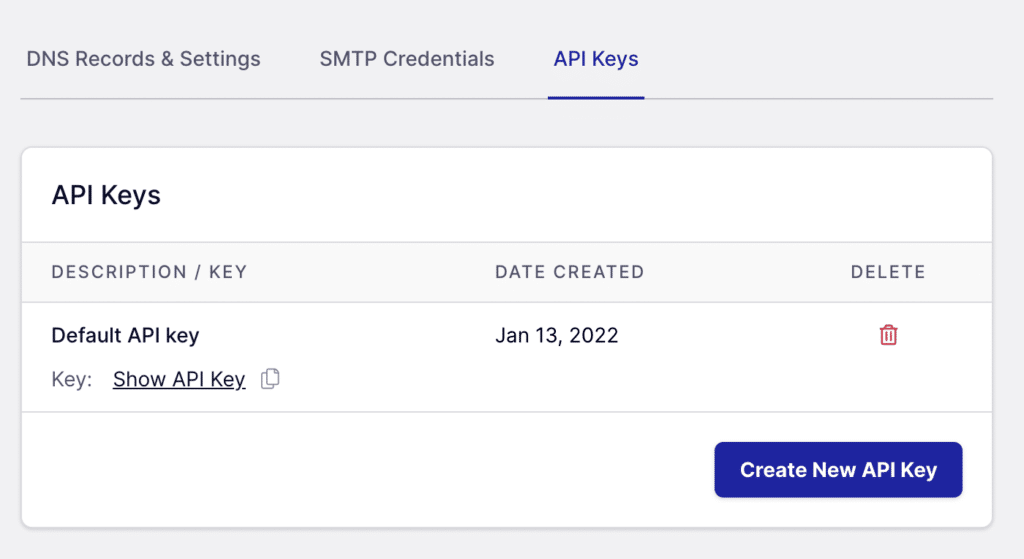
To access your API key, click the copy icon next to the Show API key link. If you need to, you can also create new API keys by clicking the Create New API Key button.
5. Configuring Easy WP SMTP
Now you’ve set up a SendLayer account and accessed your API key, you can return to Easy WP SMTP to complete setup.
Navigate to Easy WP SMTP » Settings.

Next, choose SendLayer from the list of available mailers.
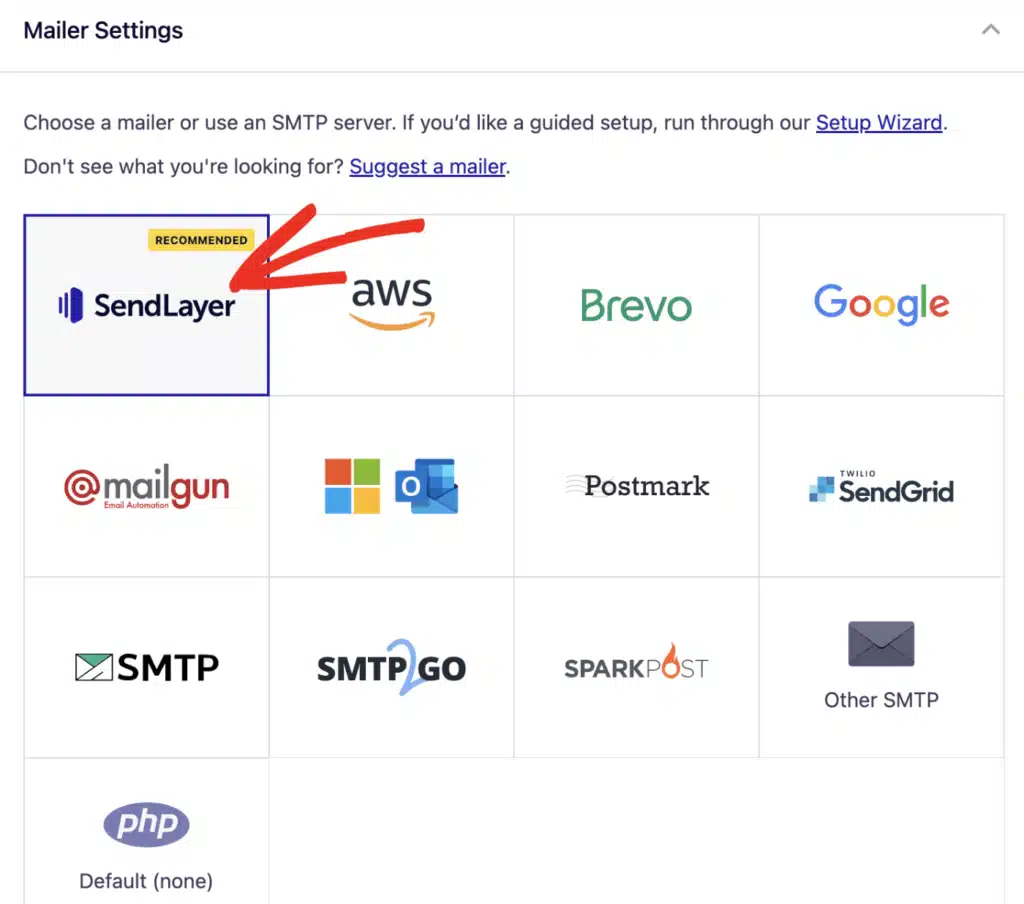
Scroll down and paste the SendLayer API key you just copied to the API Key field.

Next, enter the From Email you want to use for emails sent from your WordPress site. This email should match the domain you added to SendLayer. For example, if you authorized the domain “example.com” in SendLayer, the From Email should be “[email protected]” (you can replace the part before the “@” with anything you wish.)
It’s also recommended to turn on the Force From Email setting. This allows Easy WP SMTP to override any other email settings in other plugins so all the emails sent from your WordPress site will come from the same address.
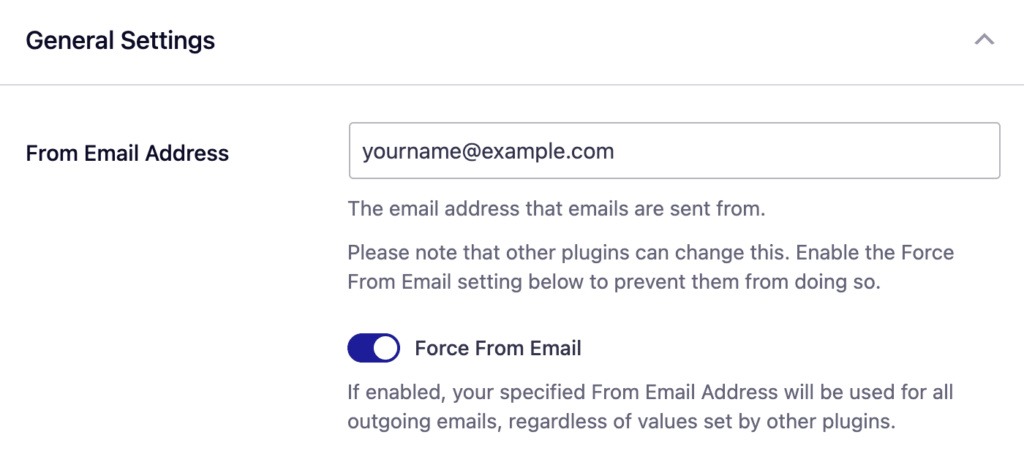
You can also set the From Name for your WordPress emails to anything you wish, and optionally force the From Name setting for all other plugins.

Remember to click the Save Settings button at the bottom of the page before leaving this screen.
6. Send a Test Email
Finally, we should send a test email to make sure everything is configured correctly.
Go to Easy WP SMTP » Tools and navigate to the Email Test tab.

Enter the email address you want to send the test email to. You can leave the remaining settings as their default. Then, click the Send Test Email button.
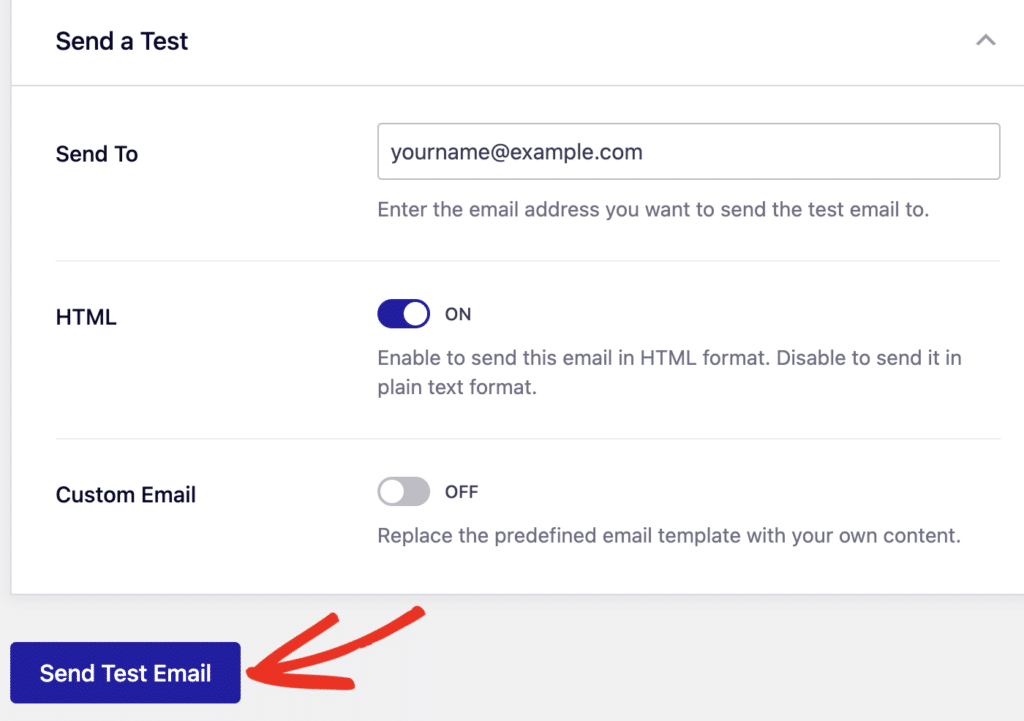
If you’ve successfully completed setup, you should see a message that the test email was sent successfully.

Now, check your inbox to make sure you received the test email.
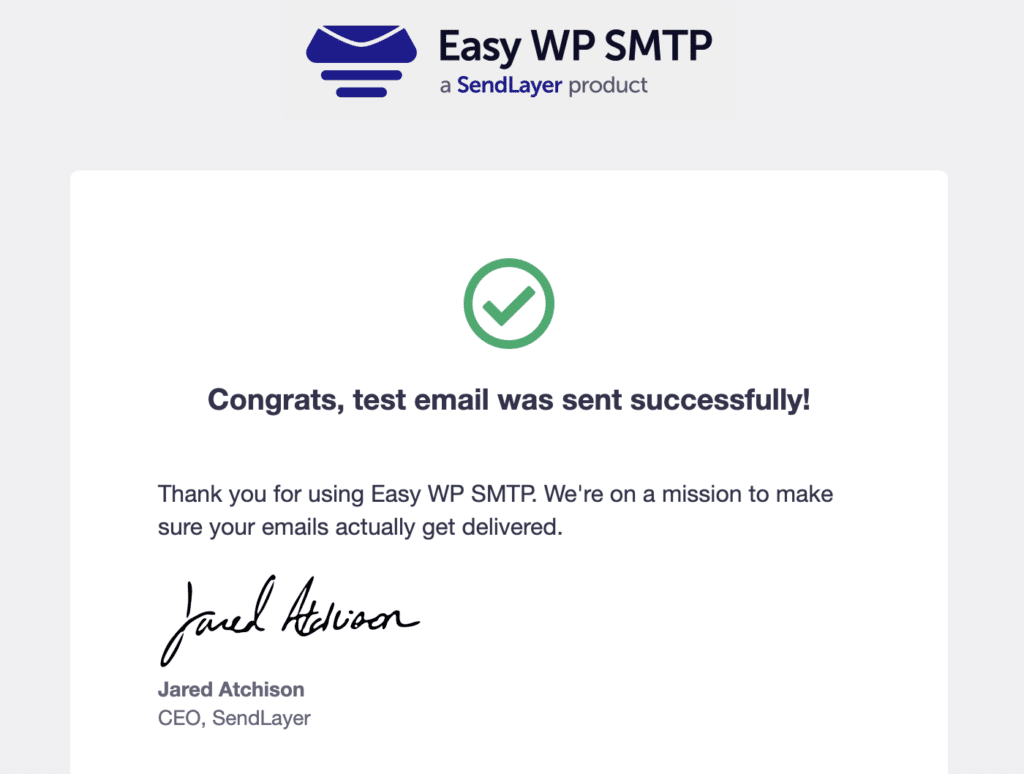
Once you’ve confirmed you’ve received the test email, your WordPress site is successfully configured for sending transactional emails. Now you’re free to focus on other aspects of running your website and your business, safe in the knowledge that your email is taken care of.
That’s it! Now you know how to send transactional email with WordPress
Next, do you want to view your WordPress email logs? Easy WP SMTP Pro stores full details of sent messages so you can easily see all emails sent from your WordPress site.
