In this tutorial, we’ll cover how to add a DMARC record for your Easy WP SMTP mailer configuration.
Understanding How DMARC Record Works
A DMARC record essentially contains at least three important components (or tag-value pairs). Here is an example:
v=DMARC1; p=quarantine; rua=mailto:[email protected]
In the example above, there are 3 tags: v, p, and rua with values DMARC1, reject, and mailto:[email protected]. Below, we’ll explain what each of these tags means.
- v tag specifies the version of DMARC
- p tag is the policy (or the action to perform if email fails DMARC checks)
- rua tag is the email address where you want to receive the DMARC aggregate report.
For our example, the p tag has the value quarantine. This means that the policy defined here will quarantine a message when it fails authentication. Below, we’ll explain other policies DMARC supports:
- None: No action is taken for messages failing DMARC. However, aggregate reports will still be sent to you so you can monitor what’s happening to your emails. You may get a ‘DMARC policy not enabled” error if the policy is set to none.
- Quarantine: Messages failing DMARC checks are put in the junk folder in the recipient’s inbox.
- Reject: All email messages failing authentication are completely rejected, never reaching the recipient’s inbox.
Creating and Adding a DMARC Record
Let’s go over the process of setting up a DMARC record on your domain. We’ll use a generic record that works with any domain host in this tutorial.
Checking Your DNS With a DMARC Analyzer
If you’re not sure whether you have a DMARC record set up on your site, you can use a DMARC checker like MXToolbox to scan your DNS records.
Once you’ve opened the page, type your domain name into the field and click DMARC Lookup.

If you don’t have DMARC set up, the DMARC analyzer will show a failure message.

If you’re using Easy WP SMTP, you can also check if DMARC is enabled by sending a test email. To do so, log in to your WordPress dashboard, then go to Easy WP SMTP » Send a Test.
Once there, send a test email using the form on the Email Test page.
After sending the email, you’ll likely see the warning below if your site is missing one of the required DNS records.

When you scroll down, you’ll see a warning that reads: It doesn’t look like DMARC has been setup on your domain…

This could mean any of the following:
- You don’t have a DMARC record in your DNS zone
- Your DMARC record hasn’t propagated yet
- The DMARC record might not be properly formatted.
Accessing Your Domain’s DNS Settings
Now, we’ll access our domain’s DNS settings page to create a new DMARC record. For this tutorial, we’ll show you how to create a DMARC record manually in Cloudflare.
The steps to add the record should be similar regardless of your domain host. However, if you’re at all unsure, please get in touch with your domain host to help you locate your DNS settings page.
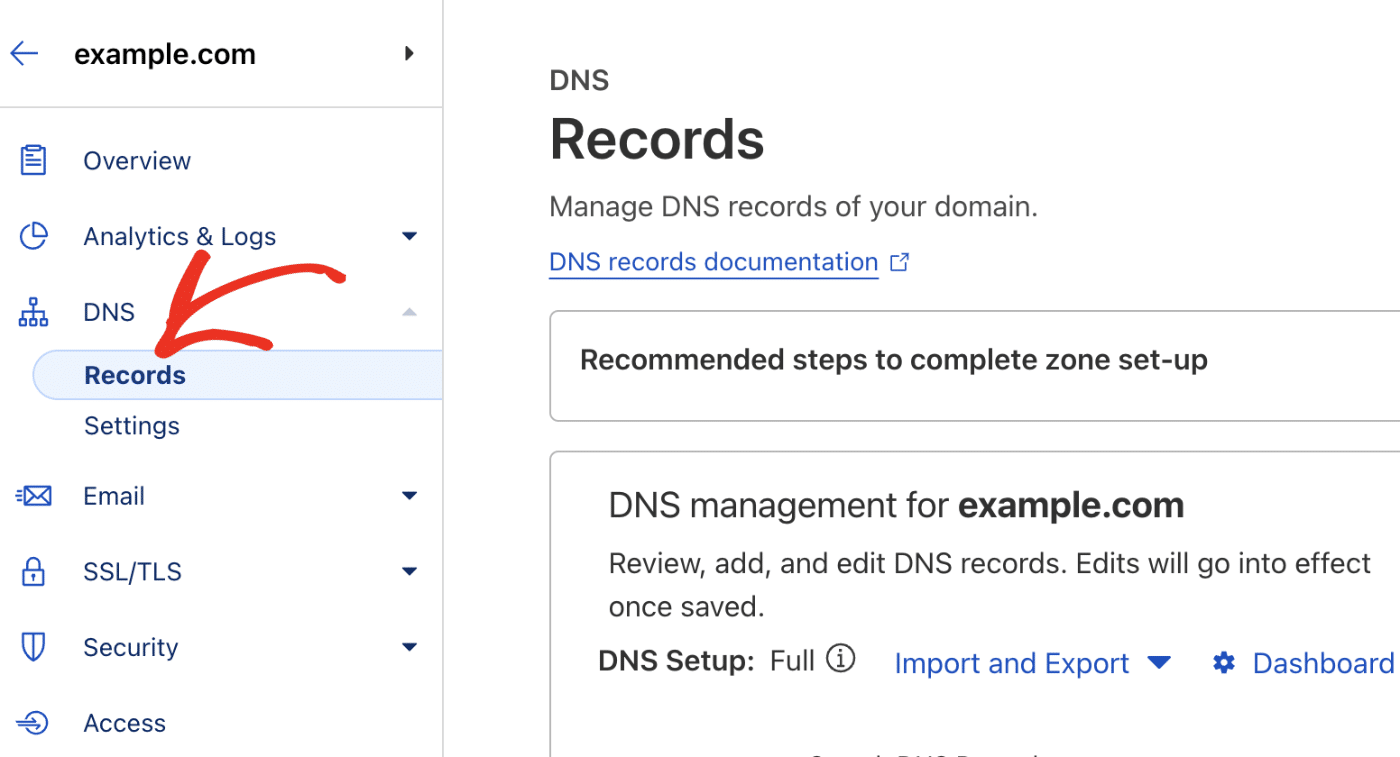
To start, log in to your Cloudflare account, then go to DNS » Records. You’ll see a table containing all your domain’s DNS records.
Note: You shouldn’t have multiple DMARC records for a single domain. Regardless of whether you’re using a subdomain. So before you proceed, double-check that don’t have an existing DMARC record.
Creating Your New DMARC TXT Record
There are 2 ways to create a DMARC record: Manually adding a DMARC TXT record to your domain host, or generating a DMARC record in Cloudflare. We’ll cover both methods below.
Manually Adding a DMARC Record (Any Host)
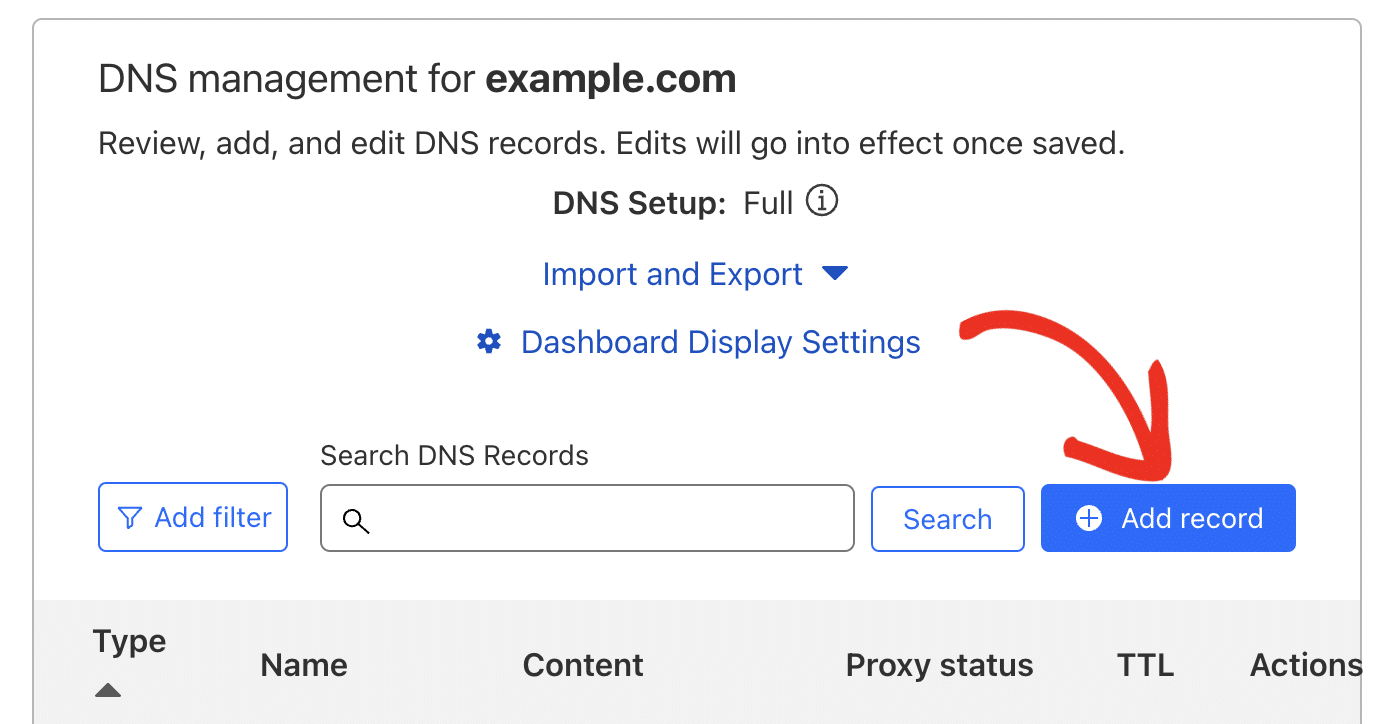
On Cloudflare’s DNS Management page, click Add record to create a DMARC record.
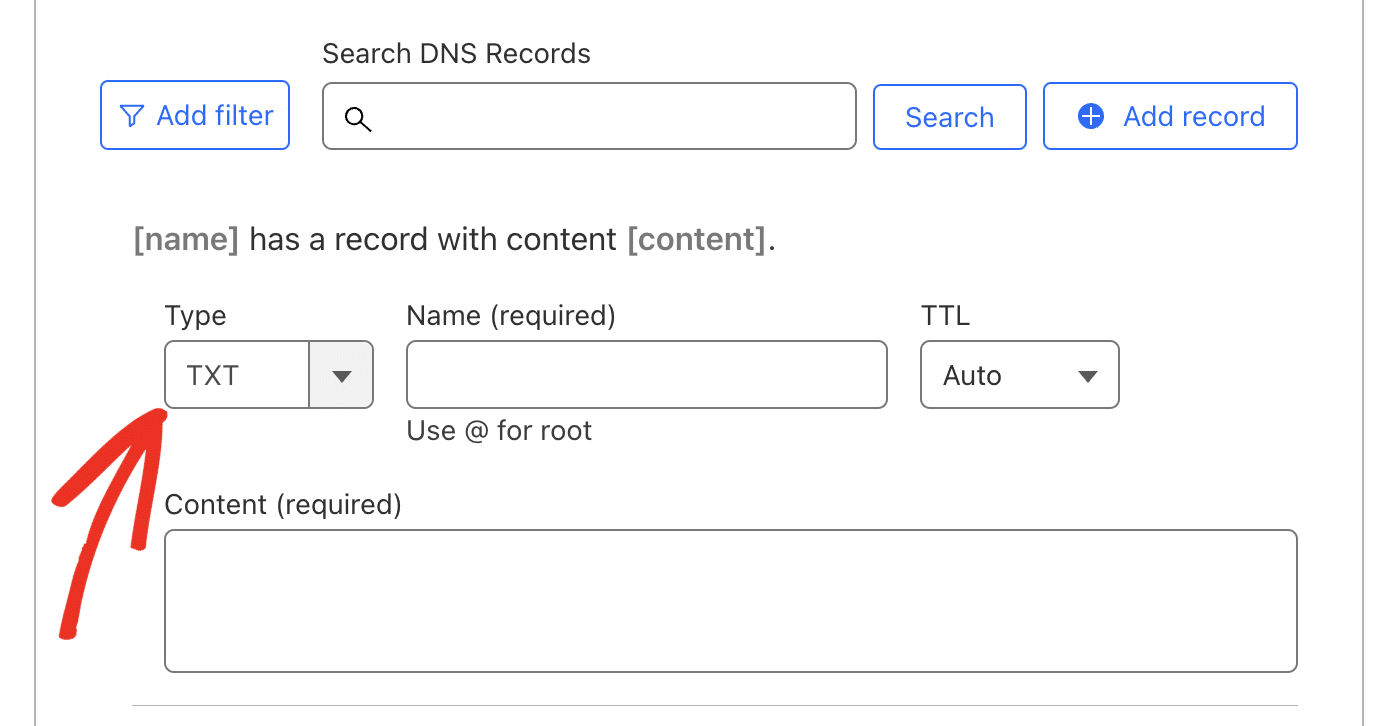
In the Type dropdown, select TXT as this is the default record type for DMARC records.
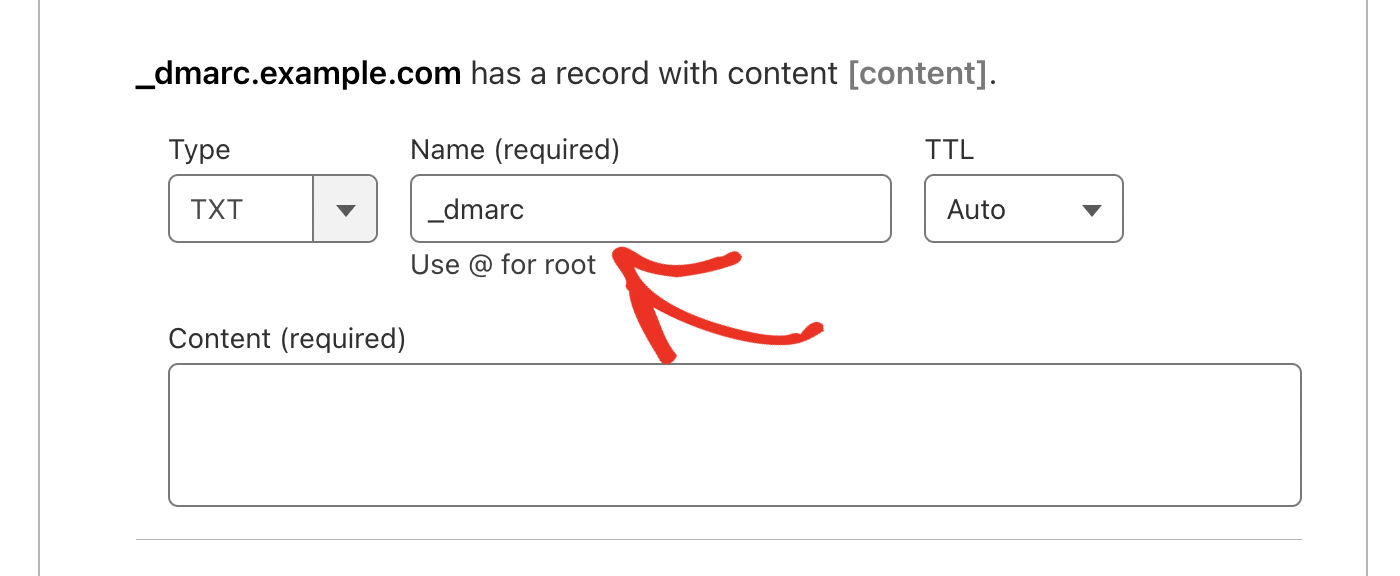
Next, in the Name field, type _dmarc.
In the Content field, paste in the DMARC record below.
v=DMARC1; p=none; fo=1; rua=mailto:[email protected]
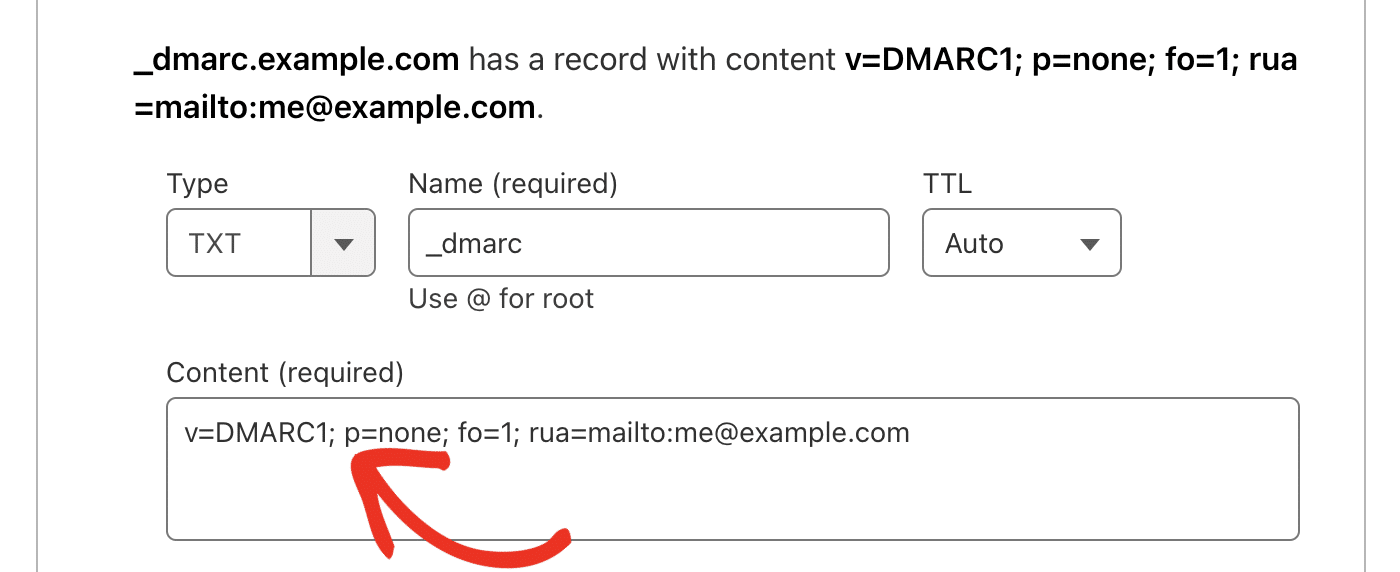
Below, we’ll explain what each rule does:
- We’re using
p=nonebecause it’s a flexible option. This setting ensures you receive reports but doesn’t prevent emails from delivering if there’s an issue. However, we suggest updating this rule to a more strict option if you start to get suspicious DMARC reports. - The
rua=mailto:address should ideally be set to the email address provided by your email server. If it doesn’t provide one, you can use your domain’s email address. - We also added the
fo=1rule to generate forensic reports. This report will be sent out if the DMARC record doesn’t align with other email records (DKIM and SPF).
Note: You can exclude the alignment rule if your SMTP provider doesn’t explicitly ask for it. DMARC records can function properly without the rule.
After adding the details for the record, click Save to update your DNS.

Generating a DMARC Record (Cloudflare Users)
If you use a CDN like Cloudflare to host your domain, you can easily generate a DMARC record. Cloudflare lets you generate DNS records for SPF, DKIM, and DMARC.
To start, go to Email » DMARC Management in the left sidebar menu of your Cloudflare dashboard.
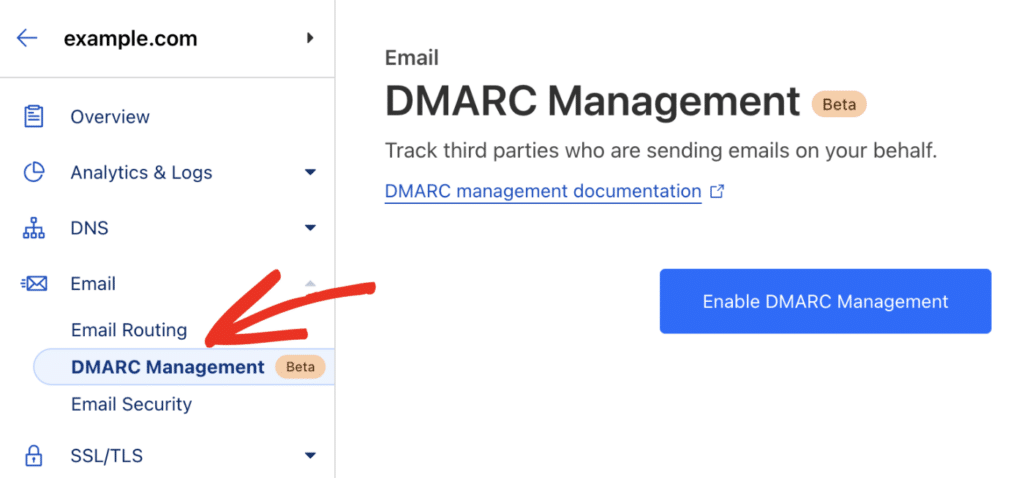
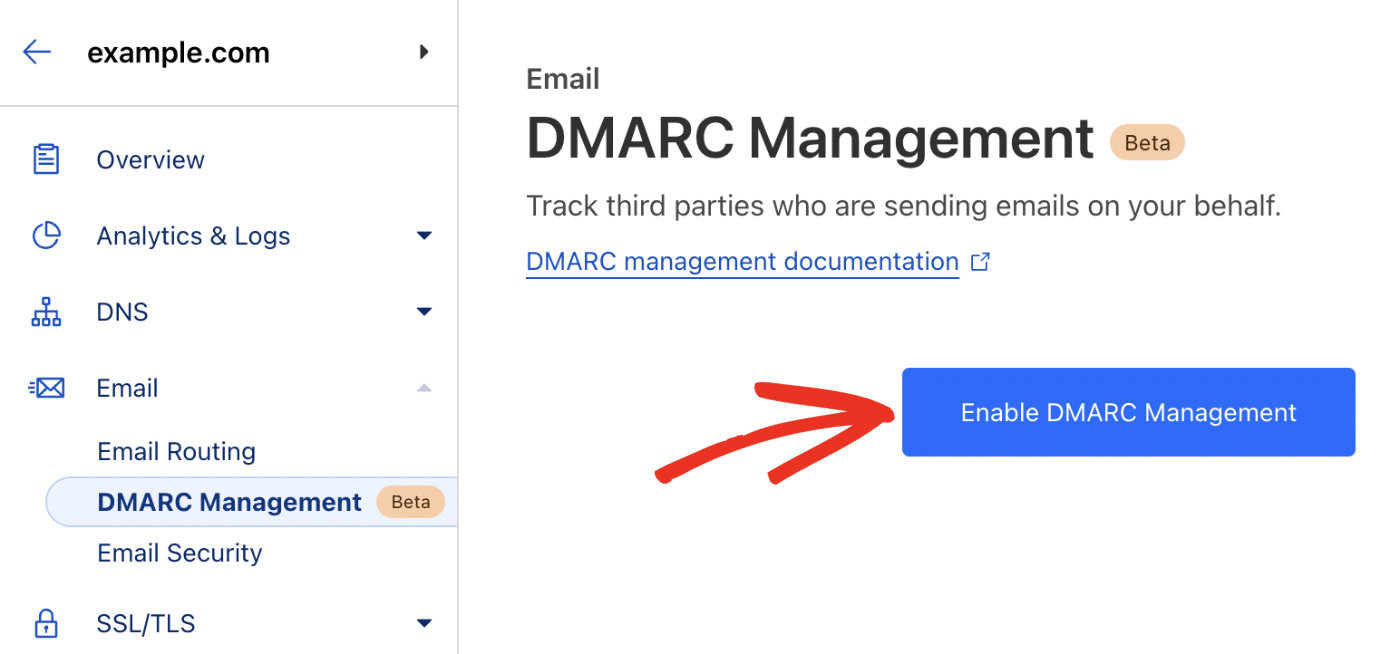
If this is your first time here, you’ll need to click Enable DMARC Management to proceed.
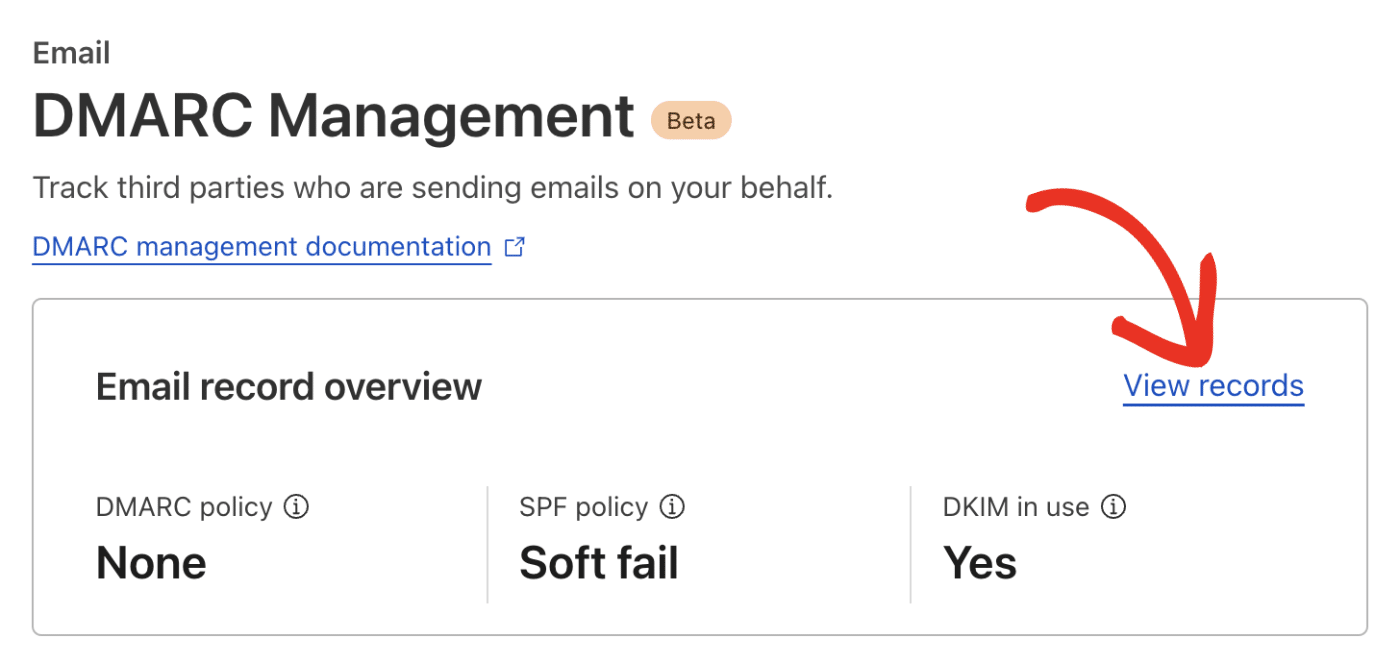
On the DMARC Management page, you’ll see details about your site’s email performance. To proceed, click on View records to view existing records for your domain.
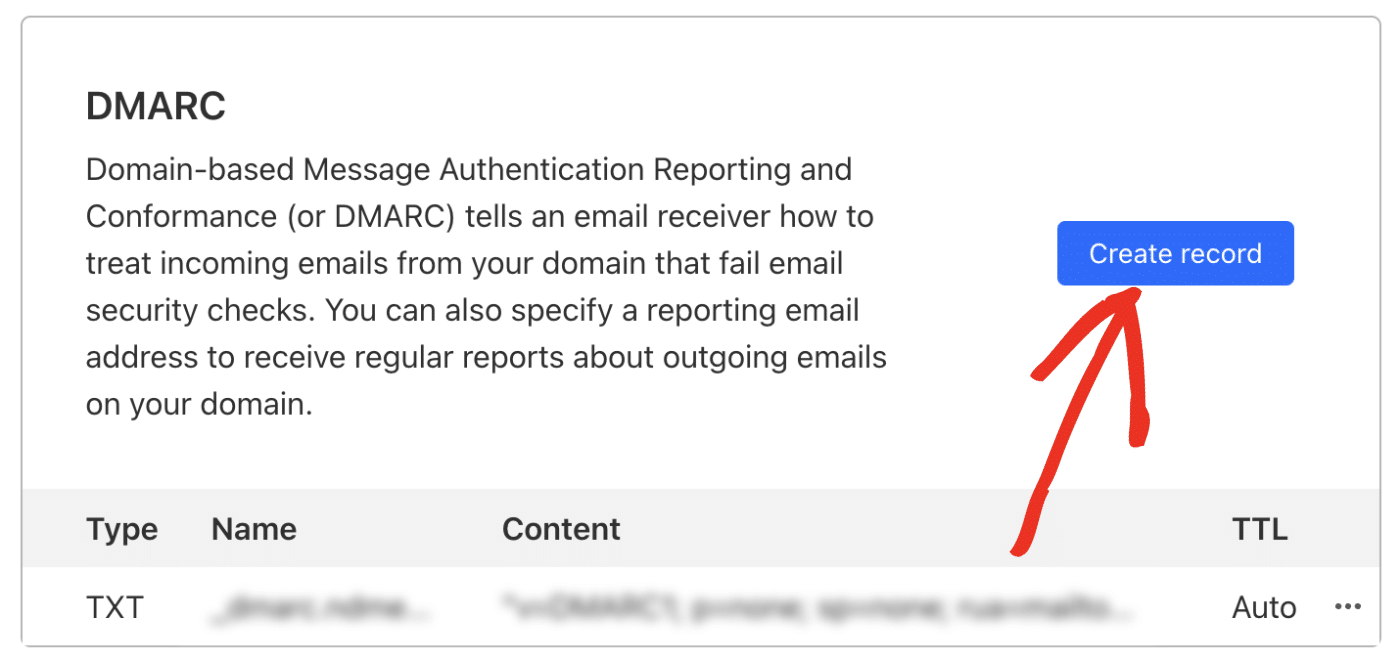
Here, you can create and manage SPF, DKIM, and DMARC records for your domain. Scroll to the DMARC section and click on Create record.
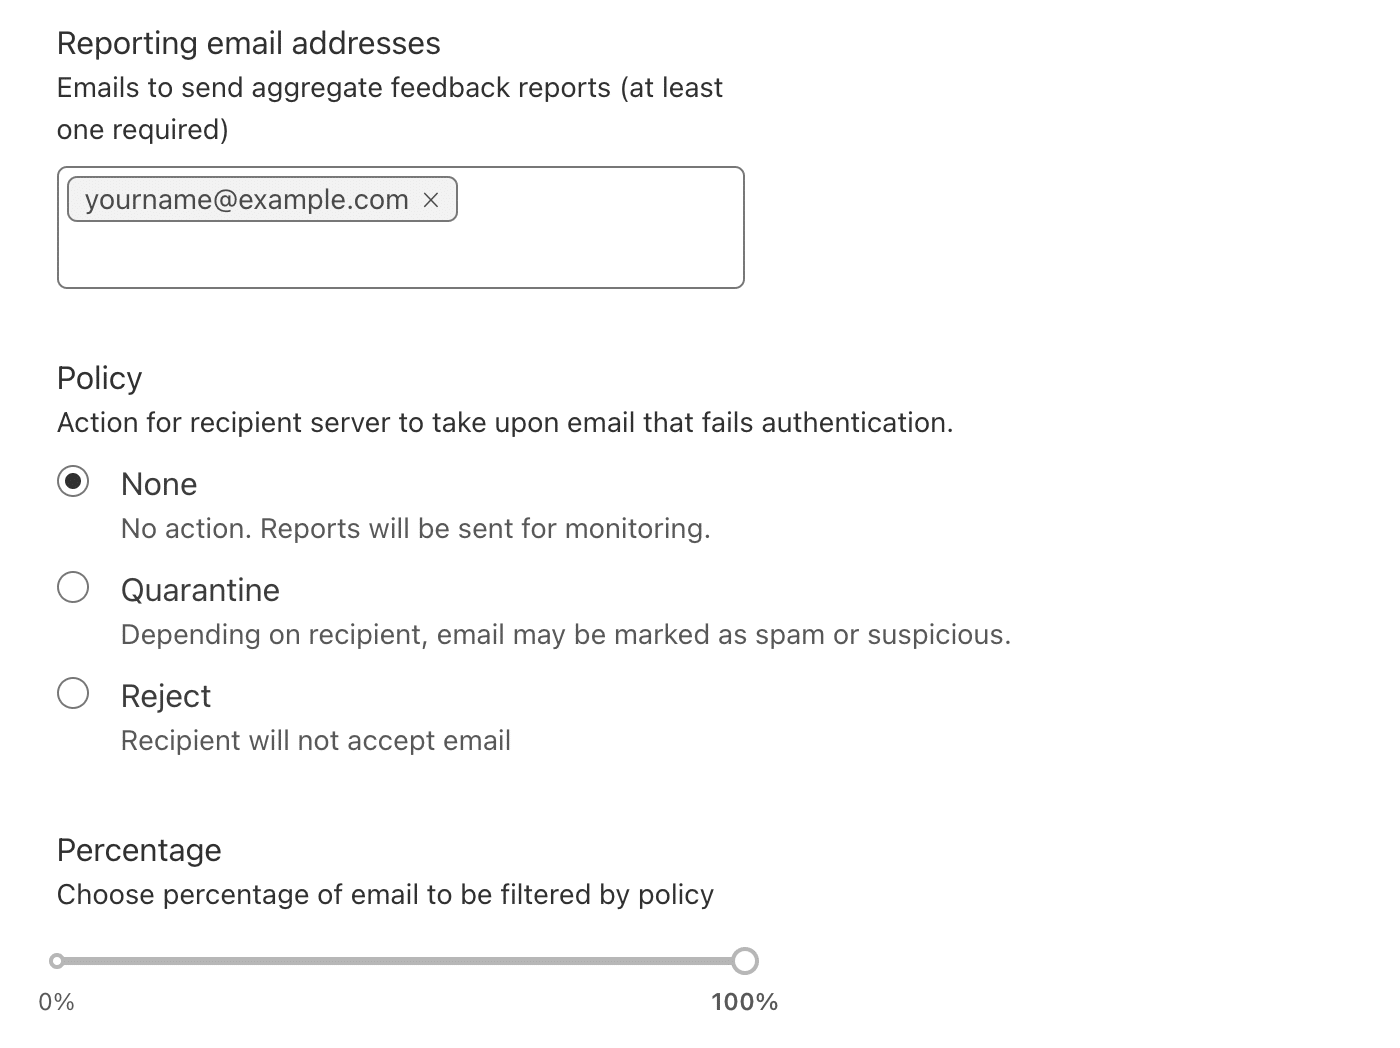
Now, you’ll need to configure the options for your DMARC record. Cloudflare provides a simple interface for you to set these options. Below, we’ve highlighted the available settings:
- Reporting email addresses: The email addresses that’ll receive DMARC reports
- Policy: The specific DMARC Policy you want to use. Available options include; None, Quarantine, or Reject
- Percentage: Number of emails you want to filter.
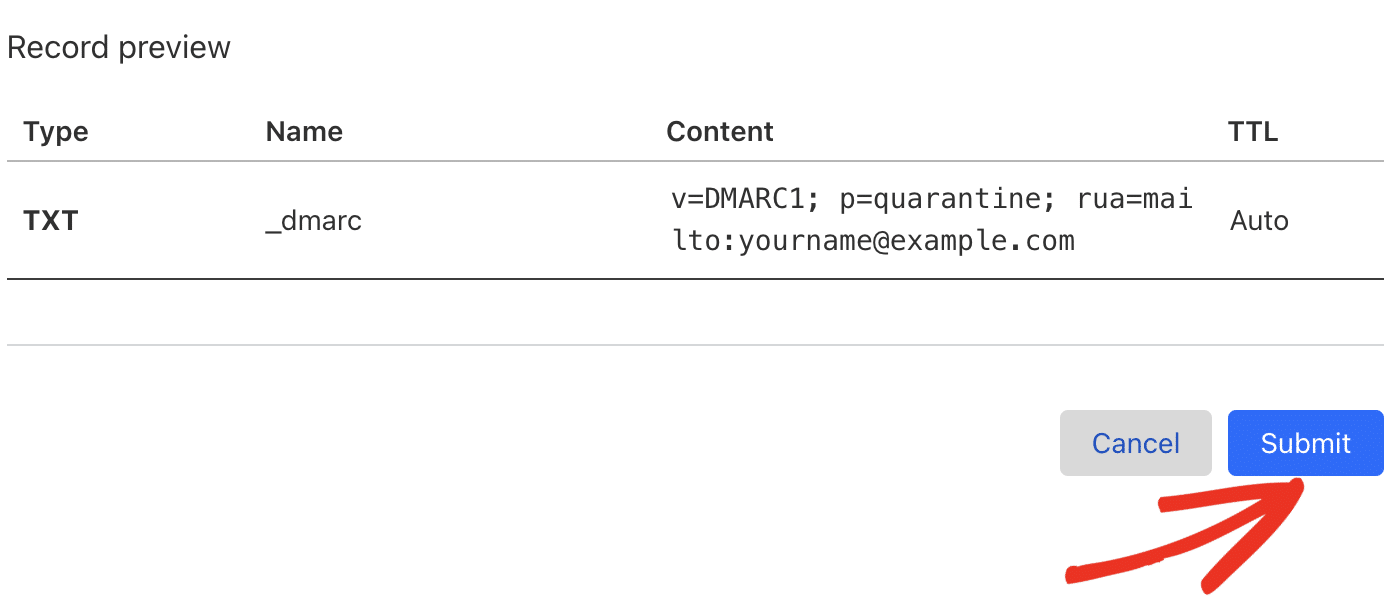
After configuring the record options, you’ll see an overview with the configured details. When you’re ready, click Submit to generate your record.
Note: DNS records can take up to 48 hours to propagate with your domain. If you’re seeing a record not found message when you test for DMARC, it’s likely the record isn’t fully propagated.
Frequently Asked Questions
These are answers to some of the top questions we receive about adding a DMARC record.
What does DMARC stand for?
DMARC stands for Domain-based Message Authentication, Reporting, and Conformance.
Are DMARC records required?
No, DMARC records are not required for email sending. However, we recommend that you add a DMARC record to your DNS to improve email deliverability.
Where are DMARC records stored?
DMARC records are stored in your DNS as TXT records. Your DNS also stores SPF and DKIM records. These DNS records protect you from email domain spoofing and improve the overall deliverability of your emails.
How many DMARC records can I have?
We recommend having a single DMARC record for your domain and subdomains under your main domain. If you have multiple DMARC records at the same domain level, it may confuse mailing servers.
Why is my DMARC record check failing?
DNS propagation can take up to 48 hours to complete. If your DMARC record isn’t showing, likely, that the record has not propagated. We suggest waiting a while before contacting your domain host.
That’s it! Now you know how DMARC records work and how to create one for your site’s domain.