In this tutorial, we’ll cover how to create an invoice in Easy WP SMTP.
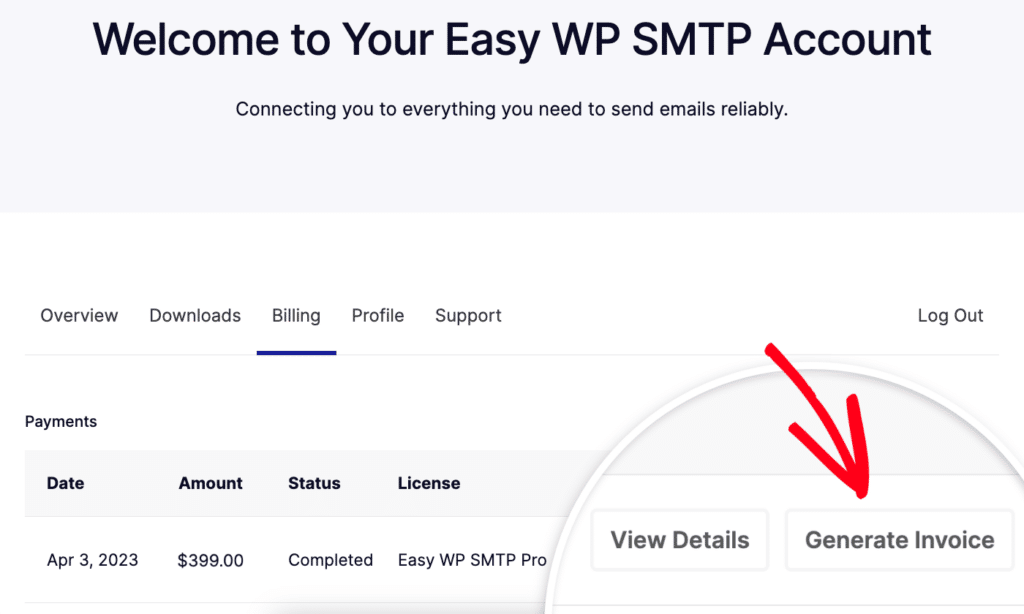
To start, you’ll first need to log in to your Easy WP SMTP account.
Once you’ve logged in, select the Billing tab. Then, on the right side, click the Generate Invoice button.
This will open an overlay where you can enter all the billing details you’d like to include in the invoice.
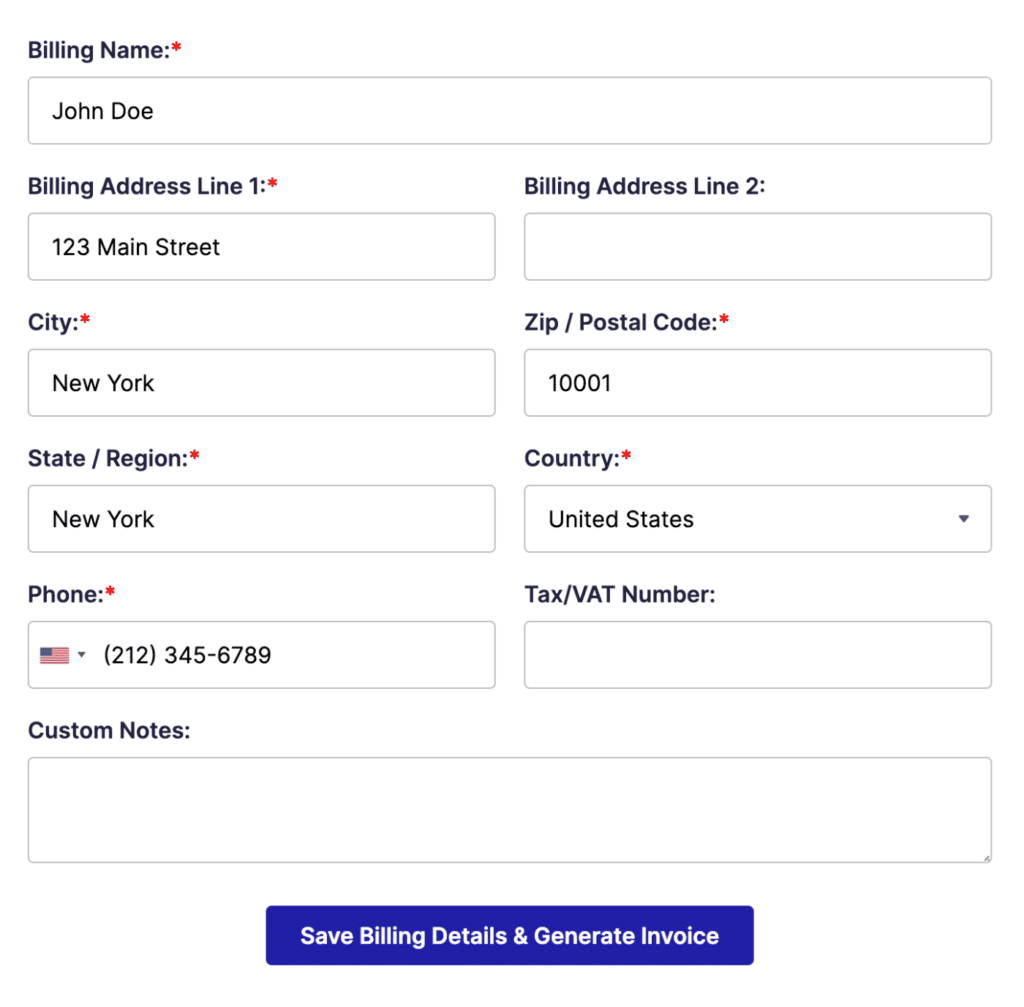
Here are all of the details you can fill in:
- Billing Name
- Billing Address (2 lines)
- City
- Zip / Postal Code
- State / Region
- Country
- Phone
- Tax / VAT Number
- Custom Notes
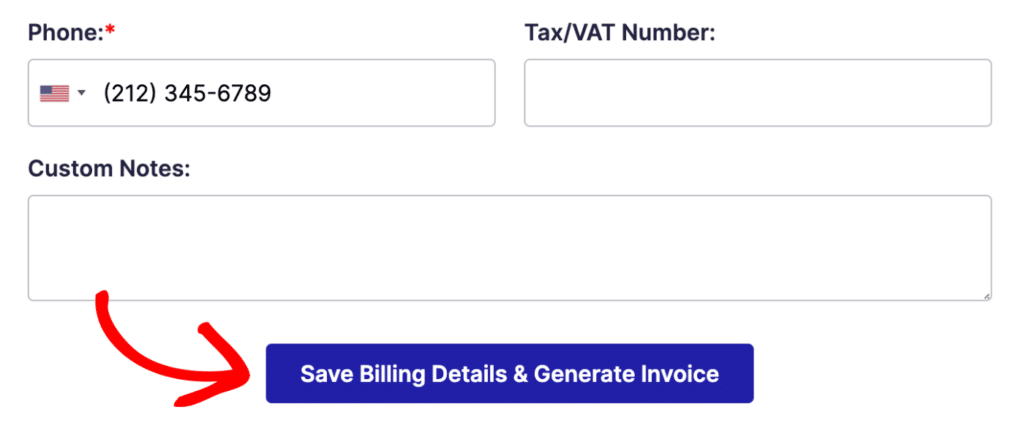
Once you’ve added the information you’d like to include in the invoice, go ahead and click the Save Billing Details & Generate Invoice button.

If you would like to print your invoice, just click on the Click Here to Print button at the top of the page.
That’s it! Now you know how to generate an invoice for your Easy WP SMTP account.
If you have any additional questions about your account, please get in touch with our support team. We’d be happy to assist!