The Simplest SMTP Plugin for WordPress
Join 700,000+ WordPress users who already enjoy hassle-free email delivery.
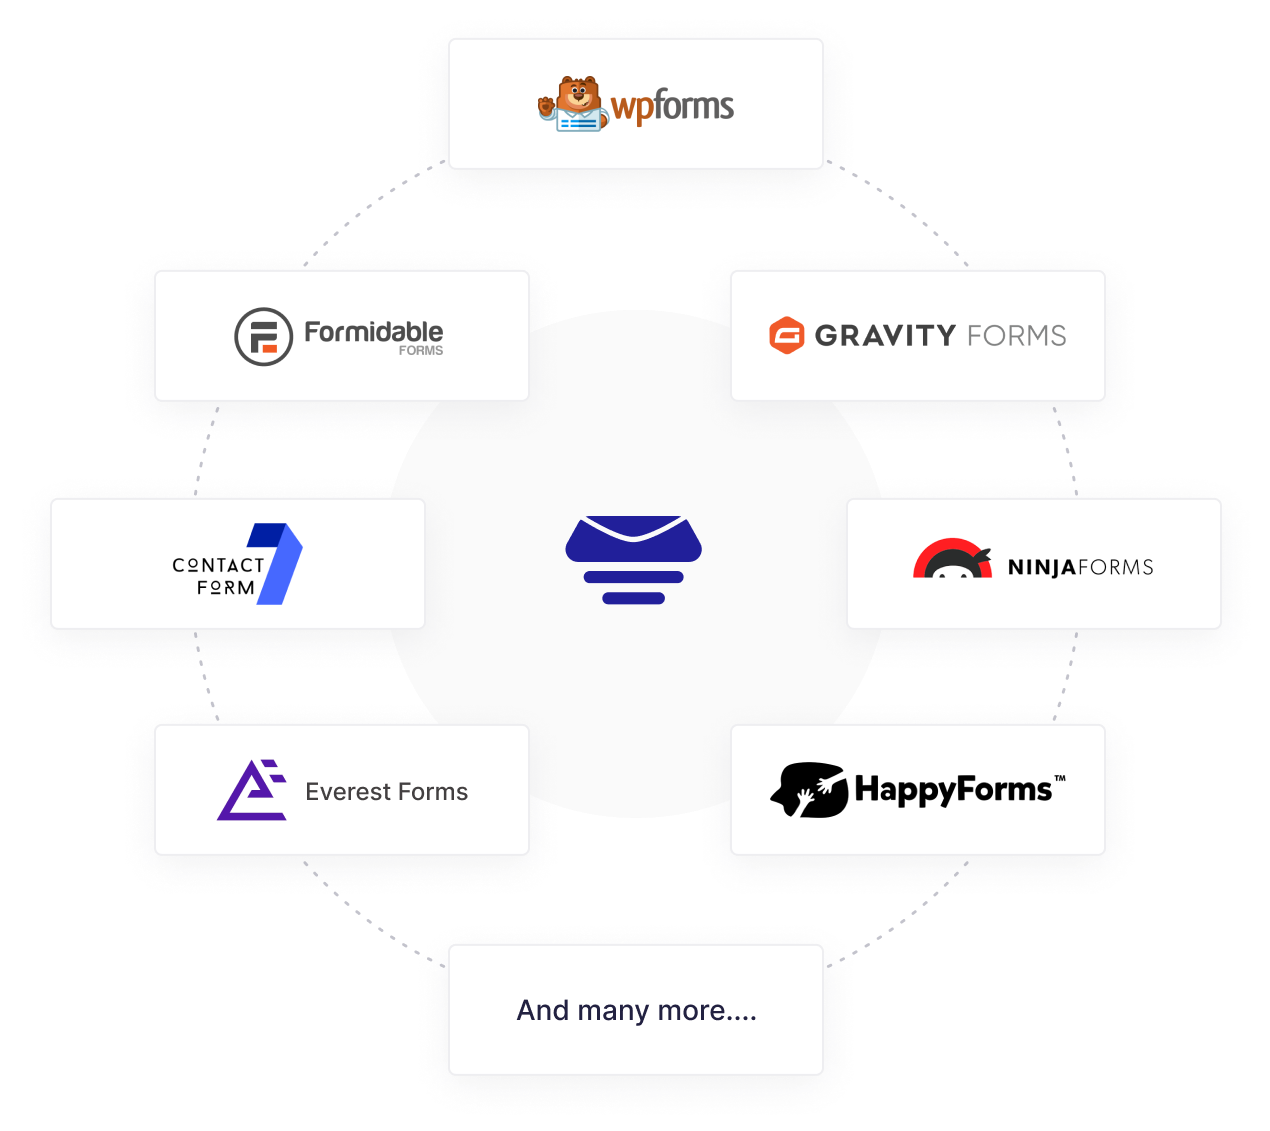
Easy WP SMTP works with thousands of WordPress plugins
Fix your email deliverability issues in WordPress.
Easy WP SMTP resolves deliverability problems and stops your emails from going to spam.
Reliable email delivery
Easily send emails through a third-party mailer or SMTP server so you never miss a message.
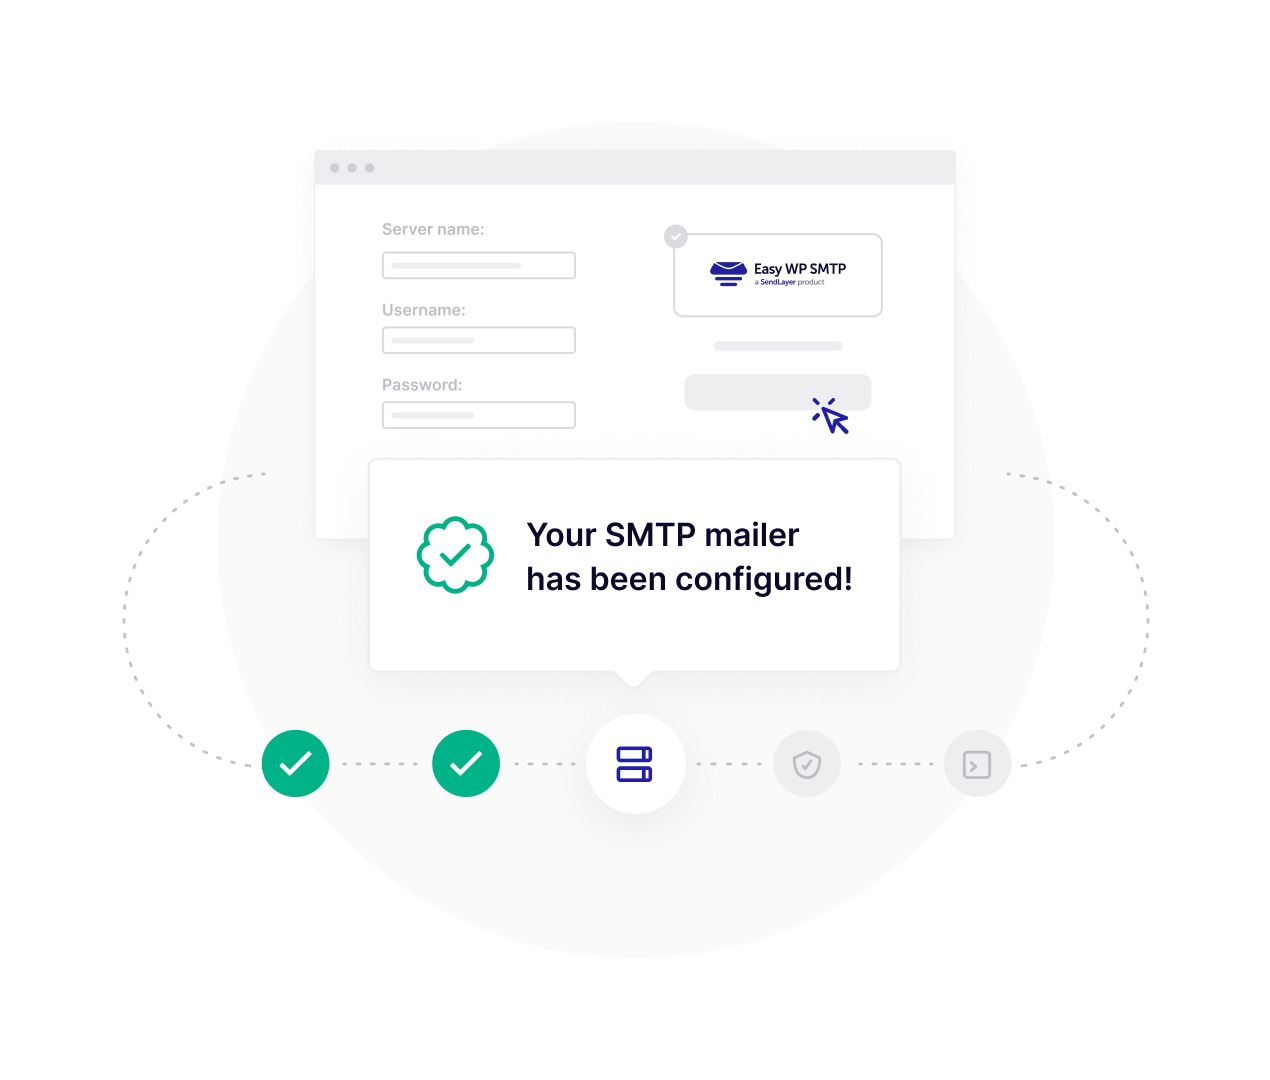
Easy setup
Use our Setup Wizard to configure your mailer or SMTP provider. We’ll walk you through every step.
Choose your provider
Choose from trusted email platforms like SendLayer, Gmail, Sendinblue, Mailgun, AWS SES, Outlook, Postmark, and more.
Send with SMTP
Use the Other SMTP option to send WordPress emails through your own SMTP server.
Gmail one-click setup
Connect your personal or business Gmail account with a single click of a button. It’s that easy.
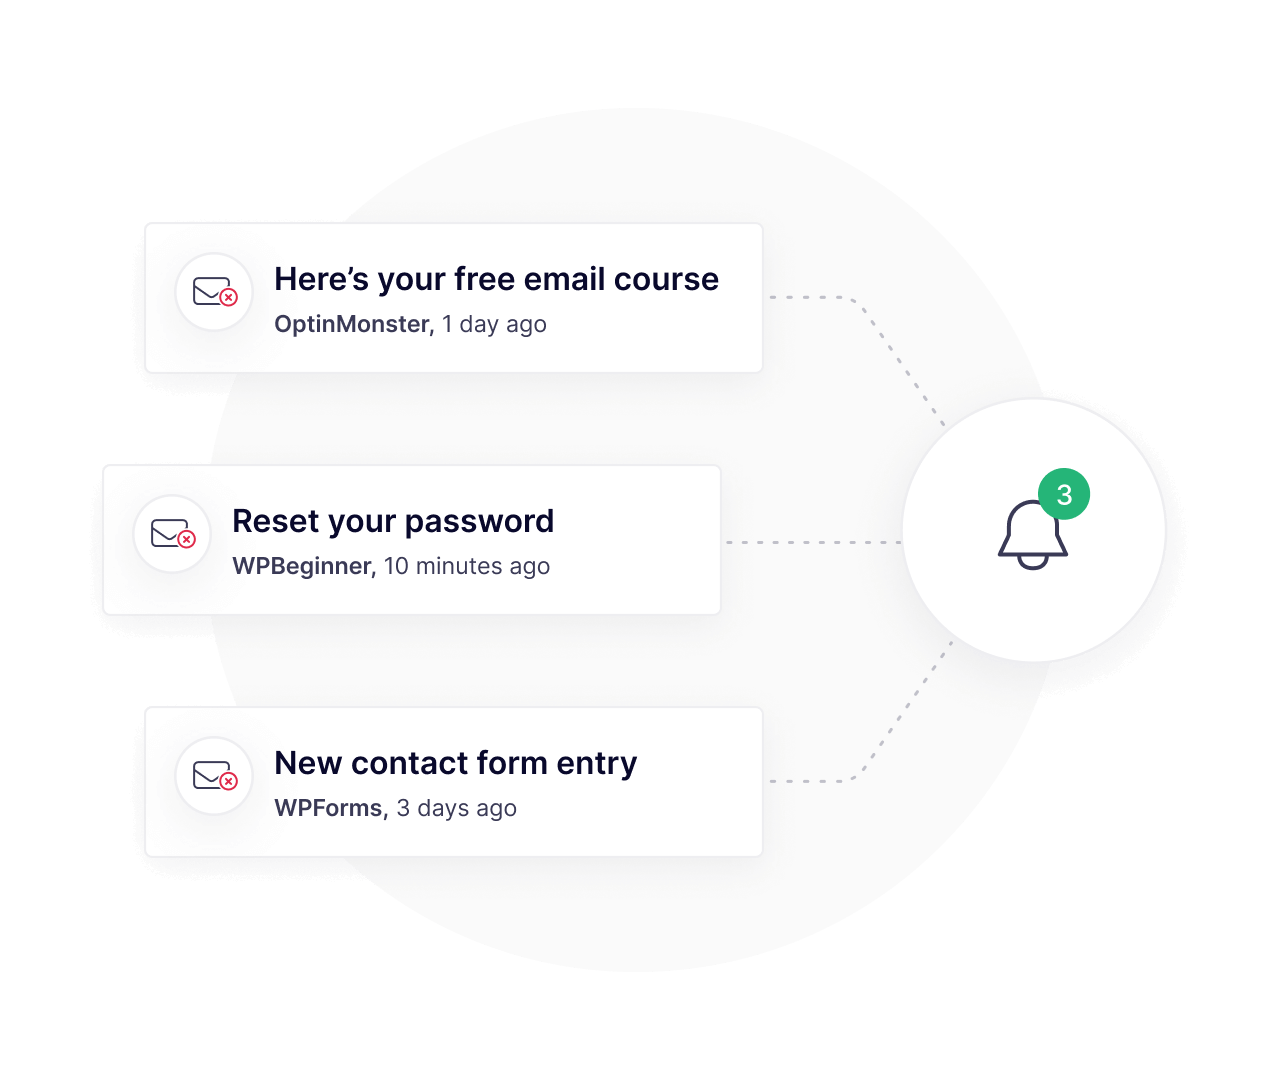
Log sent emails
Log emails sent from your site and easily resend sent emails if you need to.
Resend failed emails
Resend any email from your email logs. If an email fails, resend it with a few clicks.
Create reports
Generate reports in your WordPress dashboard to check how many emails were sent from your site.
Know the status of your emails
Instantly know if the emails your site sent were delivered or not with the email log statuses.
Receive alerts for failed emails
When an email fails to be sent from your site, you will get alert notifications via email, Slack, Microsoft Teams, SMS (Twilio), or custom webhooks.
Backup connection
If your primary connection fails to send an email, the backup connection will step in and deliver it. Backup connection makes sure that all of your emails get delivered.
Smart conditional routing
Use different email providers based on the conditions you set. Sent marketing emails with one provider and your e-commerce emails with another.
Never miss another email from your WordPress site
Get started with Easy WP SMTP now.
Fabulous plugin for sending emails from WordPress. Very easy to use and it helped me a lot with my first website.
Easy setup (just few clicks) and it works! Even if you do not use an SMTP server, it improves the standard mail sending with phpmail.
The SMTP settings are easy to implement and the option to send a test email makes this a perfect option if you want to use SMTP on your site.
Top 8 Reasons to Use Easy WP SMTP
Here’s how Easy WP SMTP will fix your WordPress email delivery issues for good.
Take Control
Choose Your Email Service
In just a few minutes, Easy WP SMTP lets you send WordPress emails through platforms like SendLayer, Brevo, SMTP.com, Amazon SES, and more.
Reliable Email Delivery
Fix Contact Form Emails Fast
Contact form emails going to spam? We can fix that. With Easy WP SMTP, you’ll never miss another message from your forms. No need to mess with your form’s settings.
Wow Your Customers
Reliable Email Delivery
Running a store on WordPress? Easy WP SMTP works great with WordPress shopping cart plugins. Delight your customers with reliable delivery of invoices, delivery updates, and order receipts.

Log and Resend
Save Copies of Sent Emails
Easy WP SMTP lets you keep a copy of every sent email in WordPress. Even better, you can resend any email in a couple of clicks right from your email log.

Receive Instant Alerts
Instant Alerts for Failed Emails
Ensure your emails reach their destination. Get instant alerts for failed emails via email, SMS, Slack, or Microsoft Teams. Quickly resolve issues and resend crucial emails to protect your business.
Improve Deliverability
Backup Connections
Prevent email outages from affecting your business. Easy WP SMTP activates a backup mailer if your primary connection goes down, ensuring your emails get delivered to their recipients.

Create Reports
Monitor Email Sending
Want to know which plugins are sending email from your site? Easy WP SMTP makes it easy to keep track and generate sent email reports.

Simple Answers
Get World-Class Plugin Support
Need a hand getting started? Seeing an SMTP error you can’t fix? Our team is standing by to assist you.

Never miss another email from your WordPress site
Get started with Easy WP SMTP now.
Frequently Asked Questions
Want to know more? If your question isn’t listed here, please contact us for a speedy answer.
What is Easy WP SMTP?
Easy WP SMTP is a WordPress plugin that fixes email delivery problems. After setting it up, the plugin routes your emails through a professional email platform or SMTP server so that they’re delivered to your inbox and not filed in the spam folder.
Why do I need Easy WP SMTP?
Most WordPress sites send emails through a web server. It’s common for emails sent this way to be marked as spam — or fail to be delivered at all. Easy WP SMTP lets you send emails through a dedicated email service, resulting in much better deliverability.
Does Easy WP SMTP work on non-WordPress sites?
No. Easy WP SMTP is a WordPress plugin. It won’t work on sites that aren’t set up using WordPress.
Which email providers can I use to send emails?
Easy WP SMTP supports many professional email services including SendLayer, Gmail / Google Workspace, Brevo, Mailgun, SMTP.com, Microsoft Outlook/ 365, and Amazon SES.
Can I send WordPress emails using SMTP?
Yes. Easy WP SMTP has an Other SMTP option. If you prefer to use an SMTP server, you can use this to enter the connection details and send your emails through SMTP instead of an email provider.