In this tutorial, we’ll cover how to use the Mailgun mailer with Easy WP SMTP.
1. Activating Your Mailgun Account
If you don’t have an account with Mailgun, you’ll need to sign up for a Mailgun account on their website.
Note: Mailgun accounts without a credit card can only send emails to 5 recipients. If you want to remove this limitation, you’ll need to add a credit card to your account. For more details, check out Mailgun’s sign-up page.
After completing the registration, you should receive an email to verify your Mailgun account.
When you click the verification link in your email inbox, you’ll be prompted to enter your mobile number. Mailgun requires this step to help secure your account and enable 2FA.
After completing these steps, you’ll be logged into your Mailgun account automatically.
2. Adding a Domain
To continue the setup process, go to Sending » Domains from the left menu in your Mailgun dashboard.

Click the Add New Domain button on the Domains page.

Then, enter a subdomain for your website’s domain name. A subdomain is like a separate section or directory of your website and replaces the “www” part of the address. For example, subdomain.example.com.
In this case, the subdomain will only be used by Mailgun to send emails and won’t be visible on your website.
You can name it anything you like, such as “mail.example.com” or “mg.example.com”. Naming it “mail” or “mg” can help identify what it’s used for.

Next, in the Domain region section, you’ll have to select either US or EU. If your website is hosted in the European Union, select EU. If it’s hosted outside of the EU, go with the default US option.

Next, open the Advanced settings (DKIM) by clicking on it. This gives you an extra layer of security against spam.

We suggest picking the 2048 option, which gives you a longer DKIM key. Finally, click the Add Domain button to move on to the next step.

Keep this page open, as we’ll return to it later in the next section.
3. Verifying Your Domain
To ensure the security of both site owners and their visitors, some SMTP services, including Mailgun, require verifying your domain by adding certain records to your site’s DNS. For more information on why verifying your domain is important, refer to Mailgun’s guide.
To get started, open your site’s DNS settings. If you’re not sure how to find these, Mailgun provides helpful links on their setup page when you’re adding a domain.

Note: If you’re not sure where to find your site’s DNS settings or feel unsure about making changes, please contact your site’s hosting provider before making adjustments.
In the DNS settings, look for an option to add a new record.
To verify your domain with Mailgun, you need to add 2 TXT records to your website’s DNS settings.

After that, you’ll need to add 2 MX records to your site’s DNS.

There may also be a TTL (Time To Live) field for each record in the DNS settings. If applicable, set the TTL to 1 day or 86400 seconds.
Note: The DNS records must be added to the subdomain you created, not the main domain. Also, ensure all the records are copied exactly as they appear in your Mailgun account.
Now that you’ve added both TXT and MX records, your DNS settings are all set.
Checking Your Mailgun Verification Status
Mailgun will now check to make sure your domain’s DNS records are set up correctly. This might take up to 48 hours because changes to DNS records can take time to propagate.
To see if the verification has finished, click the Verify DNS settings button.

If Mailgun confirms your DNS changes, it will show that your domain name is active.

Don’t wait around for this to finish, you can move on to the next step while you wait. Just be sure to keep this tab open, as you’ll need it soon.
4. Configuring Easy WP SMTP Settings
To prepare your WordPress site to start using Mailgun with Easy WP SMTP for sending emails, you’ll need to configure some plugin settings. To access the settings from the WordPress dashboard, go to Easy WP SMTP » Settings.

In the following steps, we’ll go through each of these settings in detail.
Mailer Settings
Select the Mailgun option from the list of available mailers. Once you choose Mailgun, more settings related to this mailer will appear.

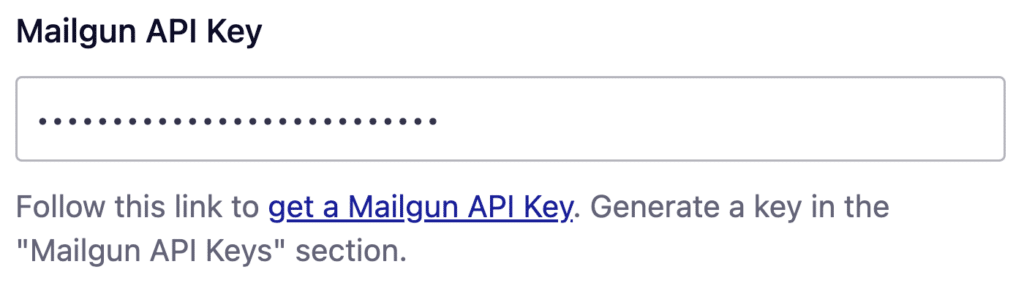
Mailgun API Key
Mailgun will provide the Mailgun API key, even if your domain is still waiting to be verified. You may have received this information automatically by email. If not, use this link to get your Mailgun API key.
Alternatively, you can always access the API keys page by clicking on your profile and selecting API Security.

This will take you to a page with your API keys.
Note: In your Mailgun account, you’ll likely see 3 API keys: Verification Public key, HTTP Webhook Signing key, and Mailgun API keys. We recommend using your Mailgun API key to configure Easy WP SMTP. Using the Verification Public API key will result in email deliverability issues on your website.
To generate your Mailgun API key, scroll to the Mailgun API keys section and click the Create API key button.

Next, a modal window will appear where you can add a description for your API key. We recommend adding a description that will help you remember what you’re using the API key for. When you’re ready, click the Create Key button.

A new modal will then appear with your new API key. Be sure to copy the key and store it somewhere safe and accessible, as the key is only displayed once. You can copy the key by clicking on the copy icon.

Note: If you lose or Mailgun API key, you’ll need to generate a new one by repeating the previous steps in this section.
After copying the text for the full key, return to the Easy WP SMTP settings and paste it into the Mailgun API Key field.
Note: If you have an older Mailgun account, you may see a prefix key- before your key. Be sure to copy this prefix and add it to your Easy WP SMTP settings as well, as leaving this out will cause issues with verification.
Domain Name
For the Domain Name, enter the subdomain you created in Mailgun (e.g. mg.example.com).

Region
Next, make sure to check the Region setting and set it to match what you set up in Mailgun (outside of the European Union, select the US option).

General Settings
From Email Address
By default, the From Email Address field will be filled with your site’s admin email.
You can use any valid domain-specific email address for the From Email Address (e.g. [email protected]).
You also have the option to enable the Force From Email if you want the From Email Address to be the same site-wide.

From Name
The From Name is the name that appears in the emails sent from your site, letting the recipient know who sent the email. By default, the From Name is set to your site’s name. However, you can change the name to whatever you’d like.
Similarly, you can enable the Force From Name toggle to apply the settings site-wide.

When you’re done with the configuration, be sure to click the Save Settings button to save your settings.

That’s it! You’ve now successfully set up the Mailgun mailer with Easy WP SMTP.