In this tutorial, we’ll cover how to use the Brevo (Sendinblue) mailer with Easy WP SMTP.
1. Activating Your Brevo Account
Note: If you already have a verified account with Brevo, you can proceed to authorize your domain.
You’ll need to have a Brevo (Sendinblue) account before getting started. If you don’t already have one, go ahead and create a free account with Brevo. Signing up does not require a credit card.
When you sign up for a Brevo account, you’ll need to verify your email address and provide some general information about your business.
After you fill out all the required fields, you’ll be able to choose a plan. We’ll be using the free option, but the setup process will be the same regardless of which one you select.
Once your account is set up, you can proceed to the next step.
2. Authorizing Your Domain
To improve email deliverability, you’ll need to authorize your domain in Brevo. The domain you add here should be the same as the one you specify as your From Email.
For instance, if the domain you authorize in Brevo is example.com, you’d need to use a From Email with an @example.com domain.
Adding a Domain in Brevo
To add a domain, first, log in to your Brevo account.
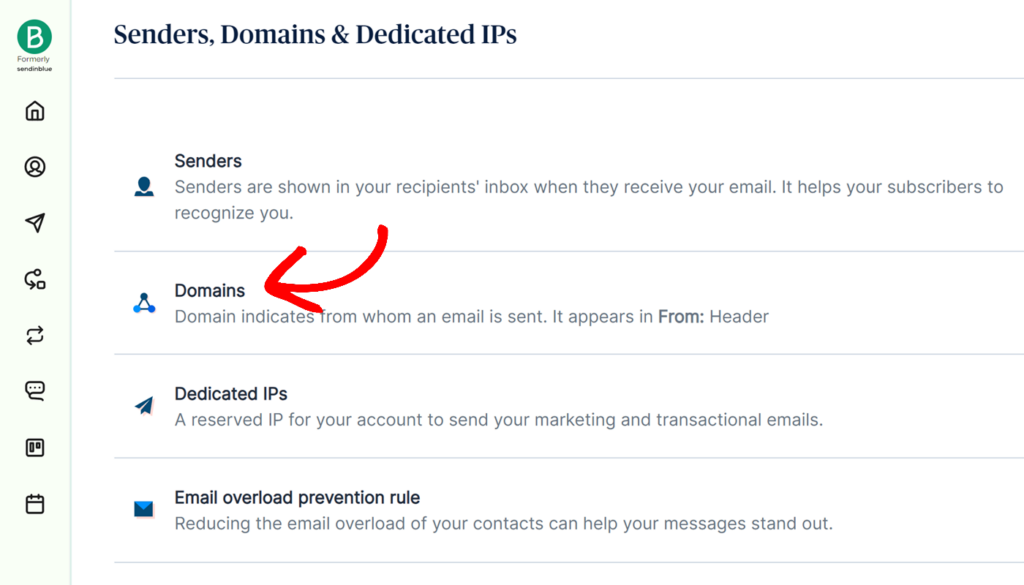
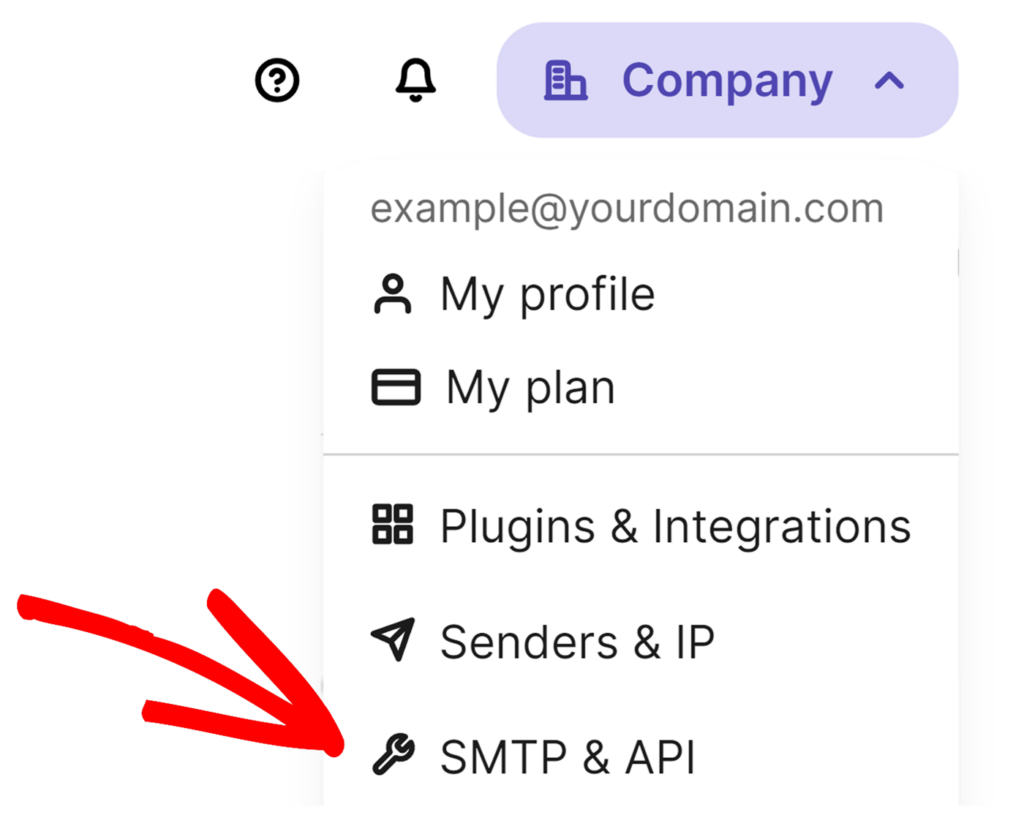
In your account dashboard, click on your company name in the top right corner and select Senders & IP from the dropdown menu.

Next, click on the Domains option from the next page.
Then, click the Add a domain button.
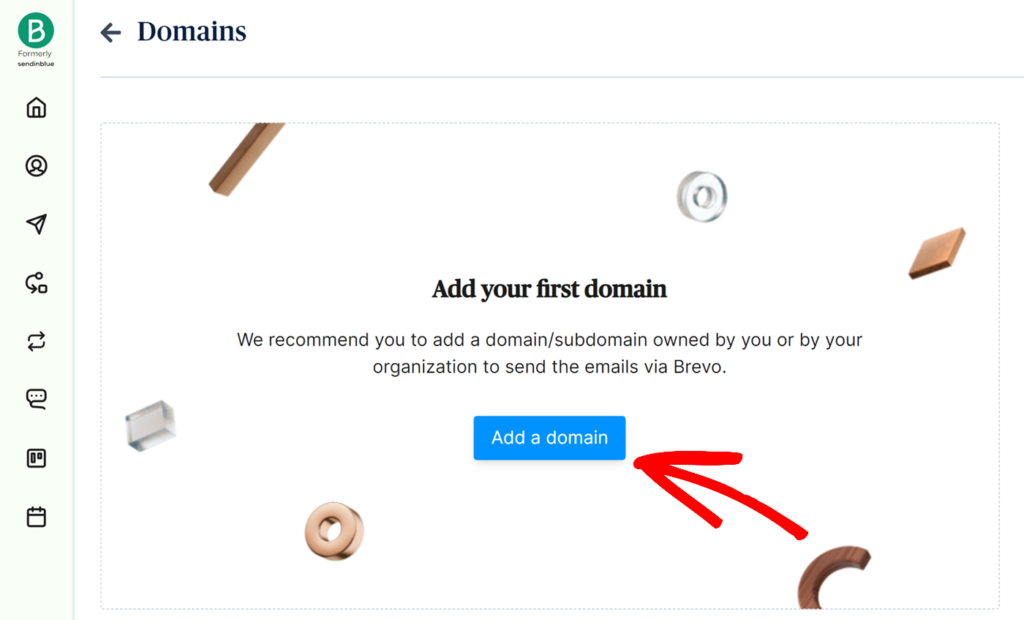
Next, in the Domain name field, you’ll need to enter your WordPress site’s domain name.

When you’re ready, click the Save button to proceed.
Configuring DNS Records
Once you save the settings, you’ll be taken to a new page with several DNS records that you need to add to your domain’s DNS. Adding these records protects your website’s data and visitors.
We recommend opening a new browser tab or window for this step. In the new browser window, log in to your domain registrar’s website and locate your site’s DNS settings.
Note: If you’re unsure how to locate your site’s DNS settings, we recommend reaching out to your hosting provider for guidance before making any changes.
After locating the DNS settings, you’ll need to add 2 TXT records to your site’s DNS to authorize your domain with Brevo. When adding the records, ensure you copy them properly from your Brevo account.
For this tutorial, we’ll use example.com as our domain. When adding your DNS records, be sure to replace example.com with your website’s domain.
Adding TXT (Brevo Code) Record
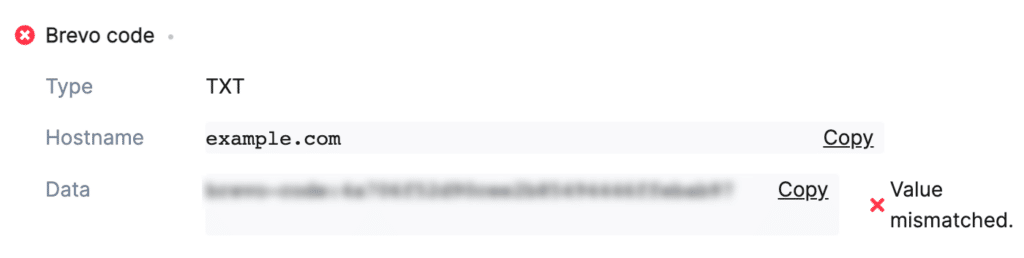
- Host/Name: example.com
- Record Type: TXT
- TTL (Time To Live): 1 day (or 24 hours/86400 seconds)
- Data: Copy from Brevo (unique for each domain)
Adding TXT (DKIM) Record
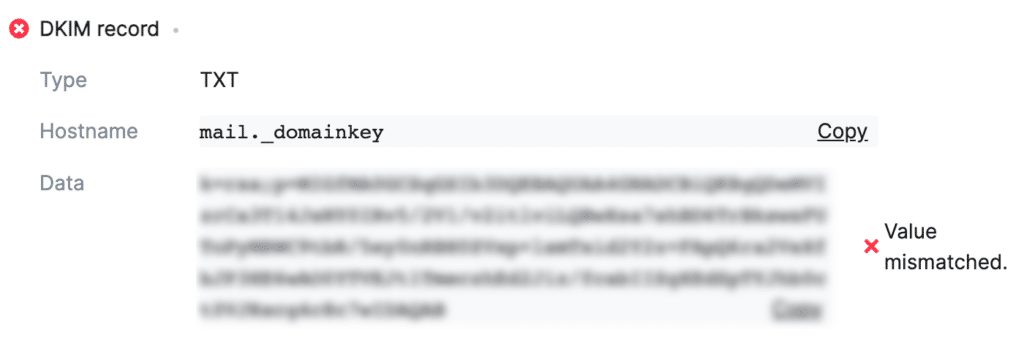
- Host/Name: mail._domainkey
- Record Type: TXT
- TTL (Time To Live): 1 day (or 24 hours/86400 seconds)
- Data: Copy from Brevo (this will be unique for each domain)
Note: If GoDaddy manages your DNS, you’ll need to set the TTL to 1 hour. Also, be sure to use 1 hour for other DNS records you’ll add.
Adding TXT (Optional DMARC Record for Google and Yahoo Users) Record
According to the most recent sender requirements from Google and Yahoo, establishing a DMARC policy on your domain is recommended.
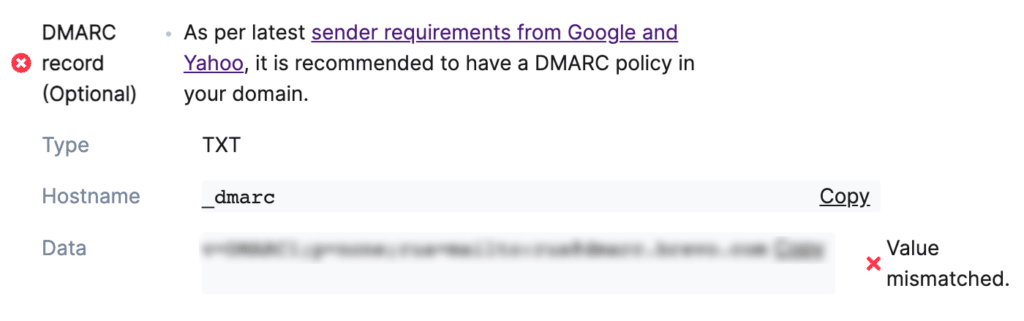
- Host/Name: _dmarc
- Record Type: TXT
- Data: Copy from Brevo
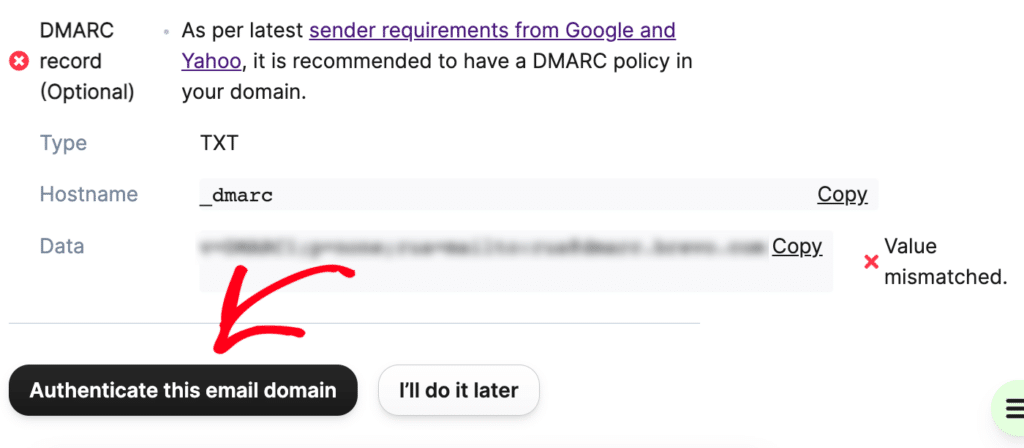
Verifying Your DNS Records
After adding the DNS records, click the Authenticate this email domain button to confirm whether the records have propagated.
In some cases, these records may take up to 48 hours to propagate. So you can proceed to the next step while you wait for the DNS record verification to complete. We recommend leaving this browser tab open, as you’ll need it later on.
3. Configuring Easy WP SMTP Settings
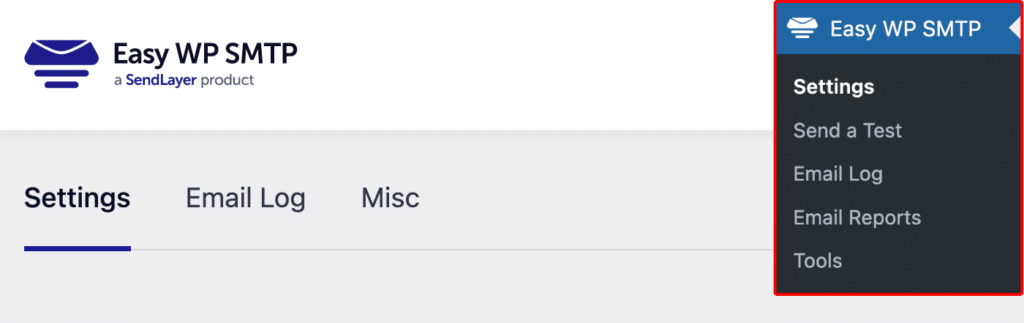
Once you’ve authorized your domain in Brevo, you can go ahead and configure your Easy WP SMTP settings. To access the settings from the WordPress dashboard, go to Easy WP SMTP and click on the SMTP Settings tab.
In the following steps, we’ll cover how to configure each of the settings on this page.
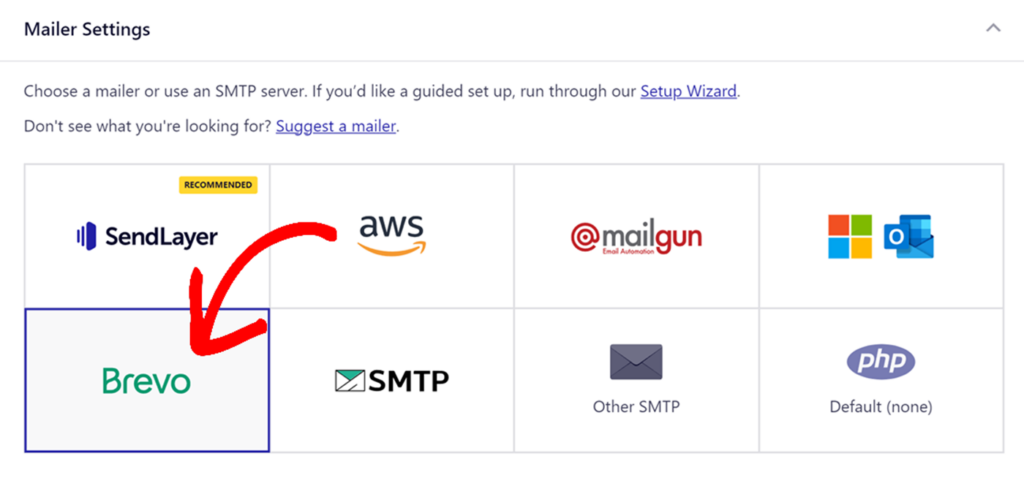
Mailer Settings
Select Brevo as the mailer to use with Easy WP SMTP.
API Key
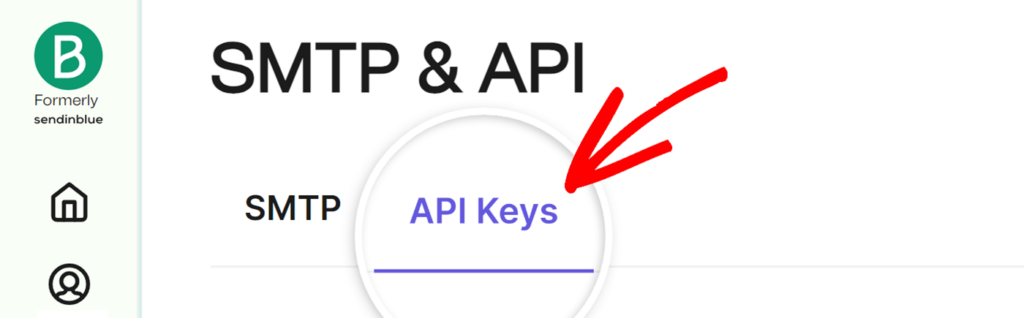
To get your API Key, head back to the browser tab with your Brevo account open. Then click on your company name in the top right corner of the screen and select SMTP & API from the menu.
This’ll take you to a page where you can create a v3 API key. To get there, just switch to the API tab by clicking API Keys.
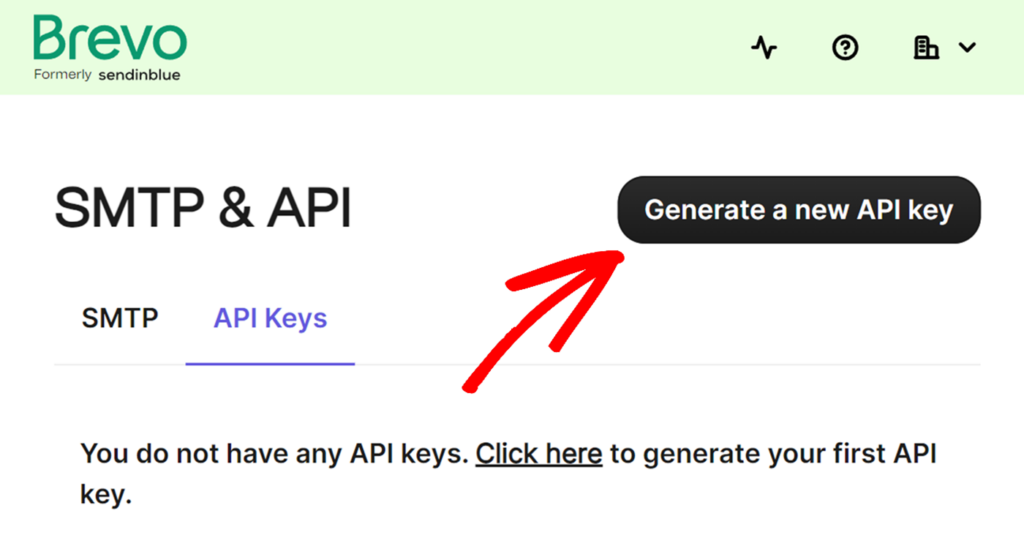
In the API Keys section, click on the Generate a new API key button to create your API key. You can create multiple API keys from your Brevo account.
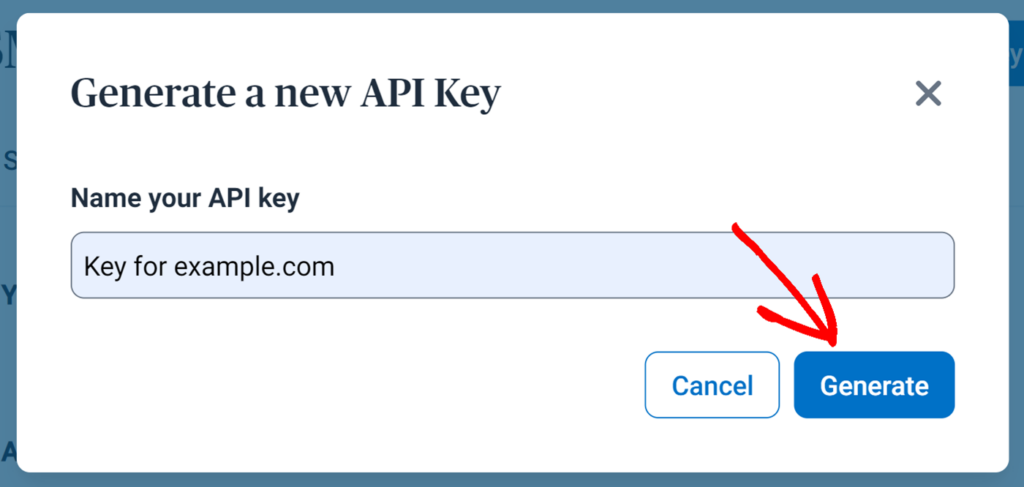
After clicking the button, a new modal window will appear where you’ll need to name your API key. This name is for your personal use alone, so you can use any name you like.
After entering a name for your API key, click the Generate button.
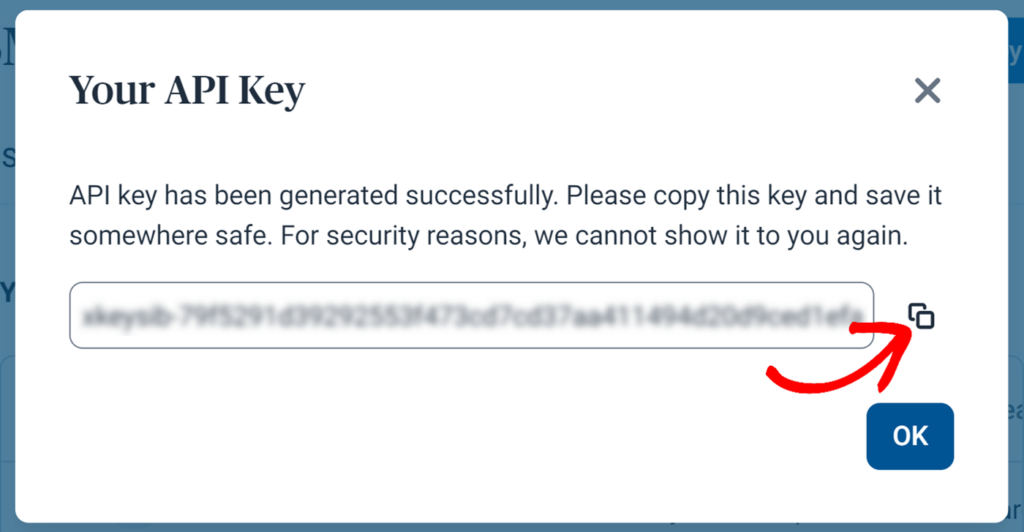
You’ll see the API key in the next modal that appears.
Note: When you close the modal window with your API key, you won’t be able to access the API key again. We recommend storing this value in a secure location in case you need to refer back to it.
To copy your API key, click on the copy icon.
Now head back to the browser tab where your Easy WP SMTP settings are open. Then paste the API key you just copied into the API Key field.

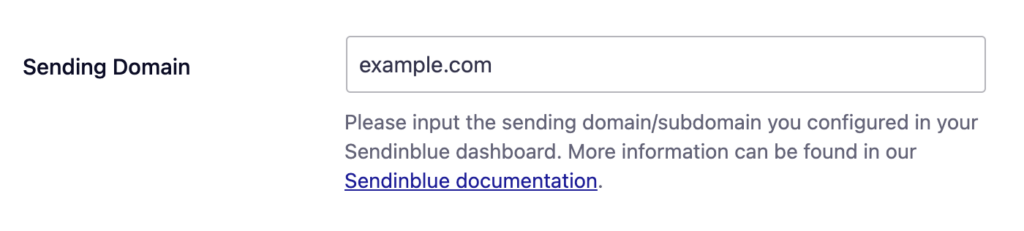
Sending Domain
The Sending Domain settings allow Easy WP SMTP to check for any domain-related error that may occur with your Brevo configuration.
This domain should be the same as the one you authorized on your Brevo account.
General Settings
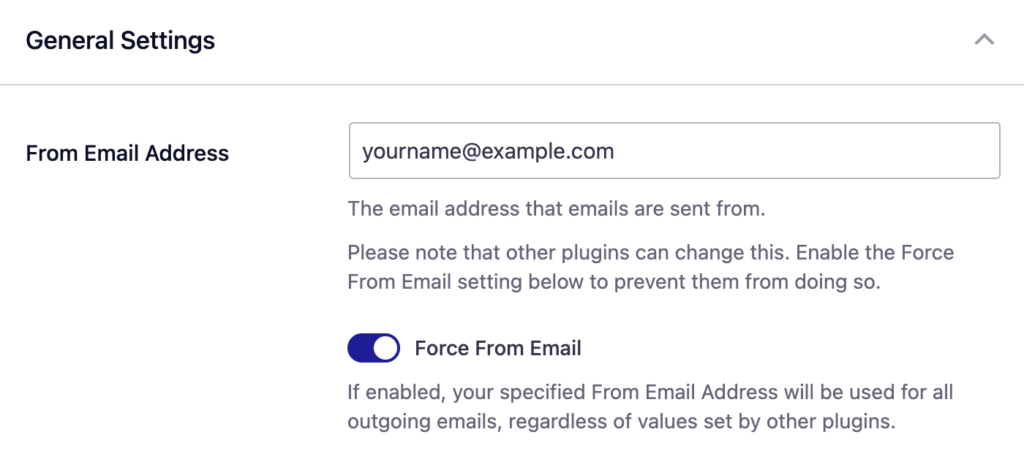
From Email
The From Email is the email address that your WordPress site’s emails are sent from. To prevent email delivery issues, this email address must match the sending domain you authorized in Brevo. For example, if you authorized example.com as your domain, the From Email must contain @example.com.
We also strongly recommend enabling the Force From Email toggle. If enabled, your From Email will be used for all emails sent from your site, ignoring values set by other plugins.
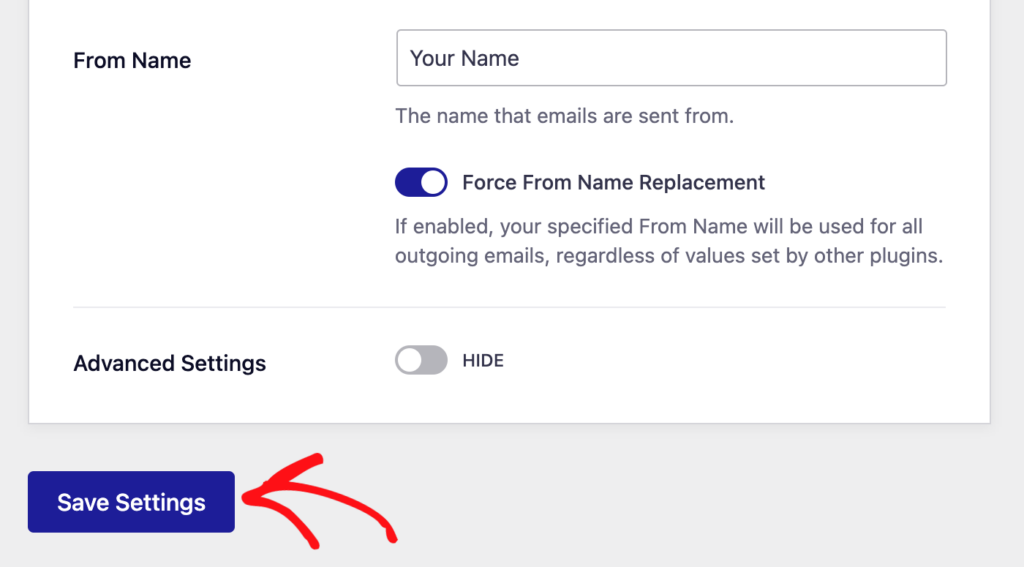
From Name
The From Name is the name that appears in the emails sent from your site, letting the recipient know who sent the email. By default, the From Name is set to your site’s name. However, you can change the name to whatever you’d like.
Similarly, you can enable the Force From Name toggle to apply the settings site-wide.

When you’re finished with the configuration, be sure to click the Save Settings button to save your settings.
That’s it! Now you know how to set up Easy WP SMTP with the Brevo mailer.